This QuickStart demonstrates how to give a Sigma agent two ways to act on a workbook instead of just answering questions: setting a control to show a specific view, and writing a new row to a table.
An agent that only answers has done part of the job. Here, we'll add two actions: one that sets a control and navigates the workbook to show something specific, and one that inserts a row into an input table — gated by your approval before anything actually gets written.
Along the way you'll learn how to:
- Configure an action that sets a control value and navigates the workbook
- Configure a writeback action that inserts a row into an input table, gated by approval
- Write instructions that scope when each action runs
- Test both actions from a chat conversation
For more information on Sigma's product release strategy, see Sigma product releases
If something doesn't work as expected, here's how to contact Sigma support
Target Audience
Sigma workbook authors and admins building agents that need to do something, not just answer questions. For a closer look at the basics of creating an agent, see Agents 01: Building Your First Sigma Agent — but this QuickStart includes everything you need to follow along on its own.
Prerequisites
- Any modern browser is acceptable.
- Access to your Sigma environment with permission to create and manage agents, and to create input tables.
- Write access enabled on the connection backing your workbook — the writeback action in this QuickStart inserts a row into a table.
- Some familiarity with Sigma is assumed. Not all steps will be shown, as the basics are assumed to be understood.

An action needs something to act on. Before building either action, this section sets up a workbook with a control to point at and an agent to do the pointing.
Create a new workbook
From Sigma Home, click Create New and select Workbook. Save and name it:
Actions & Writeback - QuickStart
Add BIG_BUYS_POS from Sigma Sample Database > RETAIL > BIG_BUYS as a Table element.
Rename the page from Page 1 to:
Data
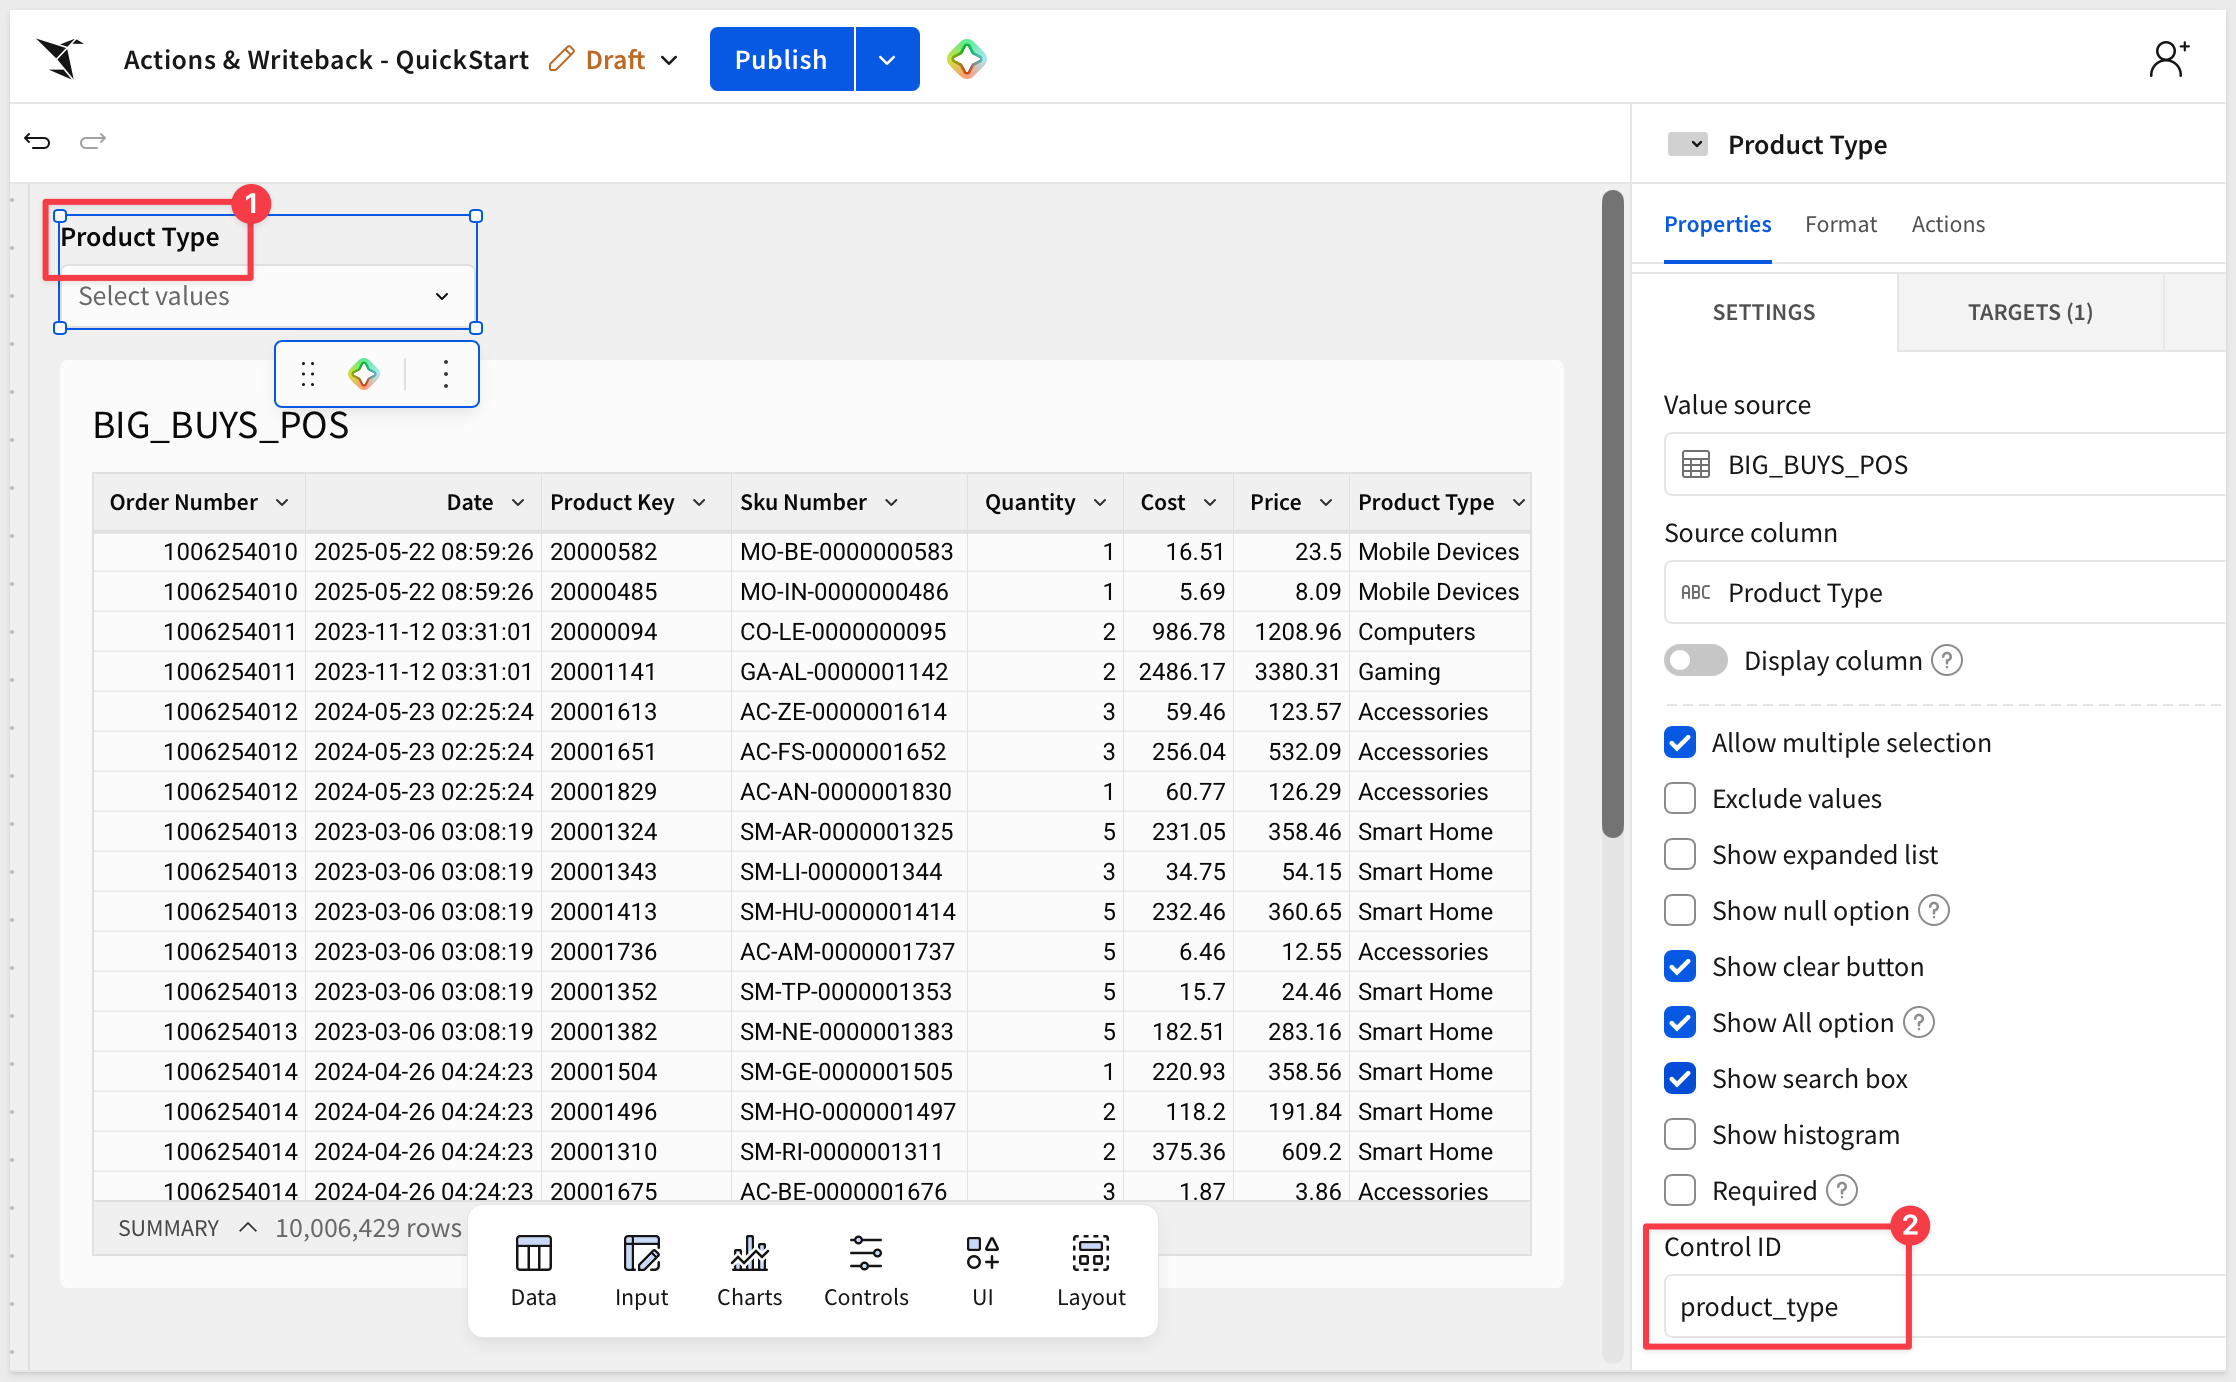
Add a Product Type control
From the element bar, add a Controls > List Values element. Set its label to:
Product Type
Set the Control ID:
product_type
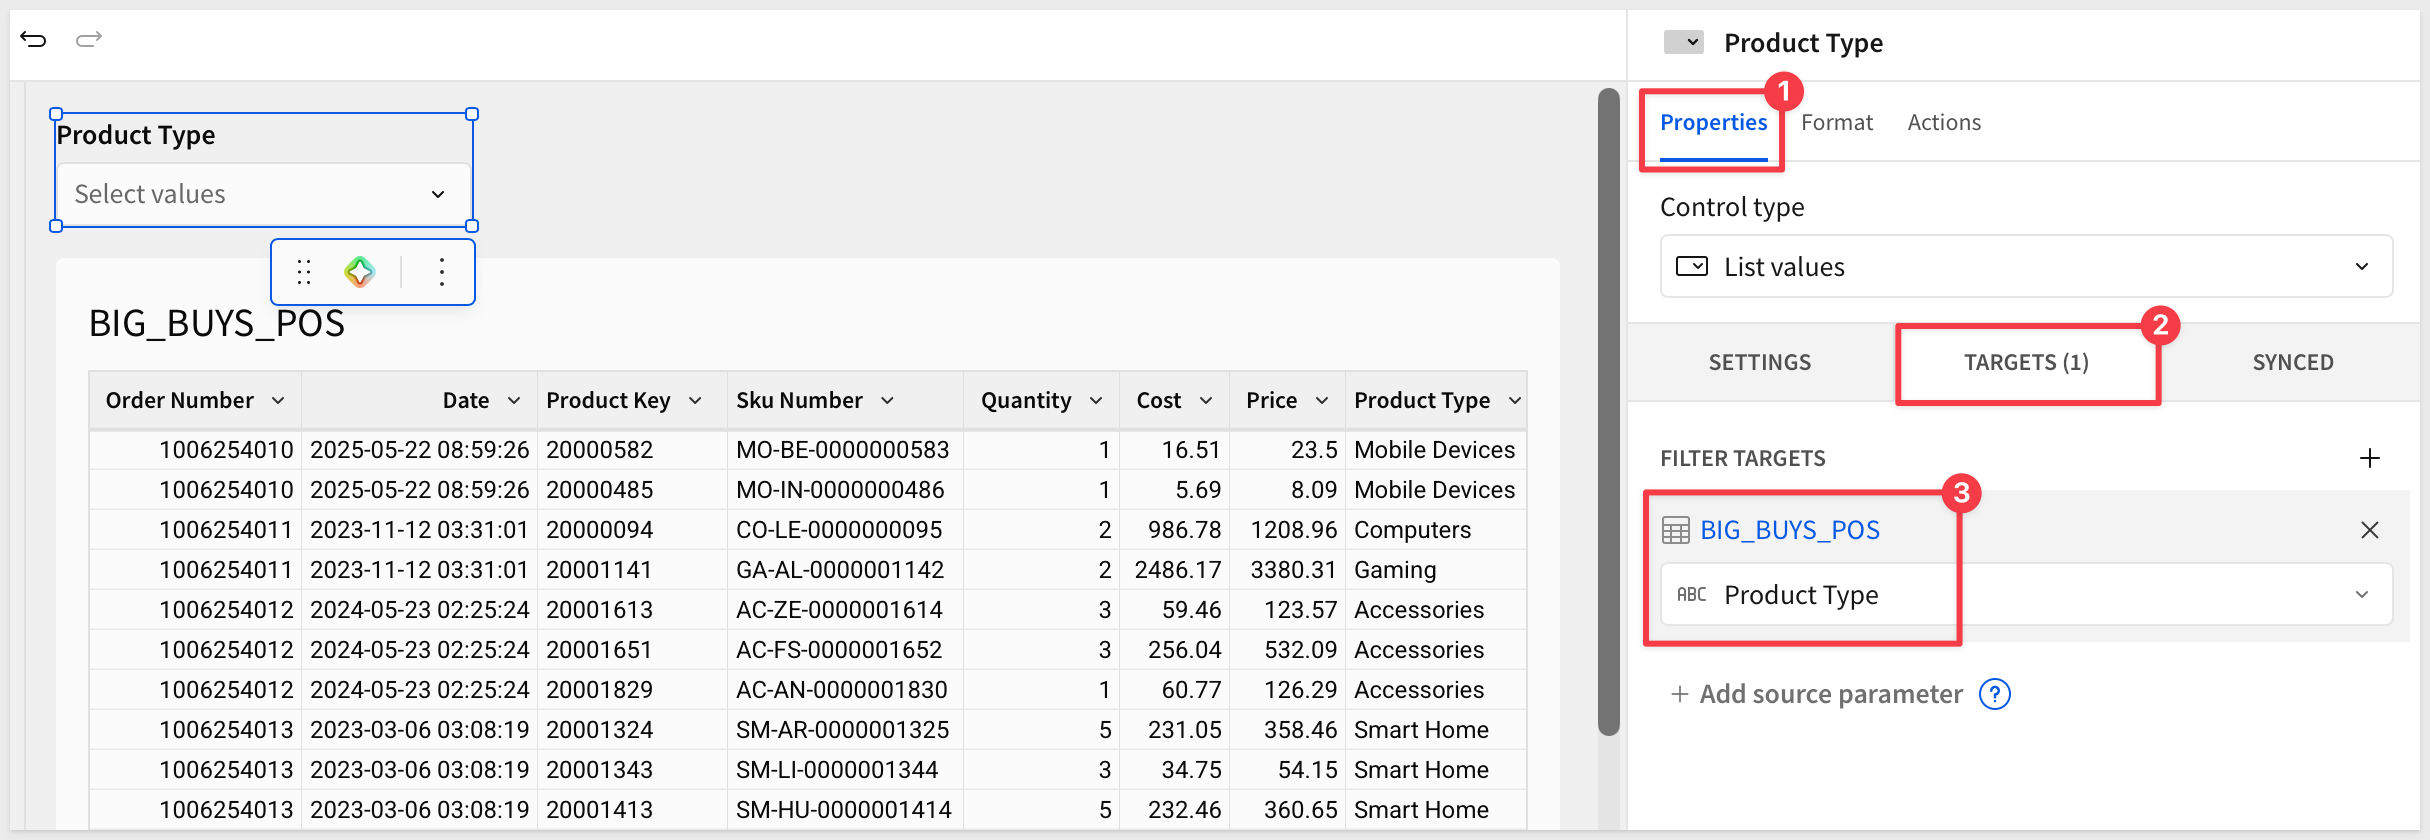
Under Targets > Add filter target, apply an Equal to filter from this control to the BIG_BUYS_POS table.
Click Publish.
Create the agent
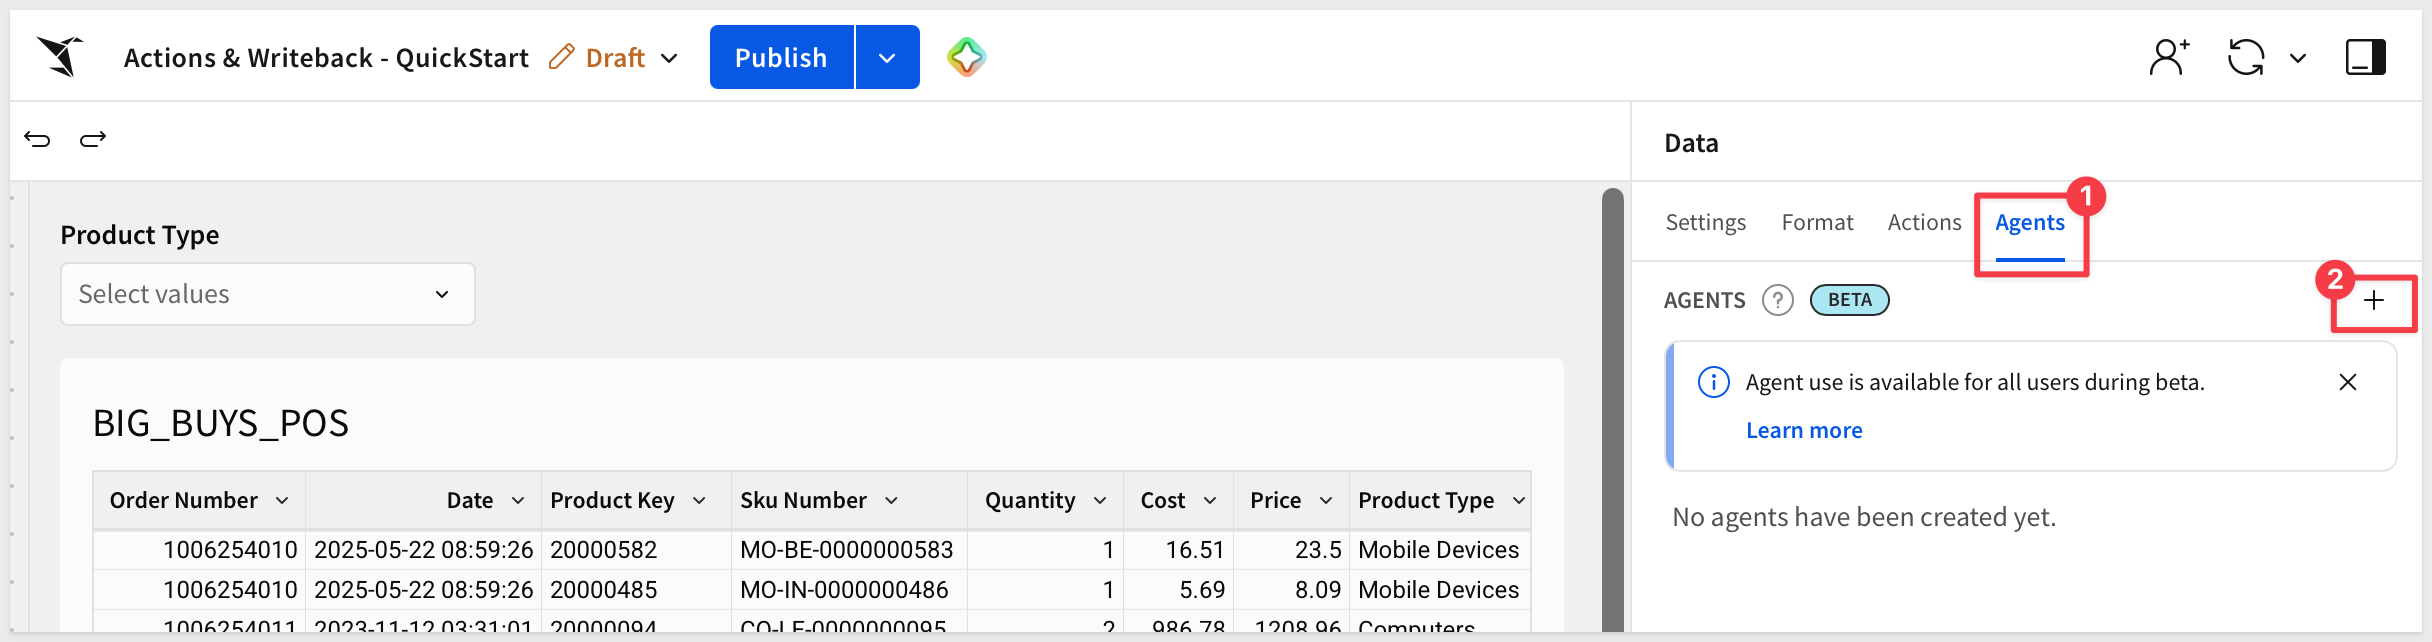
With the table or control not selected, open the Agents tab in the right panel and click +:
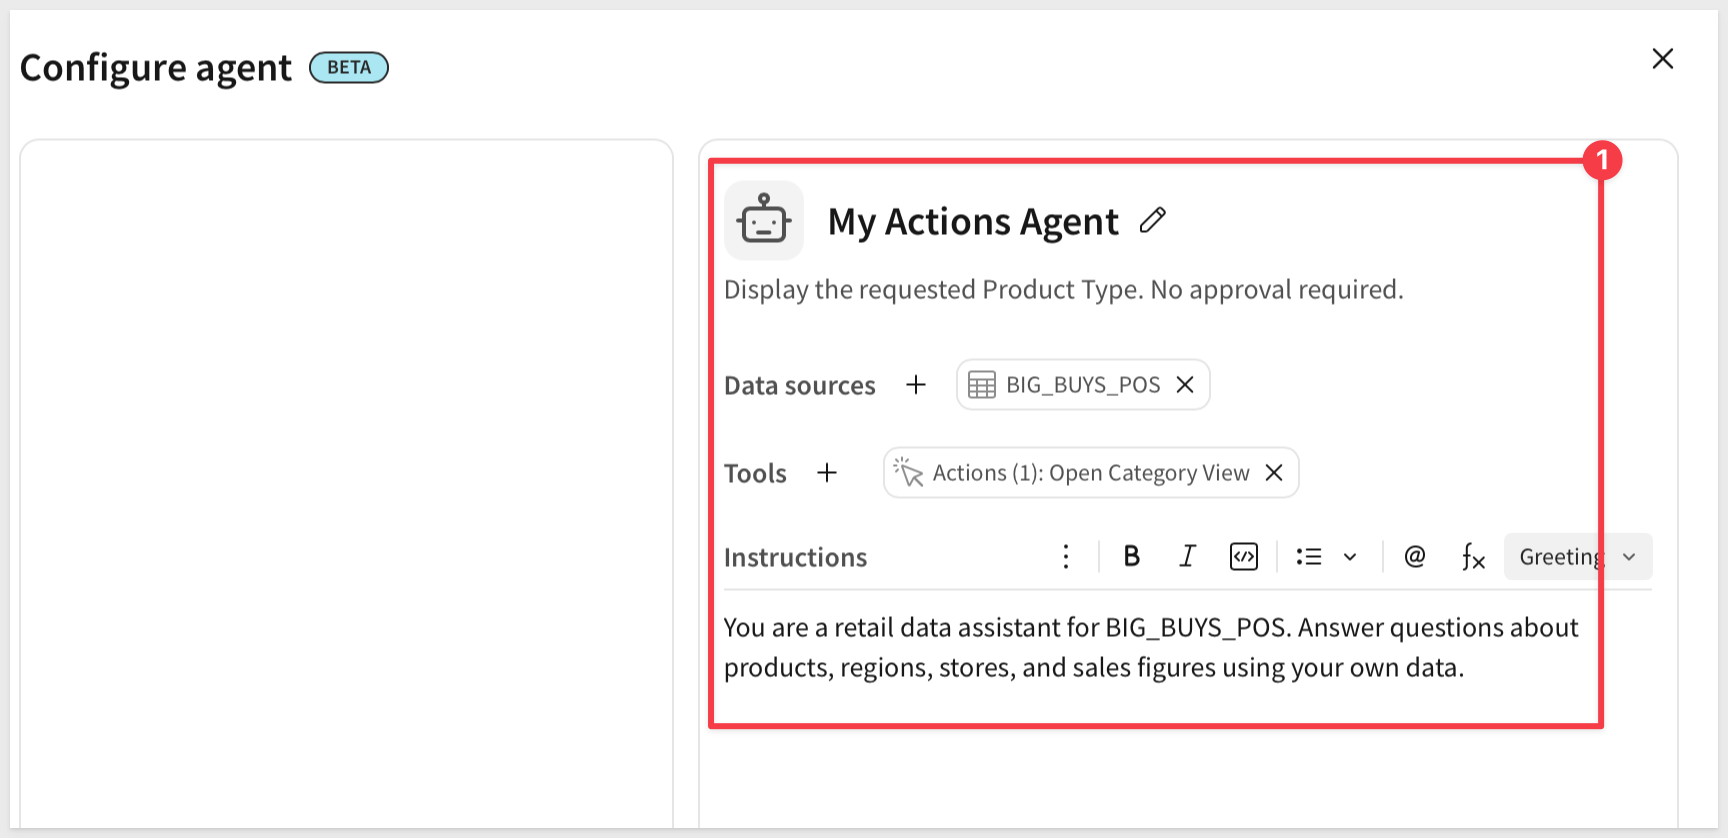
Click the pencil icon and rename the new agent:
My Actions Agent
Under Data sources, add the BIG_BUYS_POS table.
Click the Instructions tab and enter:
You are a retail data assistant for BIG_BUYS_POS. Answer questions about products, regions, stores, and sales figures using your own data.
Click Save and then Publish.
The next two sections add to these instructions as each action gets built.
This action sets the Product Type control and navigates to the Data page — the agent driving the same control a person would click into, not a separate back door.
Add the action tool
Click a blank area of the canvas to deselect any element. In the right panel, open the Agents tab and use the 3-dot menu to edit My Actions Agent.
Under Tools, click + Add tool and select Action. Name it:
Open Category View
Set the description:
Display the requested Product Type. No approval required.
Configure the steps
Configure the first step: Step type > Run an action, Action > Set control value.
Under Update control, select Product Type.
Set Set value as to Agent input, and set Agent input name to Product Type.
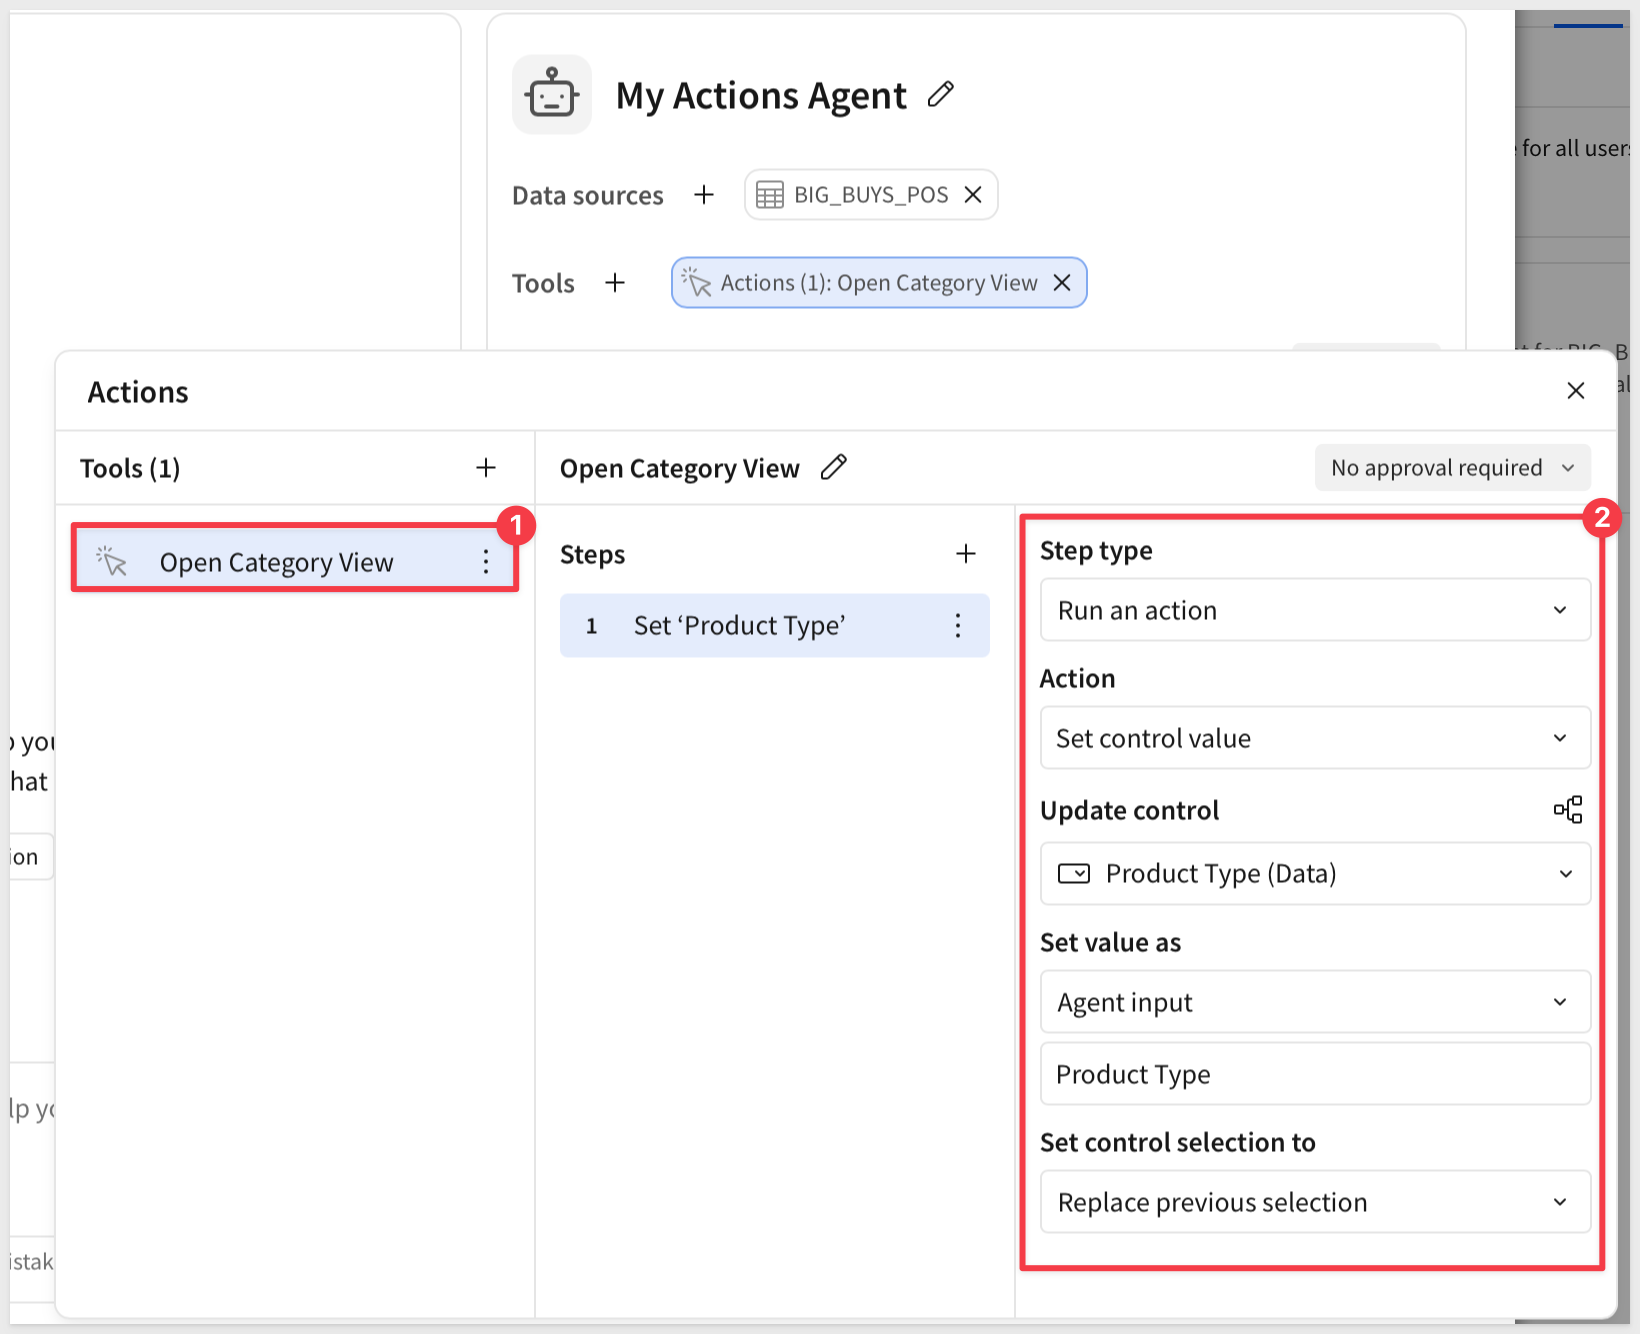
Add a second step: Run an action > Navigate in this workbook > Product Type (Data).
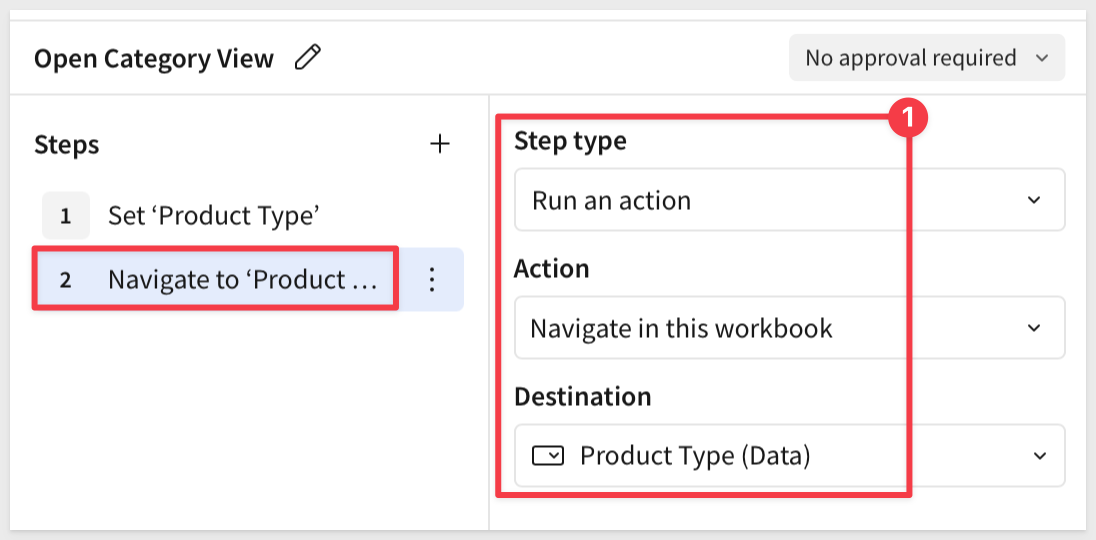
Close the tools modal.
Update the instructions
Revise the Instructions tab, adding:
Use Open Category View when asked to show or look at a specific Product Type. Set the exact Product Type requested — do not substitute a different one.
Click Save.
The display action changes what's on screen. This one changes data — which is why it needs your approval before it commits anything.
Create the Category Flags input table
On the Data page, add Input > Empty. Select the Sigma Sample Database connection.
Rename the initial Text column to Product Type.
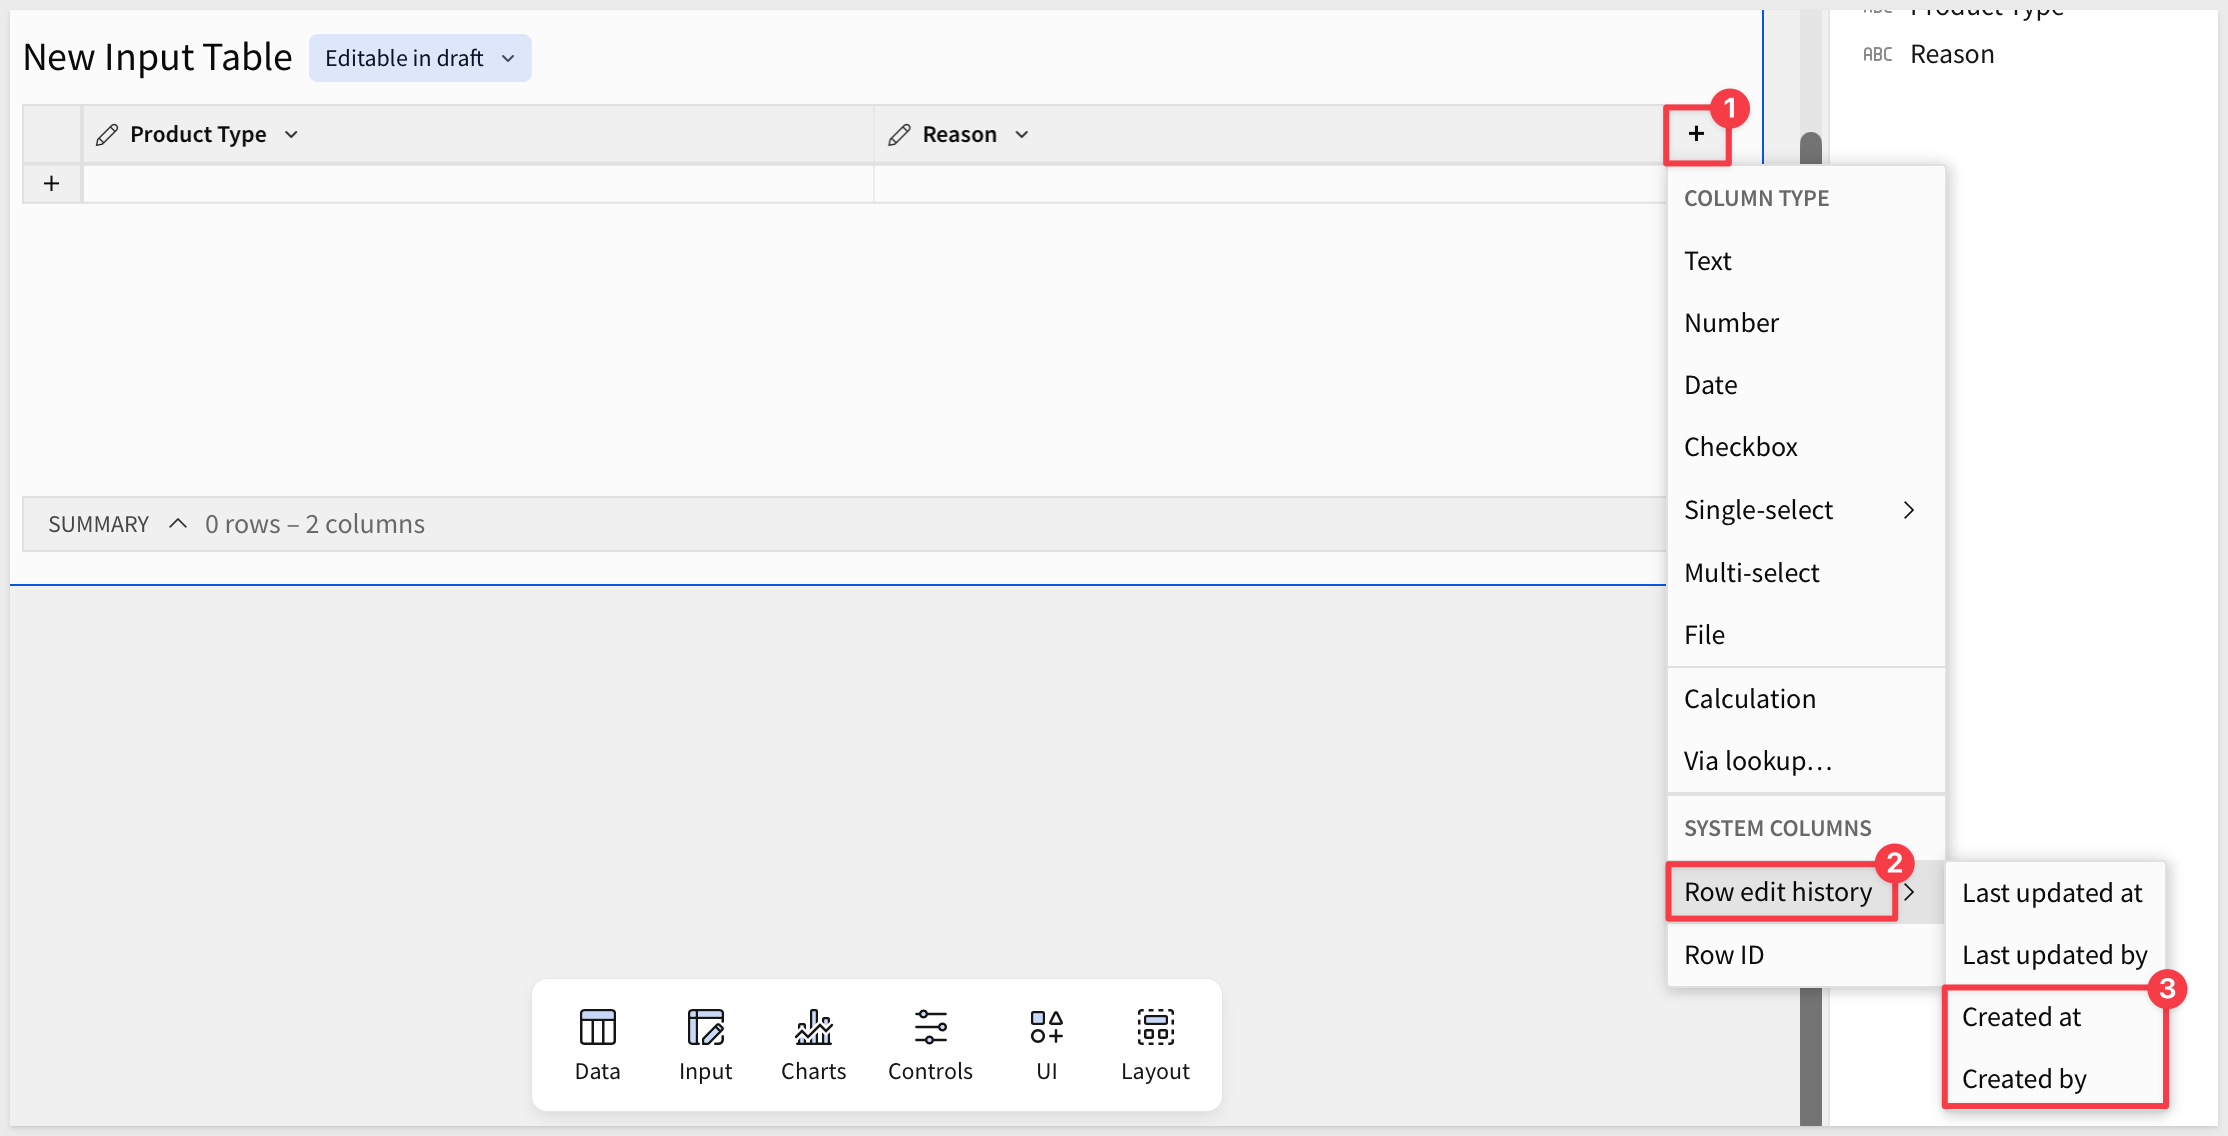
Use its column caret Add new column > Text to add a second column, Reason.
Delete the pre-populated seed rows so the table starts empty.

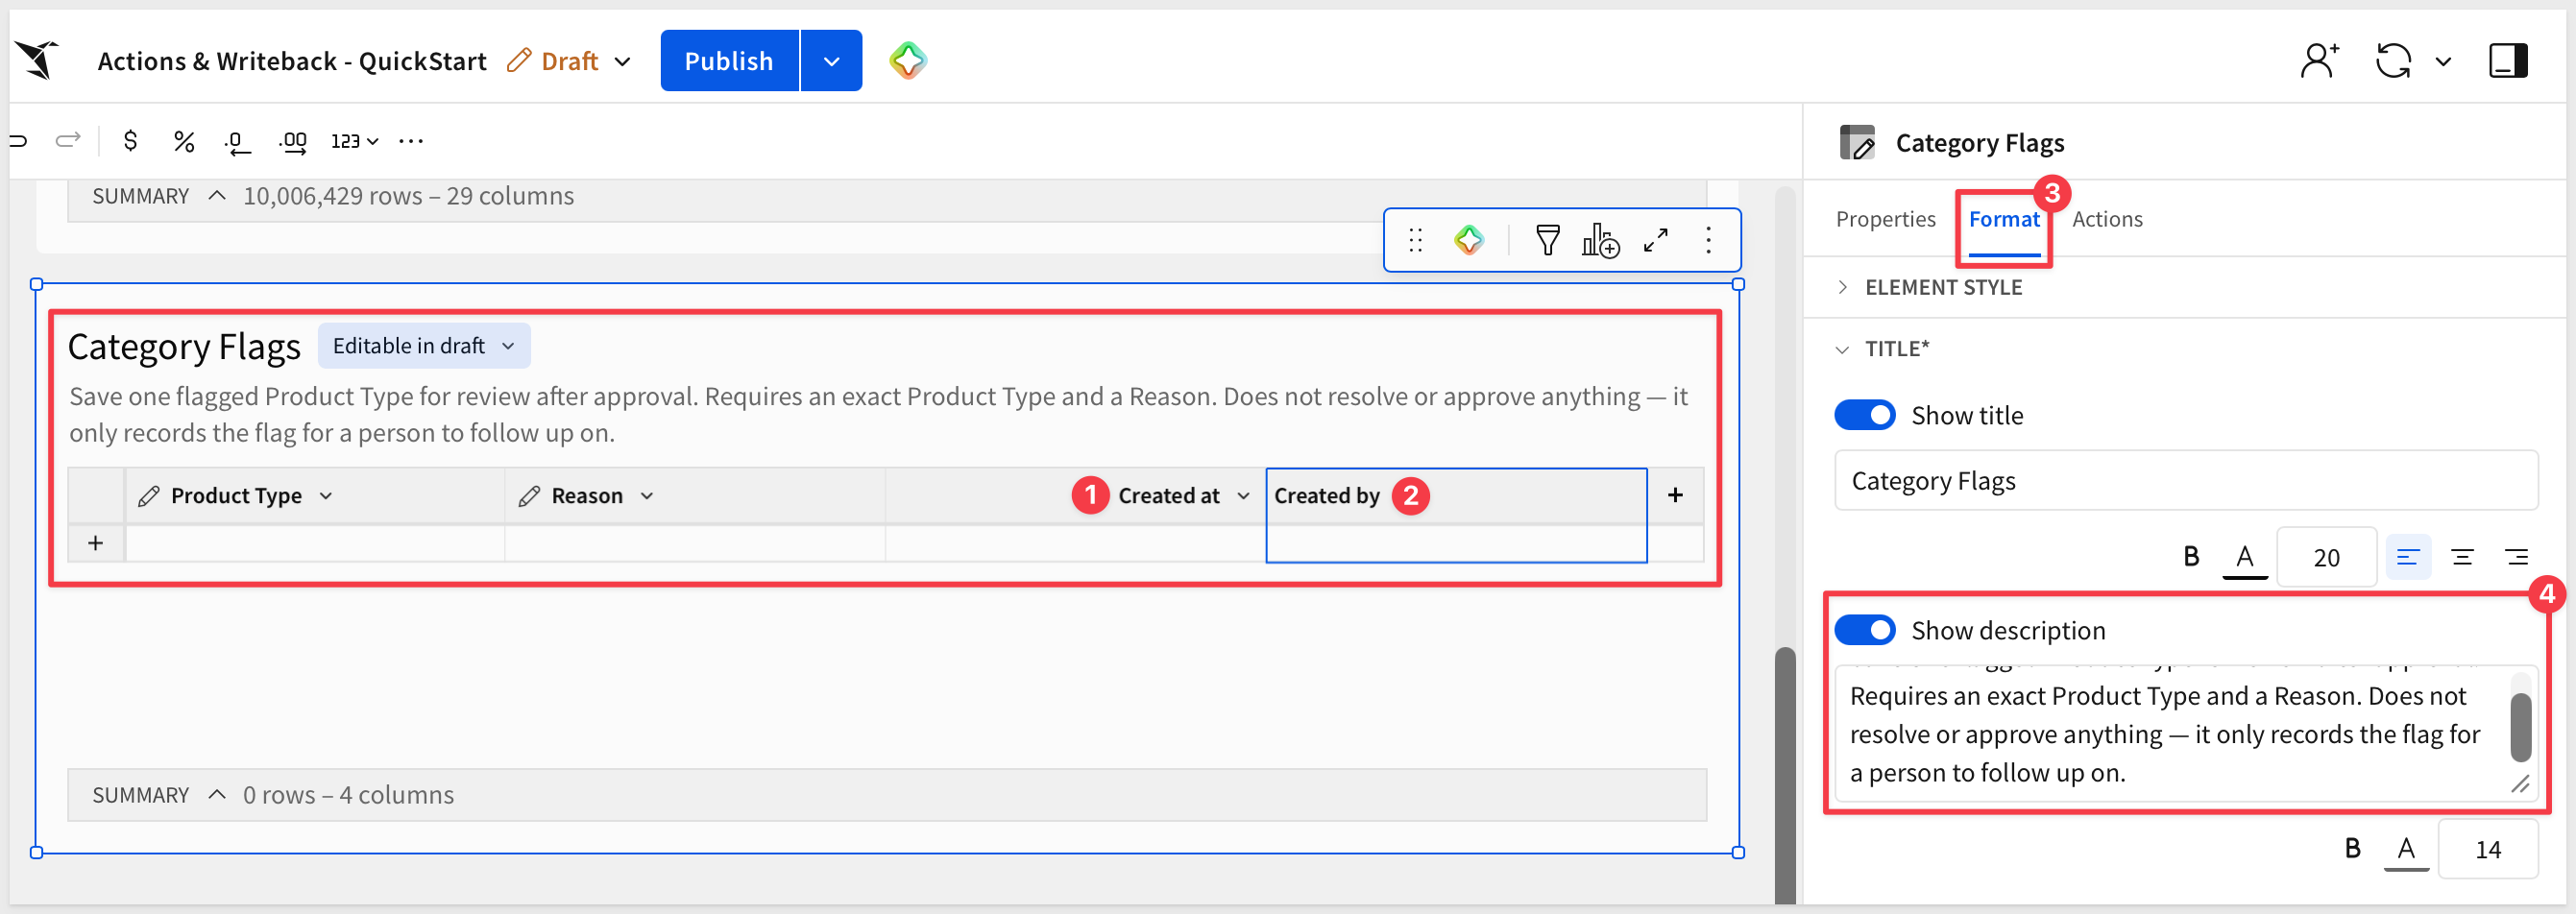
In the table's Properties, use Add column > Row edit history to add Created by and Created at automatically — no need for the agent to supply either.
Rename the input table:
Category Flags
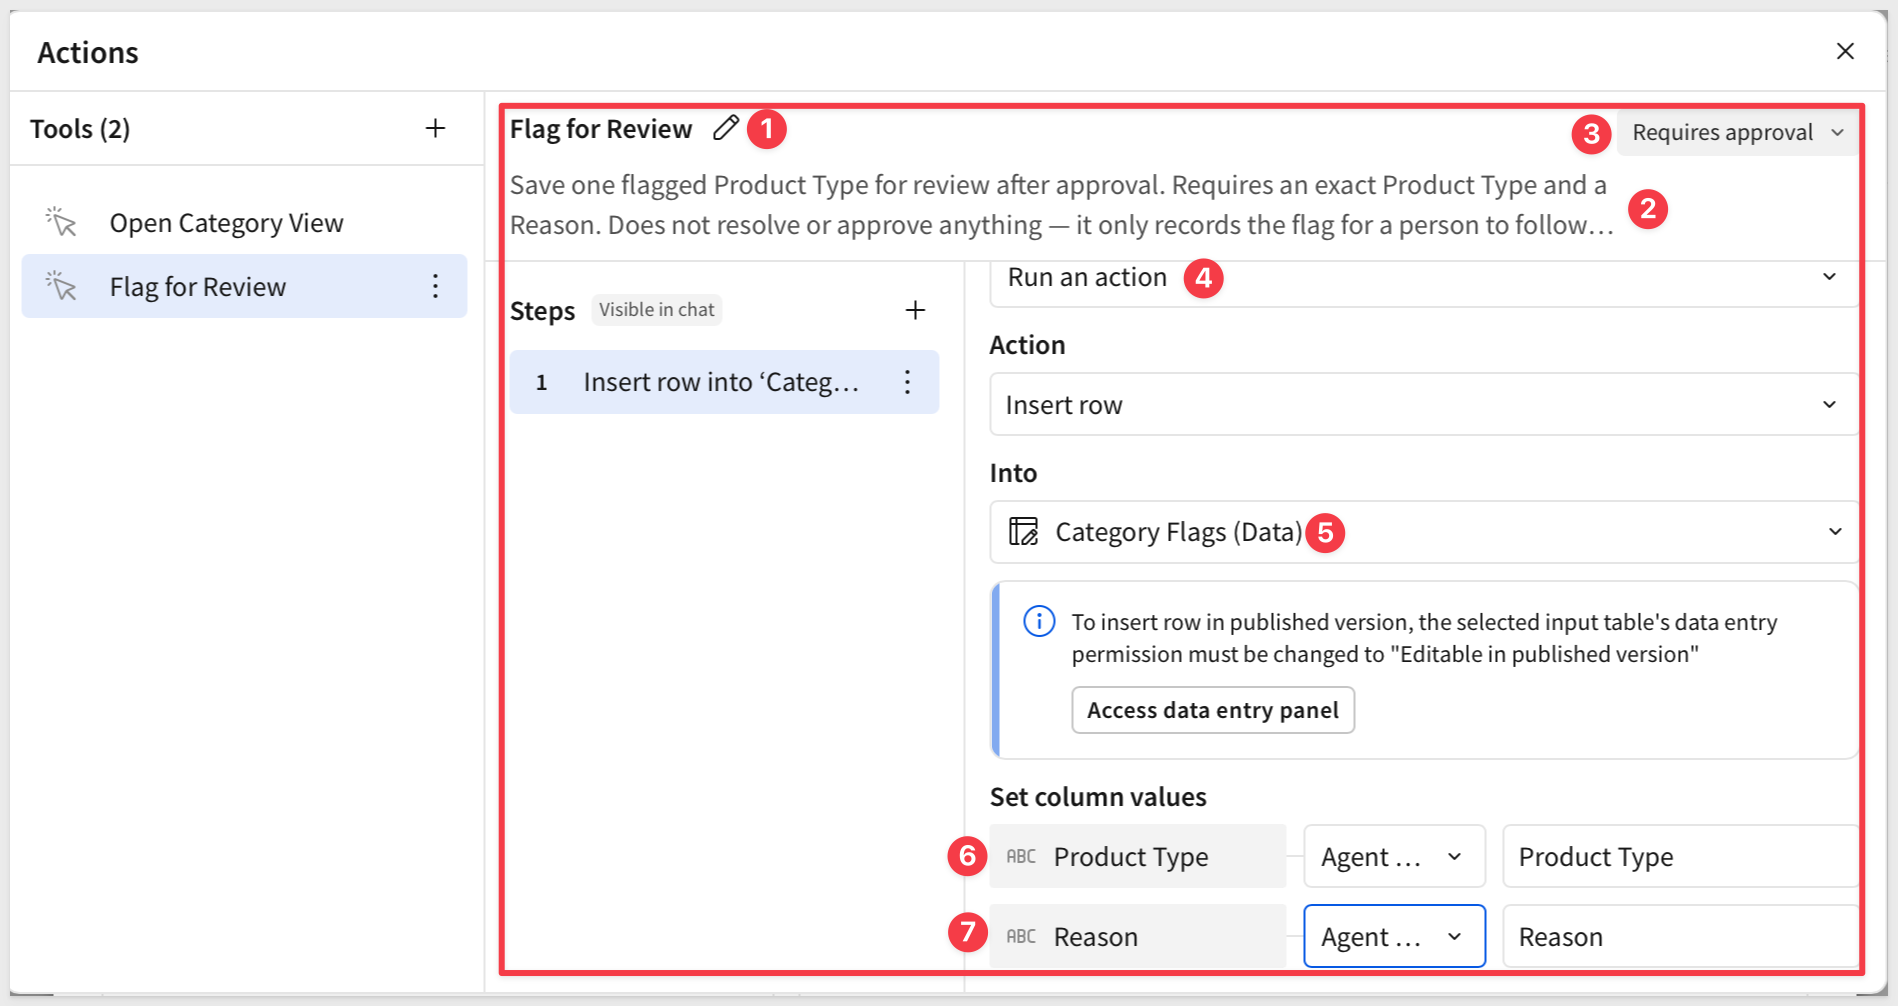
Add the writeback action tool
Back in My Actions Agent, under Tools, click + and select Action. Name it:
Flag for Review
Set the description:
Save one flagged Product Type for review after approval. Requires an exact Product Type and a Reason. Does not resolve or approve anything — it only records the flag for a person to follow up on.
Choose Requires approval.
Configure the first step: Run an action > Insert row.
Set Into to Category Flags. Under Set column values:
Product Type:Agent input, nameproduct_typeReason:Agent input, namereason
Save the tool.
Update the instructions
Open the Instructions tab and append:222
Use Flag for Review only when the user explicitly asks to flag a Product Type, and only with both an exact Product Type and a Reason. If either is missing, ask for it — do not invent a reason. This inserts one row for a person to follow up on; it does not resolve anything.
Click Save.
Add a chat element
Click + next to the page tabs to add a new page, then rename it from Page 1 to:
Chat
On the Chat page, add a UI > Chat element and connect it to My Actions Agent.
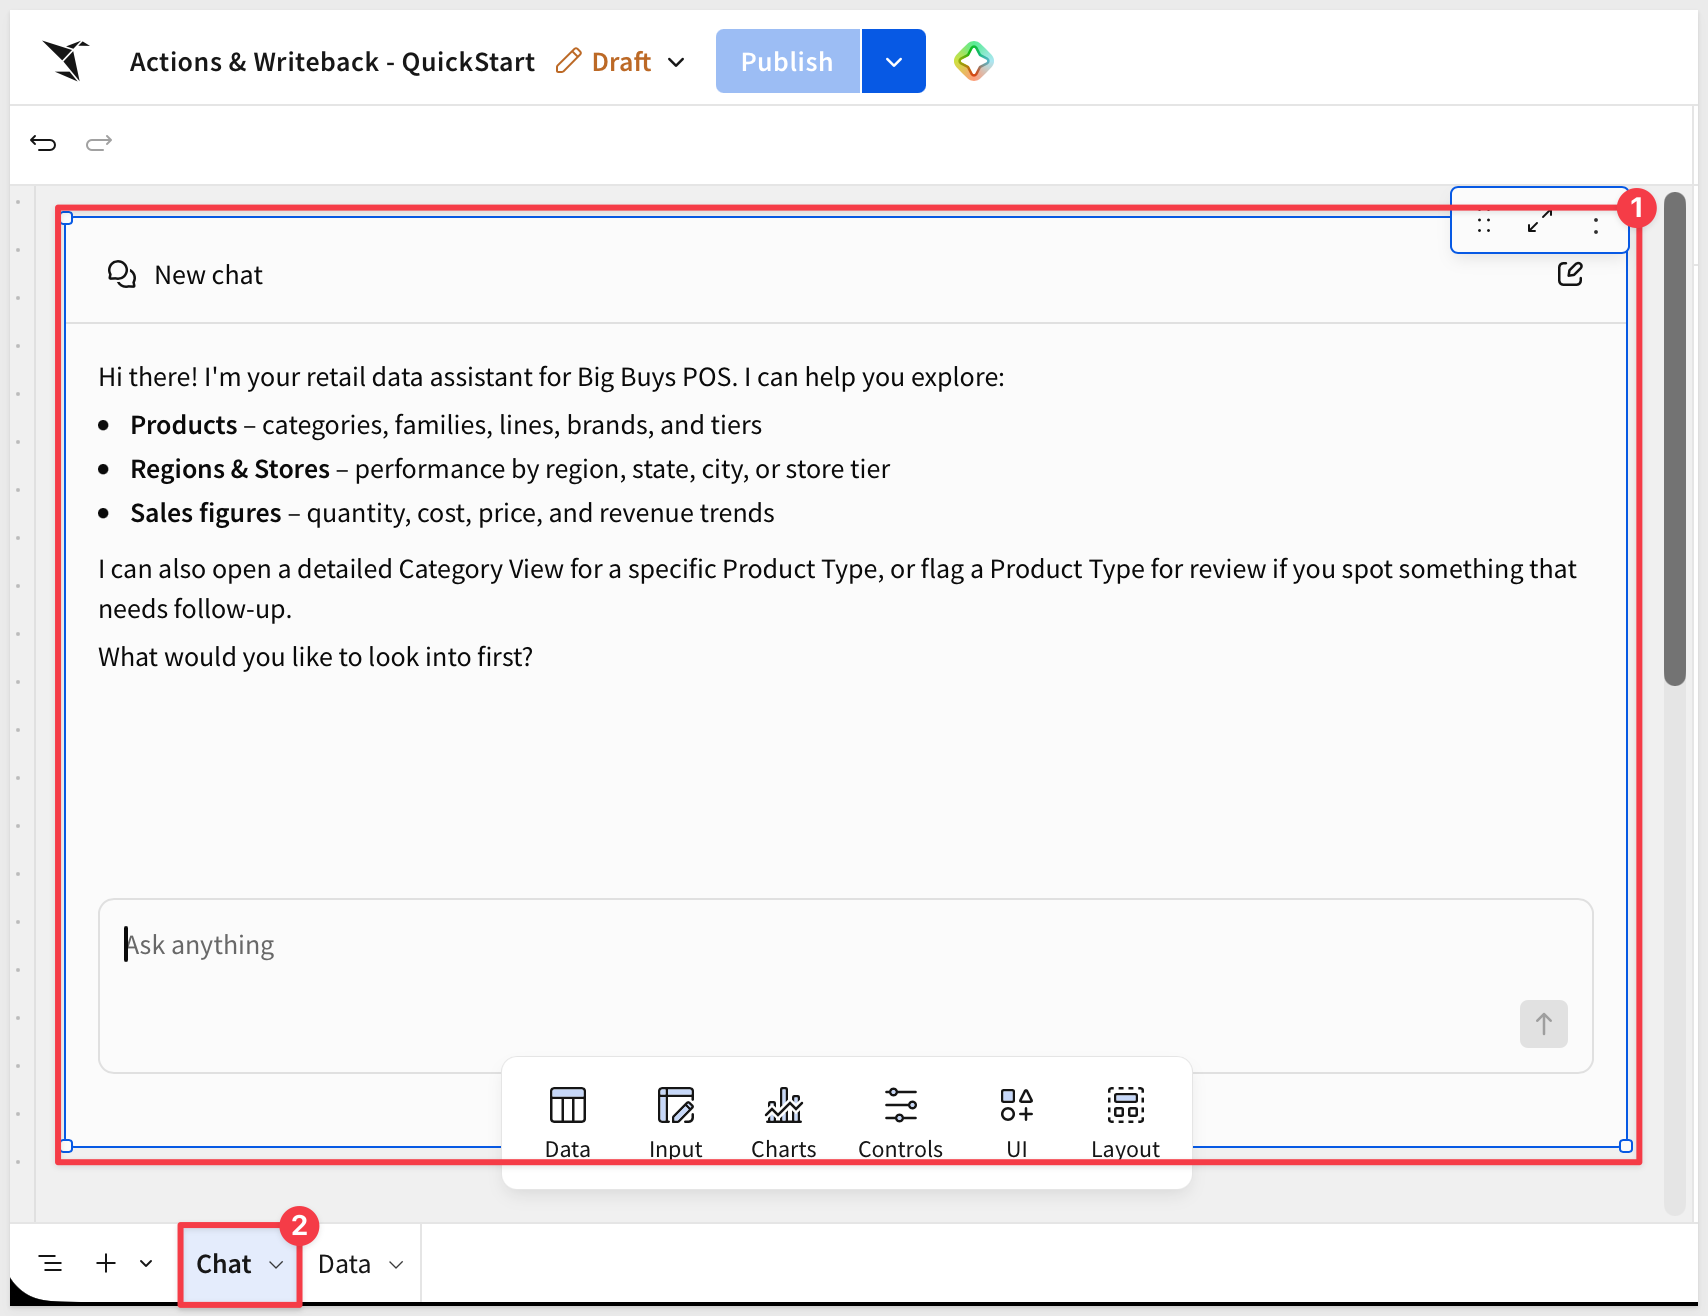
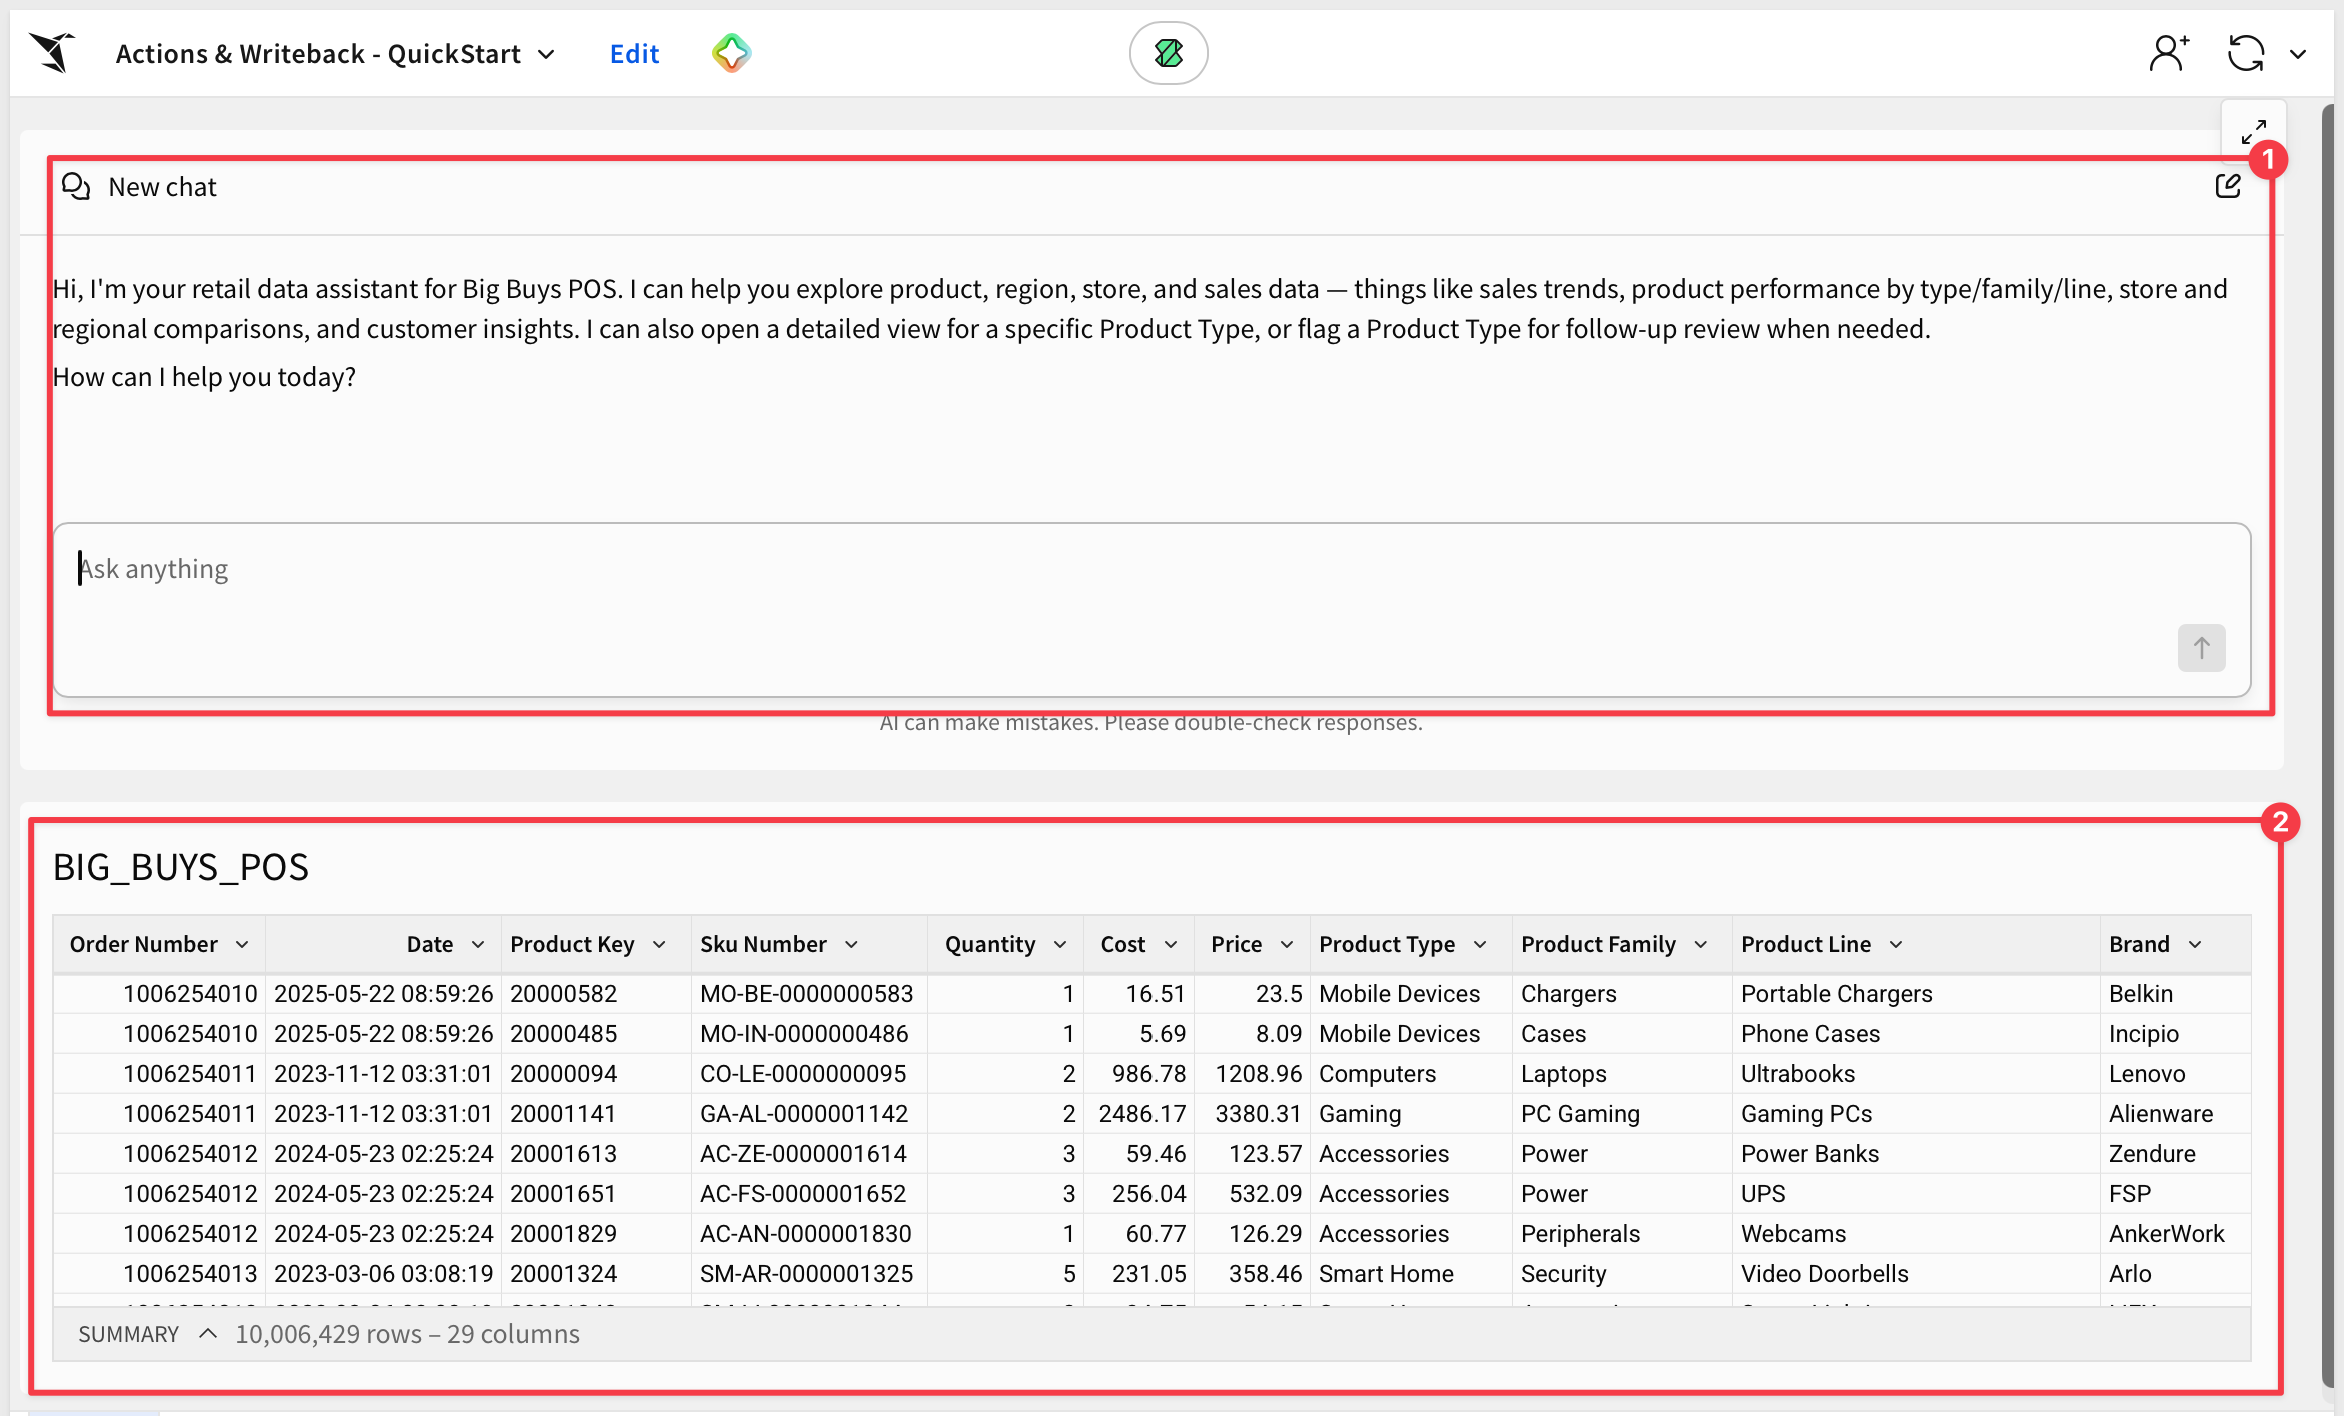
We want to be able to see the table data change when the chat changes the Product Type control. Move the BIG_BUYS_POS table to the Chat page below the chat element.
Hide the Data page.
Set the Category Flags input table to Published version (restricted).
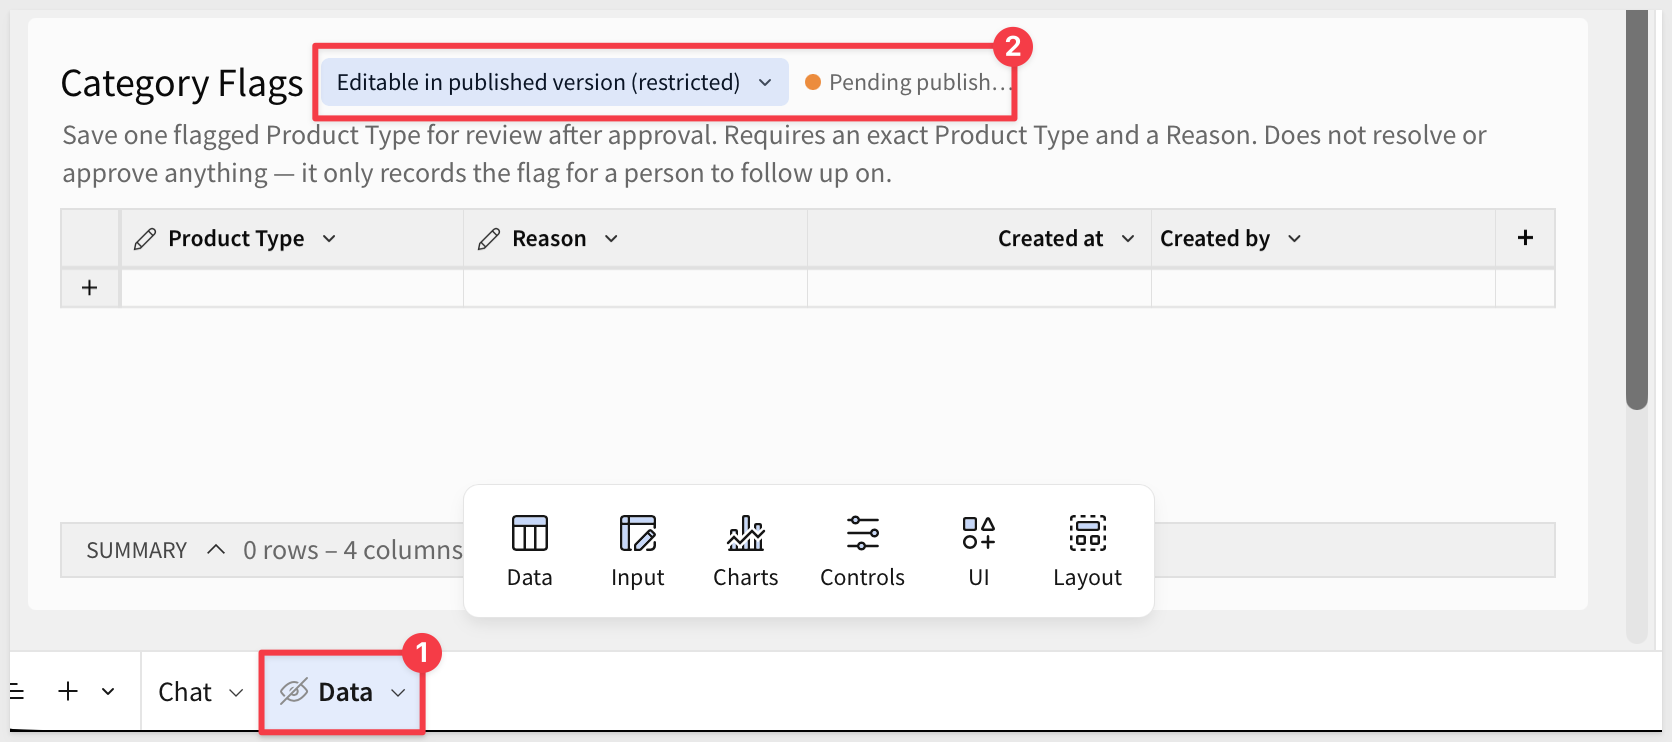
Click Publish and open the published version of the workbook.
Test all three
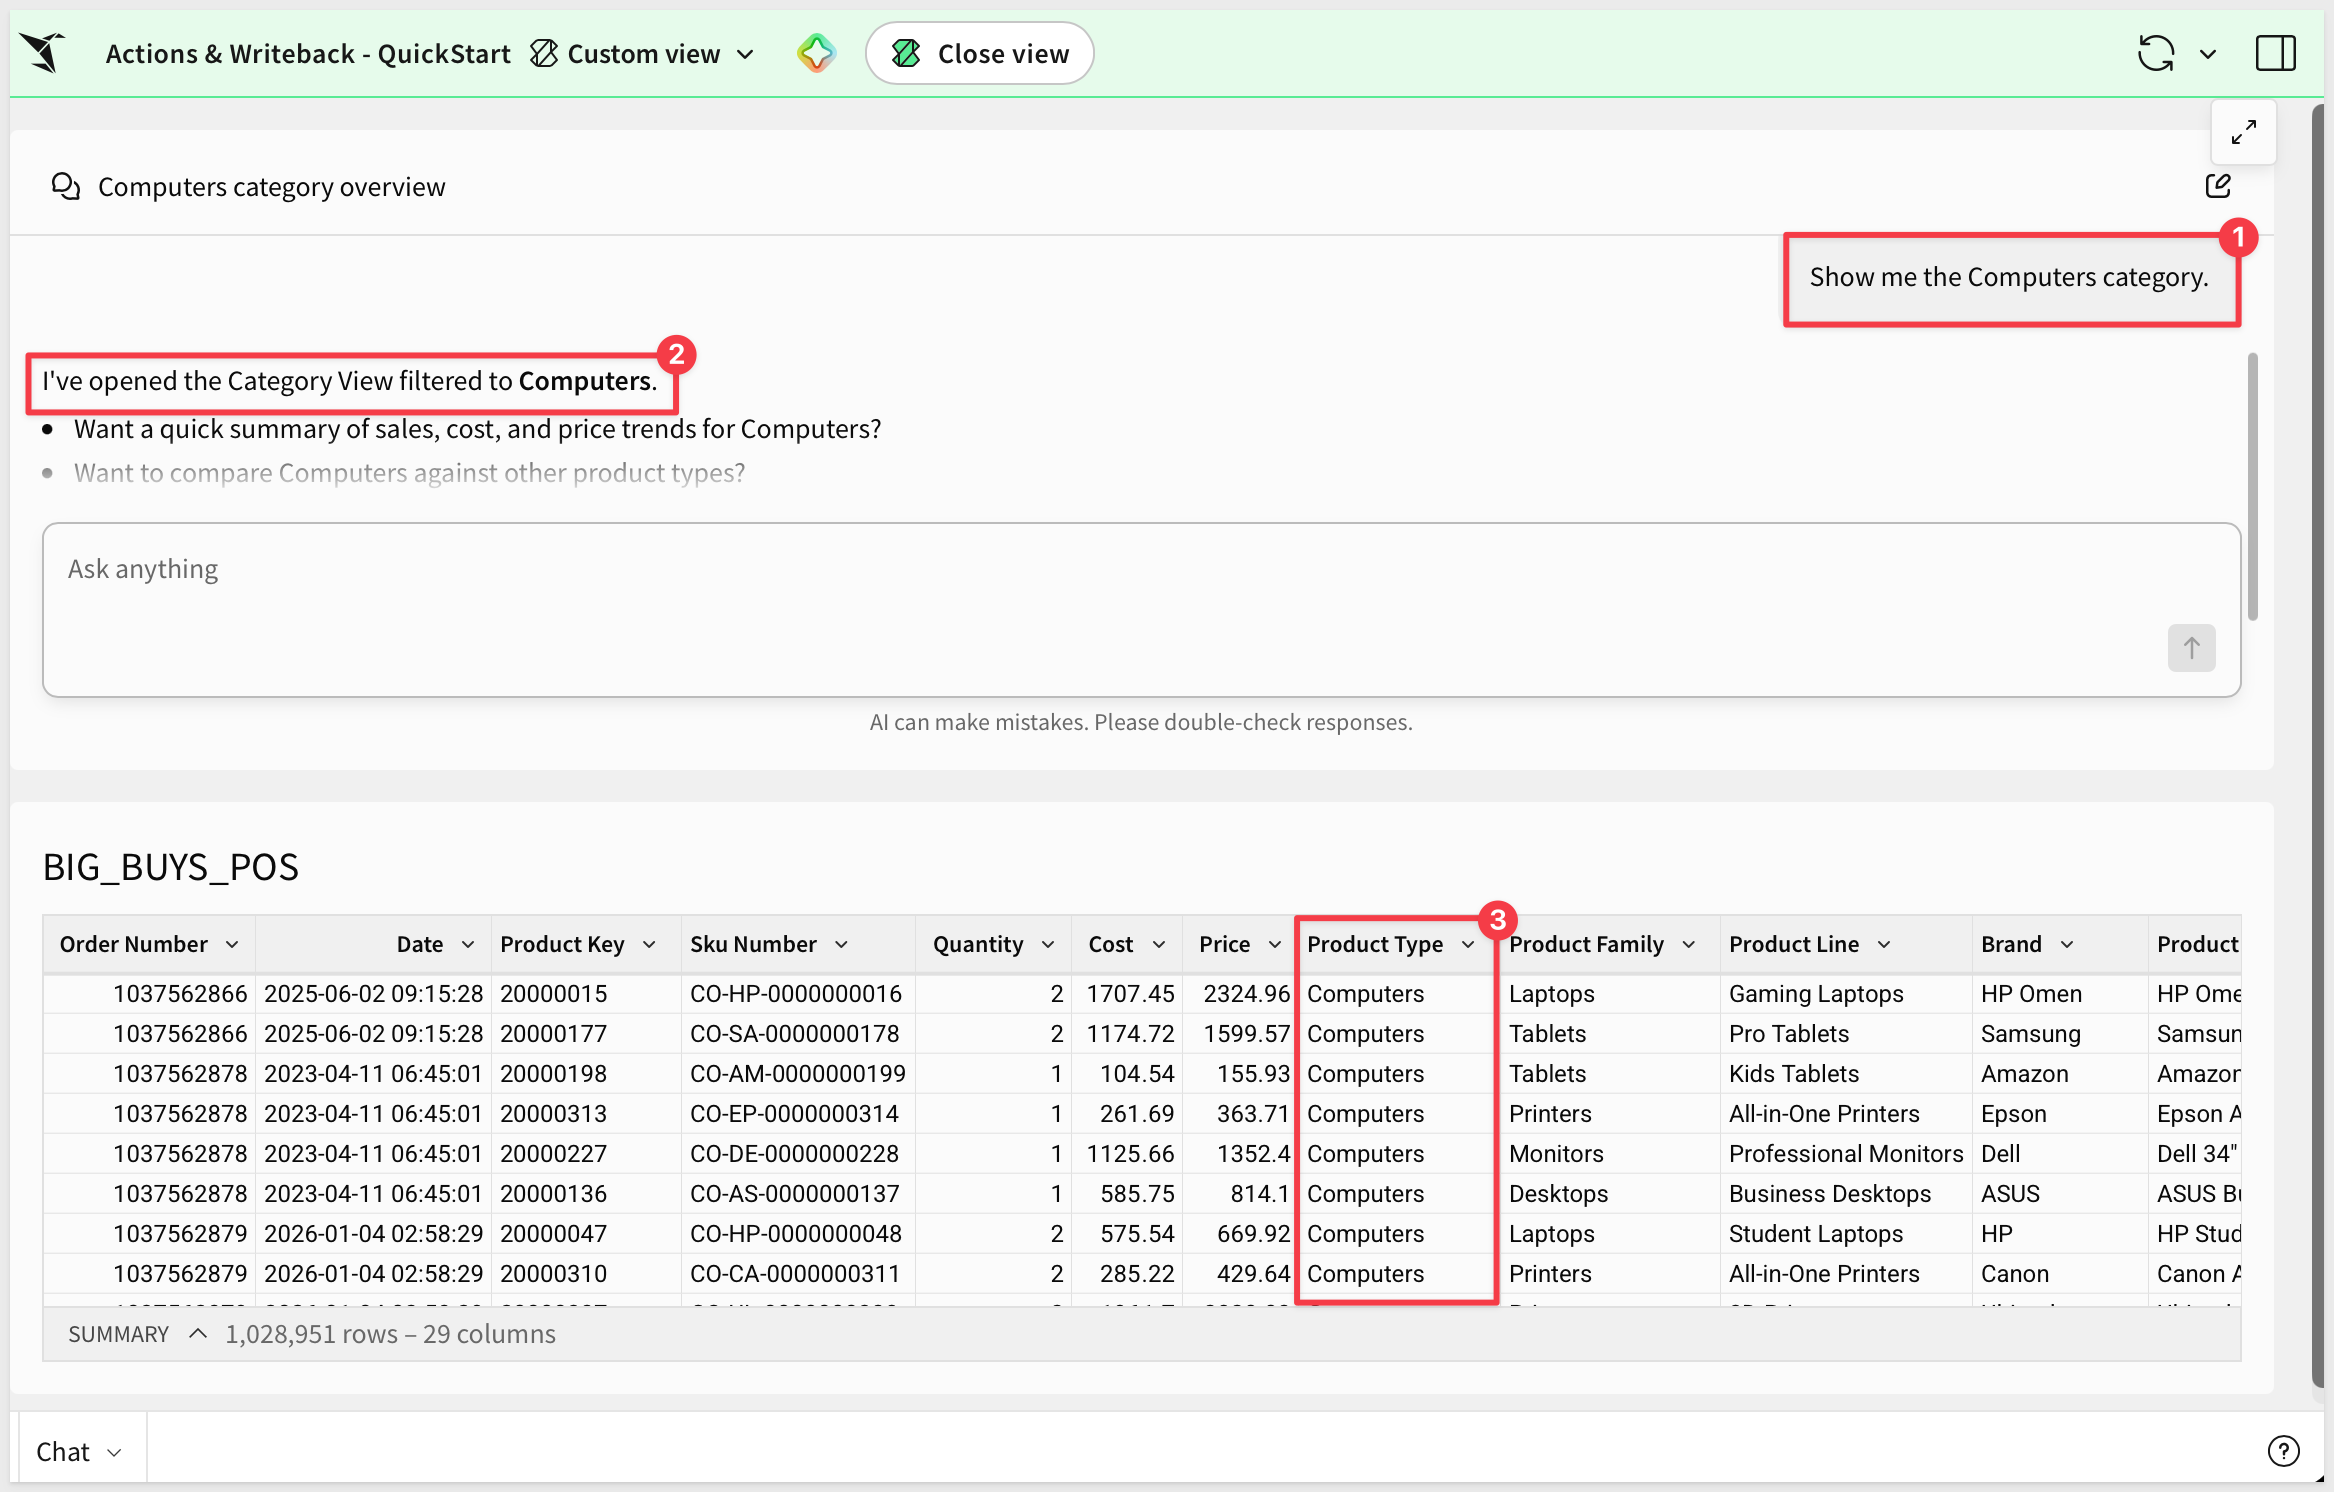
Ask something the display action should handle:
Show me the Computers category
The table is filtered for Computers.
Now ask for a flag, with a reason:
Flag Computers for review because margins look off this month
We can expand the chat interface and see that we need to approve adding a new row to the input table.
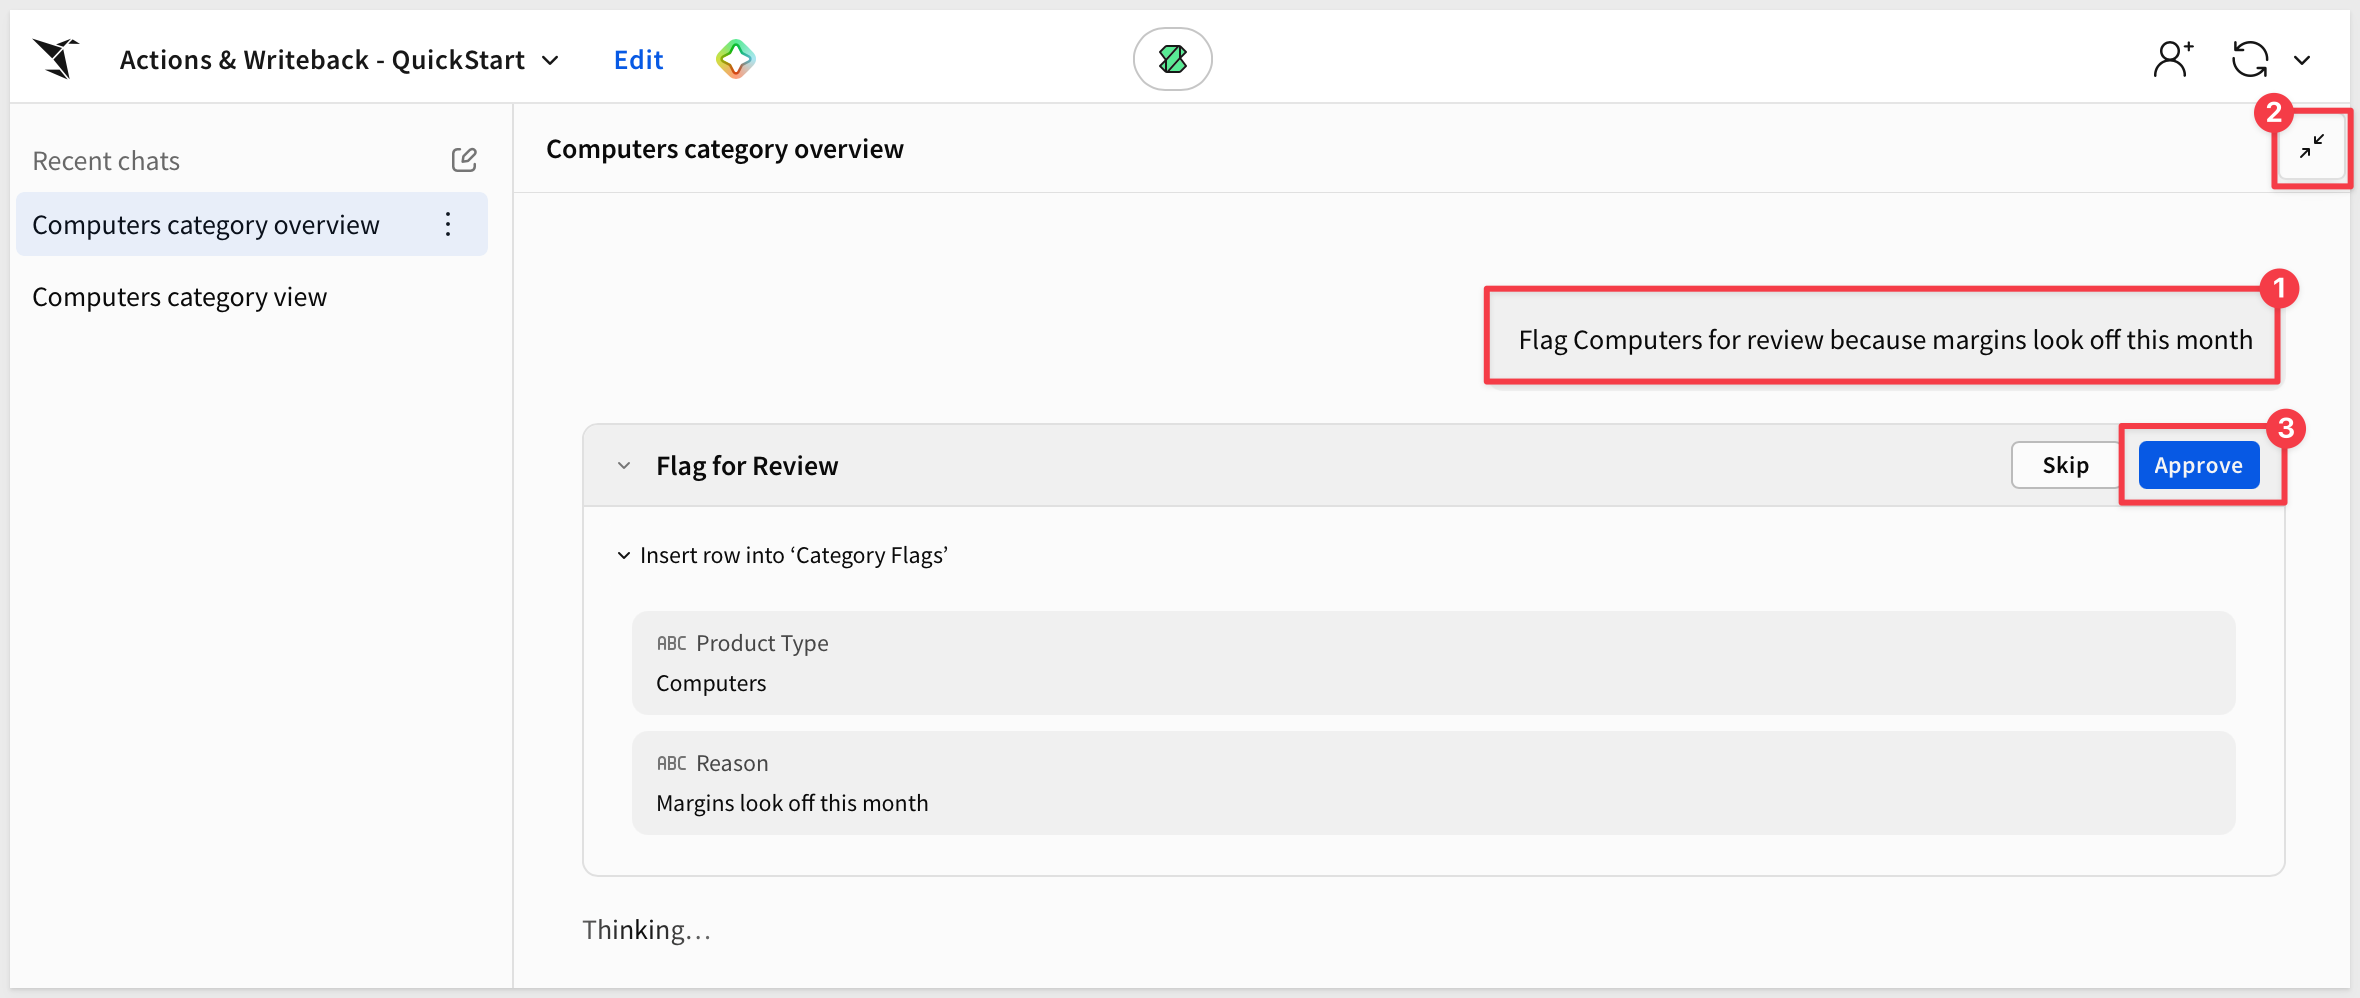
Approve the action.
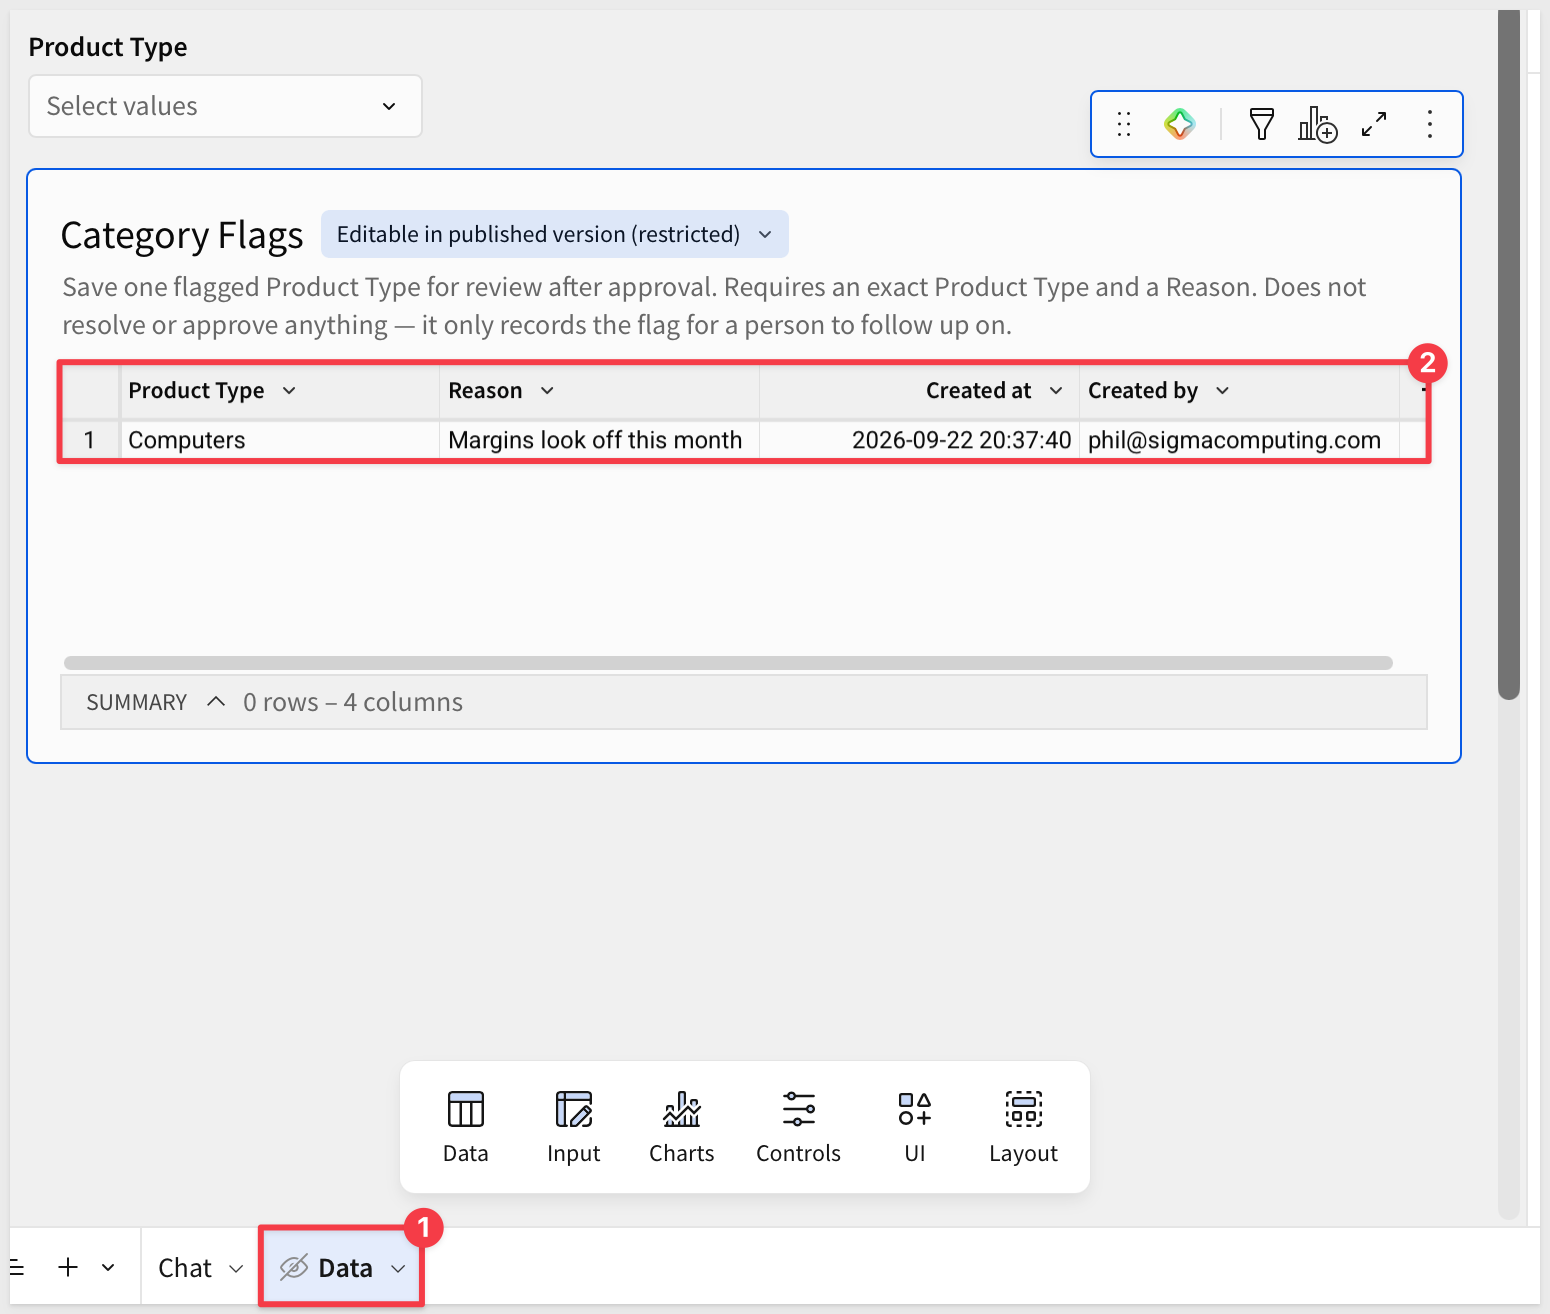
Place the workbook in Edit mode and check Category Flags for the new row — Product Type, Reason, and the Created by/Created at columns Sigma filled in automatically.
Return to the published version and ask for a flag without a reason.
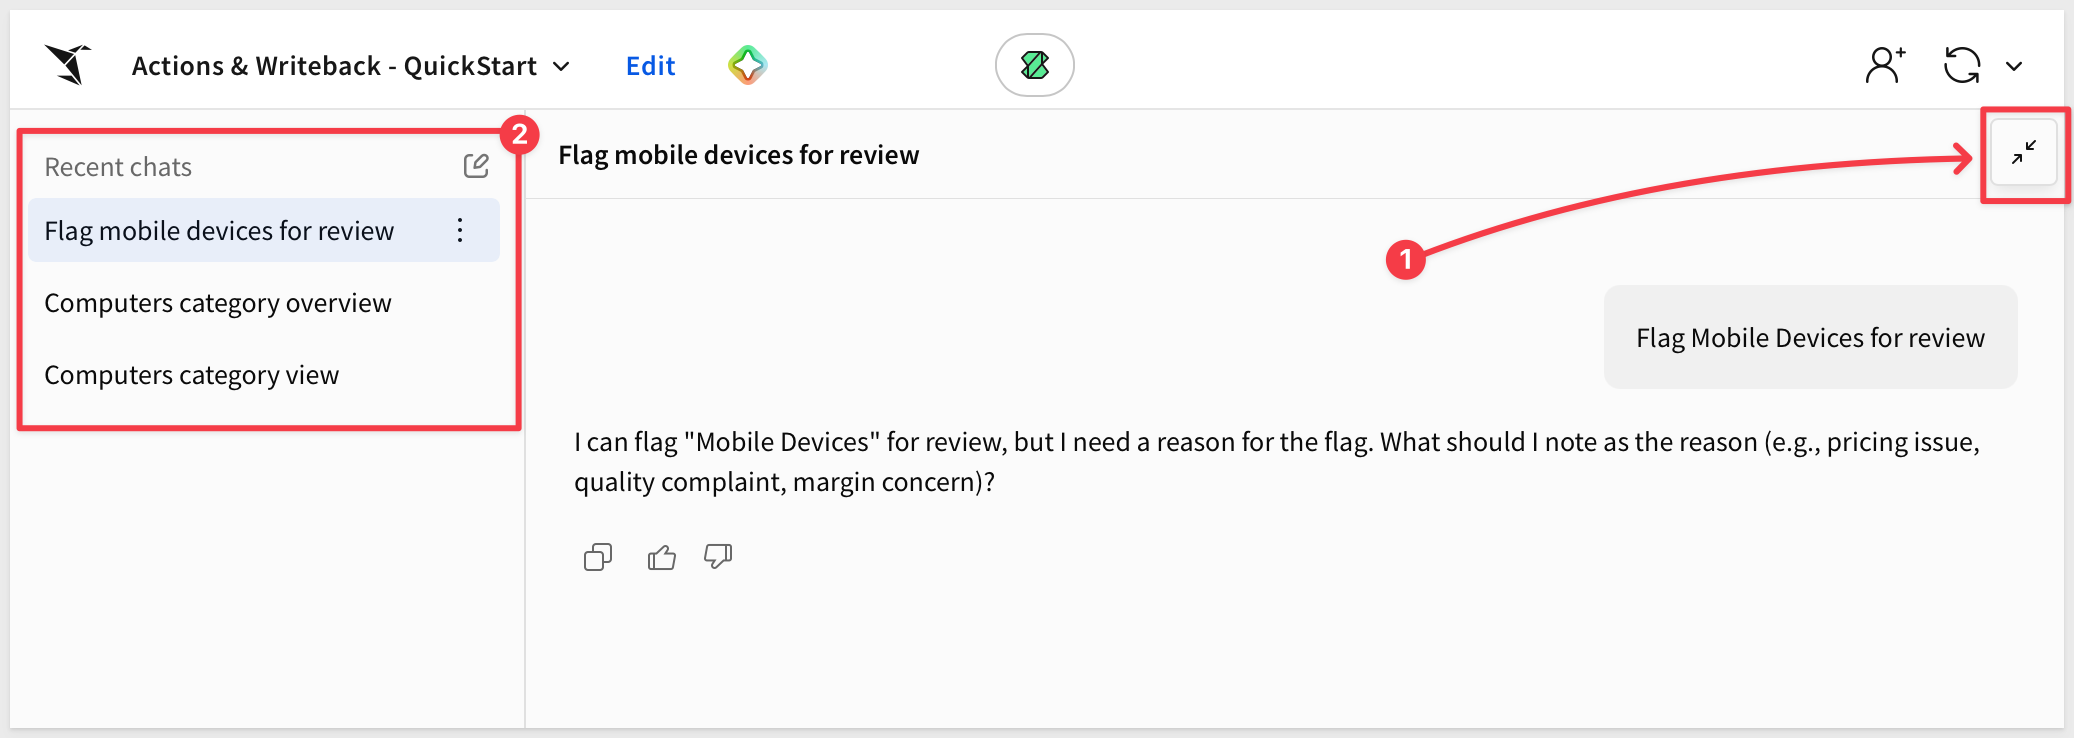
Flag Mobile Devices for review
An agent following the instructions asks what the reason is instead of inventing one.
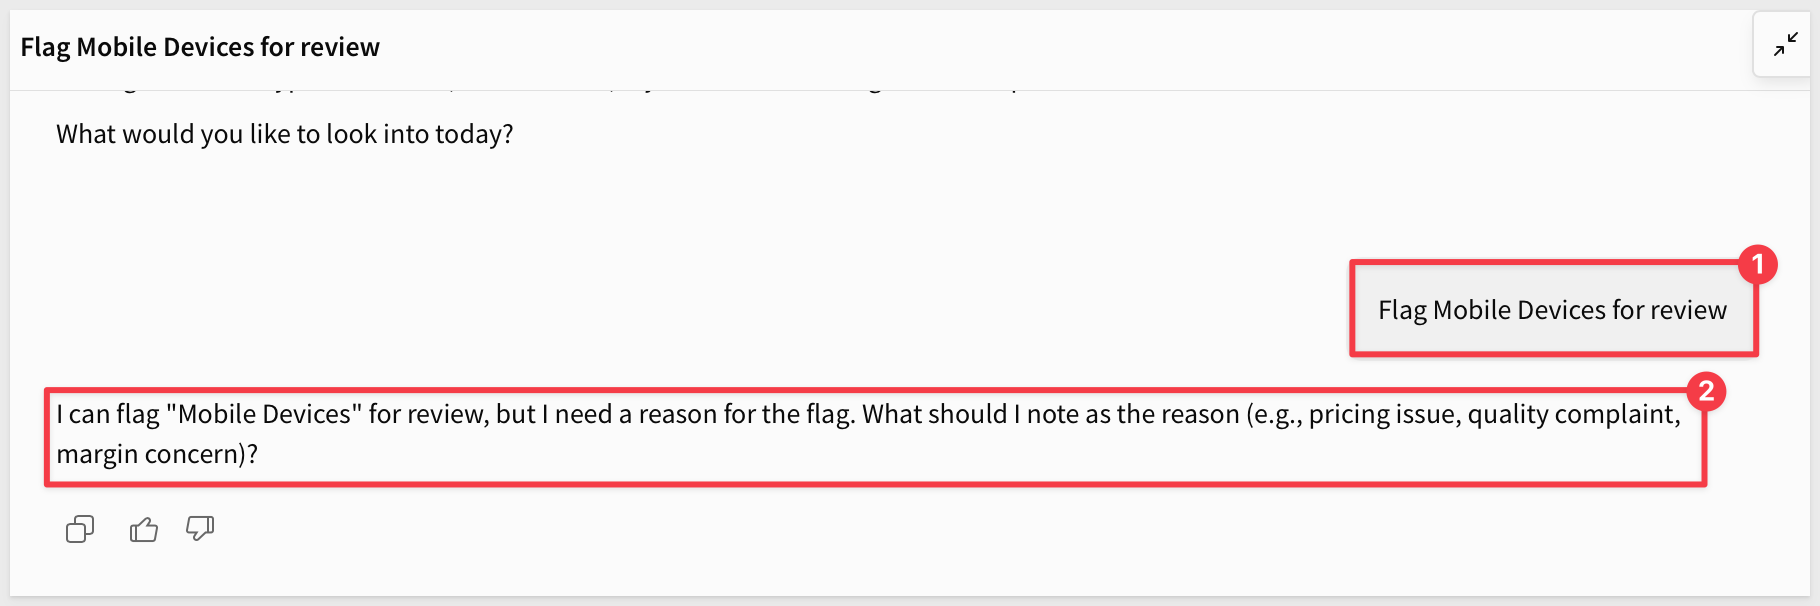
If it flags the category anyway with a made-up reason, the instructions need to be more explicit about requiring both inputs — the same lesson from earlier in this series, applied to a required input instead of a data boundary.
This isn't the same as chat history
Sigma also keeps a list of your past conversations with an agent, visible in the chat panel's Recent chats list.
It's a slick feature, but it's a different one — reopening an old chat just shows you what you already said.
The row you just approved in Category Flags is a permanent database record, not something tied to this conversation. It'll still be there next week, in a chat that hasn't happened yet, read by anyone with access to the table — not just recoverable by scrolling back through what you typed.
You've now given an agent two ways to act instead of just answer: one that's always available because nothing gets written, and one that's gated behind your approval because something does.
We gave an agent two ways to act on a workbook instead of just answer — setting a control to show something specific, and writing a new row to a table, gated by your approval before anything actually commits.
Core concepts
- Display and writeback actions are configured differently on purpose — one needs no approval because nothing gets written; the other requires it because something does
- An agent's actions run through the same controls and tables a person already uses — there's no special back door, which is why the filter and the table you built earlier in this series are the entire mechanism
- Instructions have to cover the when and the what — when an action should run, and what inputs are required before it runs
Key takeaways
Approval is the gate, not the instructions:
- No approval was needed for the display action because nothing gets written, no matter how it's used
Requires approvalon the writeback action means a person confirms before a row lands in the table, regardless of how confident the agent sounds
A missing required input is not the agent's problem to guess its way through:
- Asked to flag a category with no reason given, the agent asked for the reason instead of inventing one
- That only happens because the instructions said to ask — an
Insert rowaction by itself doesn't know which inputs are actually required
Three tests proved three separate guarantees, not the same thing three times:
- The display test proved the agent can drive the UI through a real control, not a shortcut around it
- The writeback test proved data only changes with your approval
- The missing-reason test proved a required input gets asked for, not fabricated
Next steps
Explore the rest of the Agents series.
If you haven't already, Agents 01: Building Your First Sigma Agent covers the basics of creating an agent and giving it a data source, from scratch.
Additional Resource Links
Blog
Community
Help Center
QuickStarts
Be sure to check out all the latest developments at Sigma's First Friday Feature page!