Sigma's form-creation feature makes it simple to collect structured data without requiring users to navigate complex spreadsheets.
With just a few clicks, you can create an empty input table, configure its columns, and generate a shareable form for data entry.
This allows teams to gather information efficiently while ensuring consistency and accuracy.
Use Case: Capturing Leads at a Tech Conference Booth
When working a booth at a tech conference, every conversation is a potential opportunity. Instead of relying on handwritten notes or scattered documents, we can use Sigma to capture leads in a structured format.
In this QuickStart, we will:
1: Create an input table to store attendee details.
2: Generate and share a lead capture form for easy data entry.
3: Manually enter one lead to confirm the process.
4: Bulk add 50 leads from a CSV file.
6: Quickly group, count, and analyze the captured leads.
By the end, we will have demonstrated a seamless way to collect, manage, and analyze event leads—ensuring no valuable contact is lost.
Target Audience
Sigma builders interested in leveraging the advanced capabilities to create fully functioning AI Apps.
Prerequisites
- A computer with a current browser. It does not matter which browser you want to use.
- Access to your Sigma environment.
- Some familiarity with Sigma is assumed. Not all steps will be shown as the basics are assumed to be understood.
For more information on Sigma's product release strategy, see Sigma product releases.

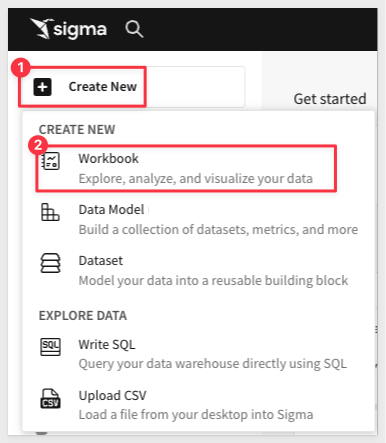
Log into Sigma as Administrator and create a New workbook:
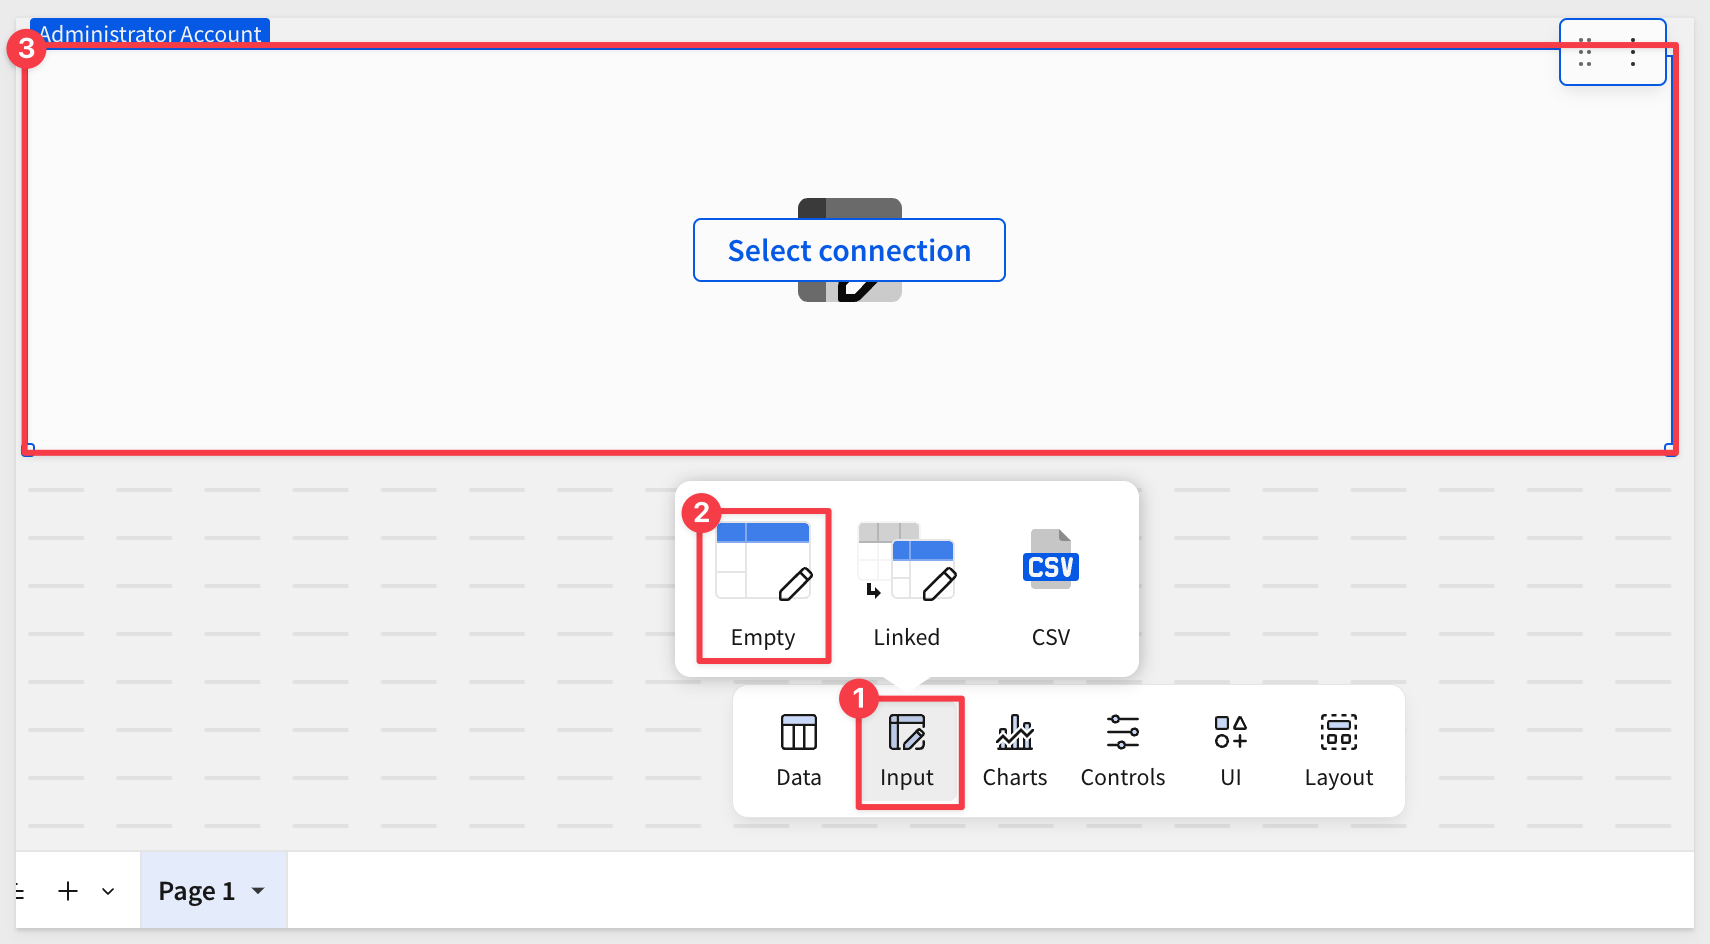
From the Element bar, click Input and then drag an Empty input table onto the page:
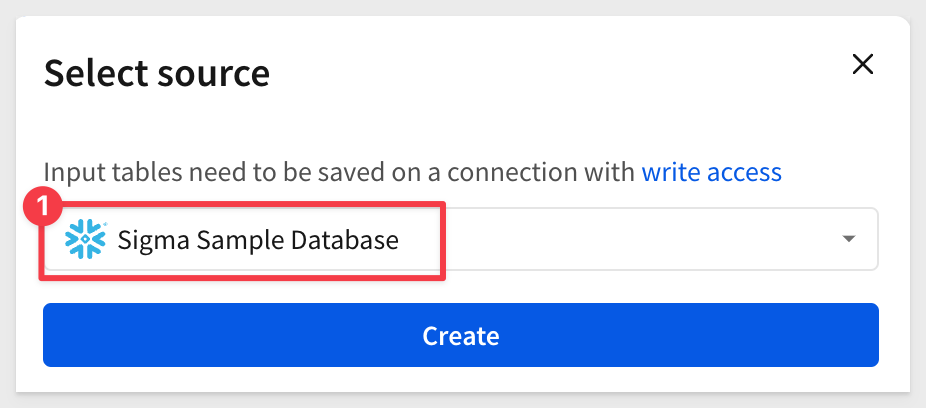
Click Select connection and select the Sigma Sample Database from the drop list. Then click Create:
Rename the input table to Trade Show Leads.
Click the Save as button and save the workbook as Trade Show Lead Capture.
Input table columns
We need to add some columns to store data from our eventual form responses.
Rename the first column to Indusrty.
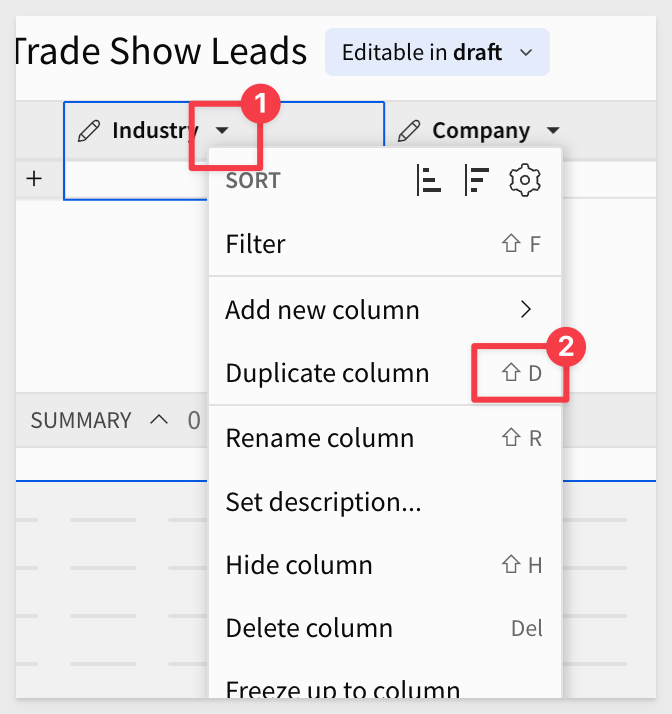
We need six more columns, and we could add them using the menus, but there is a faster way.
With the Industry column selected, press Shift D on the keyboard six times. This wonderful little keyboard shortcut adds six more columns for us. We just need to rename then now:
- Company
- Full Name
- Title
- Email
- Interest Level
- Rep

Most of the keyboard shortcuts are shown in-line with each menu item. For example:
To see more time-saving keyboard shortcuts, see:
Keyboard shortcuts: Mac OSKeyboard shortcuts: Microsoft Windows
Column data validation
Three of our columns really should be chosen from a list of selections, rather than hand-typed, which is both slow and error-prone.
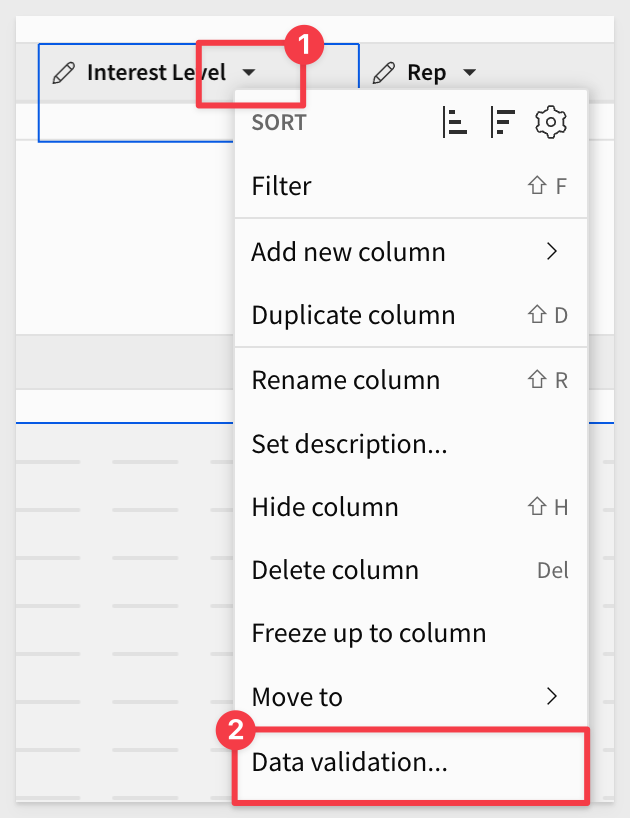
Click on the Interest Level column and select Data validation:
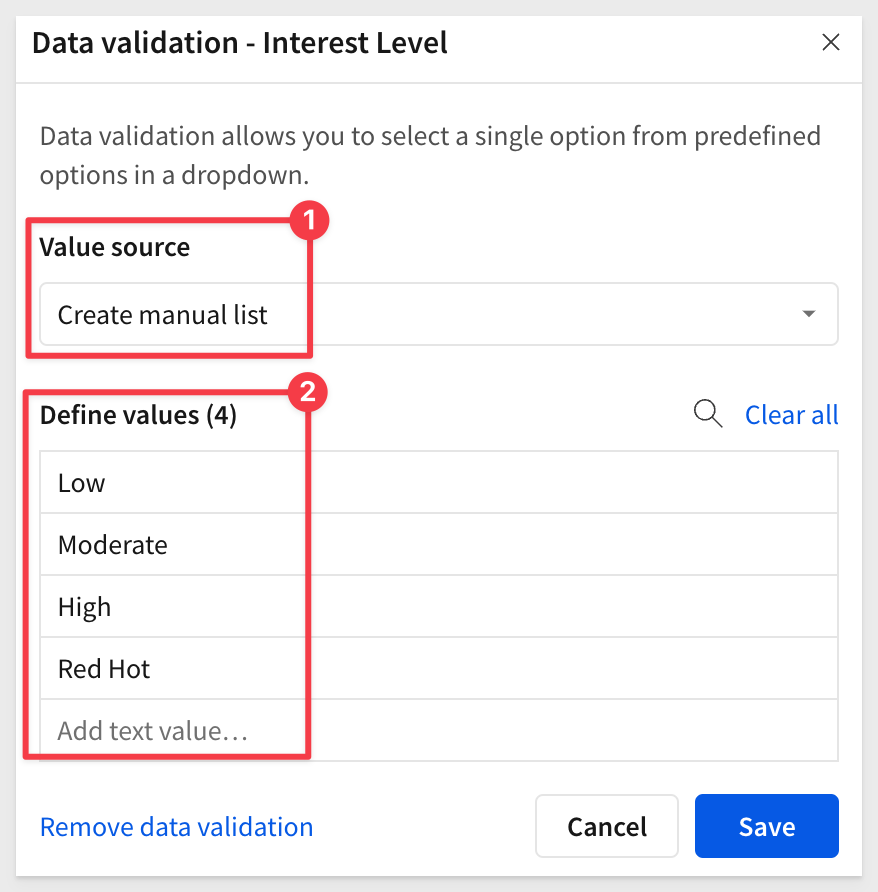
Create a Manual list using these values, and click Save:
For the Industry data validation, we will get the values from an existing data source:
Drag a new Table element on the page, from the Element bar and click Select source.
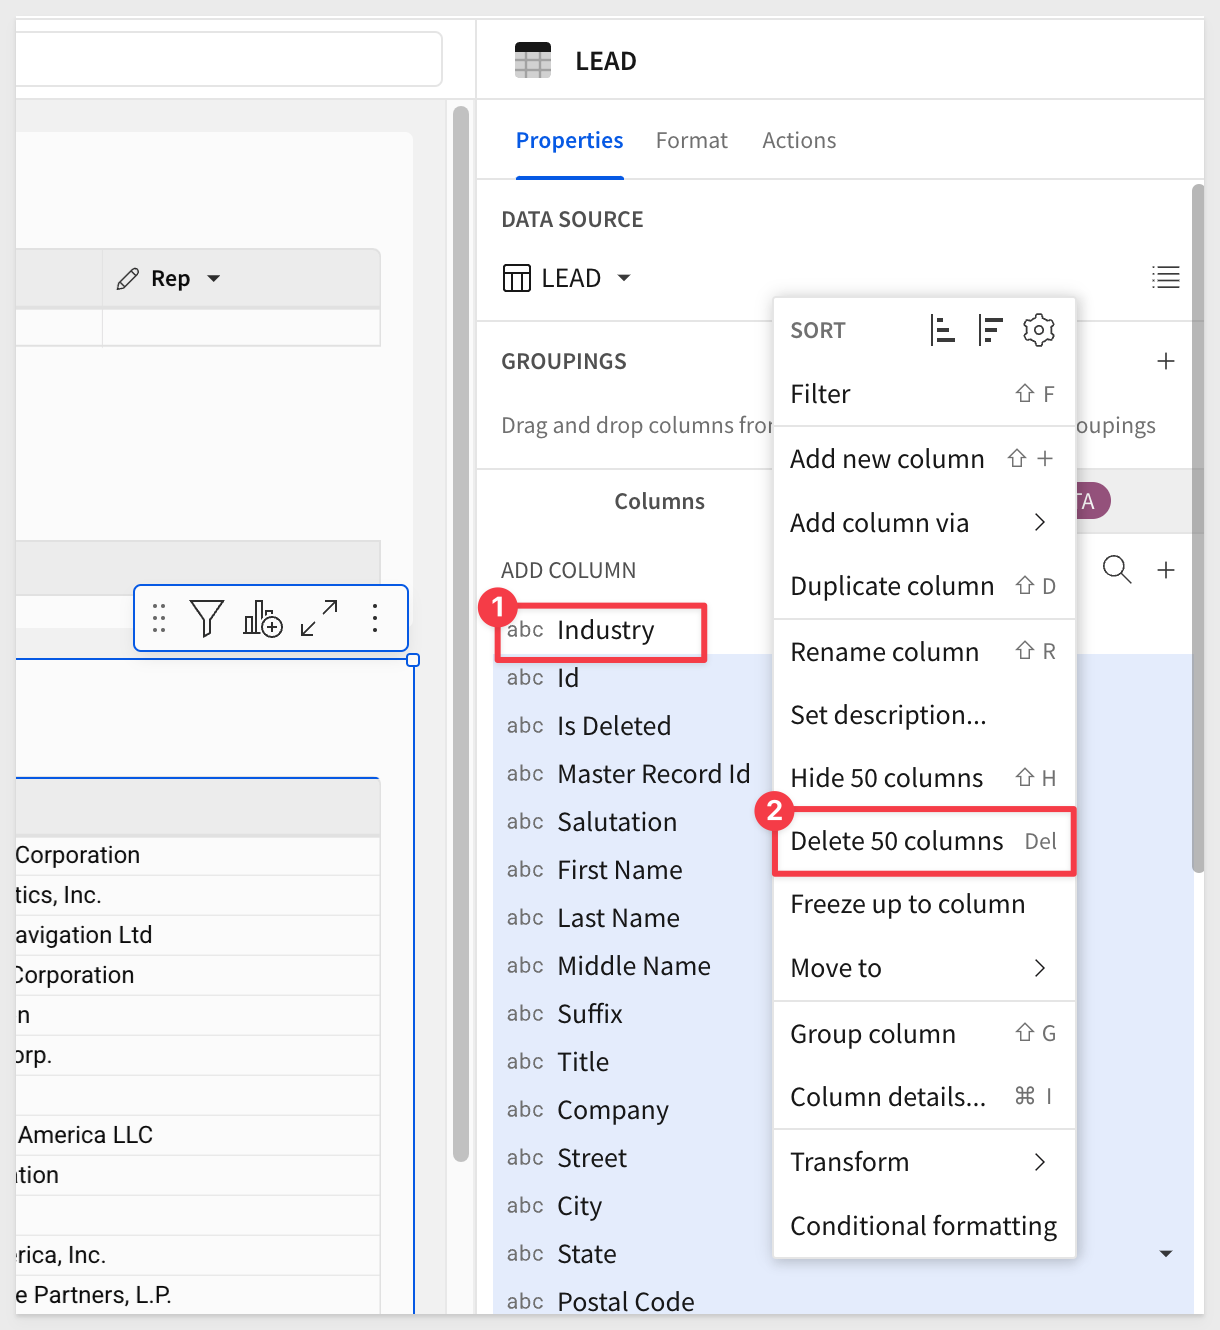
Navigate to the Sigma Sample Database > Applications > SALESFORCE > LEAD table

Using the Element panel, delete all the columns except the Industry column.
We like to first drag the Industry column to the top of the list, then using Shift and click to select all the other columns, but that is just a preference:
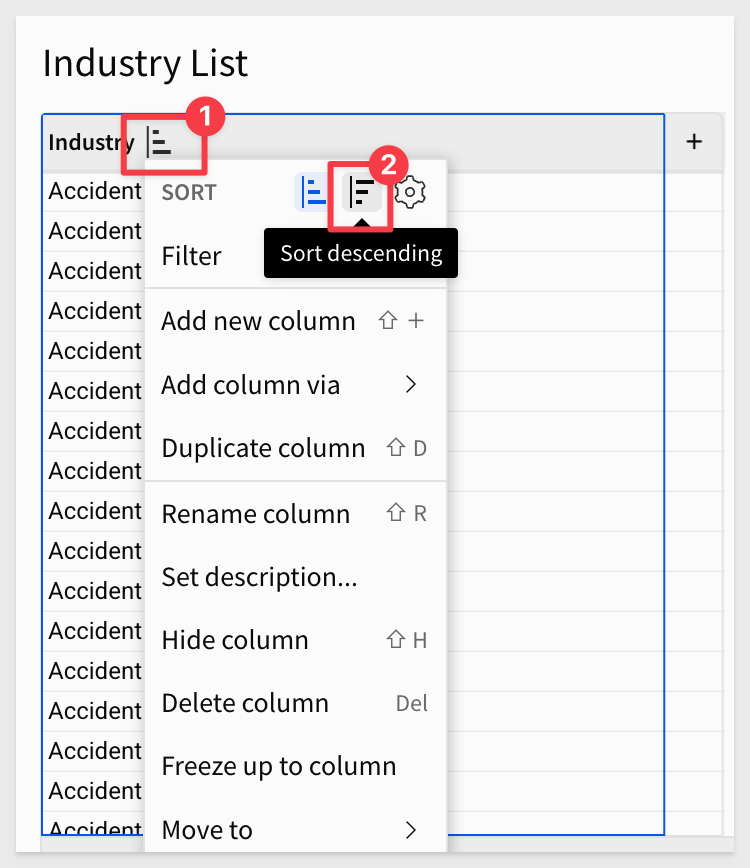
Rename the table to Industry List and sort it:
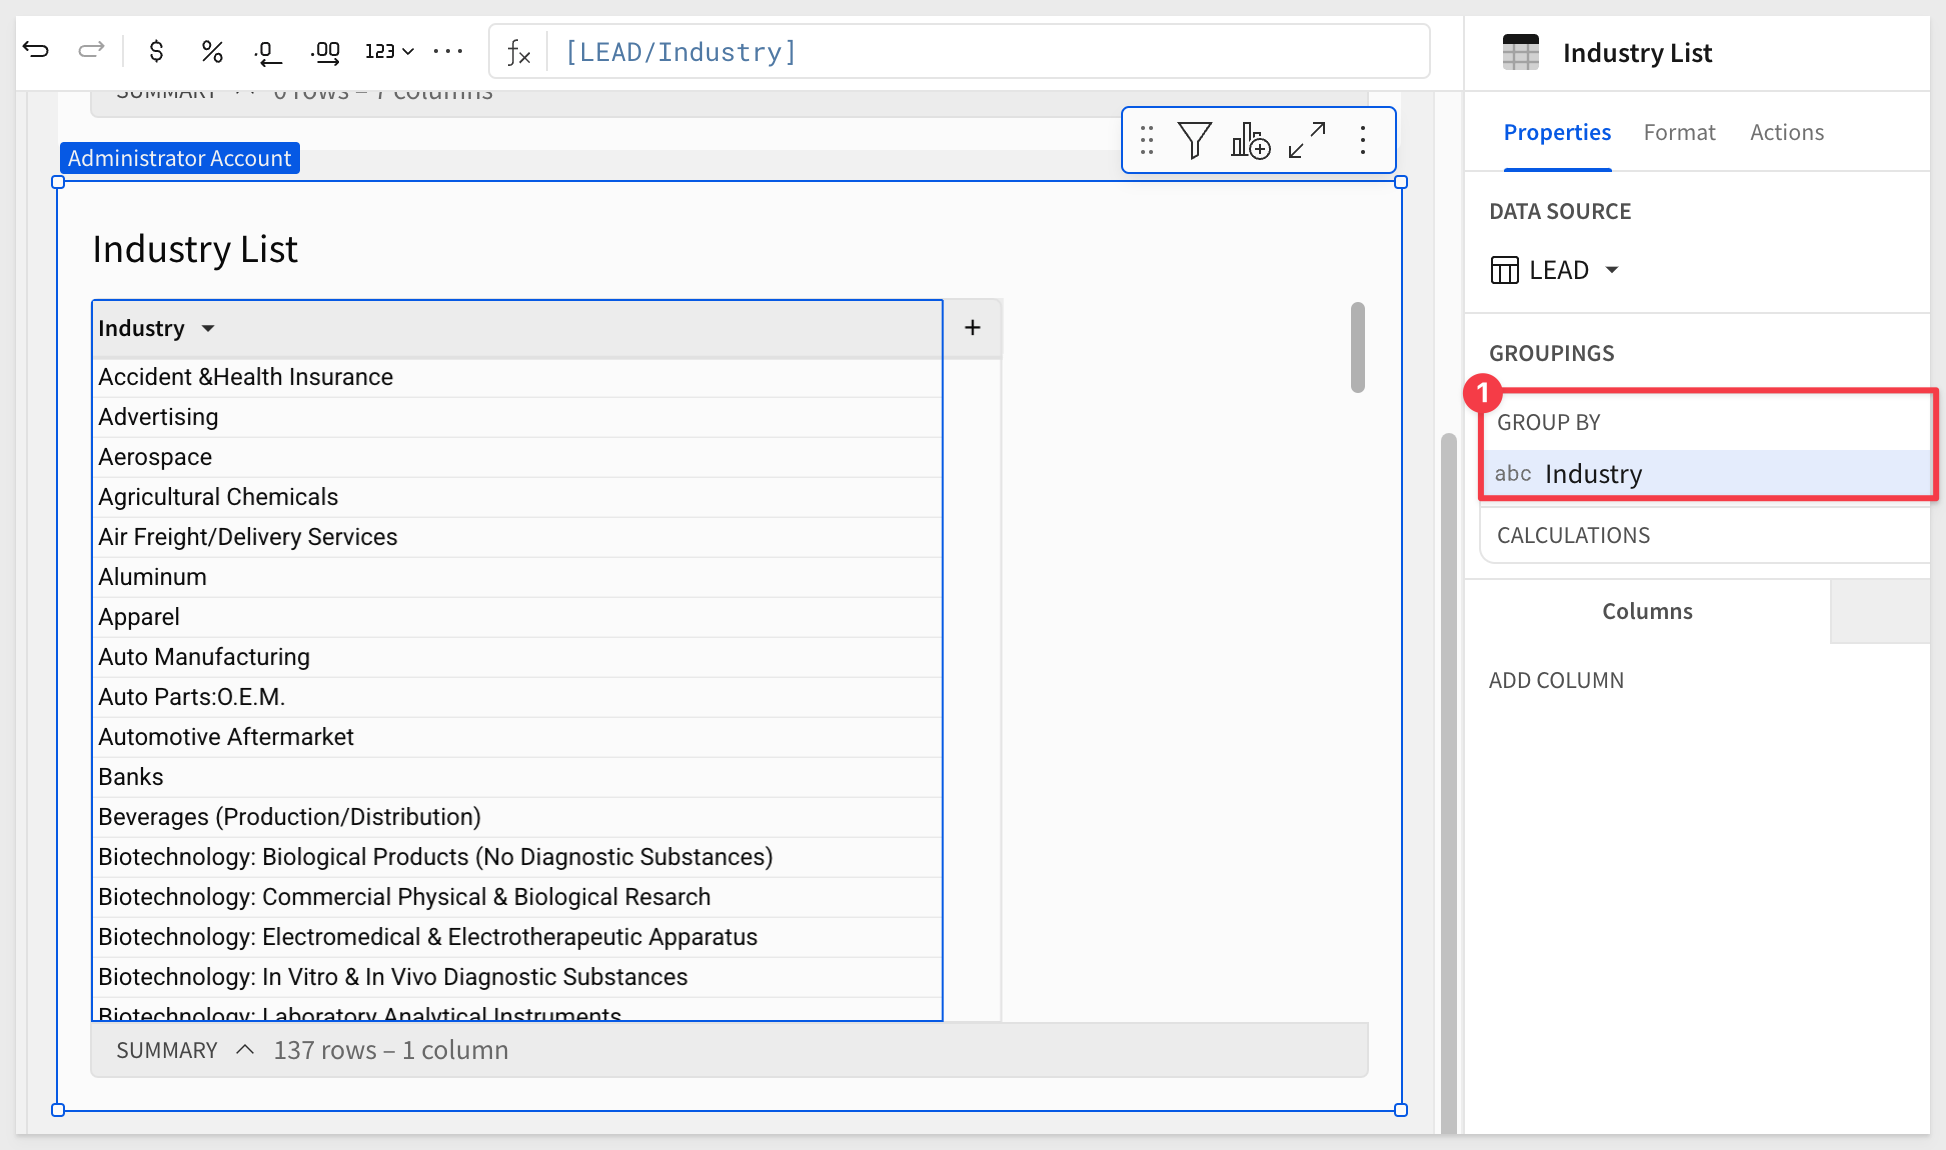
There are lots of duplicates, and we can just drag the Industry column to the GROUPINGS:
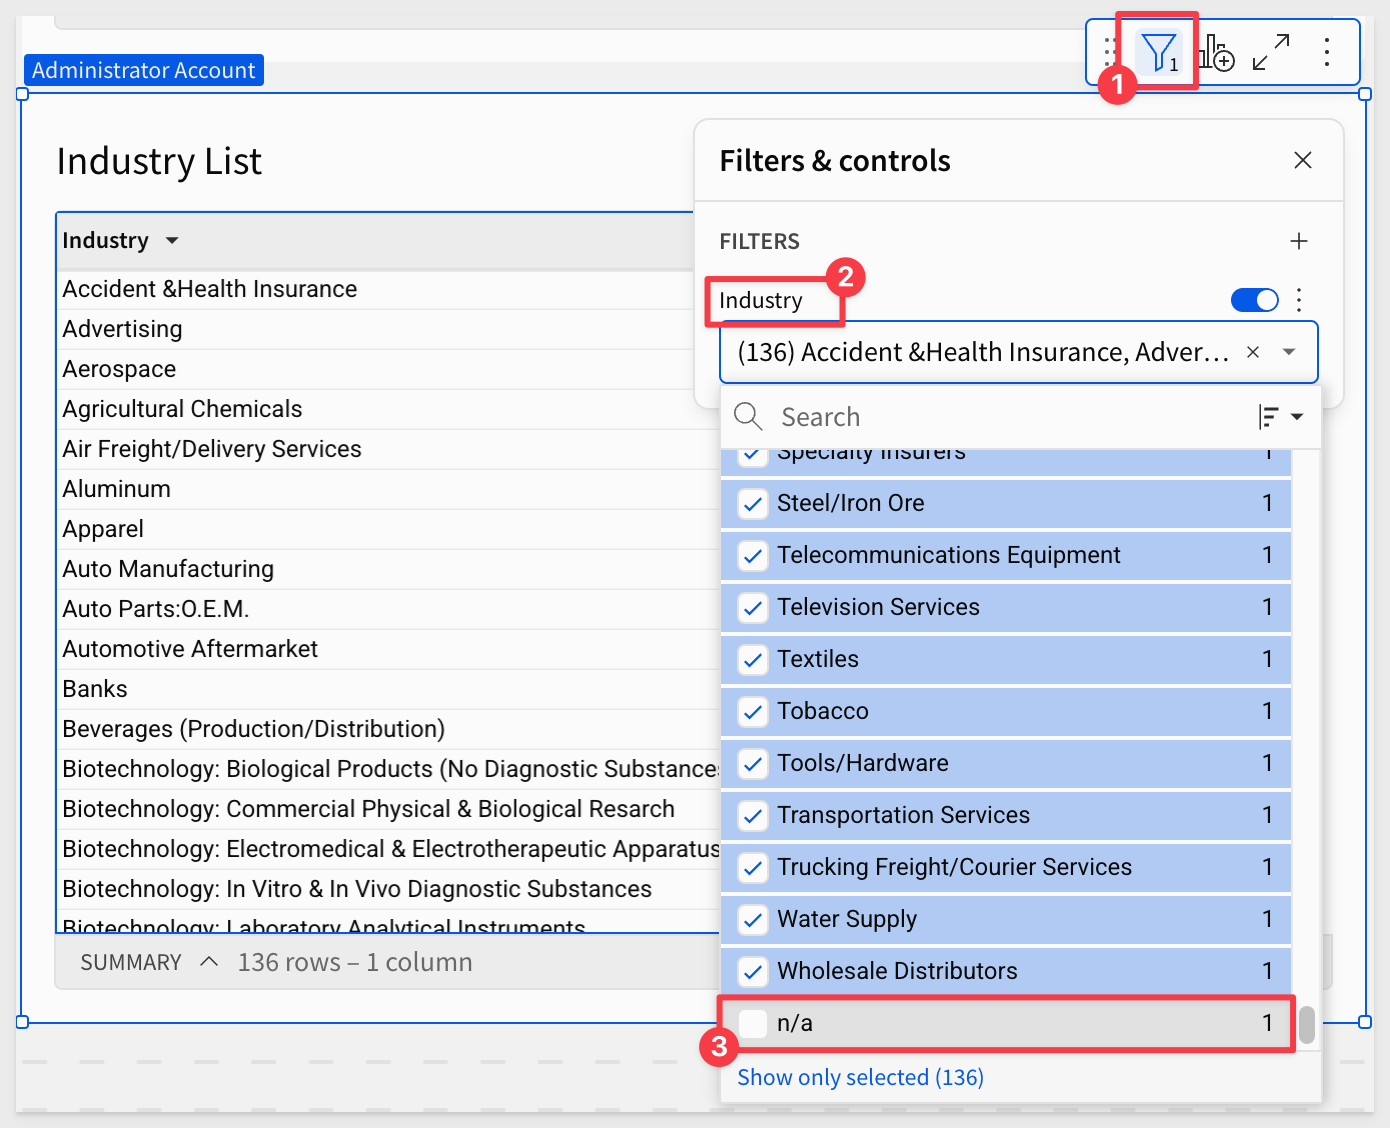
Set a filter and examine the contents of the list, after selecting All option. We noticed all the way at the bottom there is one called na, so we unchecked that. Now we have a clean list of options for our data validation:
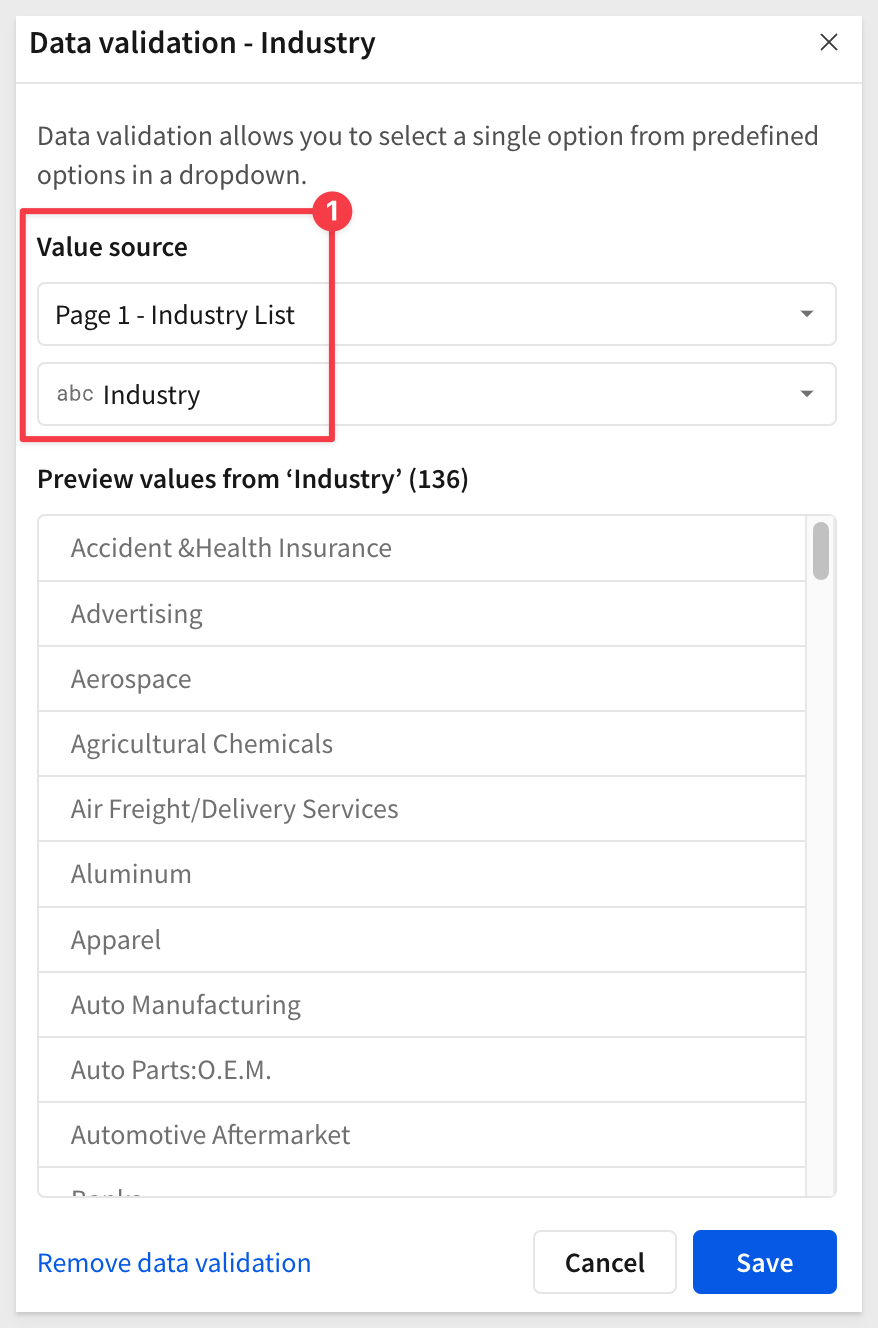
Setup Data validation for the Industry column in the Trade Show Leads input table.
Configure it to use the Industry List:
In the past, creating a form was kind of tedious and error prone. We thought there was a better way.
Click on the CREATE CHILD ELEMENT icon on the Trade Show Leads input table and select Form:
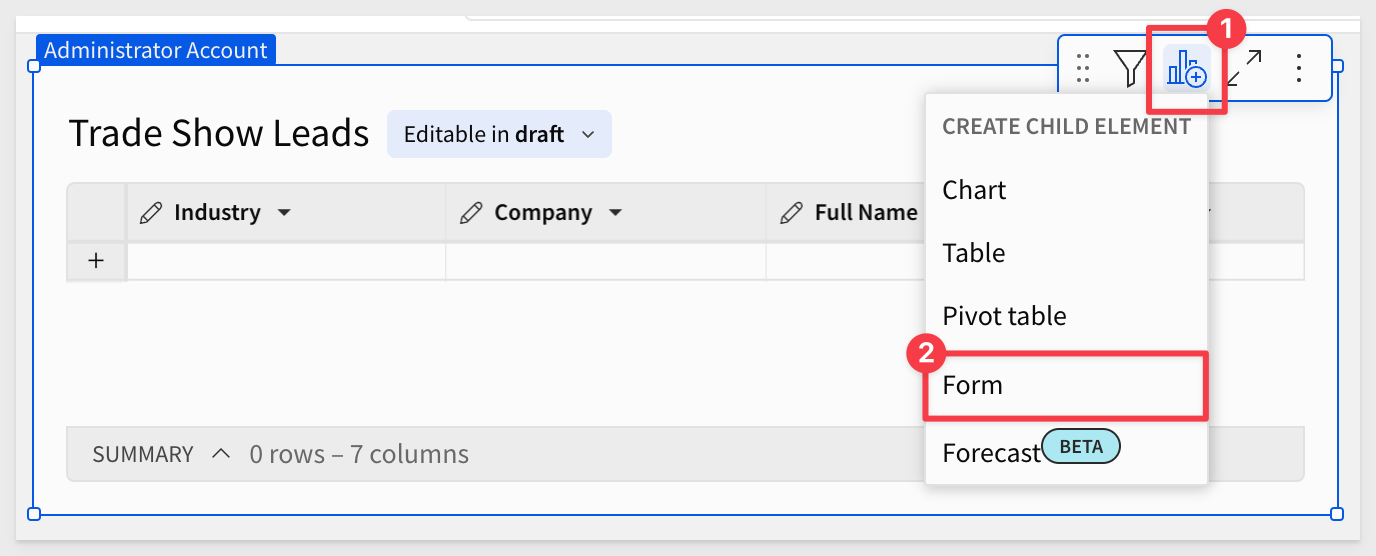
Sigma automatically creates a new form that is bound to the Trade Show Leads input table.
In fact, if we delete the Rep column from the Trade Show Leads table, it is automatically removed from the form!
Use pages
Lets organize the page elements to be separate from each other.
First, move the form to a new page:
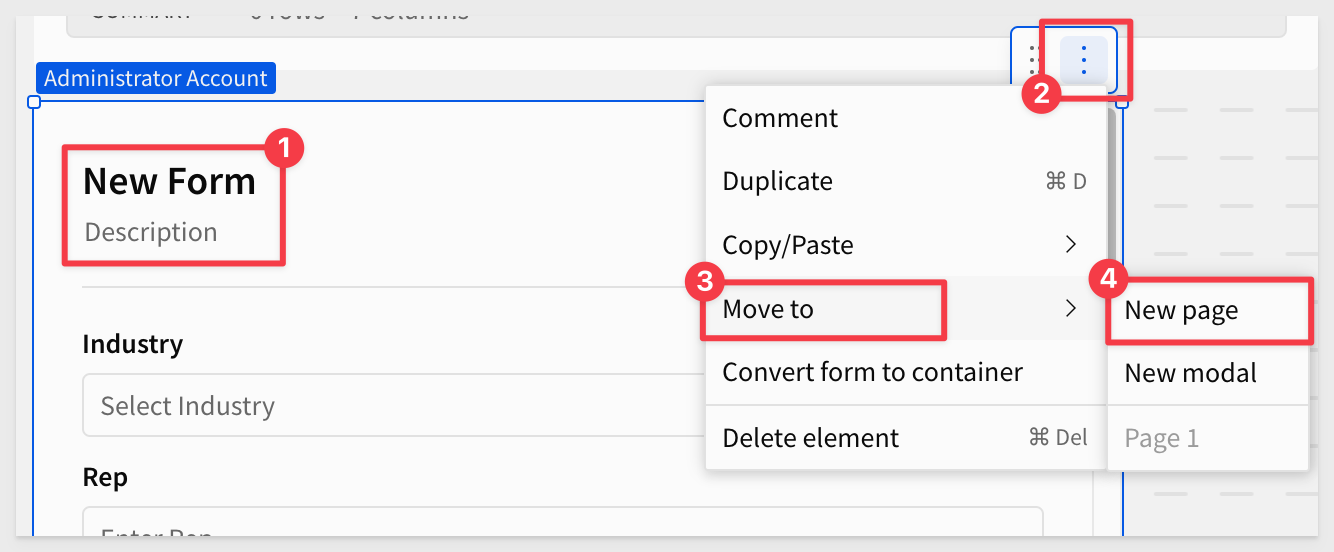
Rename the new page to Capture.
Repeat the process for the Industry List, naming that new page to Data.
Rename Page 1 to Lead List.
Hide the Data page:
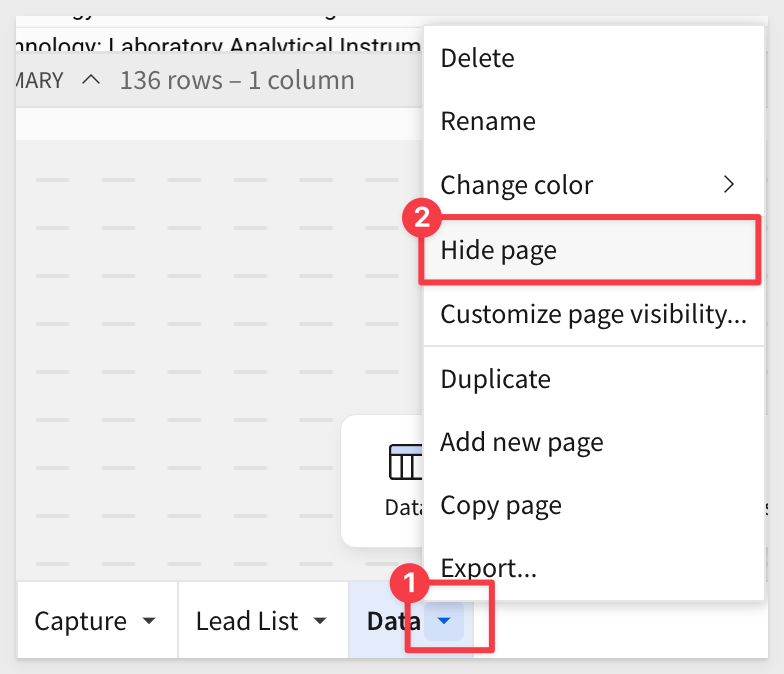
For more information on page visibility, see Manage workbook page visibility
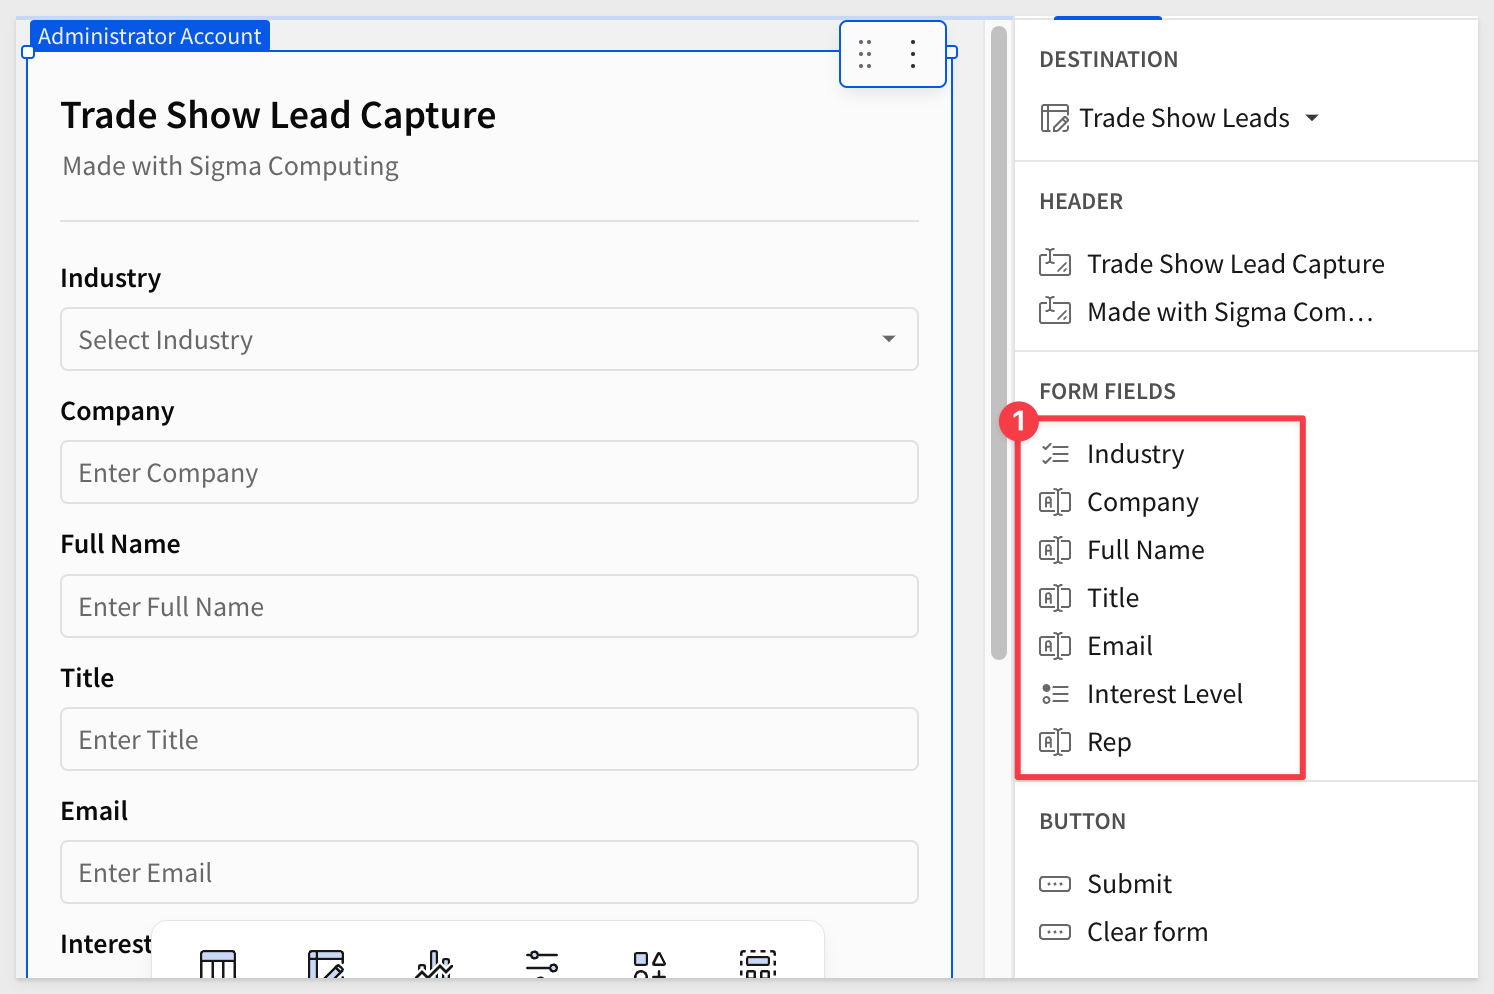
On the form, change the title to Trade Show Lead Capture and adjust the form size so that all columns are shown:
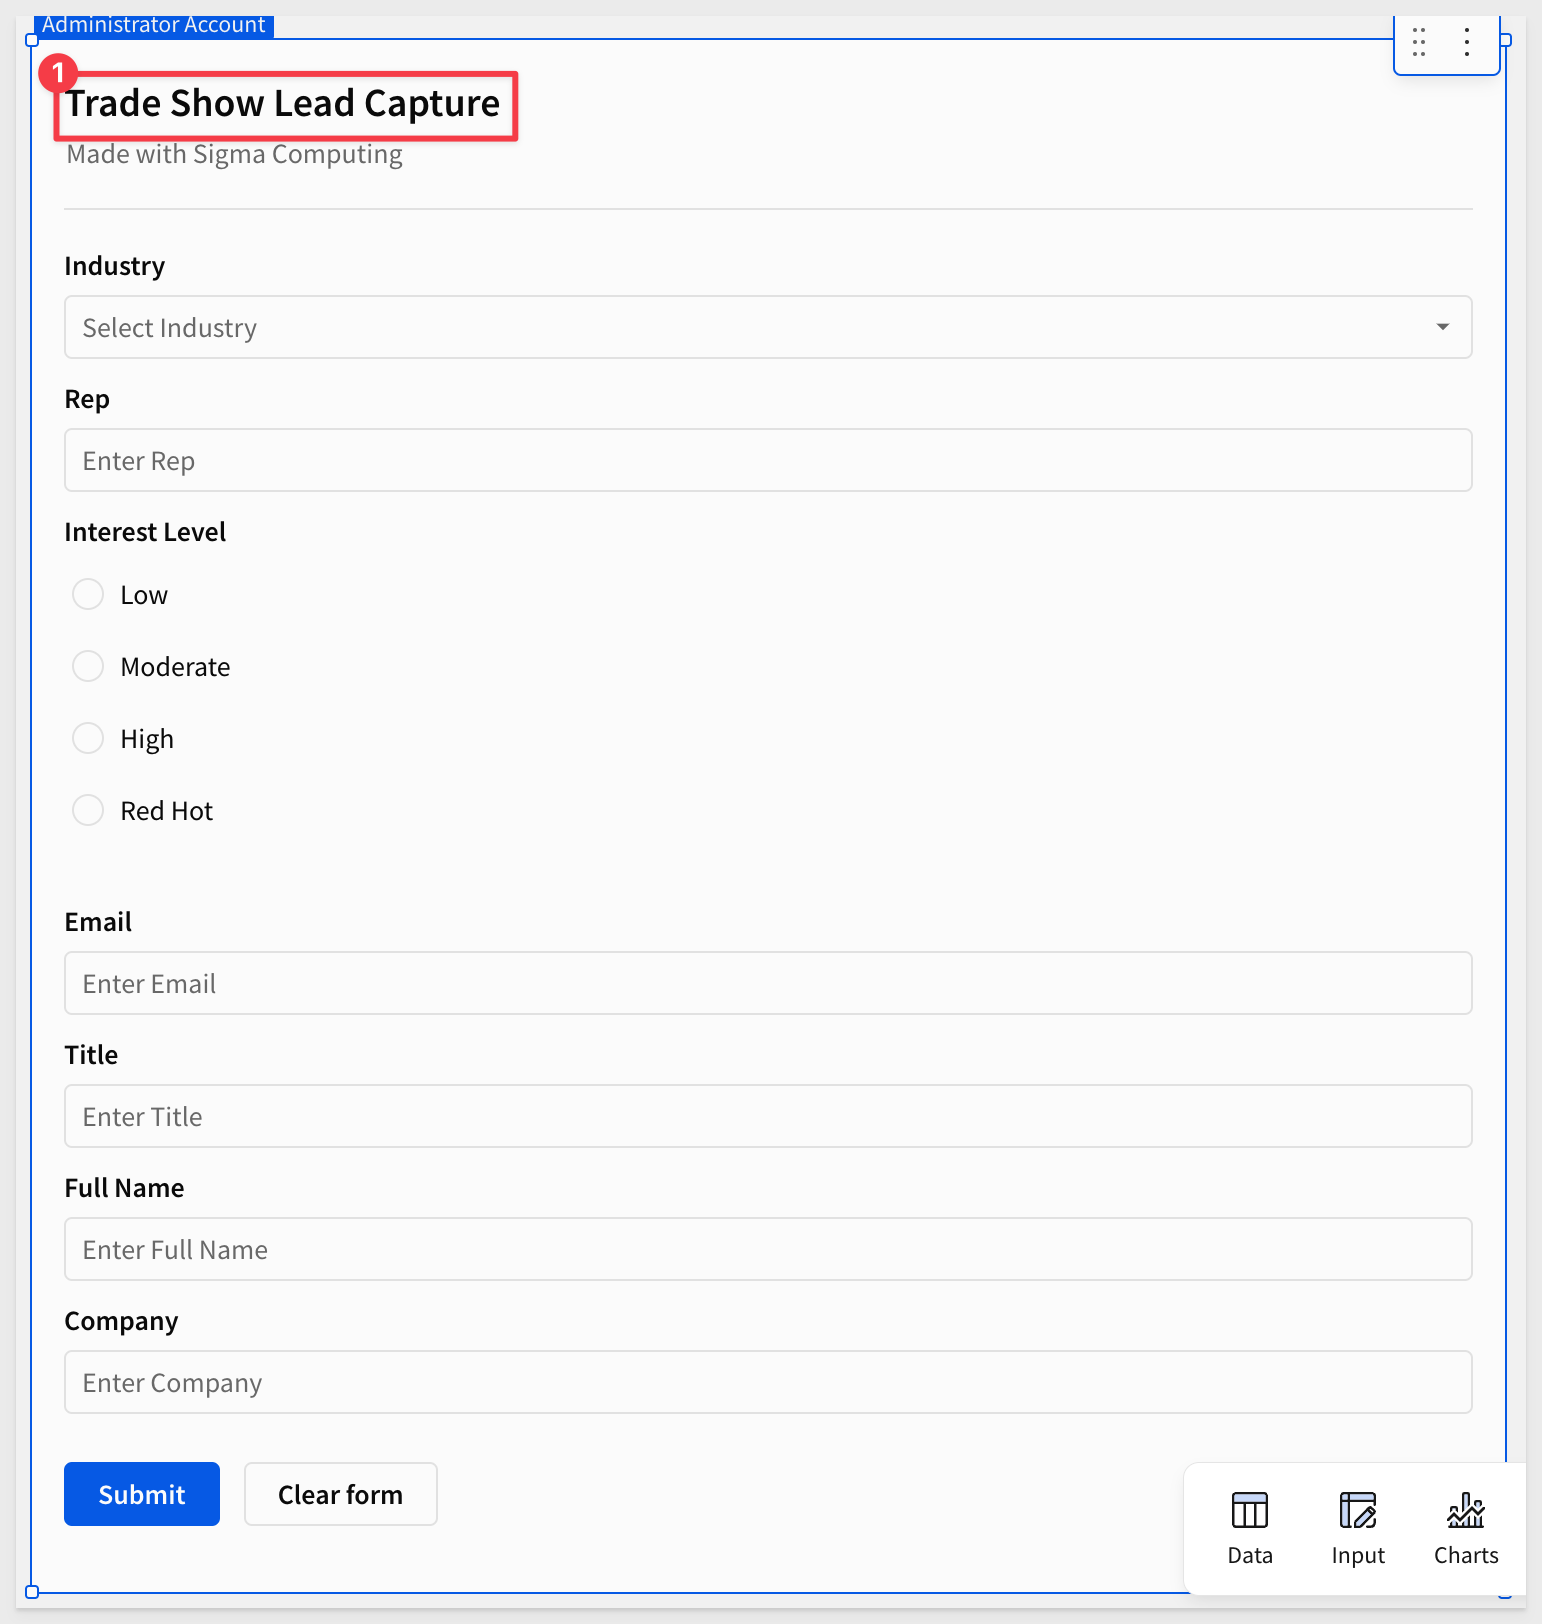
If needed, reorder the column list in the Element panel to adjust the form:
Test it out
Our Trade Show Leads input table is set to allow us to test in Draft mode, so we can test directly while editing:
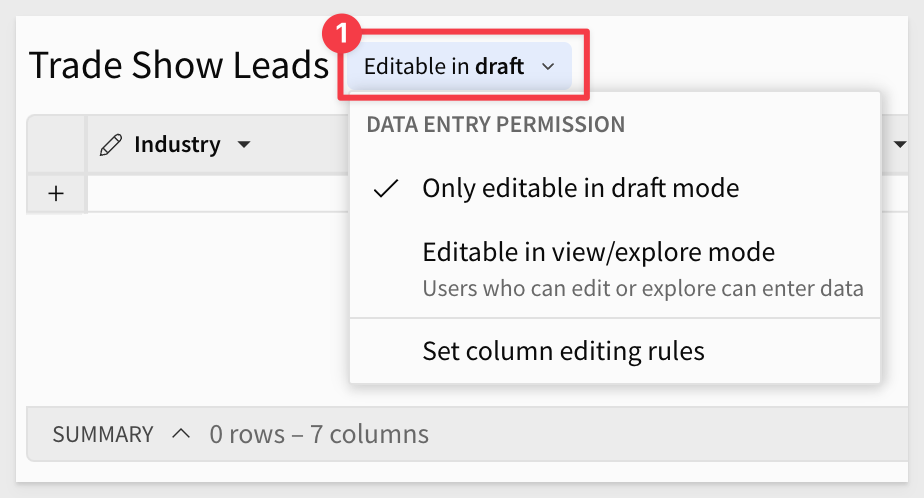
To read more about managing when input tables can be edited, see Configure data governance options in input tables
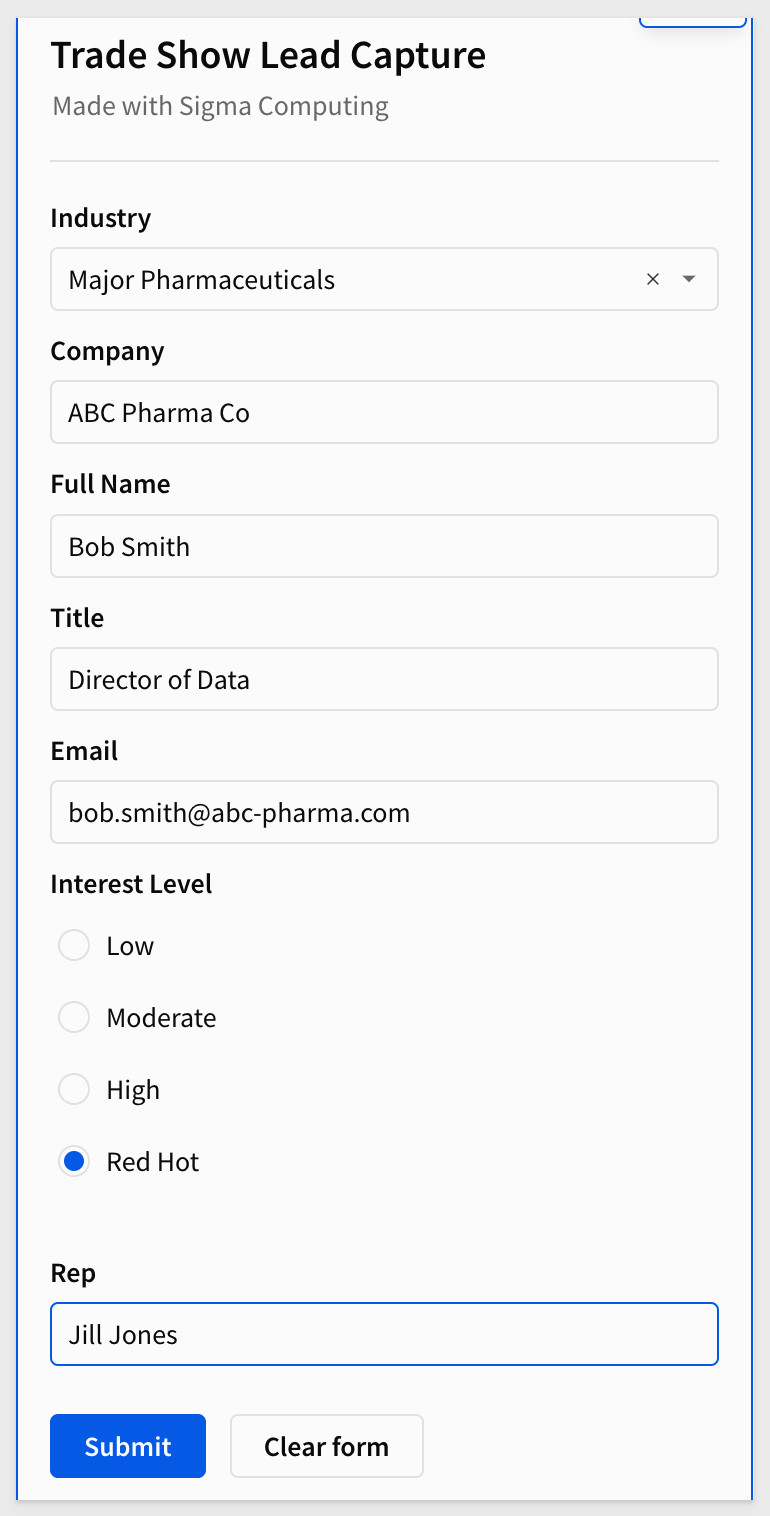
Enter some data into the form and click Submit:
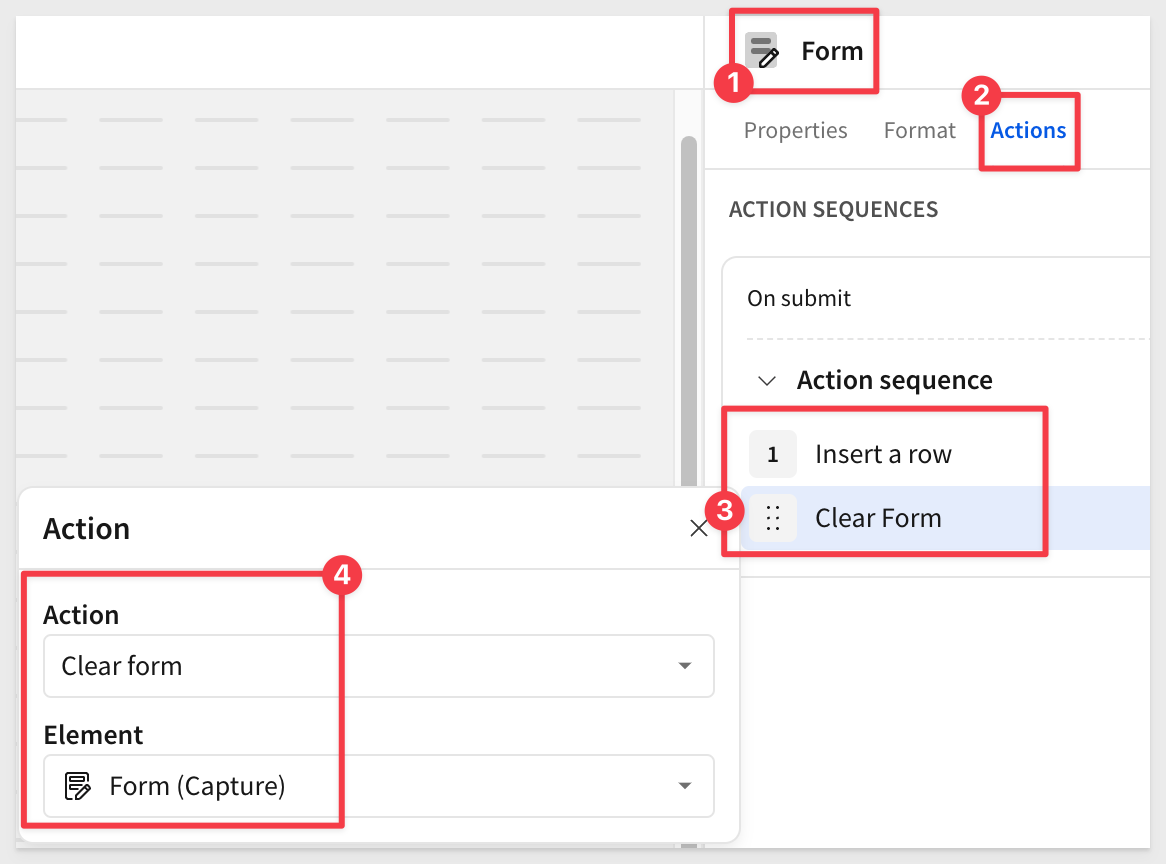
Clicking Submit cleared the form for us automatically. This is because Sigma automatically created the two actions required to both insert a row into the input table and also clear the form:
Over on the Lead List page, we can see the new row of data in the Trade Show List input table.

Red Hot Leads
We wanted to see what would "fall out" of the data once we had more of it.
To do this, we added another table to the page, created from a CSV file first.
We then just copied and pasted all the new rows into the input table manually (yeah-cheating...).
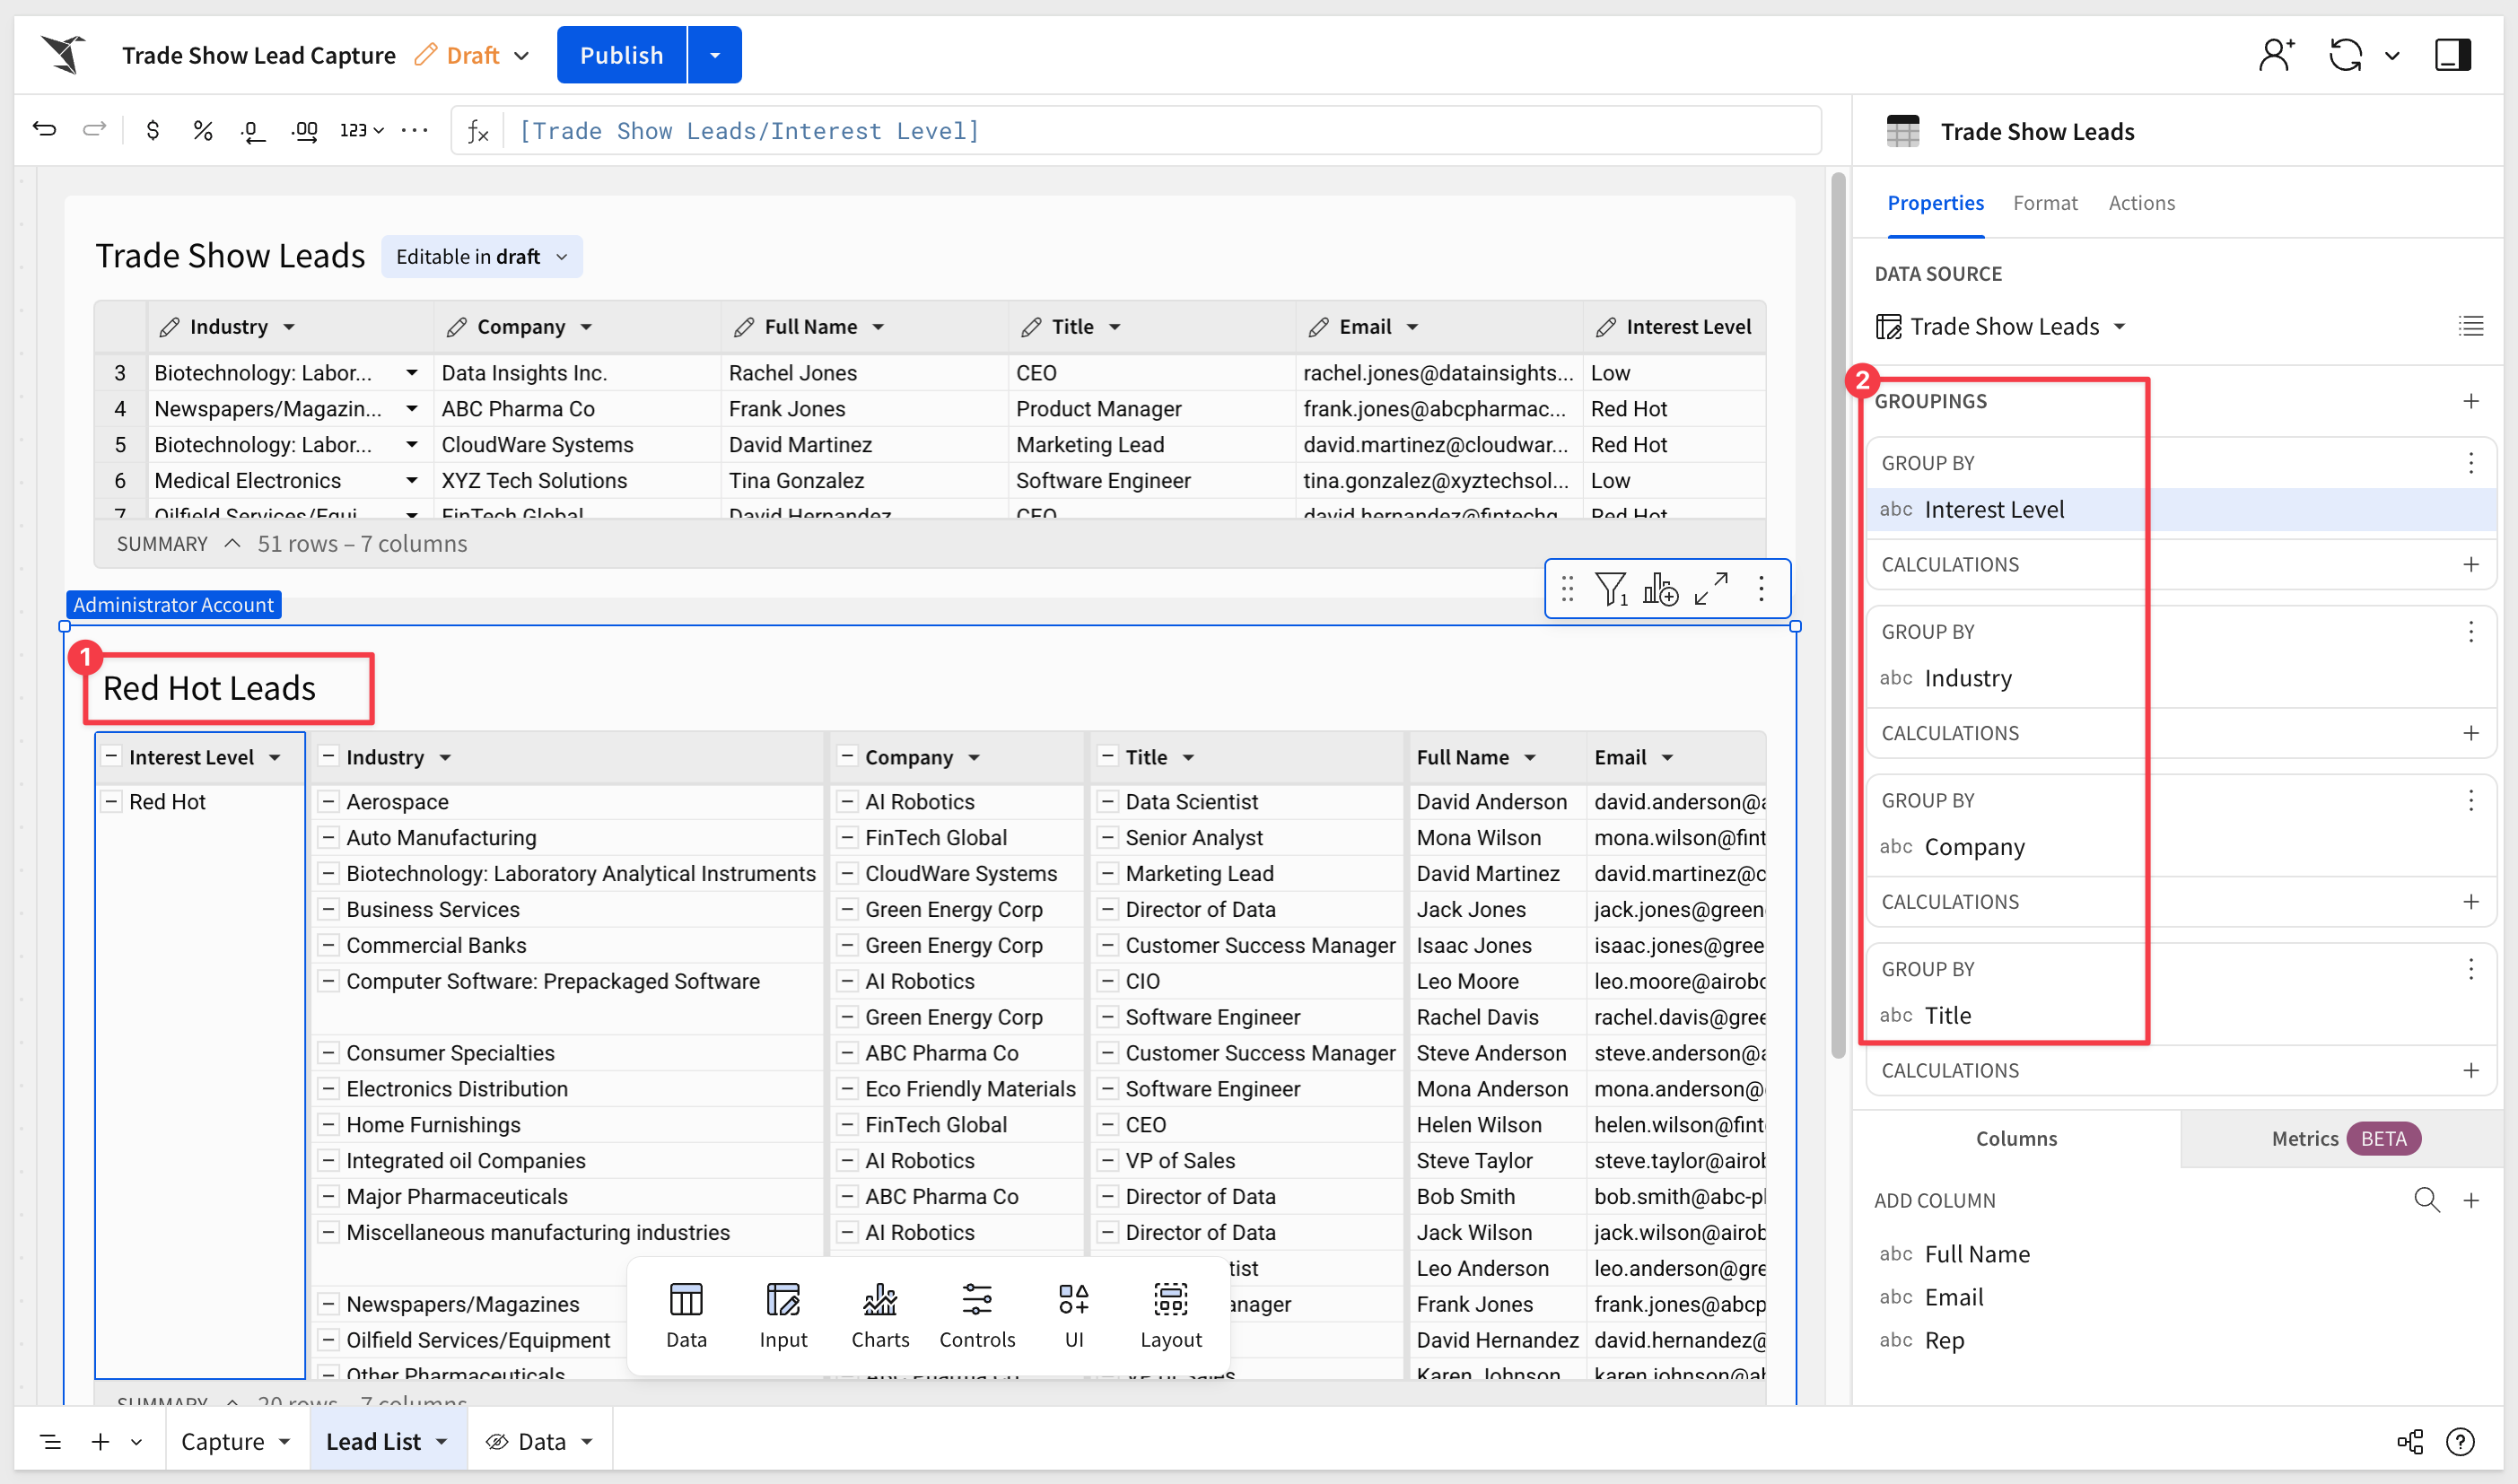
Then we created a Child table from the Trade Show Leads input table, grouped the data and filtered to show the Red Hot leads.
This took all of 5 min. Sigma - made the complex easy!
Now we know which leads to contact first:
In this QuickStart, we learned how to use Sigma's form-creation feature to collect structured data without requiring users to navigate complex spreadsheets.
Additional Resource Links
Blog
Community
Help Center
QuickStarts
Be sure to check out all the latest developments at Sigma's First Friday Feature page!