The QuickStarts API Toolkit ("toolkit") is designed to let you experiment with Sigma API calls and learn common request flows.
The toolkit is completely self-contained—just clone the GitHub repository, authenticate, and you're ready to go!
If you prefer working with raw JavaScript recipes, that option is still available. See the QuickStart: Sigma REST API Recipes
What's Included
The toolkit includes a web portal that provides an easy way to:
- Authenticate to Sigma and obtain a valid API bearer token
- Save authentication settings to encrypted local storage, making it simple to test across multiple Sigma instances
- Run many of the API recipes directly
- Manually configure parameters or select them from a list when the corresponding resource is available in Sigma
- View the response and copy it to the clipboard
- View the recipe script and copy it to the clipboard
- Access README files with details at both the toolkit and recipe levels
Once built, the portal is accessible on your localhost:
Bonus:
The toolkit also includes many simple API GET methods in the Quick API tab. These provide a fast way to check the response of an endpoint—for example, when you need a value not visible in the Sigma UI.
While not full recipes, they can be real time-savers. We've included some of the most popular ones, though this is not a comprehensive list of endpoints.
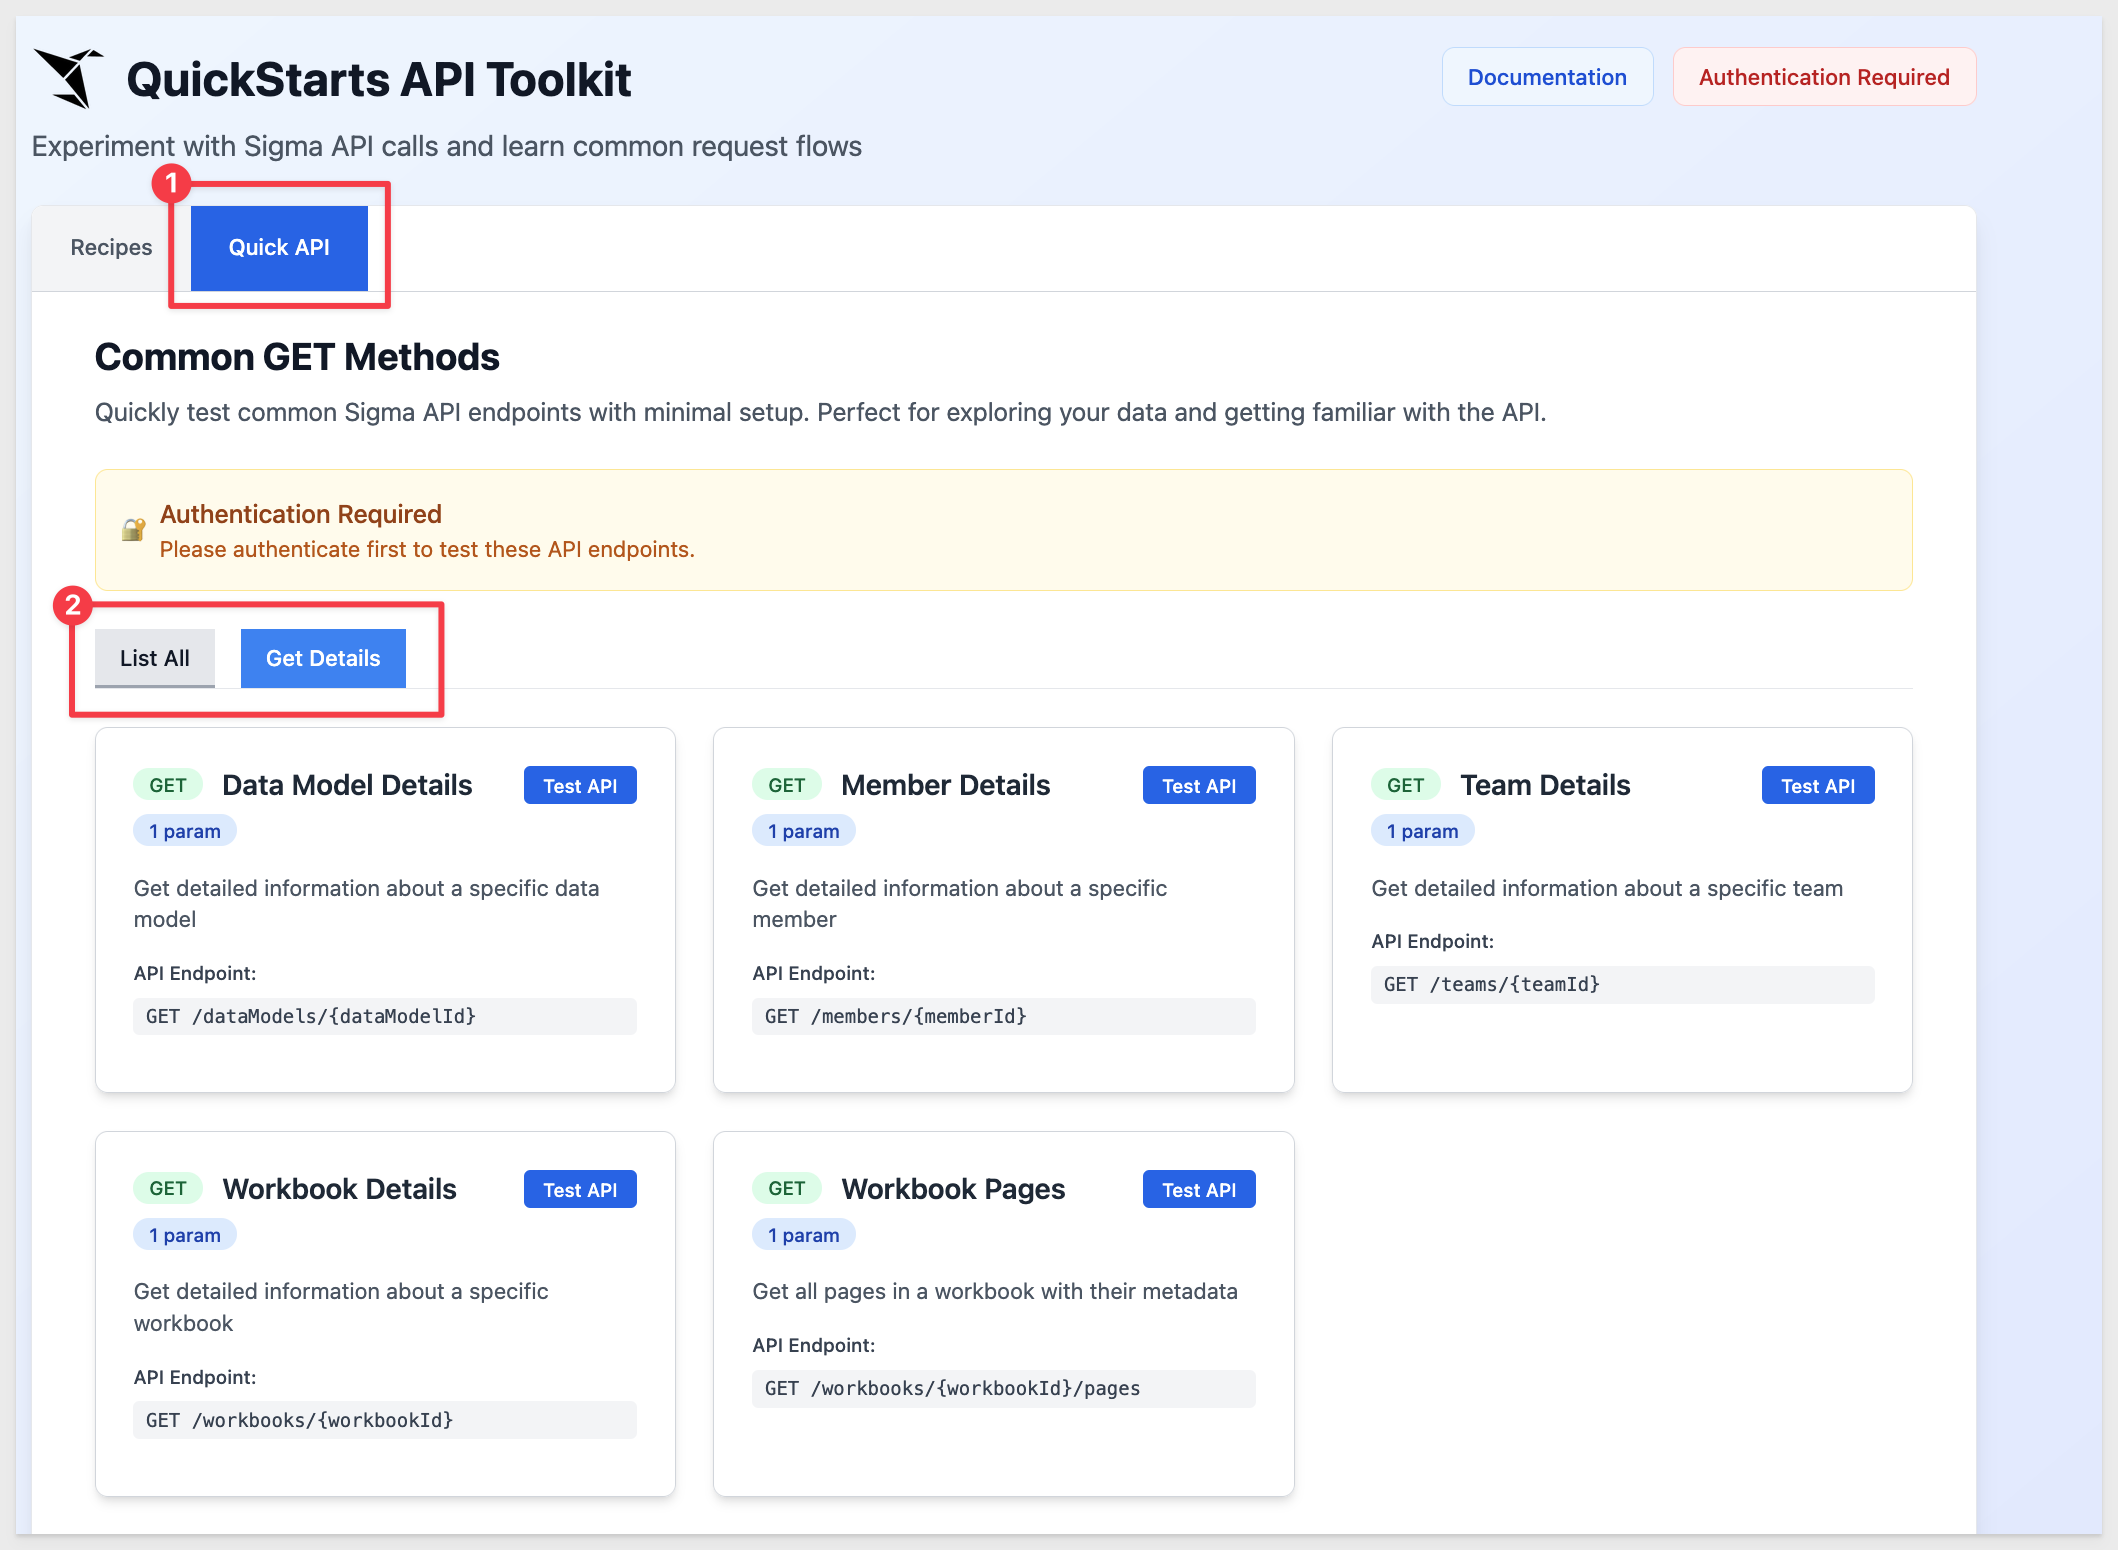
For the full and most up-to-date list of Sigma API operations, see the Sigma API Reference
For more information on Sigma's product release strategy, see Sigma product releases
If something is not working as you expect, here's how to contact Sigma support
Target Audience
Developers who are evaluating or working with Sigma's REST API.
Prerequisites
- A computer with a current browser. It does not matter which browser you want to use.
- Administrative access to your Sigma environment.
- Some familiarity with Sigma is assumed. Not all steps will be shown as the basics are assumed to be understood.
- A development environment of choice. We will demonstrate with Microsoft VSCode and related extensions

Before using the API, we need to generate a new API token in Sigma.
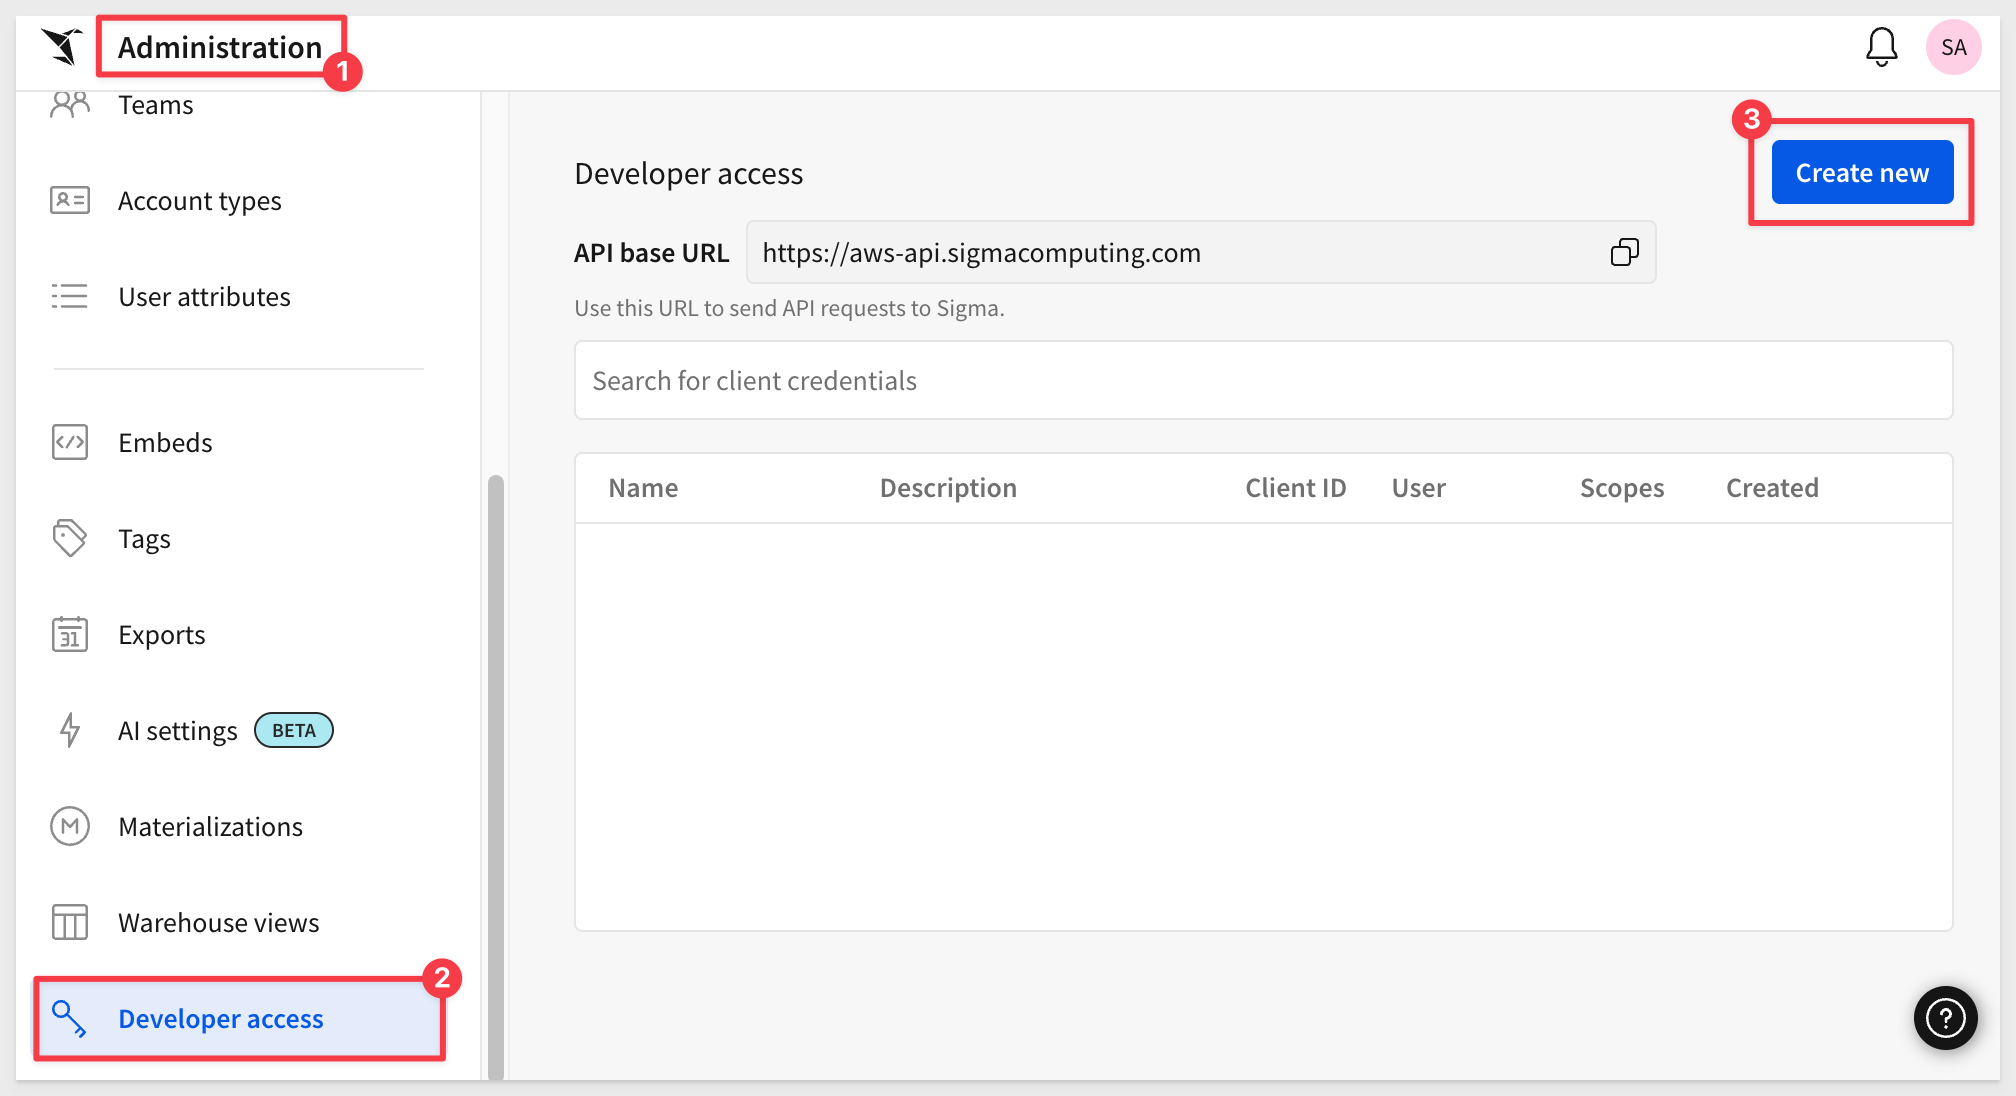
Log in to Sigma as an Administrator.
Navigate to Administration > Developer Access.
Click the Create New button:
Select REST API, then give the token a name and description.
Some customers create a Service Account user for automation purposes—this is considered a best practice.
For testing, you can choose any Admin user you prefer.
Click Create.
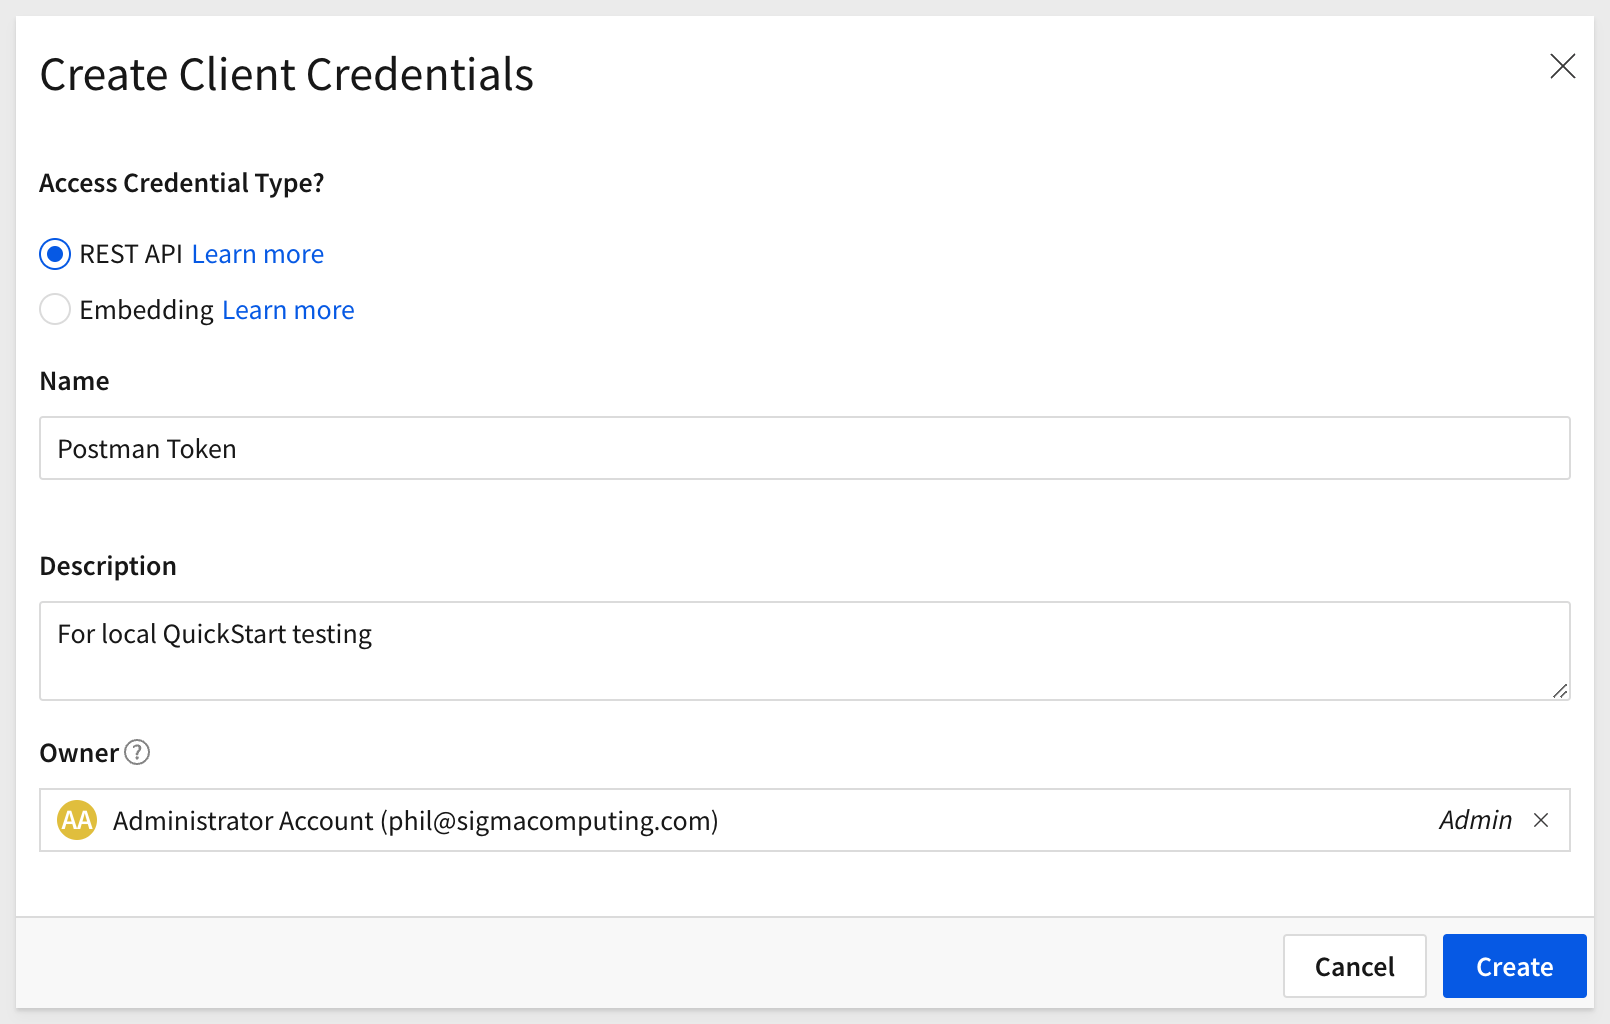
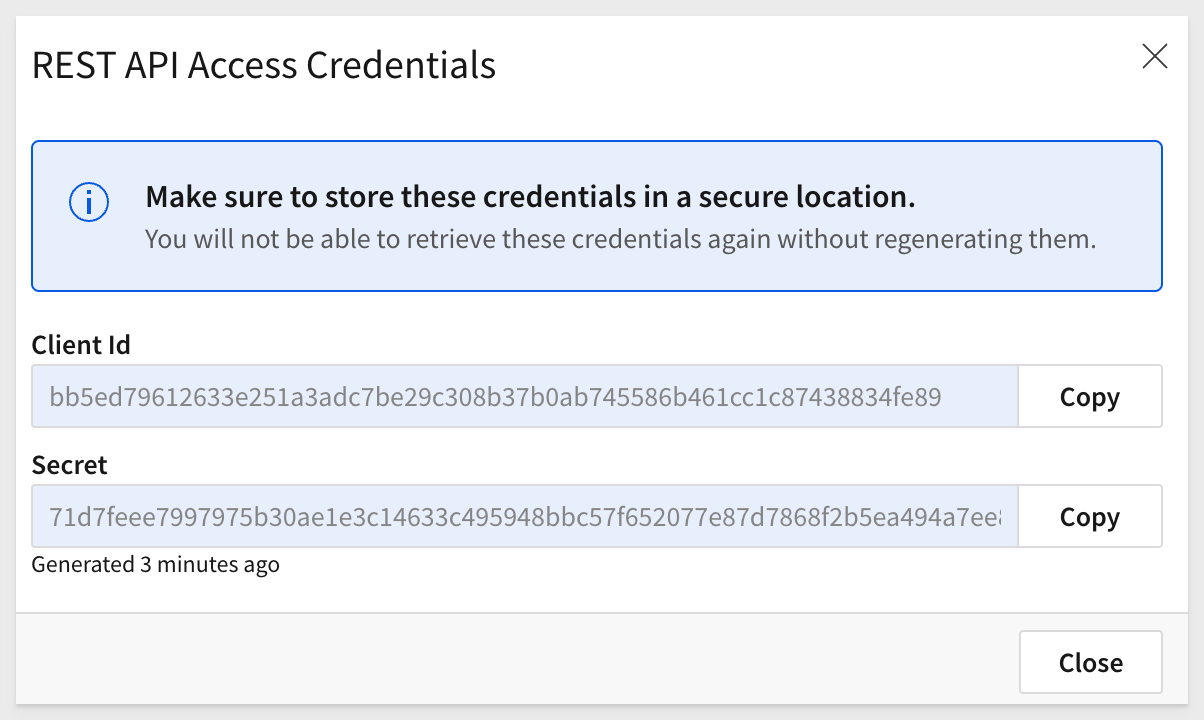
Copy the ClientID and Secretfrom the modal and save them in a secure location—you'll need them later.
Close the modal:
Create Sigma Project Folder
Create a new folder on your local computer called Sigma_QuickStart_Public_Repo. It does not matter where, as long as you can navigate to it easily.
Source Code Editor - VSCode
For this QuickStart, we will demonstrate using Visual Studio Code (VSCode), but you may use any IDE you prefer.
VSCode, is a source-code editor developed by Microsoft for Windows, Linux and macOS. Features include support for debugging, syntax highlighting, intelligent code completion, snippets, code refactoring, and embedded Git.
Install VSCode from Microsoft's download site.
Run the installation with all defaults.
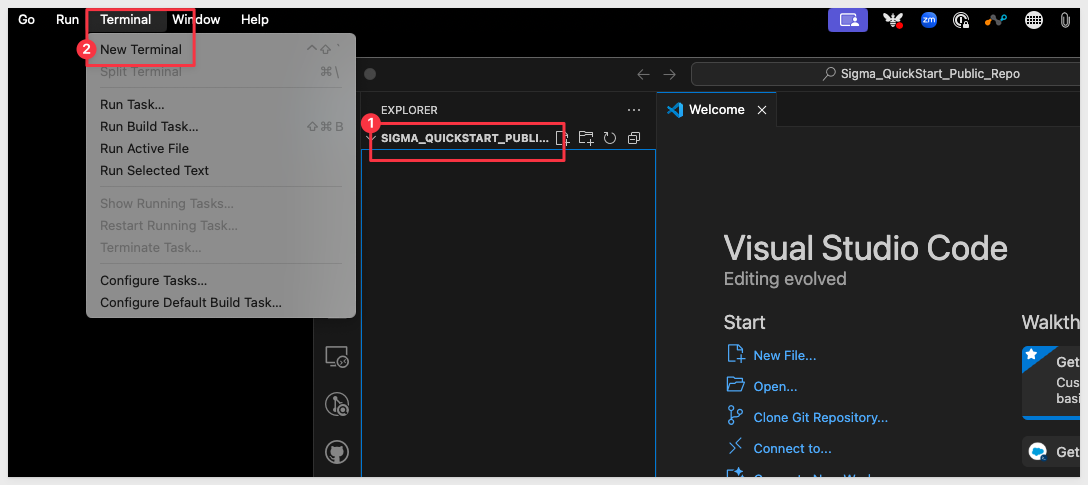
Open VSCode and make sure it loads without error and open the folder Sigma_QuickStart_Public_Repo we created earlier.
Runtime Environment - Node.js
While developers can use any language to communicate with the Sigma REST API, we'll use the popular framework Node.js. for our examples.
Node.js (Node) is an open-source, cross-platform, back-end JavaScript runtime environment that runs on the V8 JavaScript engine and executes JavaScript code outside a web browser. It was designed to build scalable network applications.
Use the LTS (long-term support) version appropriate for your operating system.
Run the installer, selecting all defaults. You do not need to specify your project folder during installation.
This will install both:
- Node
- npm (Node Package Manager, used to install and manage Node components)
The package manager is abbreviated to npm when running commands.
You can verify your installation using VS Code's built-in terminal:
Run the command:
node -v
This should return a version number, similar to:
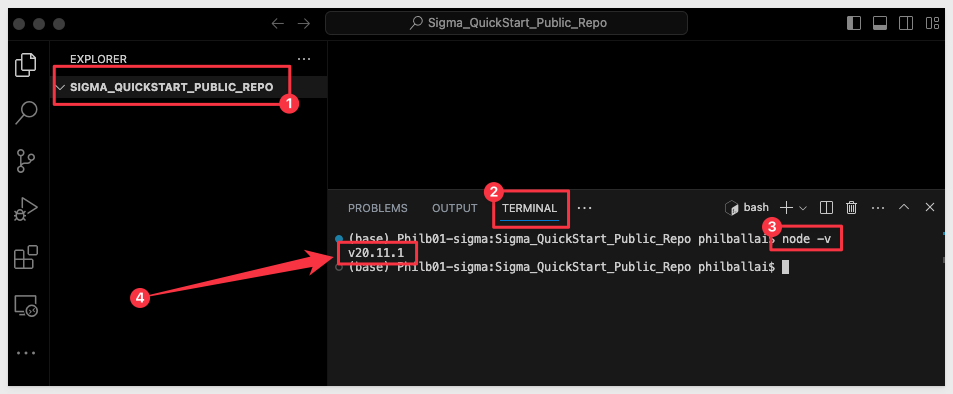
Keep the terminal session open for the next steps.
Git Repository
To save time, all the necessary project files are stored in GitHub. You can clone only what you need using Git sparse checkout.
In terminal, ensure you're in the Sigma_QuickStart_Public_Repo directory. If not, switch to it:
For example:
cd {/path/to/your/directory}
Initialize git:
git init
Add the remote repository:
git remote add -f origin https://github.com/sigmacomputing/quickstarts-public.git
Enable sparse checkout:
git config core.sparseCheckout true
Specify the folder to clone by adding it to the sparse-checkout configuration:
echo "recipe-portal" > .git/info/sparse-checkout
At this point, each command should run without errors.
Pull the specified folder from the repository:
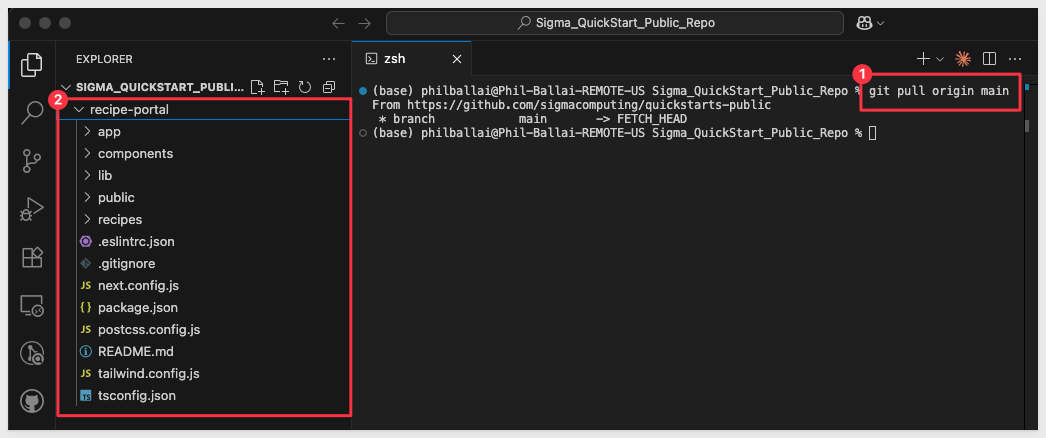
git pull origin main
You should now see the cloned project folder:
Change directories:
cd recipe-portal
Install the required Node modules:
npm install
This automatically installs the project dependencies used in the recipes
Start the local webserver
Run the command to start the server:
npm run dev
By default, the portal runs on port 3000, but if that port is already in use, it may select a different one. The terminal will display the port number in use:
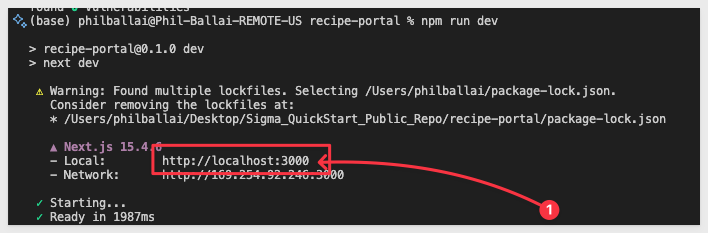
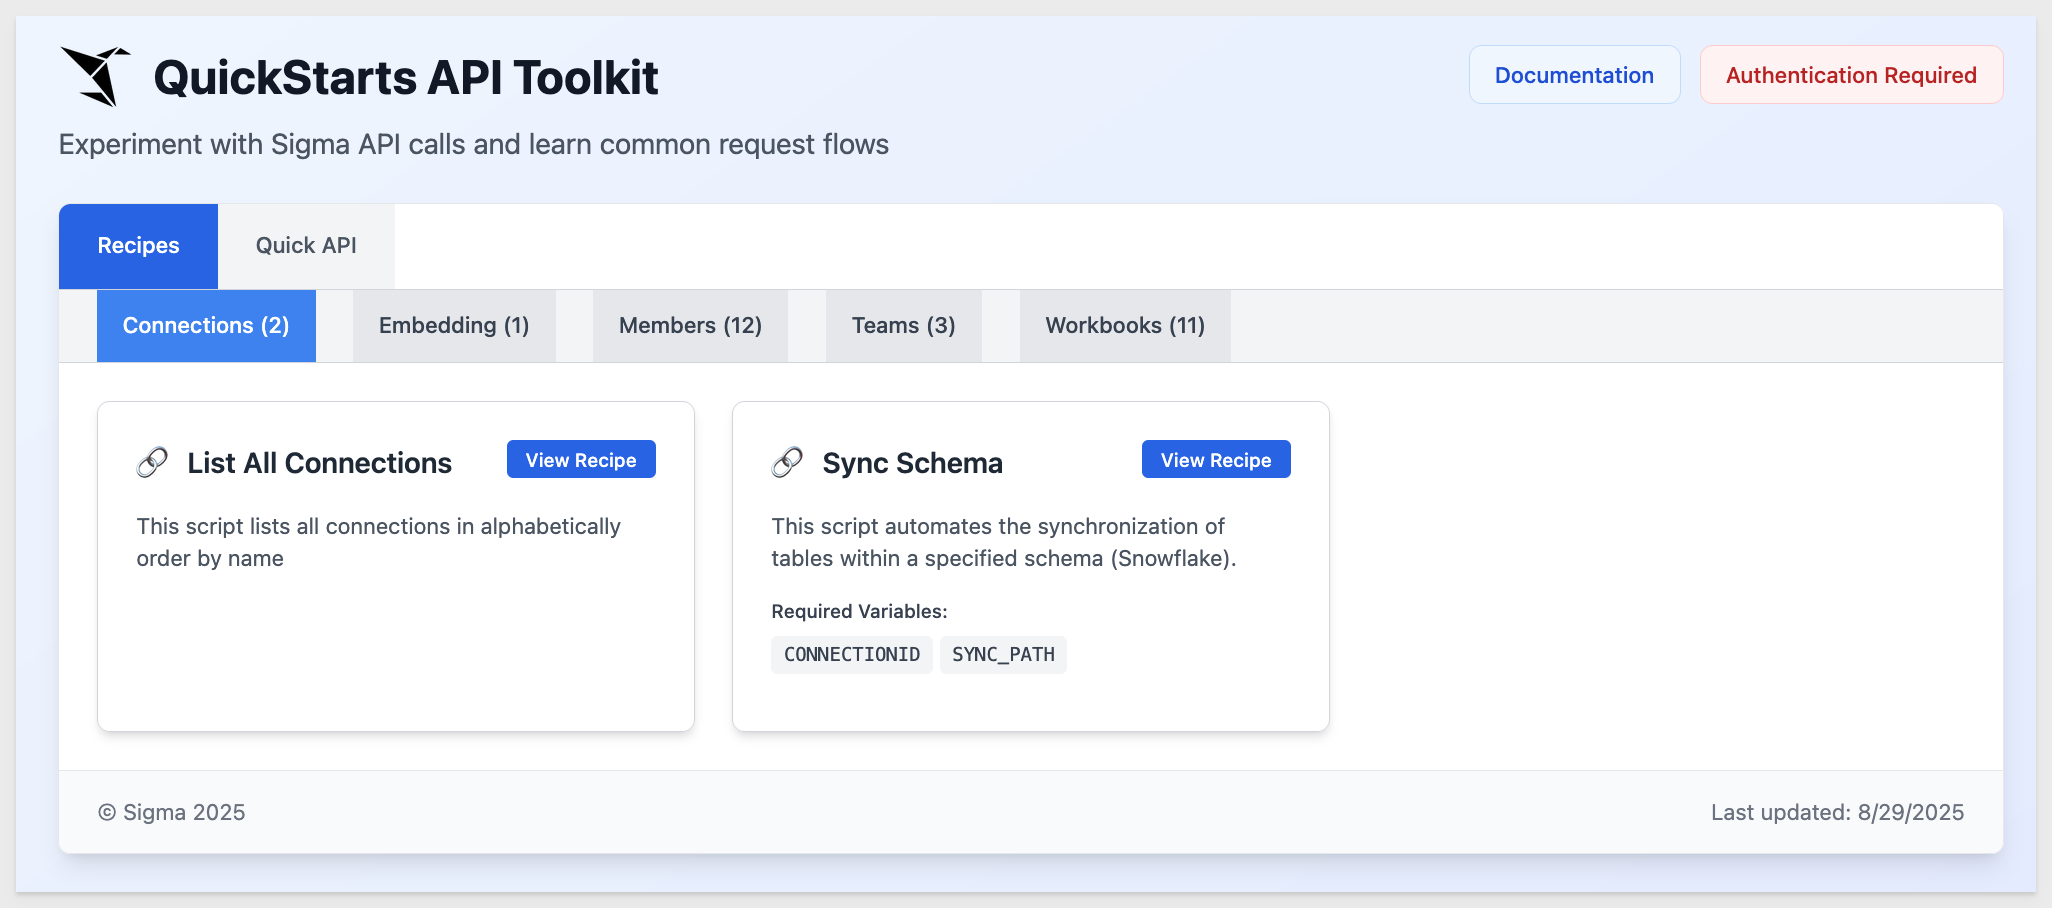
The portal should now appear as:
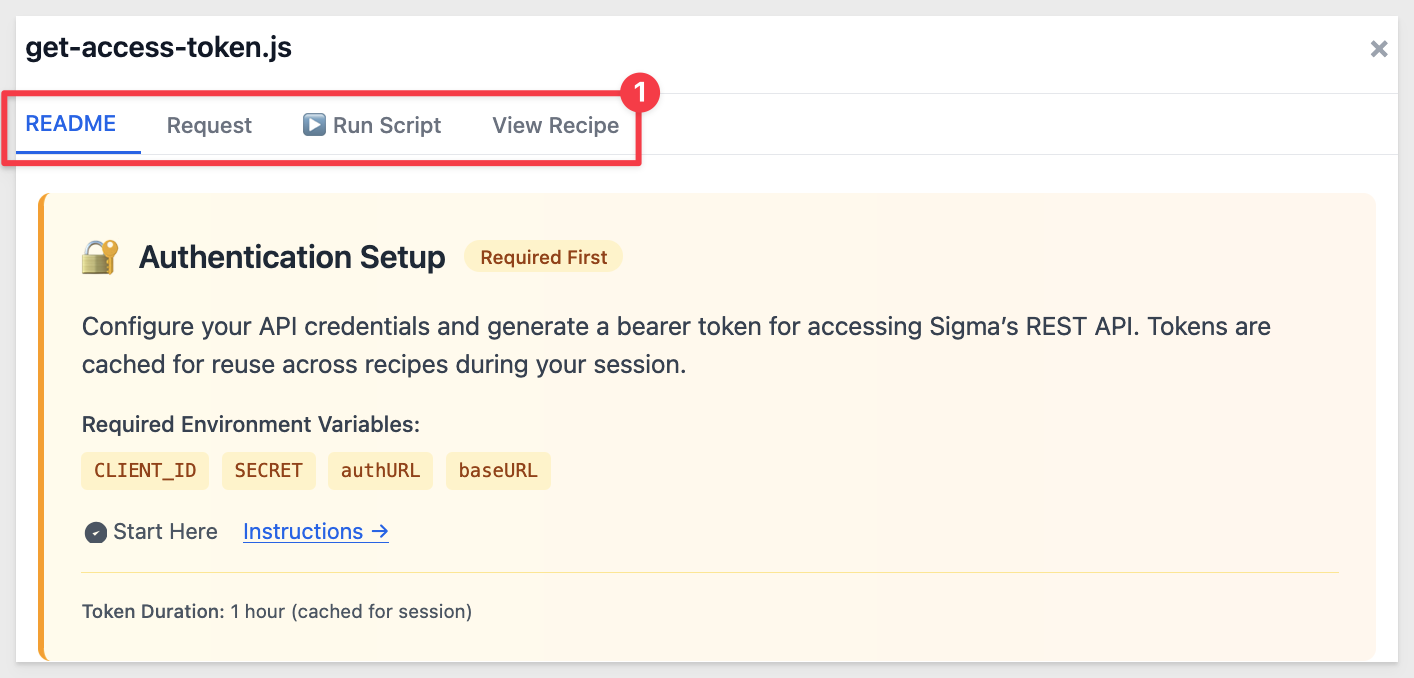
Before using any toolkit operations, you must first authenticate. Once a valid bearer token is received, it remains valid for 1 hour.
The authentication script retrieves a bearer token from the Sigma API using client credentials authentication. It:
- Extracts the required credentials from environment variables
- Sends a POST request to the authentication endpoint
- Logs the obtained token
- Exports a getBearerToken function that can be imported into other scripts for accessing protected resources
Click on red Authentication Required button to open the modal:
Select the Request tab.
This tab allows you to create named "configs" for authentication. If you only have one, that's fine—but if you work with multiple Sigma instances, configs make it easy to switch between them on the fly.
Select your Server Endpoint that corresponds to your Sigma instance.
Provide the Client ID and Client Secret.
Check the Store locally checkbox:
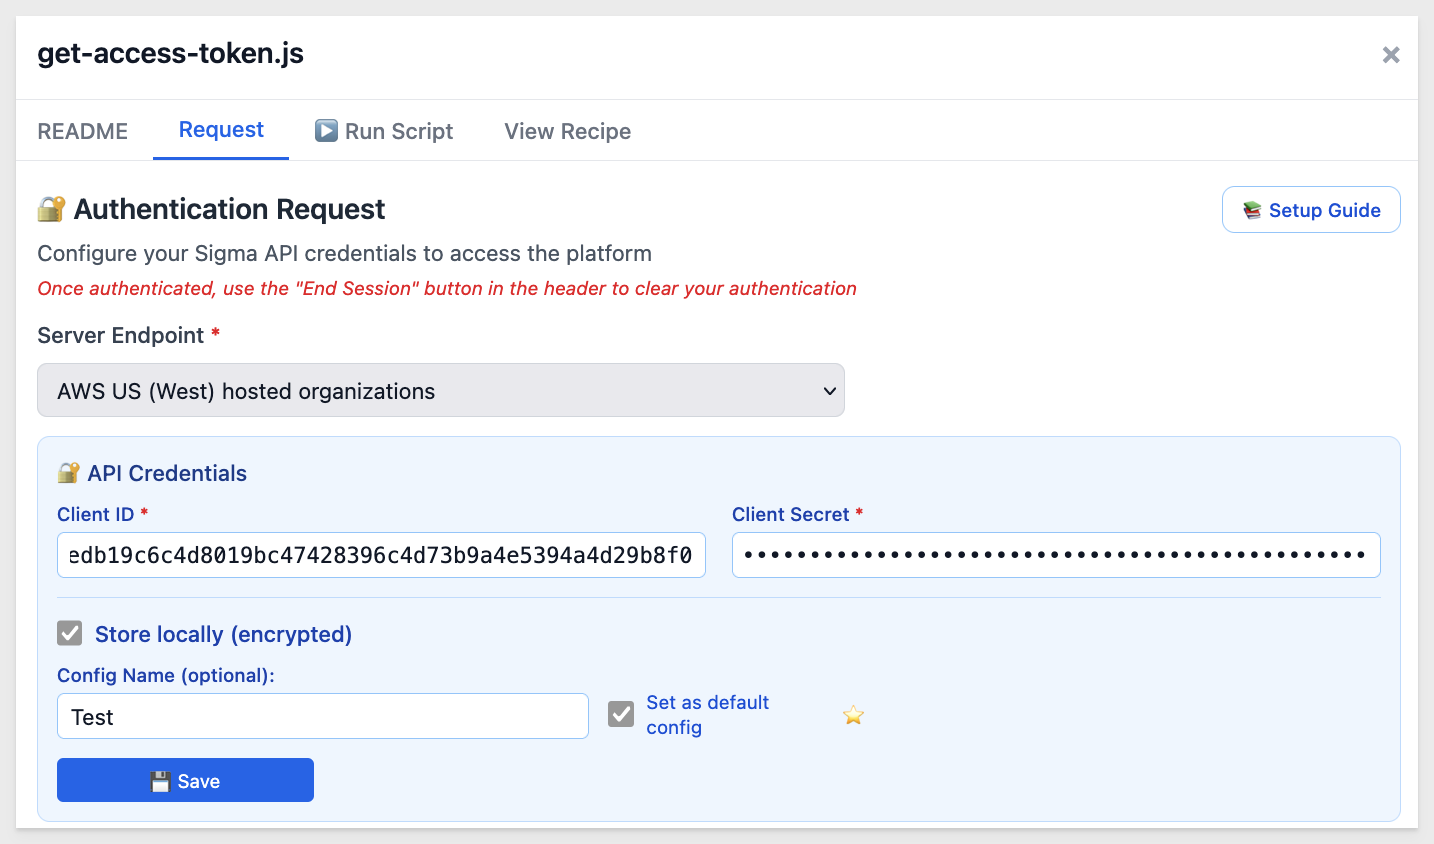
Click Save:
To add more, click New Config.
Once ready, select a config and click the green Authenticate Now button to get a valid token:
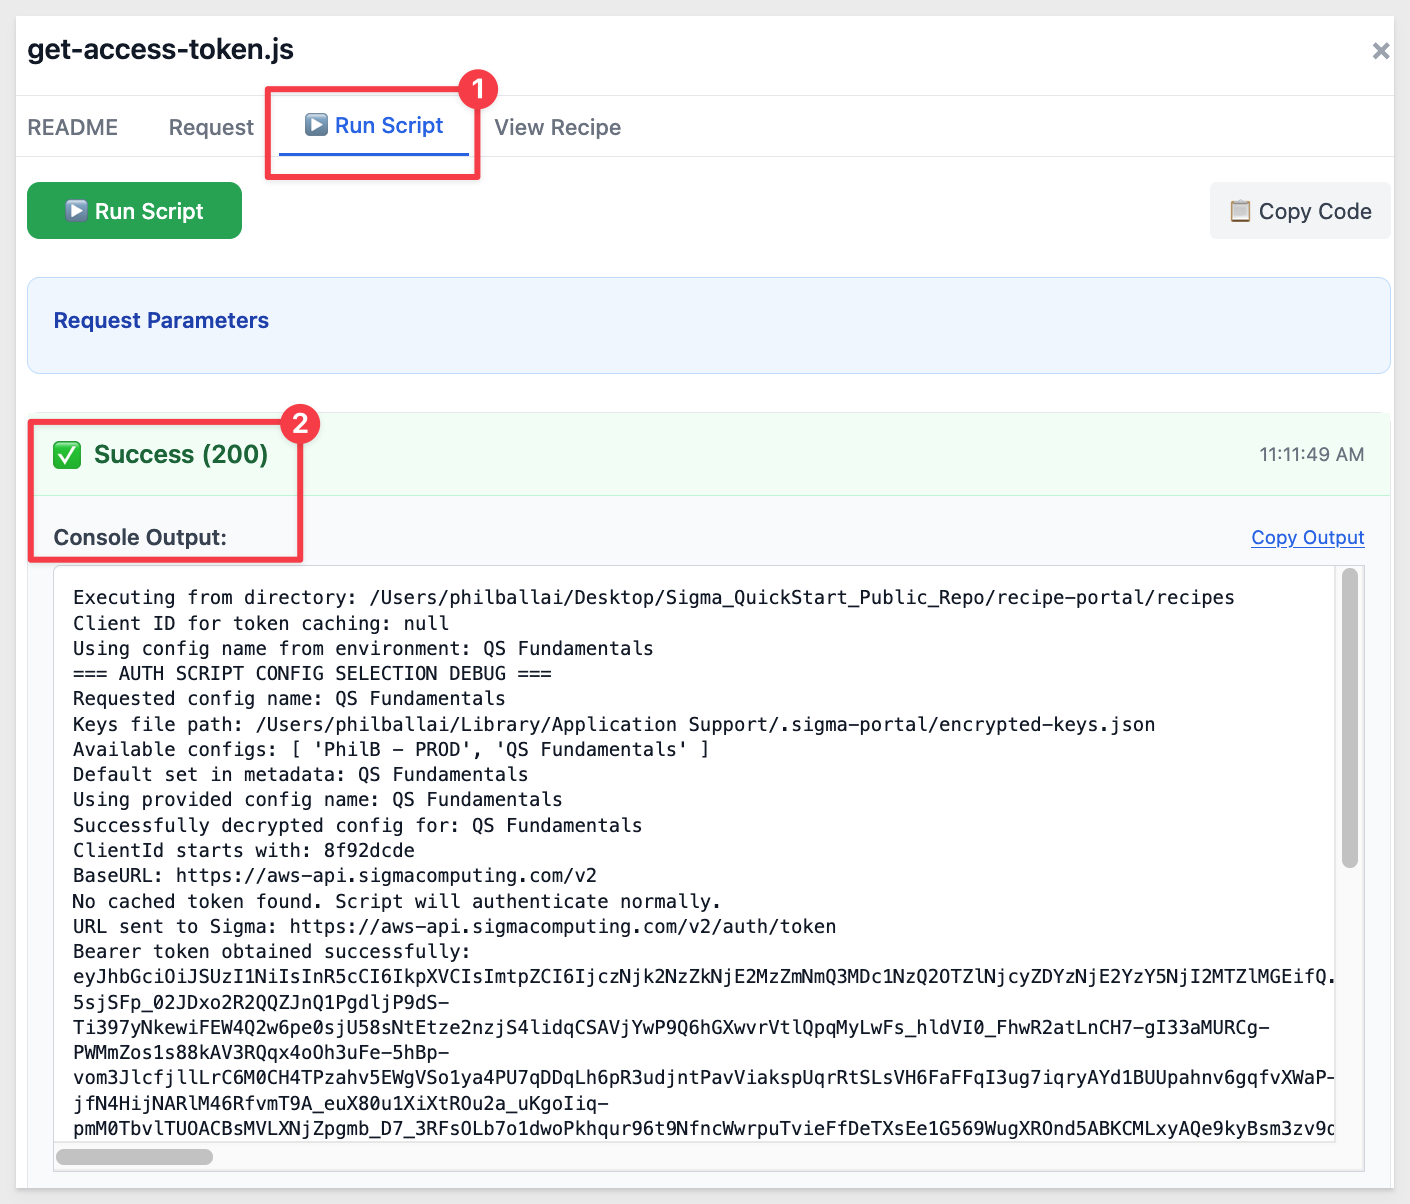
A Copy Output link is provided in all cases, which includes the API response and, when applicable, additional debug information.
After closing the authentication modal, we can immediately test.
Click View Recipe for the List All Connection recipe:
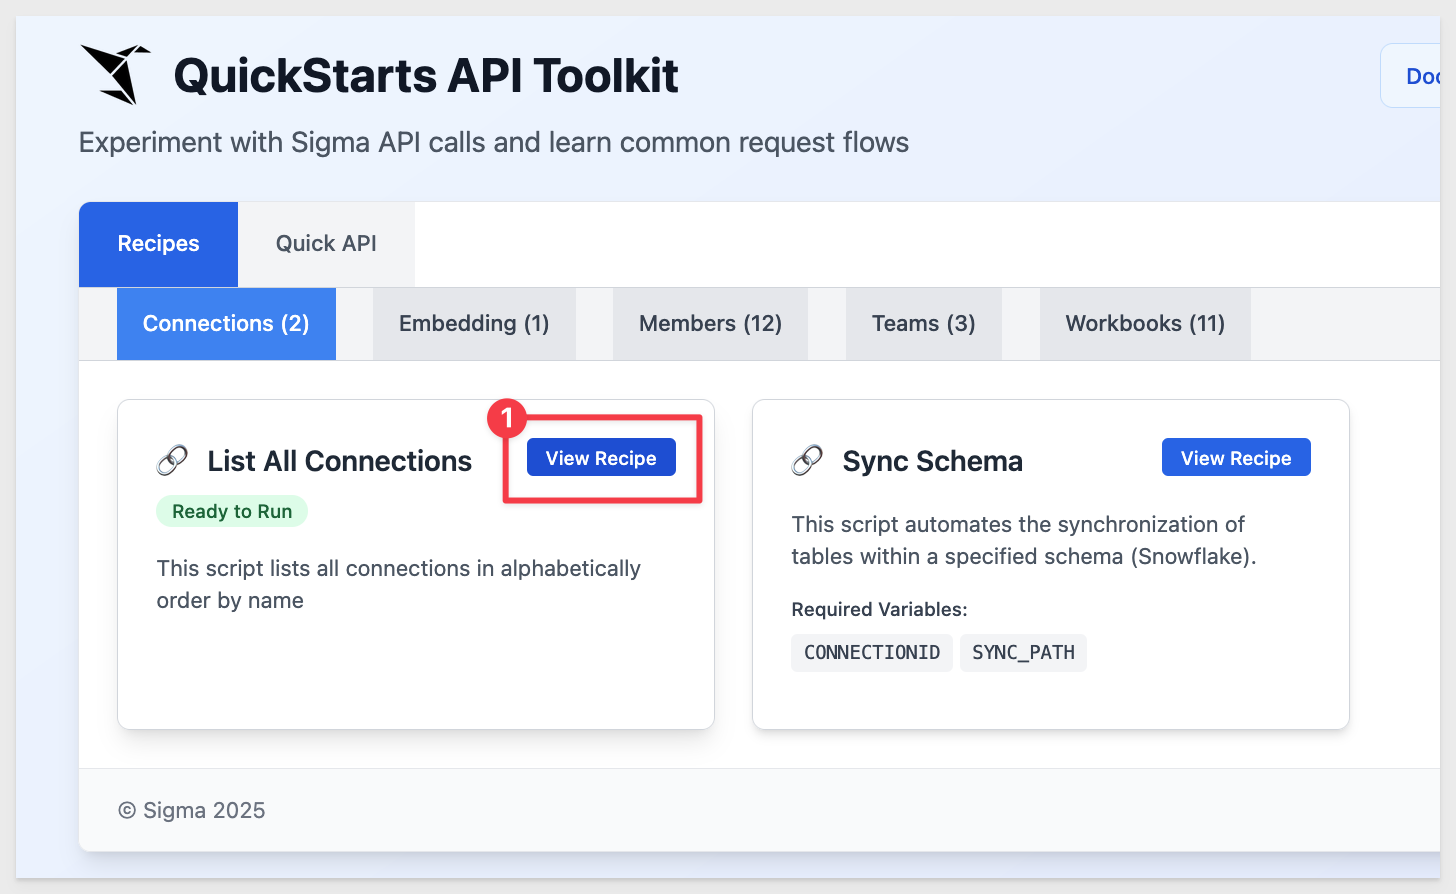
Most recipes and Quick API operations share the same tab layout, though there are a few differences we'll mention later.
Click Run Script since there are no additional parameters to provide:
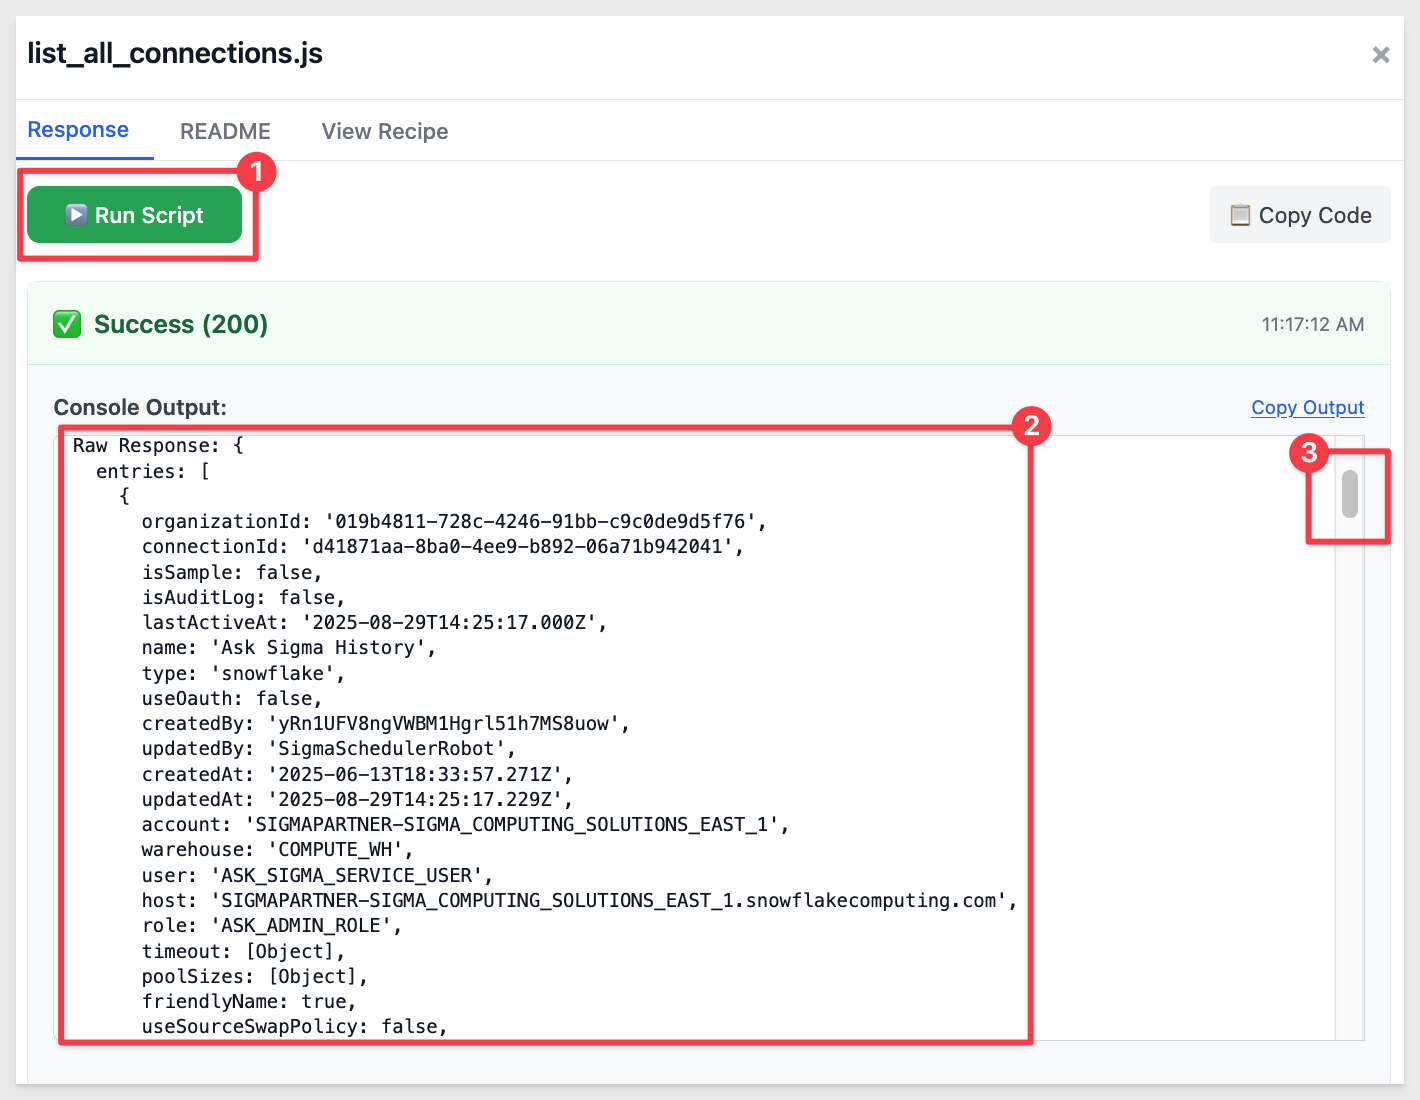
When a recipe has no required manually entered parameters, it displays the Ready to Run pill:
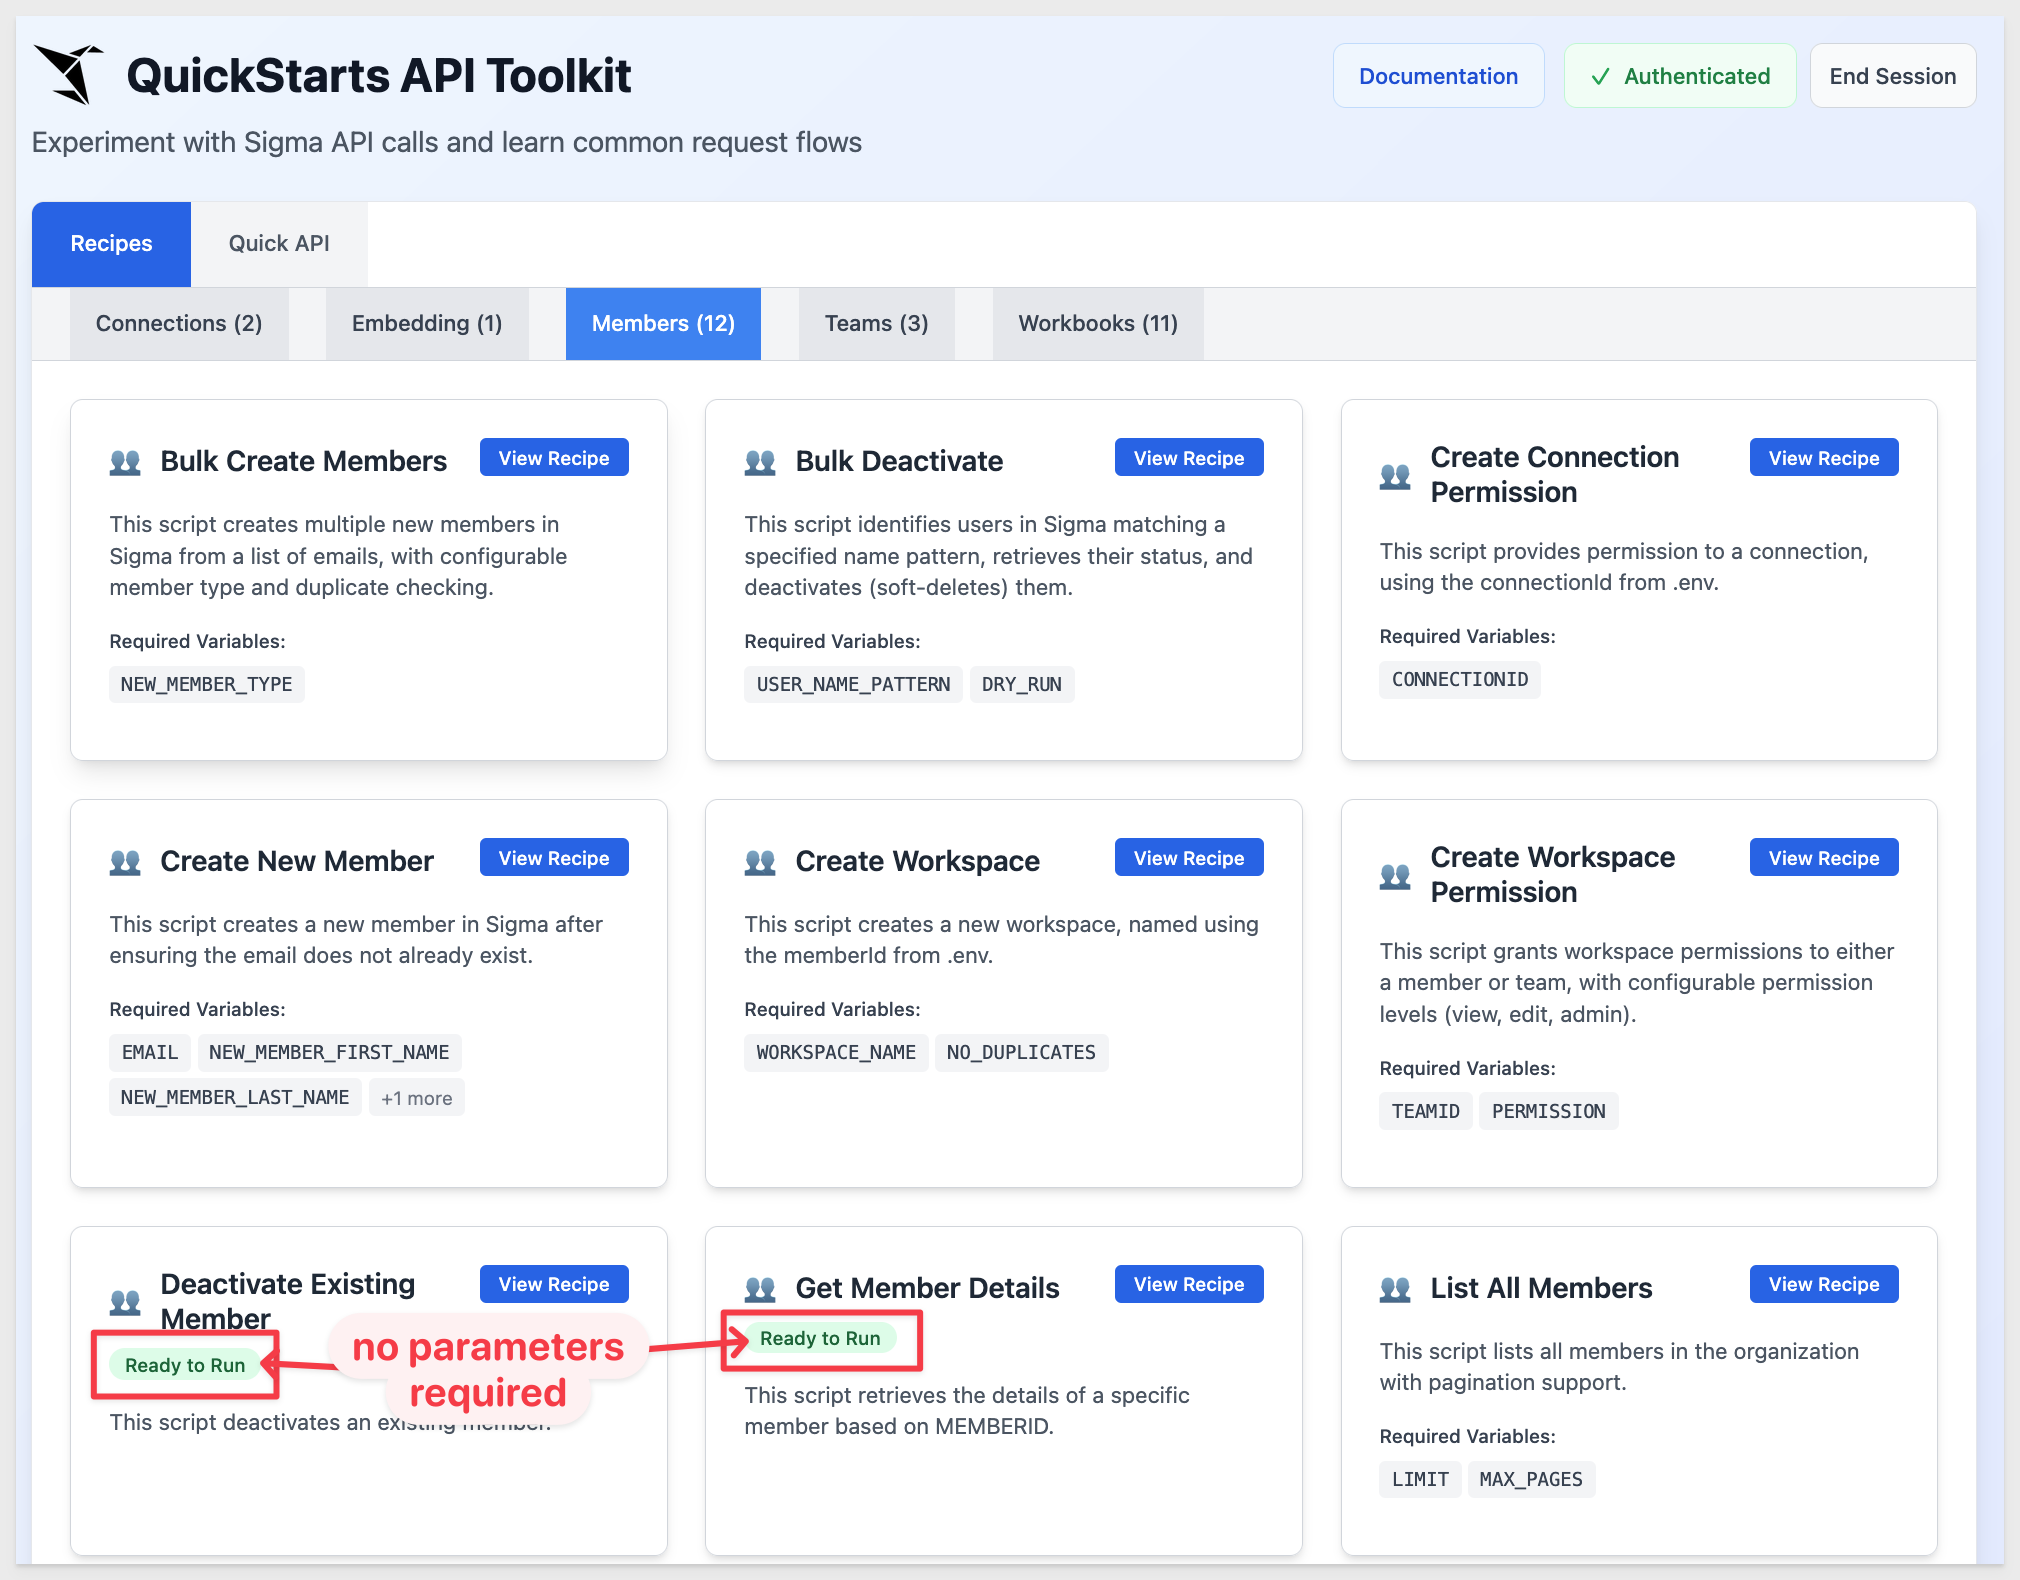
Smart parameters
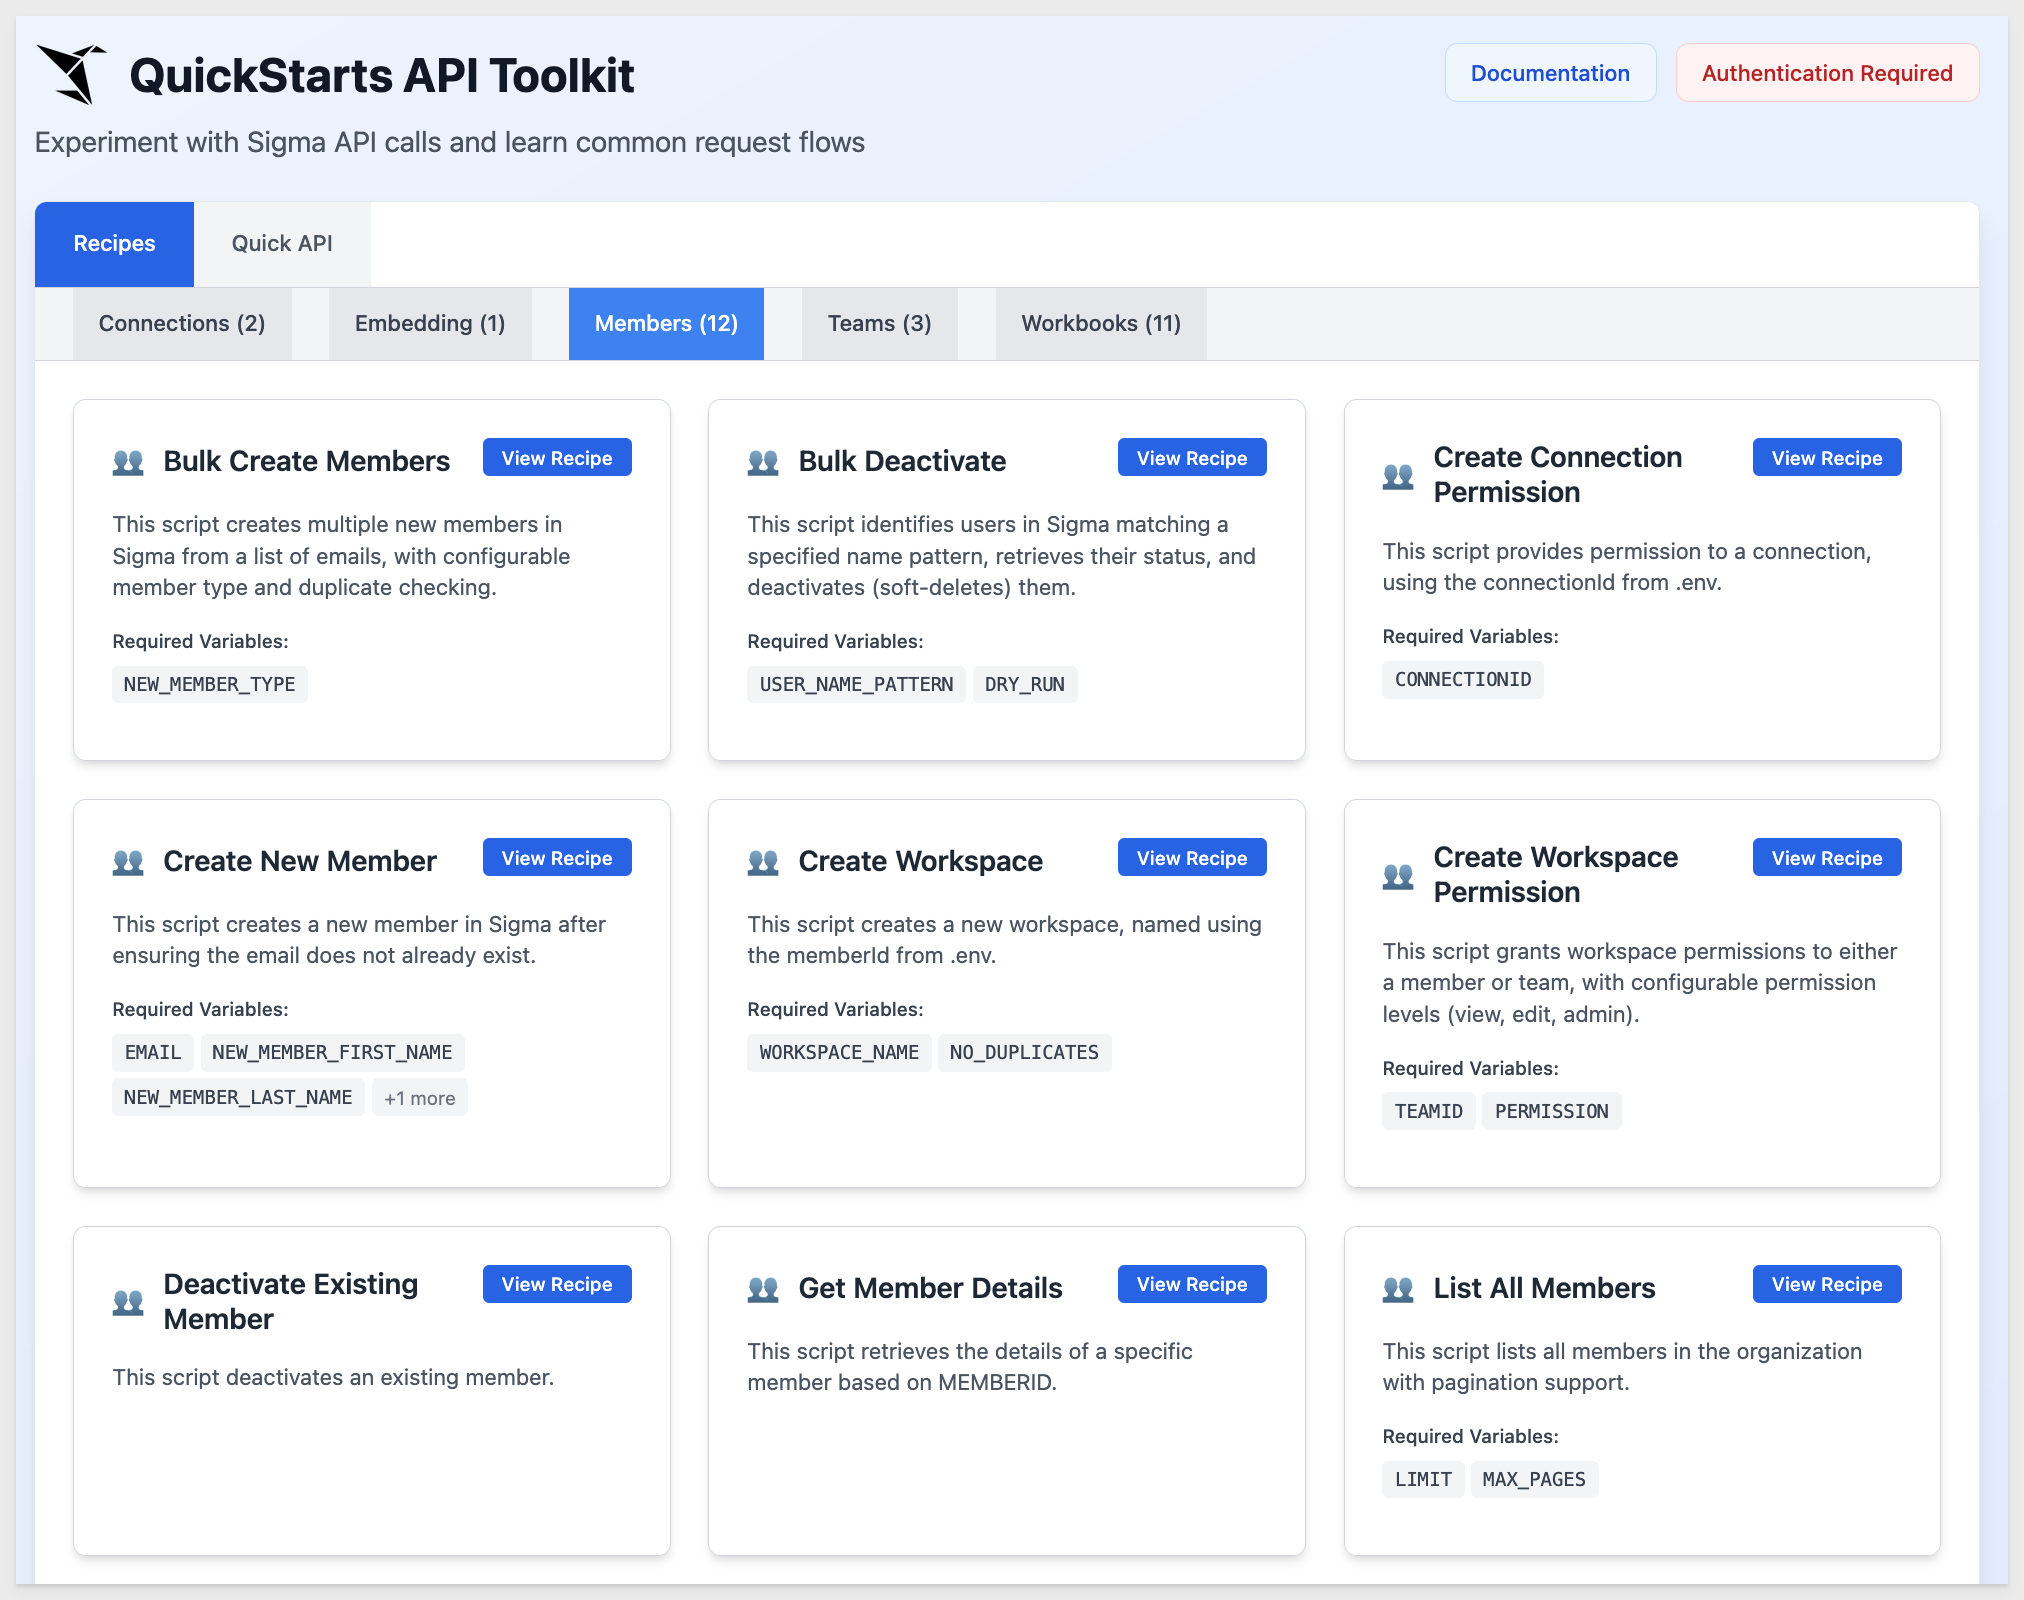
Some recipes require parameters, but many of these can be pre-fetched so you can simply select from a list of "friendly names."
For example, in the Members group, look at Get Member Details.
Instead of manually locating the required memberID, we pre-fetch them and display a list of usernames. This makes it simple to get the information you need.
Once a selection is made, the corresponding memberID is shown below the list:
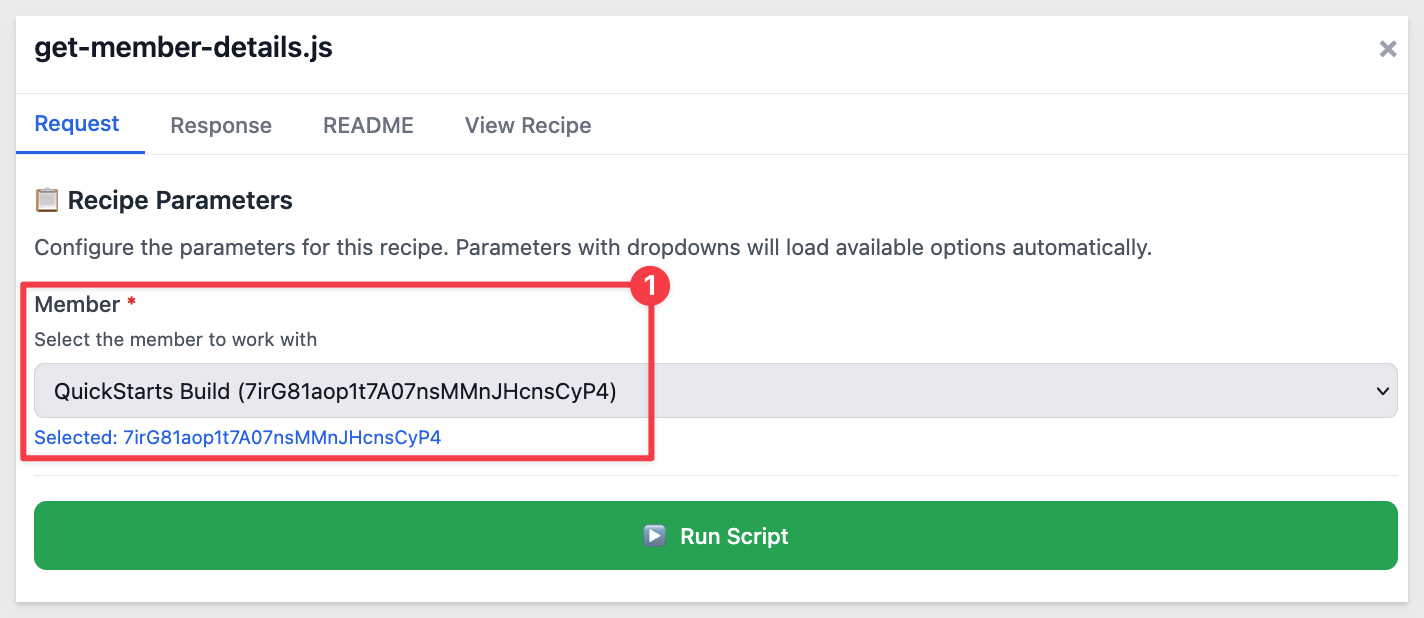
Click Run Script.
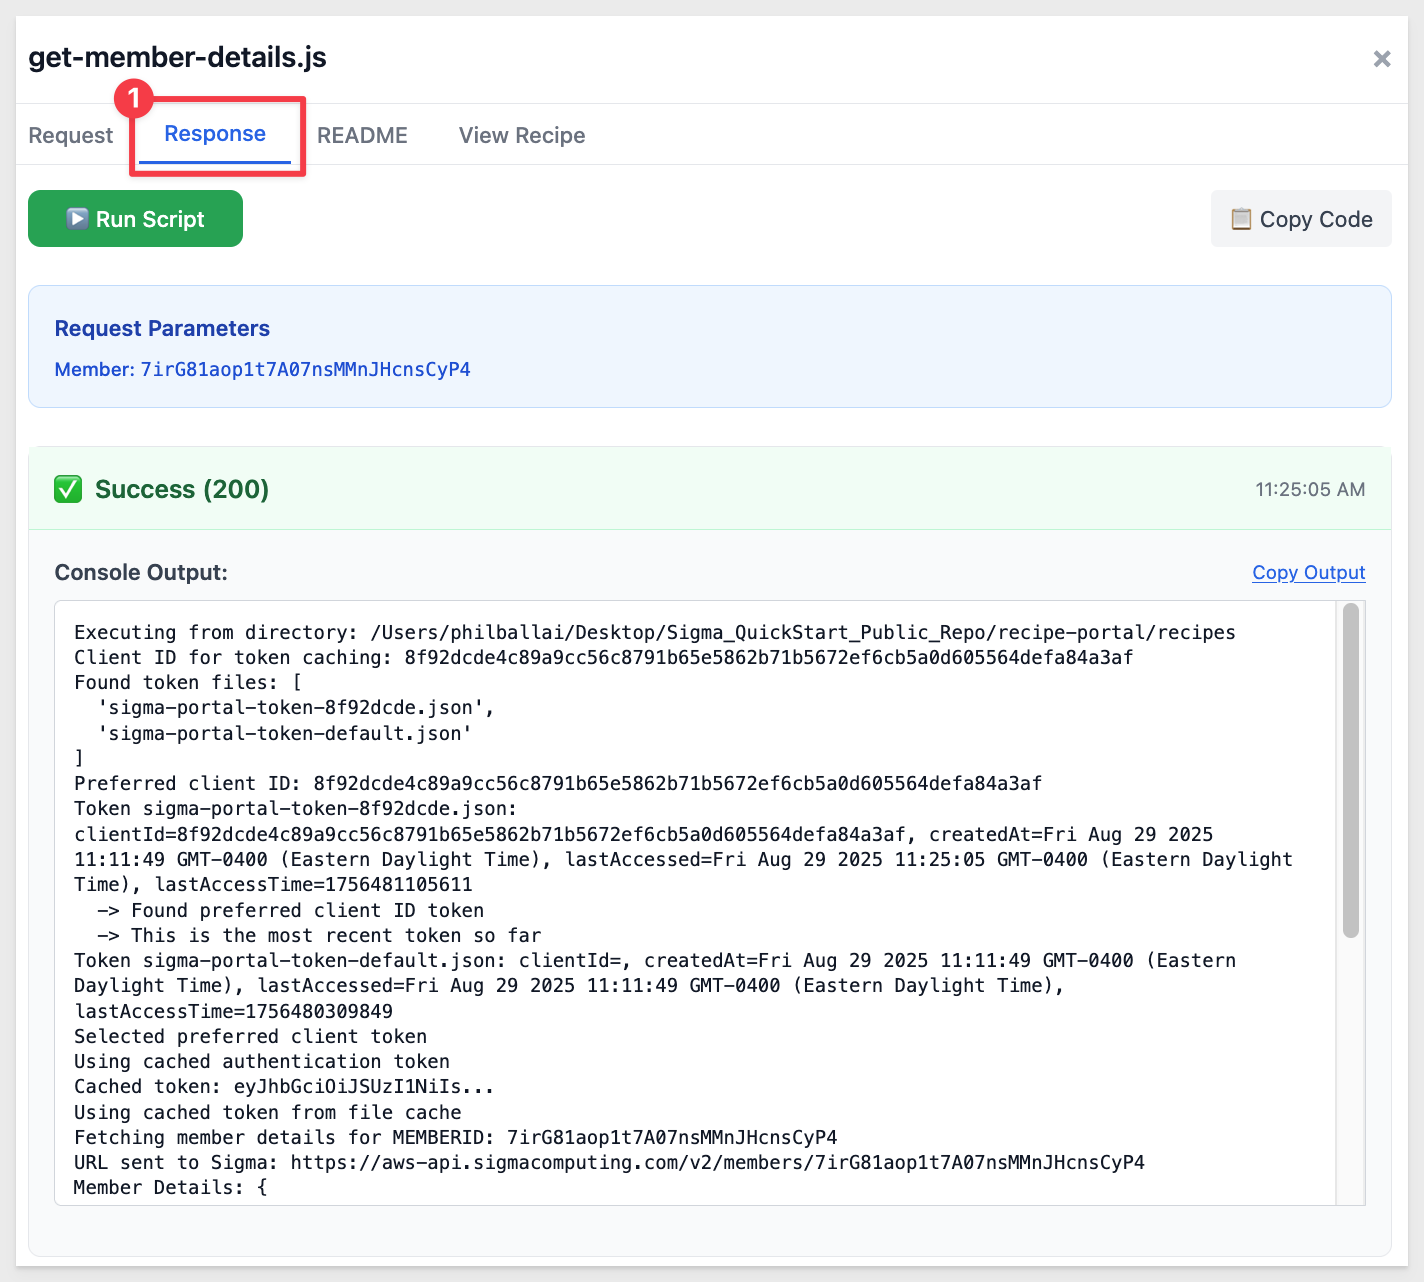
The response is shown in the Response tab, which opens automatically. This design saves space when there are many parameters and helps keep the response visible without clutter:
A word about downloads and bulk operations
A few recipes either download files or require CSV data to process bulk operations. In those cases, always review the associated README for that recipe.
In this QuickStart, we set up a local test environment using Sigma's GitHub repository of sample API recipes. We walked through generating authentication credentials, starting the toolkit, and running recipes to explore common API use cases.
With this foundation, you can now experiment with the toolkit to quickly test API flows, validate parameters, and explore how Sigma's REST API can support your own workflows.
Additional Resource Links
Blog
Community
Help Center
QuickStarts
Be sure to check out all the latest developments at Sigma's First Friday Feature page!