In this QuickStart, we demonstrate how to pass variables between the host application and Sigma. Sigma is embedded in the host application using an HTML iframe.
Inbound Events:
These are variables sent from the host application to Sigma. No listener needs to be coded into the iframe. Sigma can use these messages to update control values. For example, passing a new value to a Sigma control that is used to filter table data.
Inbound events can be passed using either JavaScript or URL.
In general:
Outbound Events:
These are variables sent from Sigma to the host application, which must have a listener coded to receive and respond to the message.
In this QuickStart, we will use the local host application we created in Embedding 01: Getting Started
For more information on Sigma's product release strategy, see Sigma product releases
If something is not working as you expect, here's how to contact Sigma support
Target Audience
Semi-technical users who will be aiding in the planning or implementation of Sigma with embedding. No SQL or technical data skills are needed to complete this QuickStart. It does assume some common computer skills like installing software, using Terminal, navigating folders and copy/paste operations.
Prerequisites
- A computer with a current browser. It does not matter which browser you want to use.
- Access to your Sigma environment.
- Embedding 01: Getting Started is required to complete this QuickStart.

We will move through this quickly, as it is assumed you have done similar configurations before in the Getting Started QuickStart.
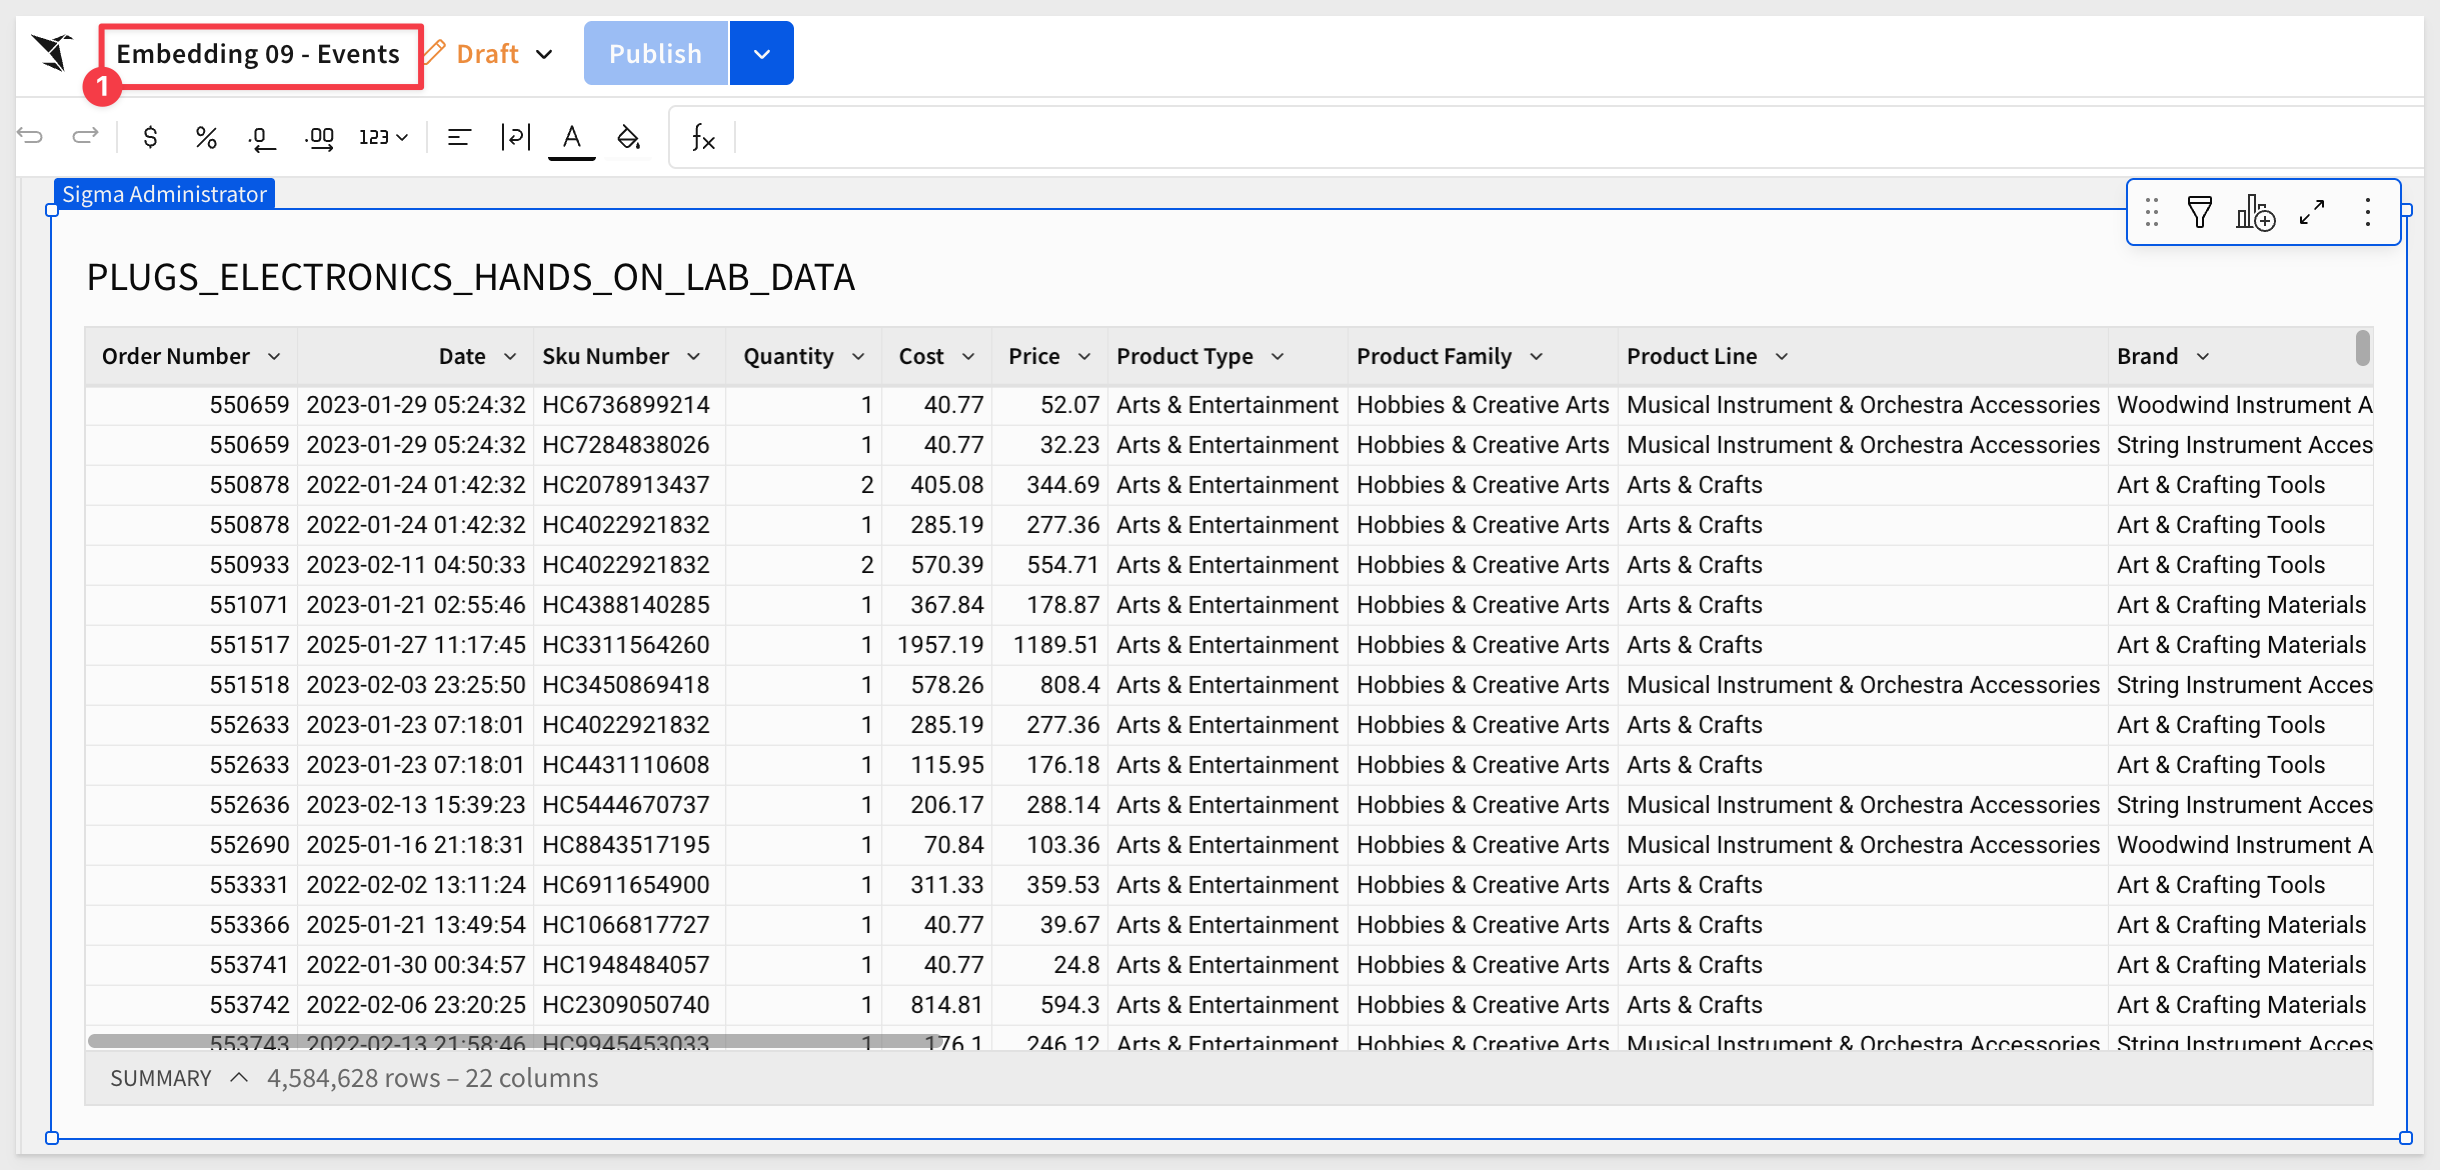
Log into Sigma as Administrator, create a new workbook and place a new table element on the page.
We will use the Sigma sample database to create a workbook that has one table and one control.
Set the table's source to PLUGS_ELECTRONICS_HANDS_ON_LAB_DATA from the Sigma Sample Database > Retail > Plugs Electronics schema.
Click Save as and name the workbook Embedding 09 - Events:
Add a new List value control from the Element bar > Control group to the page and configure it as shown below, and set its target to the table:
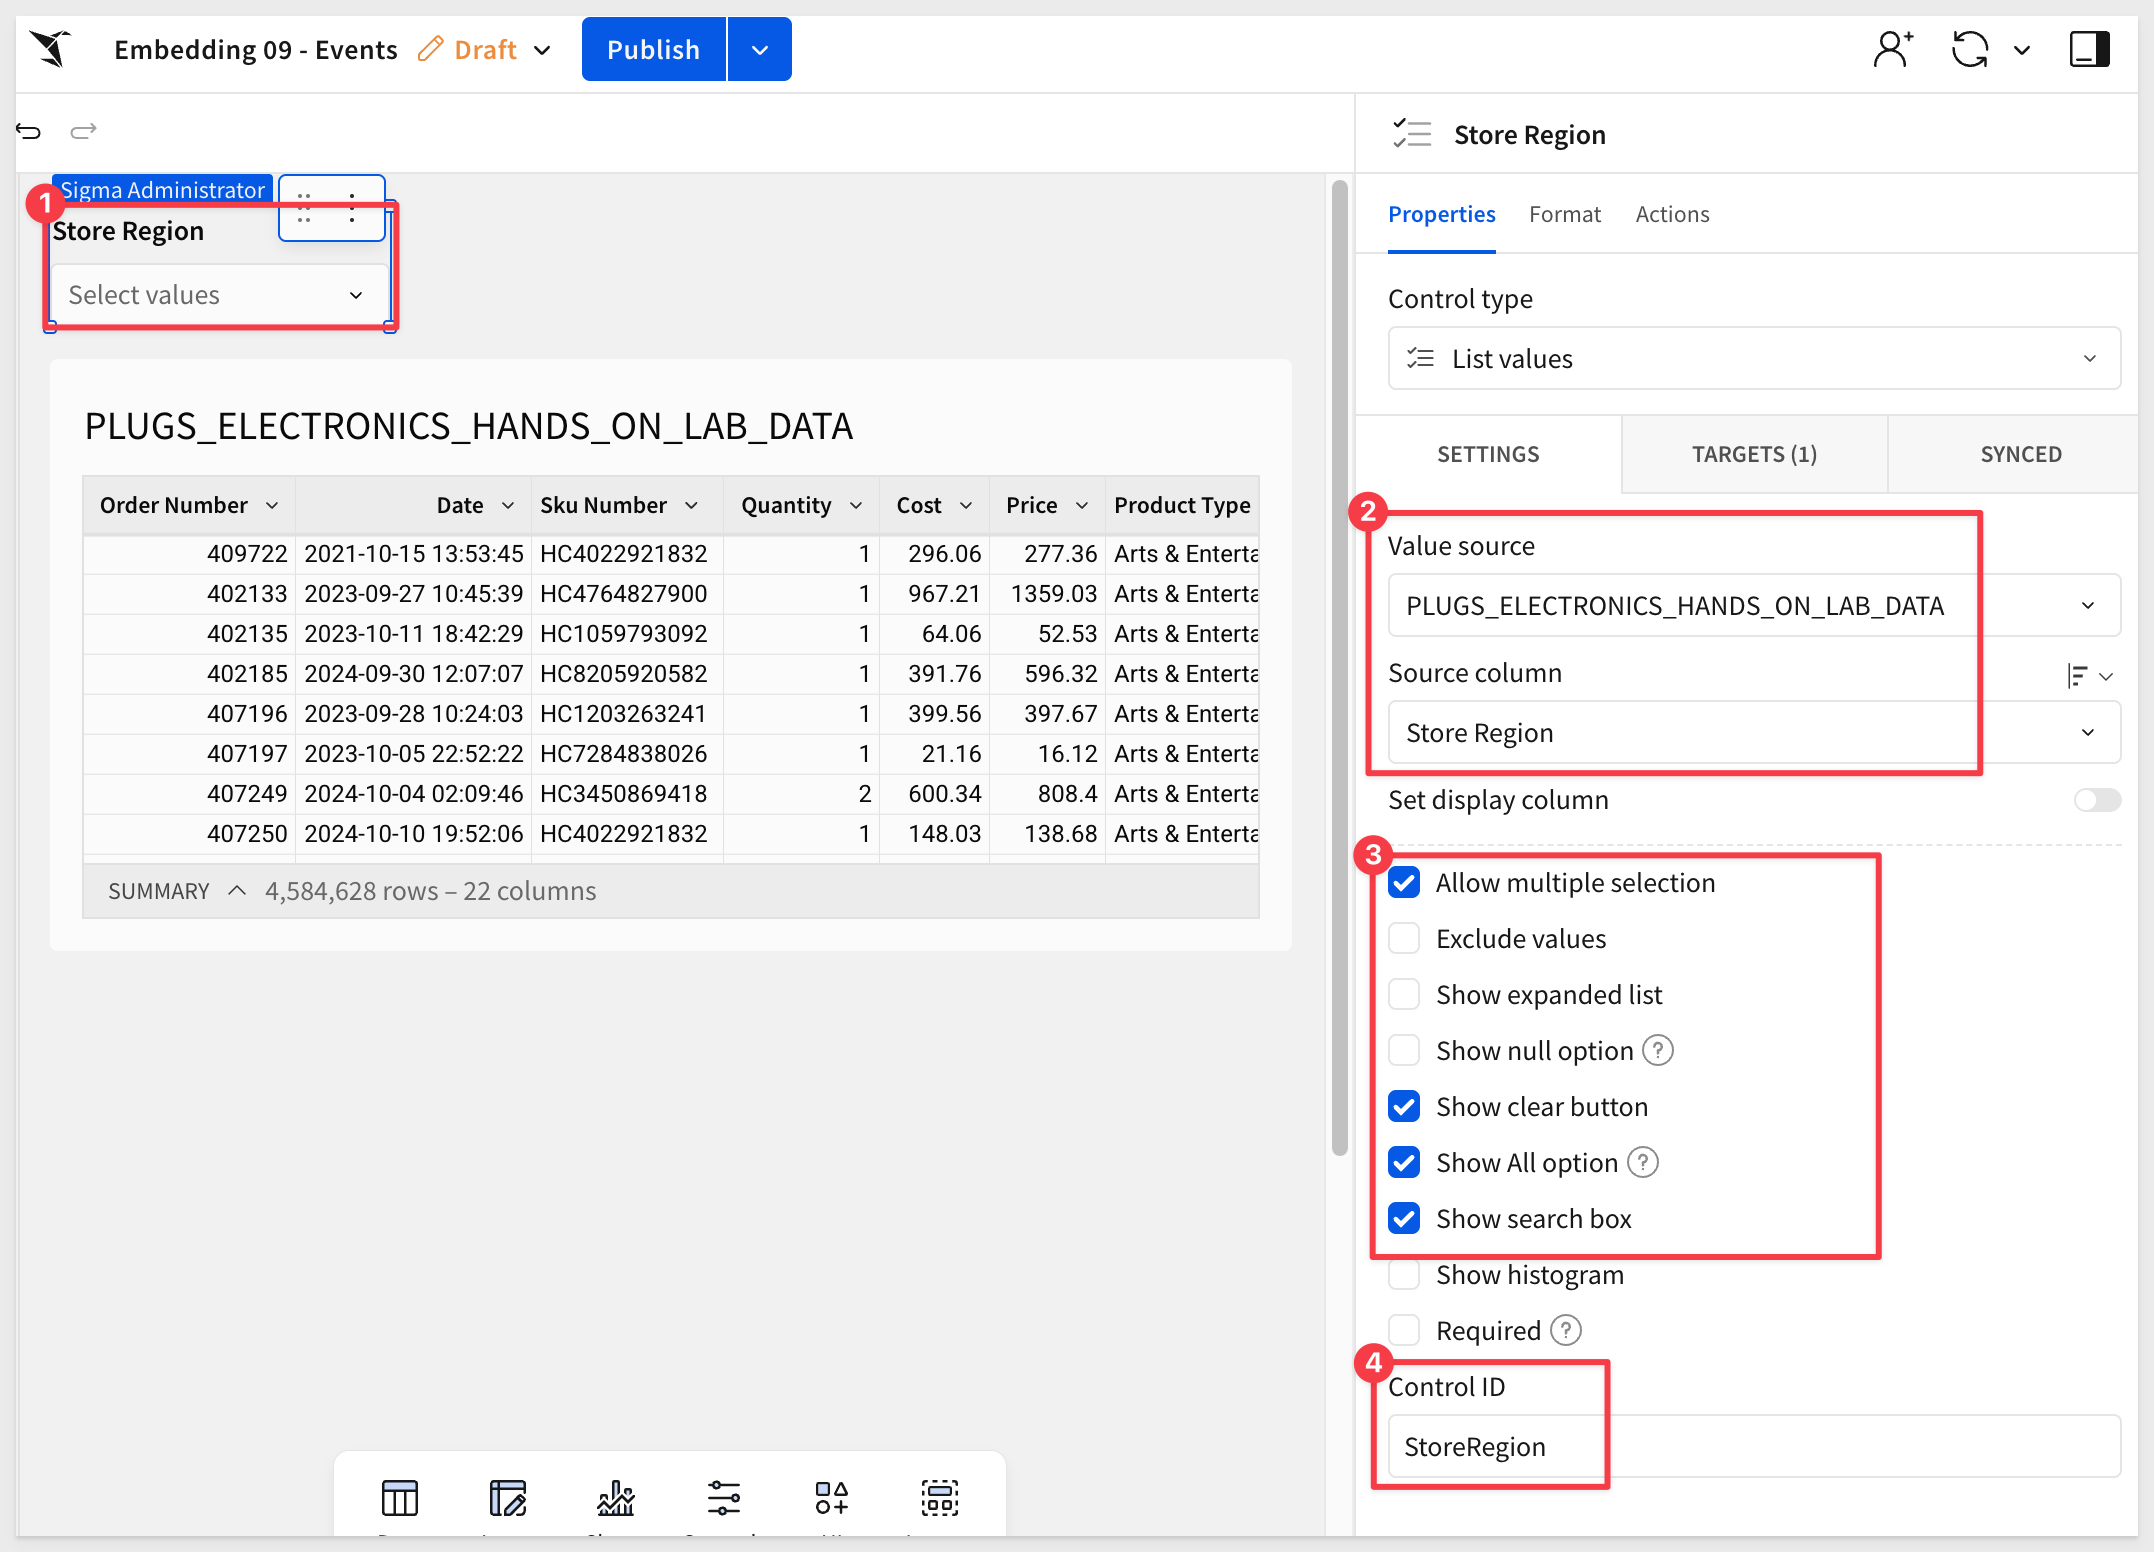
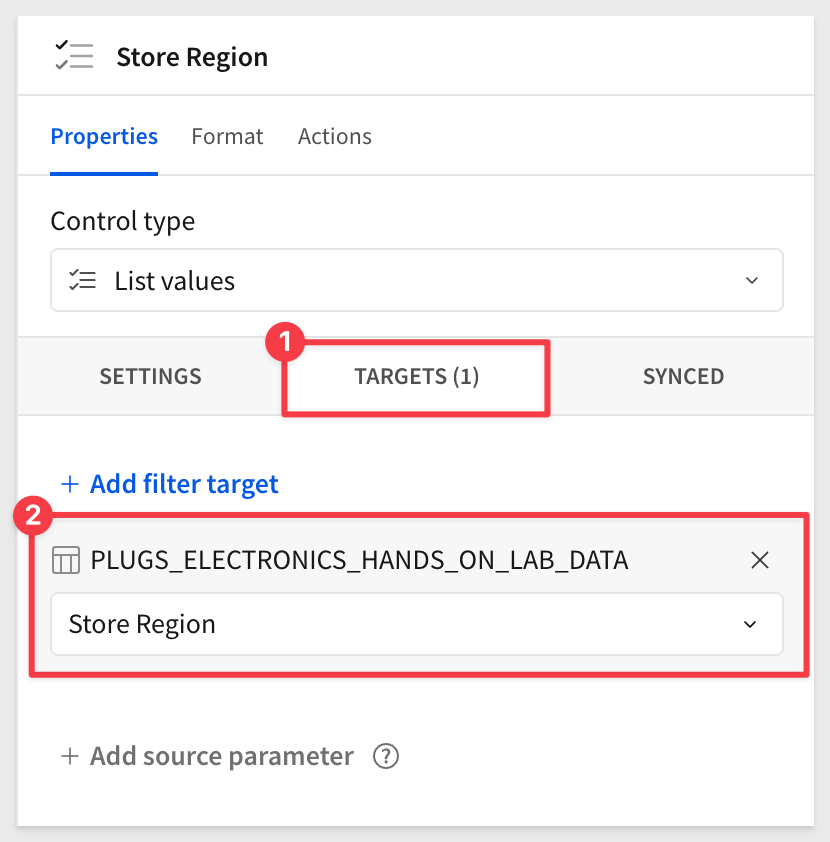
In the Element panel set a target for the control of Store Region in the PLUGS_ELECTRONICS_HANDS_ON_LAB_DATA table:
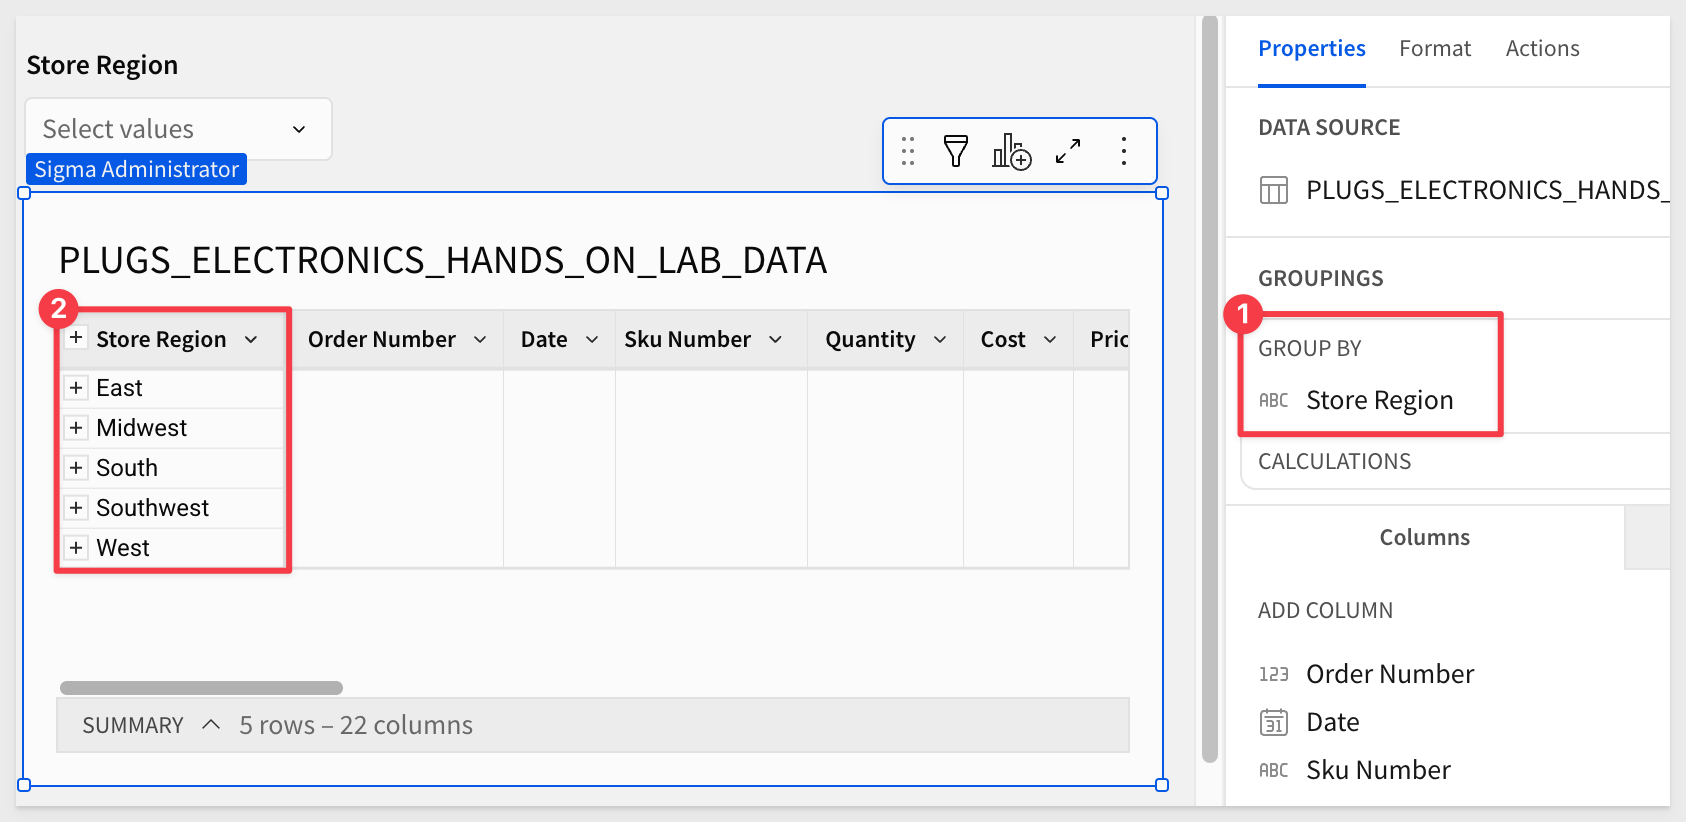
Group the table on Store Region:
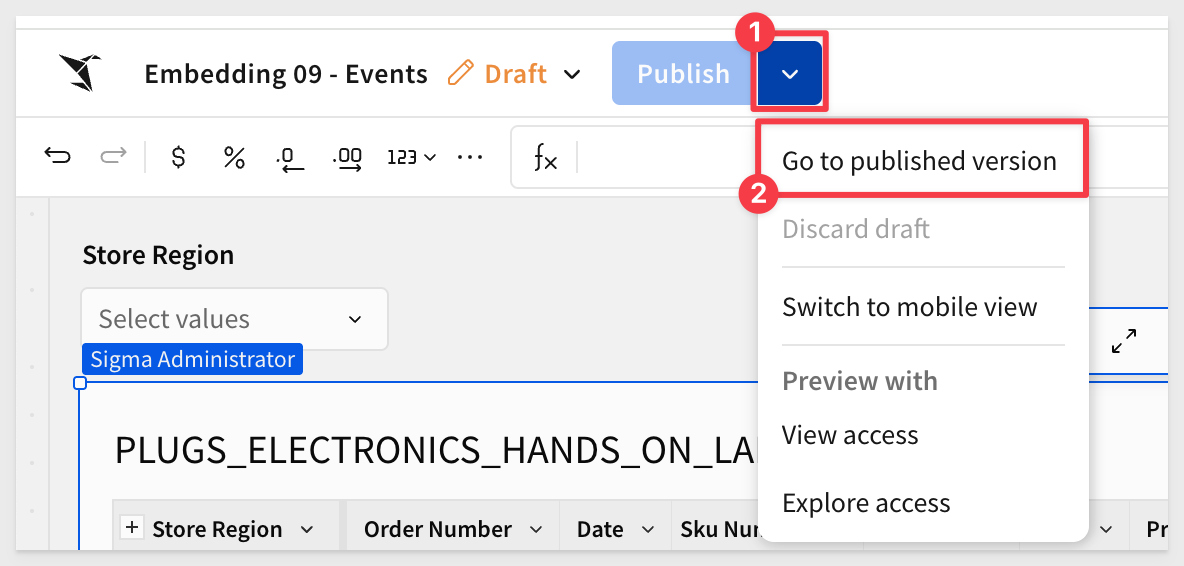
Click Publish, then open the published version:
Copy the URL from the browser. We will use this in the next section.
For more information on URL formats for JWT embedding, see What URL to use
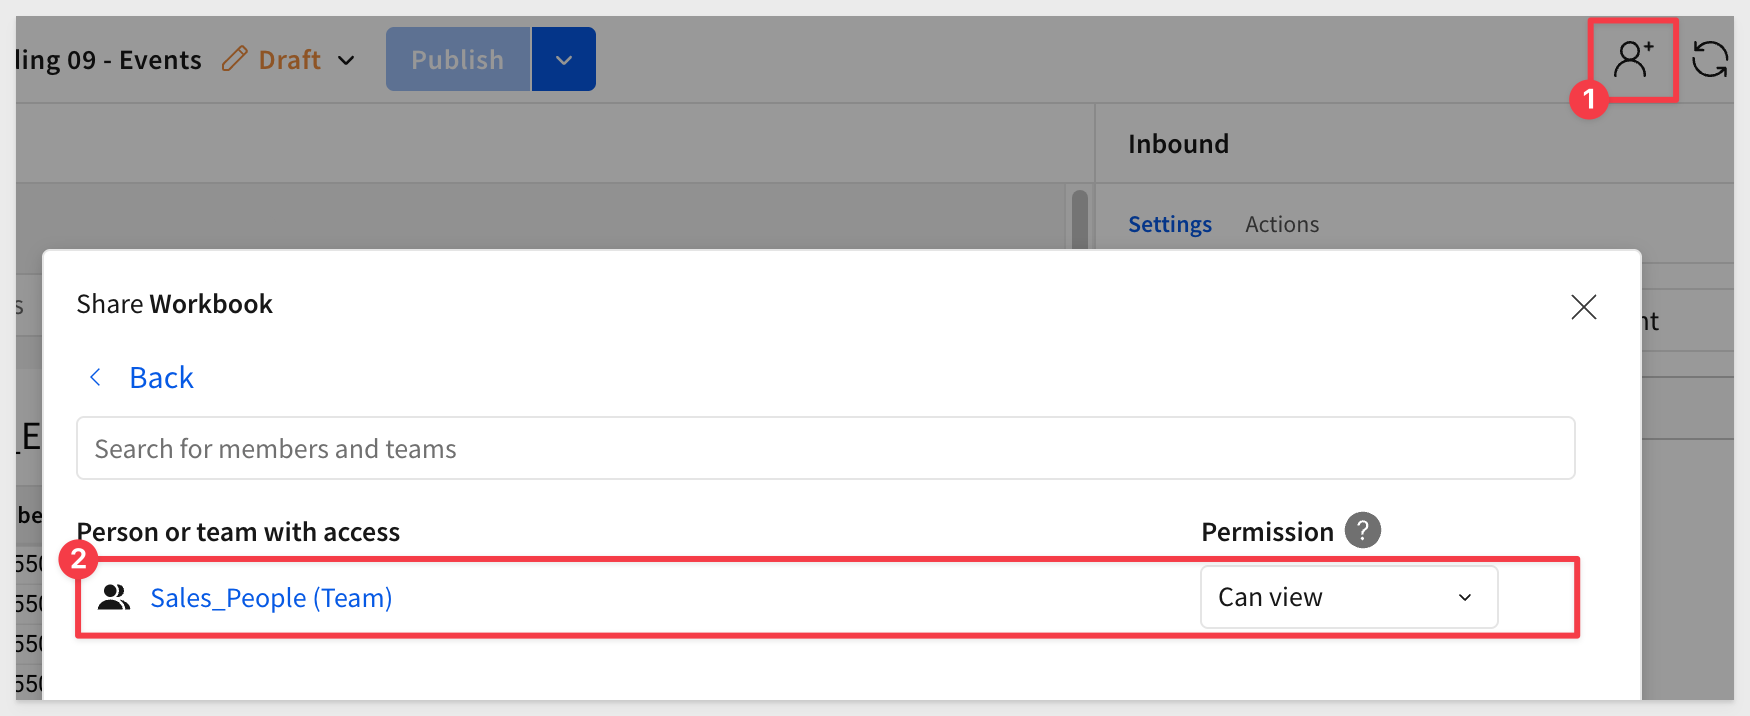
Share the workbook with the Sales_People team we created in the Embedding 01: Getting Started QuickStart:
In VSCode, open the embedding_qs_series_2 project and edit the .env file.
In the # QS: events section, set the parameters as shown, using your own base URL:

In the VSCode Terminal, start the local web server:
npm start
In a browser, navigate to:
http://localhost:3000/events/?mode=events
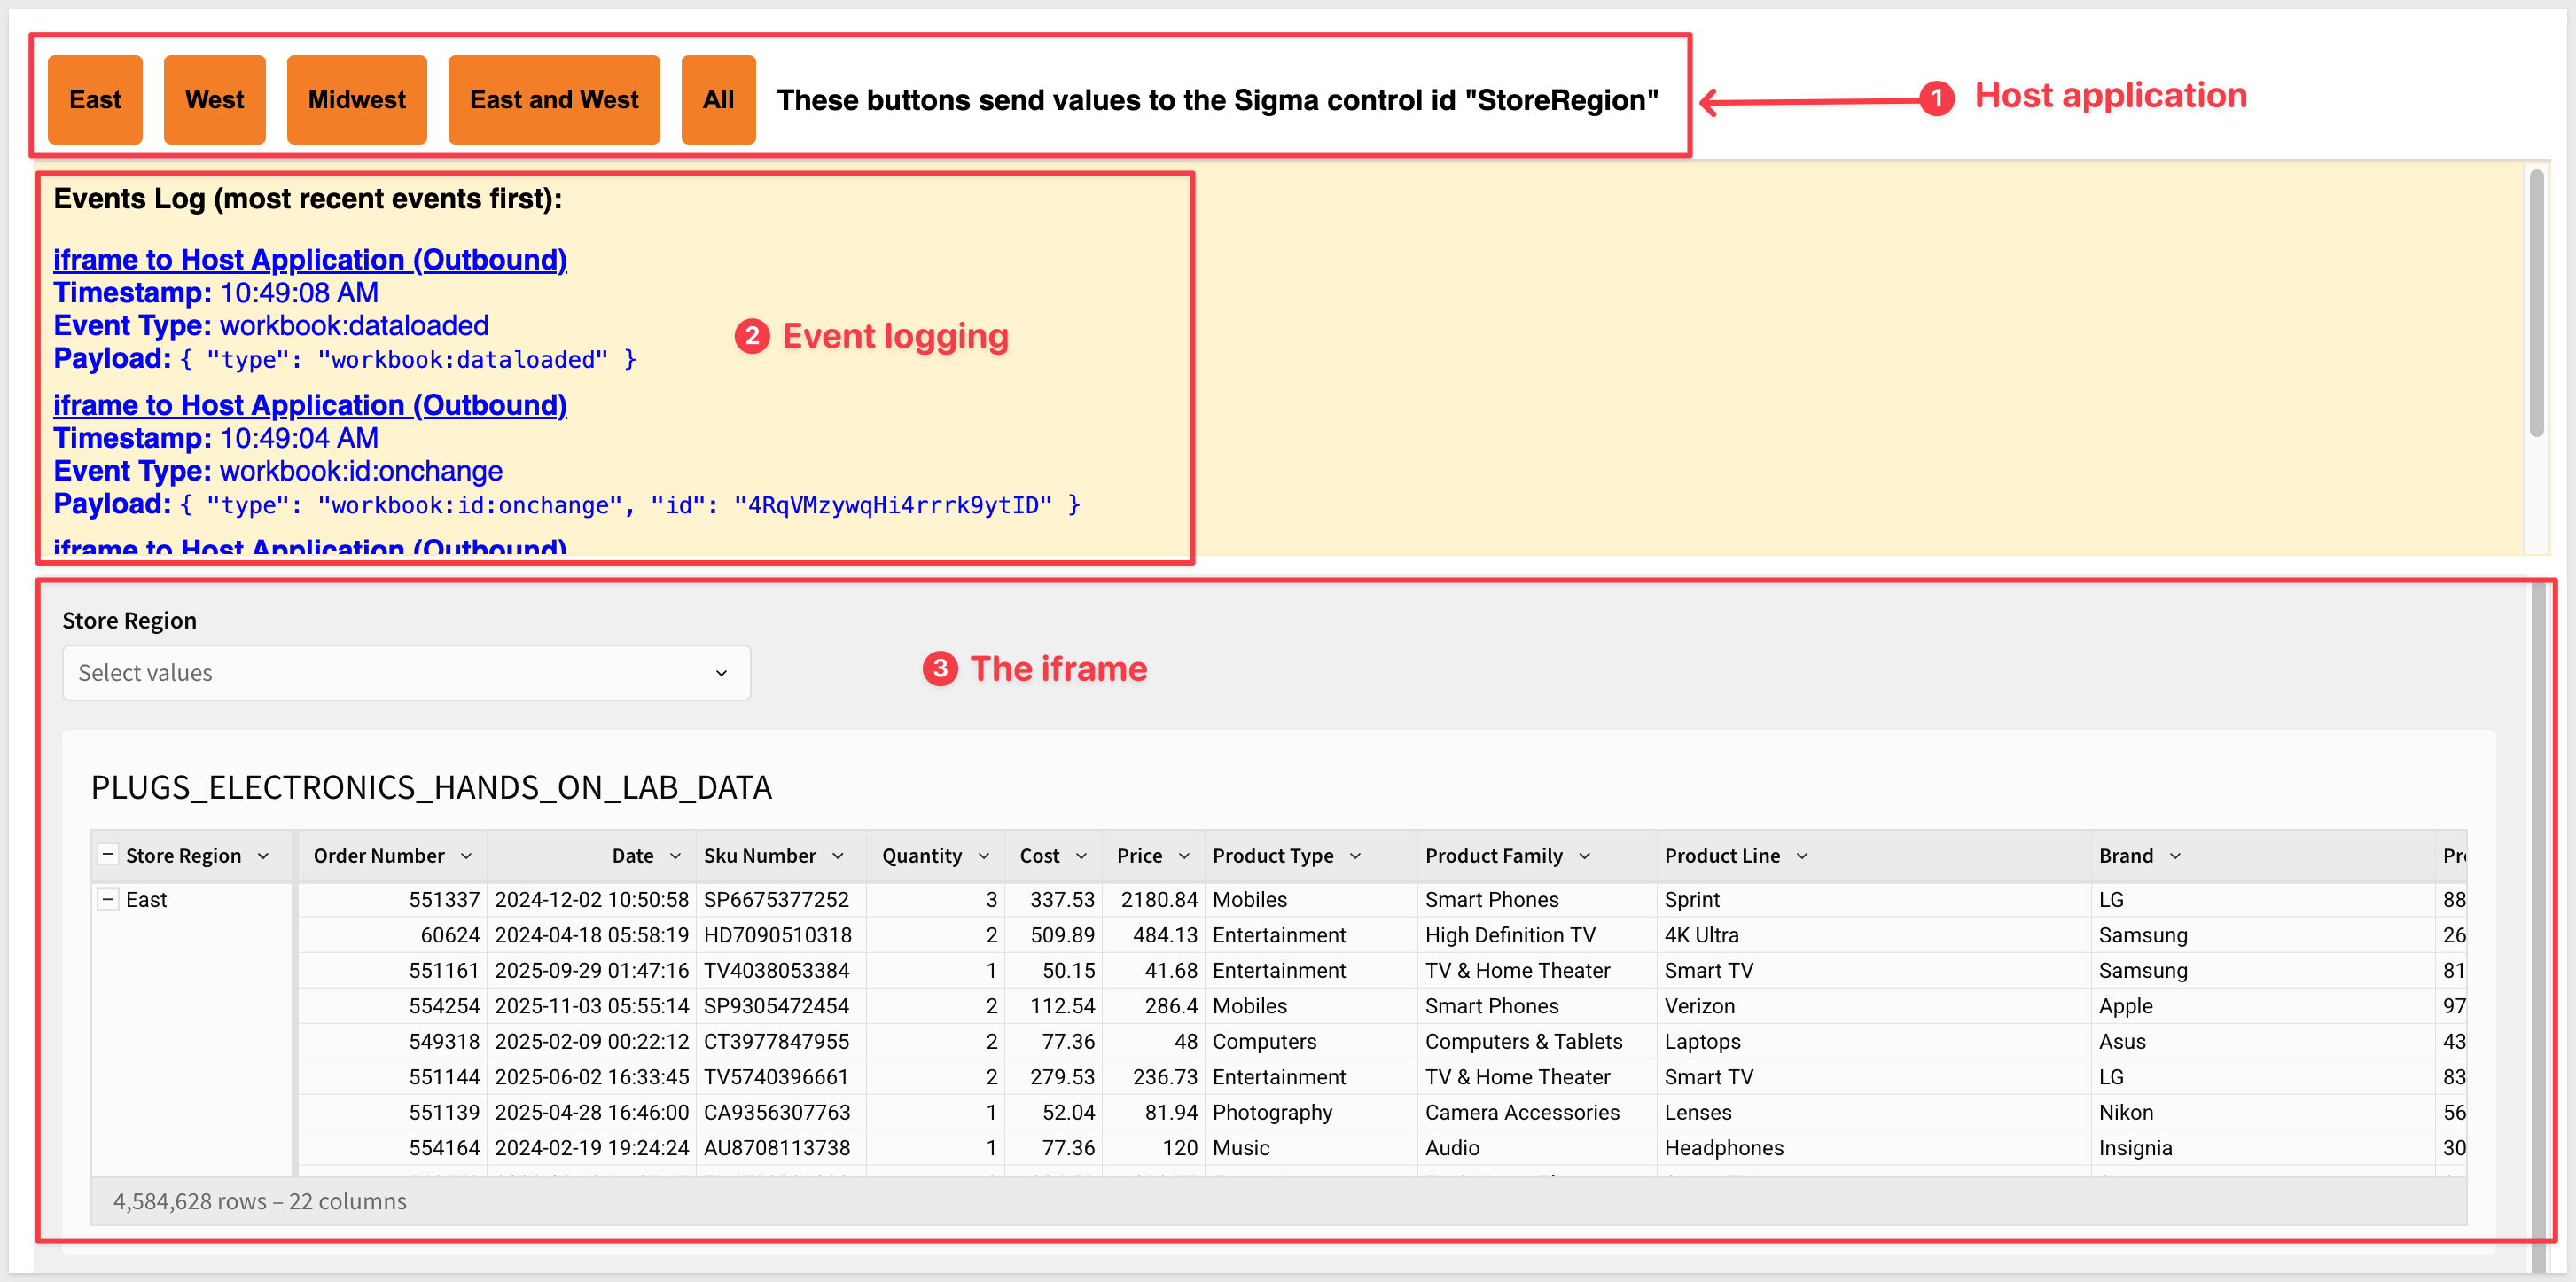
We have designed this page to display an Events Log using JavaScript for easy testing:
Event log types are color-coded:
- Blue: iframe to host application (Outbound)
- Green: Host application to iframe (Inbound)
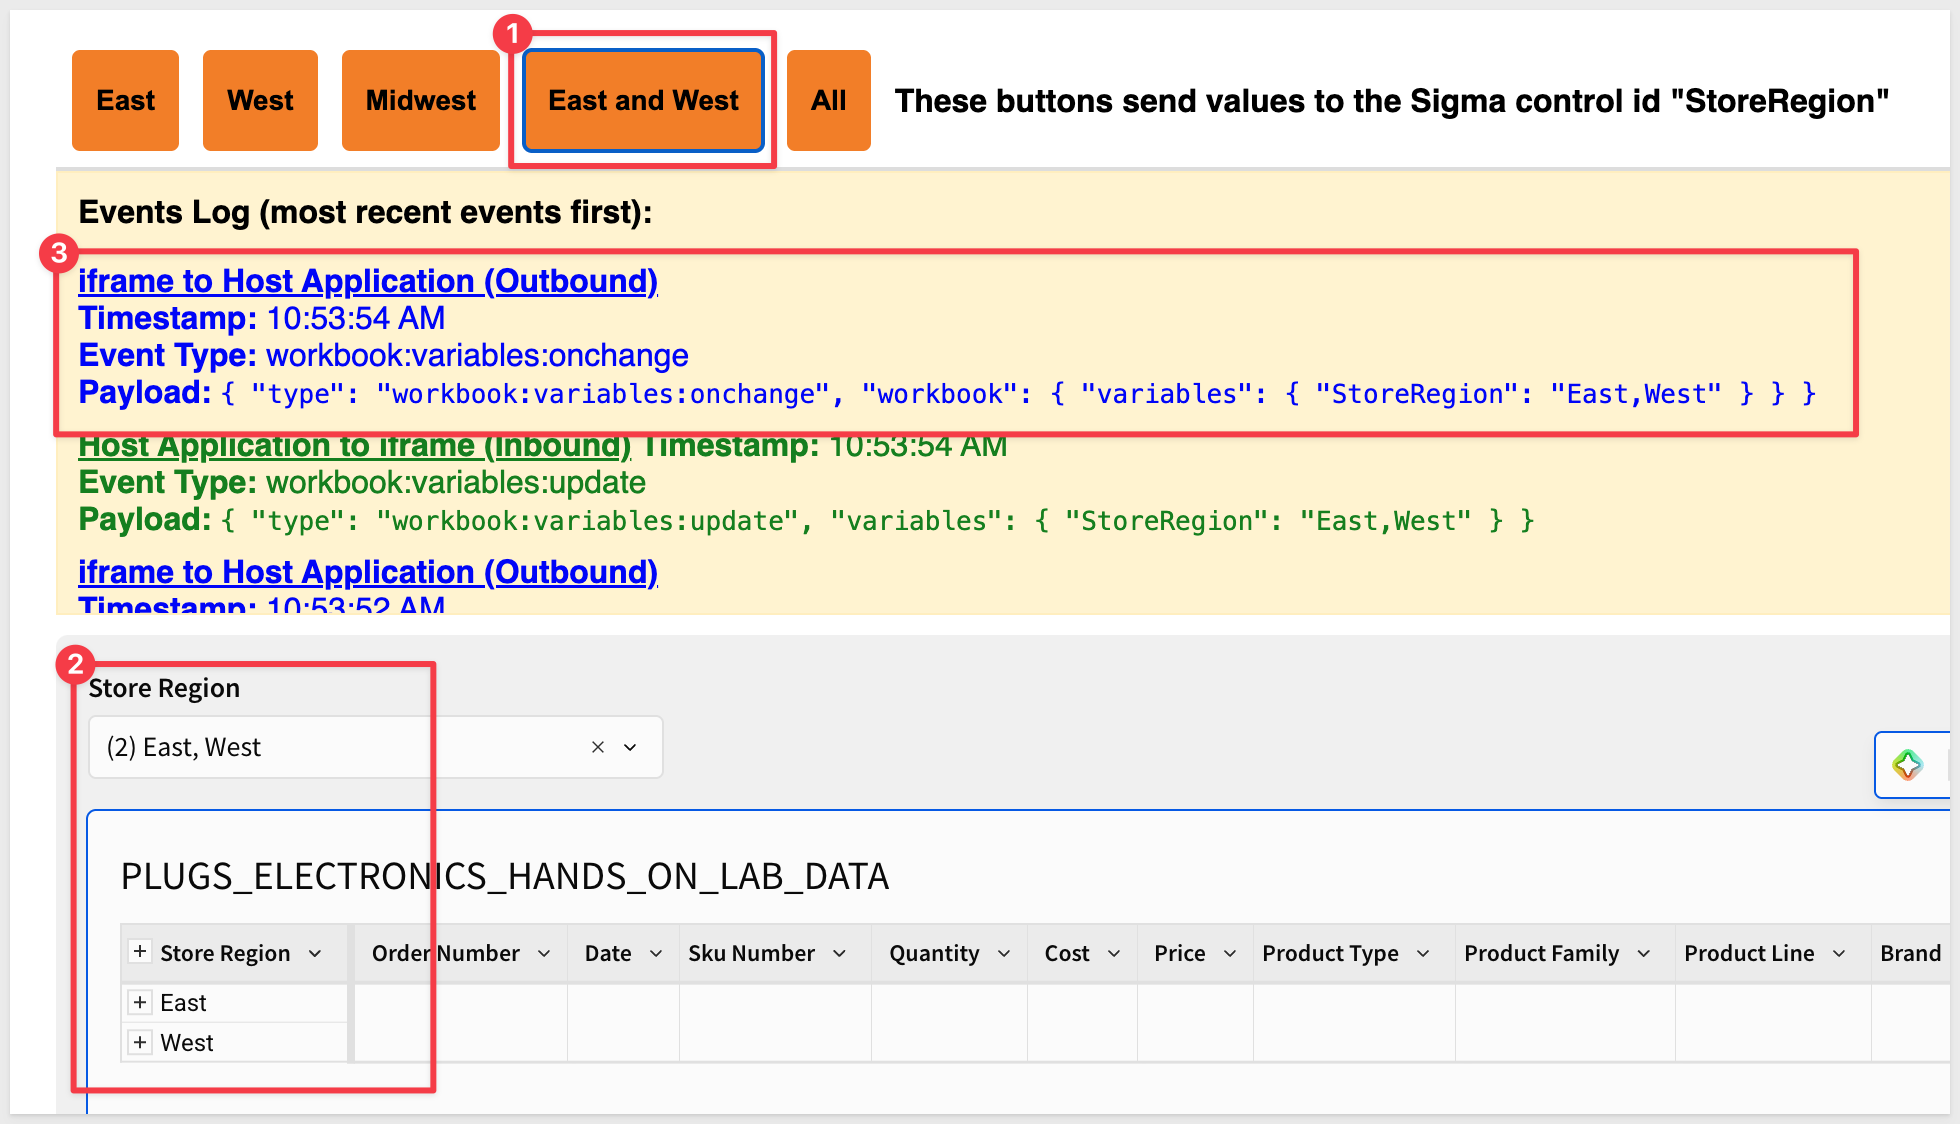
The orange region buttons are part of the host application. Clicking any of them sends the selected region value to Sigma via the iframe.
Changing the list control inside the iframe triggers an event that is logged in the Events Log and can be handled by the host application for other operations too.
We can also confirm that the Events Log is working by using the browser's inspector while testing.
For example, if we click the East button:
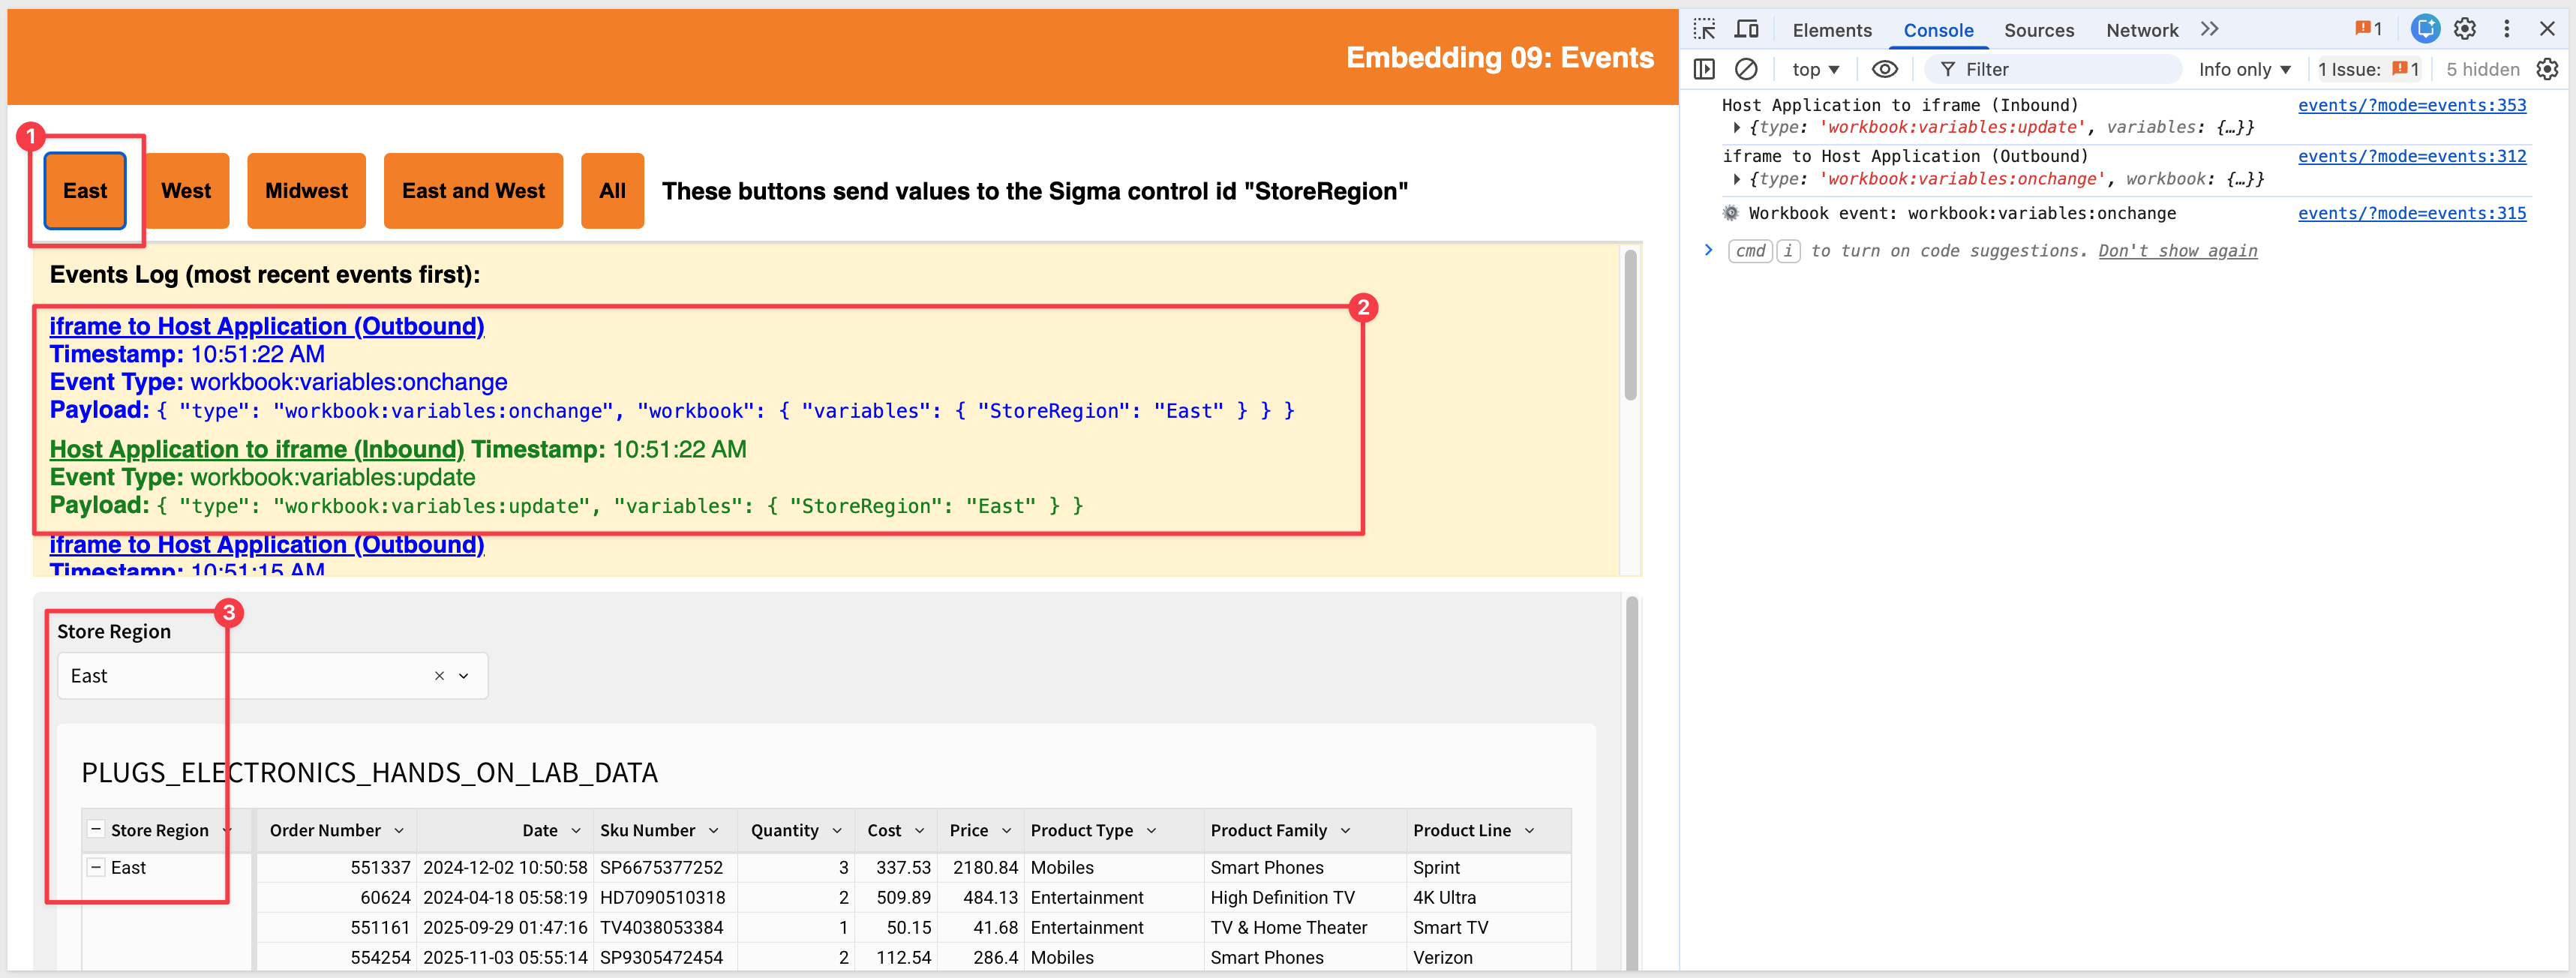
Clicking East initiates a two-step exchange:
- The host application calls
setStoreRegion("East"), which sends aworkbook:variables:updatemessage to Sigma viapostMessage. This is the inbound event (host to Sigma) — logged in green in the Events Log and in the browser console. - Sigma receives the variable update, applies it to the embedded workbook, and sends back a
workbook:variables:onchangeconfirmation. This is the outbound event (Sigma to host) — logged in blue.
Both events are visible in the Events Log panel and in the browser console simultaneously. The console is useful for inspecting the full payload structure, while the Events Log provides a human-readable view within the page.
Conversely, if you select East and West from the list control, we can see the outbound event that matches:
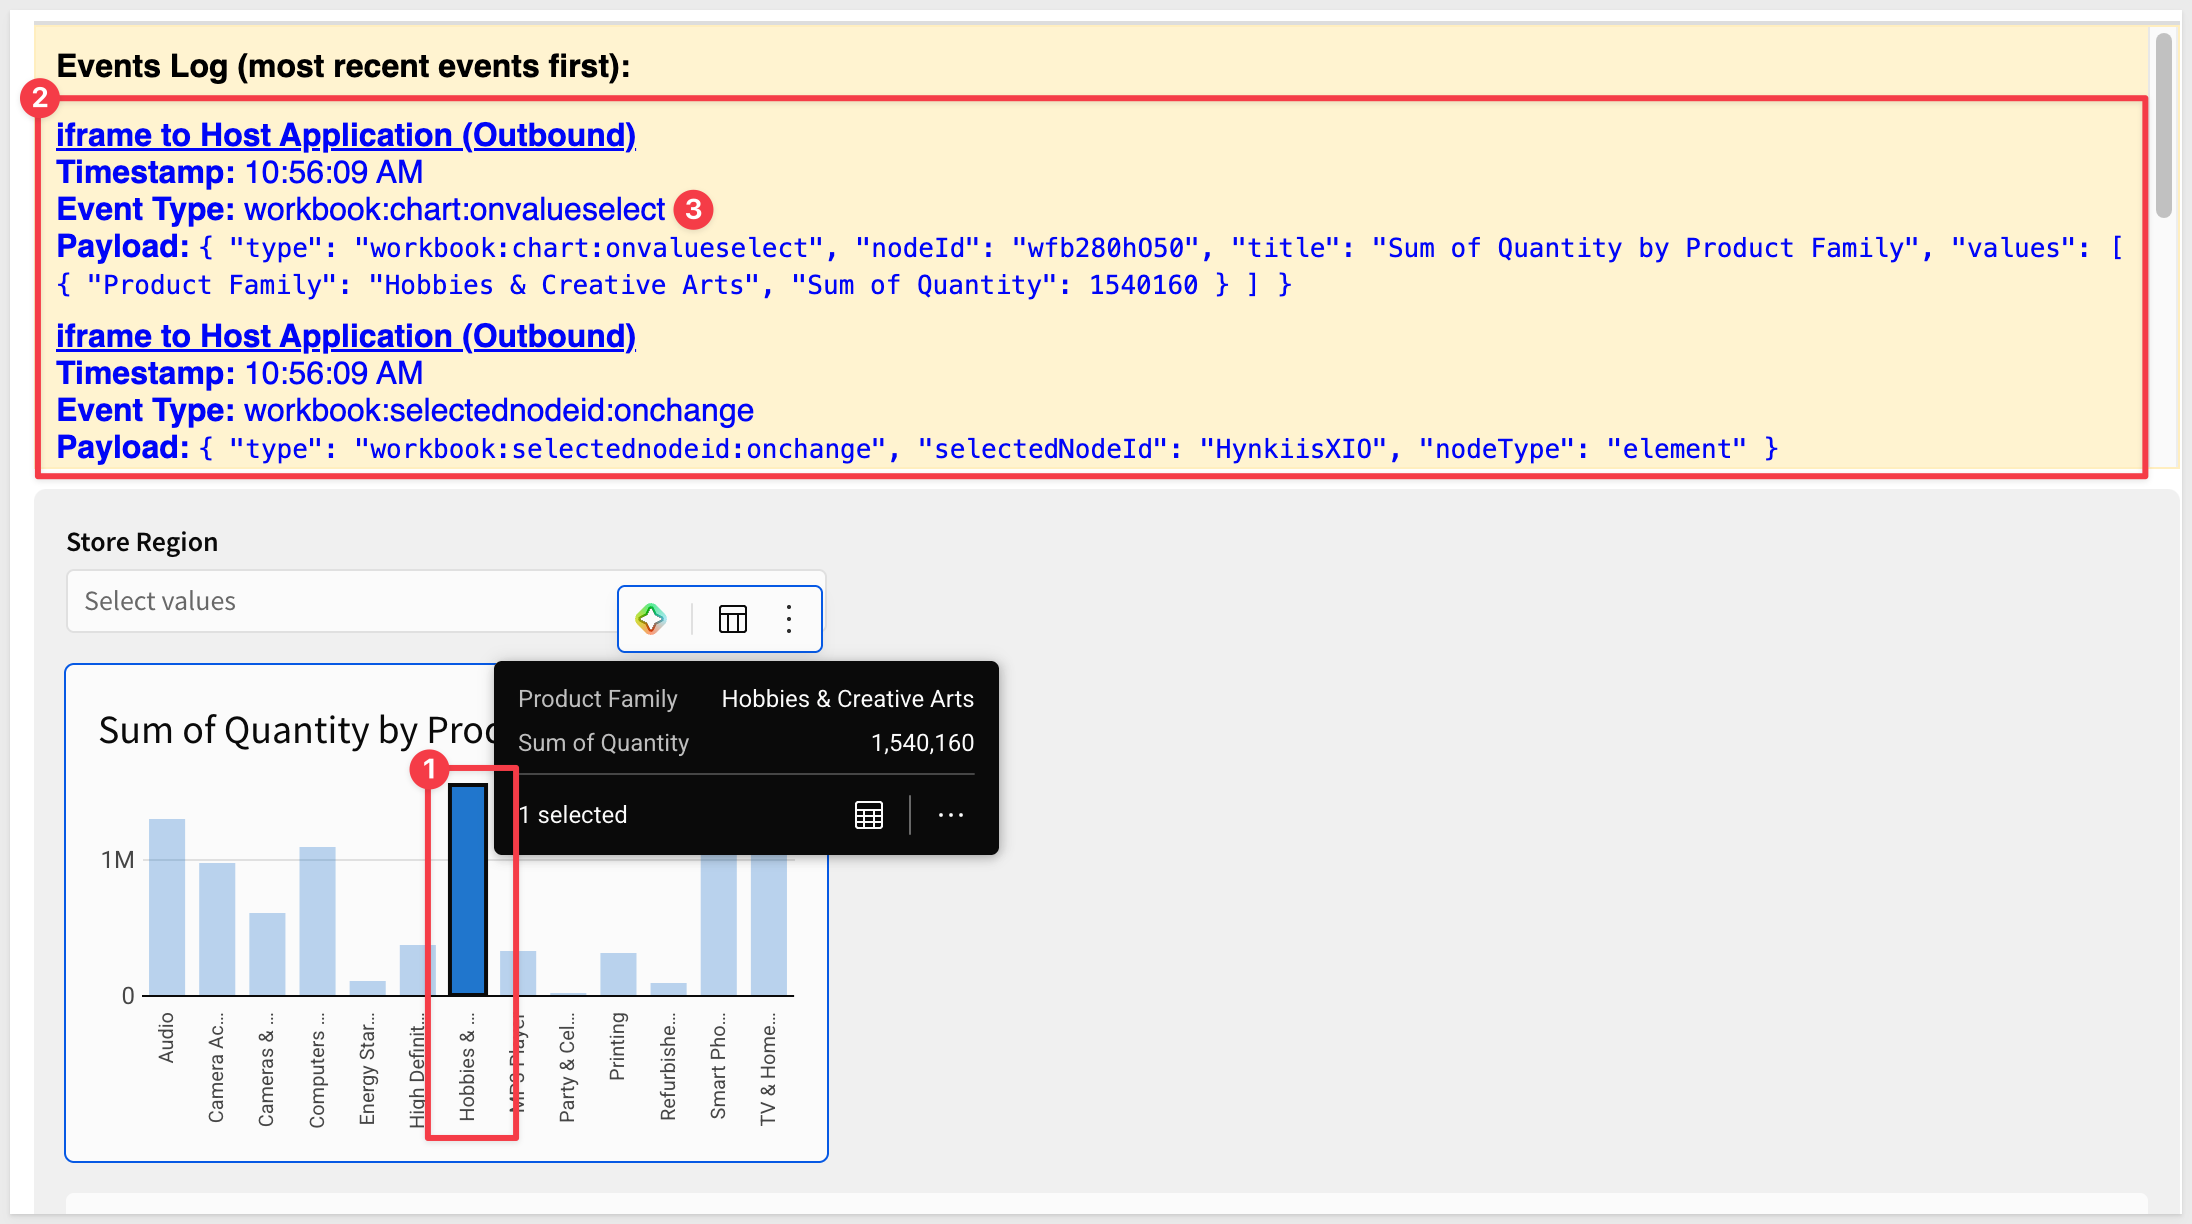
If we add a simple bar chart, we can see the workbook:chart:onvalueselect event fire by clicking on a single bar:
This works because we've added JavaScript listeners to our index.html page that render the embed.
These listeners allow us to log and inspect messages to and from the iframe — such as confirmation of variable updates or events like workbook loaded, element clicked, etc.
Two key code blocks handle message flow in our HTML file:
- Outbound events from Sigma to the host are captured using a
window.addEventListener("message")listener. - Inbound events from the host to Sigma are triggered via the
postMessage()call insetStoreRegion(region).
Each message is logged to the panel with a timestamp, type, payload, and directional label for clarity.
Outbound events from Sigma
The specific code block for outbound events is:
window.addEventListener("message", (event) => {
  if (event.origin !== "https://app.sigmacomputing.com") return;

  const { type } = event.data || {};
  console.log("iframe to Host Application (Outbound)", event.data);

  const logContainer = document.getElementById("event-output");
  const logItem = document.createElement("li");
  logItem.style.marginBottom = "8px";
  logItem.style.color = "blue";
  logItem.innerHTML = `
    <strong style="text-decoration: underline;">iframe to Host Application (Outbound)</strong><br/>
    <strong>Timestamp:</strong> ${new Date().toLocaleTimeString()}<br/>
    <strong>Event Type:</strong> ${type || "unknown"}<br/>
    <strong>Payload:</strong> <code>${JSON.stringify(event.data, null, 2)}</code>
  `;
  logContainer.prepend(logItem);
});
This block listens for messages from Sigma and logs them using the message event.
Inbound events to Sigma
This function sends variable updates to Sigma and logs the inbound message.
function setStoreRegion(region) {
  const sigma_iframe = document.getElementById("sigma-embed");
  const message = {
    type: "workbook:variables:update",
    variables: { StoreRegion: region },
  };

  if (sigma_iframe && sigma_iframe.contentWindow) {
    sigma_iframe.contentWindow.postMessage(
      message,
      "https://app.sigmacomputing.com"
    );
    console.log("Host Application to iframe (Inbound)", message);

    const logContainer = document.getElementById("event-output");
    const logItem = document.createElement("li");
    logItem.style.marginBottom = "8px";
    logItem.style.color = "green";
    logItem.innerHTML = `
      <strong style="text-decoration: underline;">Host Application to iframe (Inbound)</strong><br/>
      <strong>Timestamp:</strong> ${new Date().toLocaleTimeString()}<br/>
      <strong>Event Type:</strong> ${message.type}<br/>
      <strong>Payload:</strong> <code>${JSON.stringify(message, null, 2)}</code>
    `;
    logContainer.prepend(logItem);
  }
}
Here is an explanation of the getElementById call:
The postMessage() call sends a new value for the variable StoreRegion to the Sigma iframe. postMessage() is a global method that safely enables cross-origin communication between a host page and an embedded iframe.
Here is an explanation of the postMessage() call:
sigma_iframe.contentWindow.postMessage({type:"workbook:variables:update", variables: {StoreRegion: "West"},}, 'https://app.sigmacomputing.com',);
In this QuickStart, we explored inbound and outbound event handling for Sigma embeds, demonstrating how to exchange messages between the host application and Sigma using HTML and JavaScript.
Additional Resource Links
Be sure to check out all the latest developments at Sigma's First Friday Feature page!
Help Center Home
Sigma Community
Sigma Blog