This QuickStart will guide you through the implementation of a quick, easy, and rapid to develop method to embed Sigma content in a Streamlit application. Embedding Sigma content within Streamlit applications is a powerful tool-set that enables and empowers developers, data analysts, and even business users to create interactive data applications backed by the power of Sigma.
What is Streamlit
Streamlit is an open source app framework in Python language. It will help us to create interactive web apps for data science and machine learning in a short time. It is compatible with all major Python libraries, such as scikit-learn, Keras, PyTorch, SymPy(latex), NumPy, pandas, Matplotlib, and more.
Streamlit is intended to provide Snowflake users the ability to rapidly deploy applications and share data.
Teams use Streamlit to build Python applications to benefit from:
- Rapid Development Cycle
- Simplified Coding Experience
- Flexible Components
- Internal or External Facing
- Extensible Embedding
Streamlit works great with Sigma to accelerate your path of deployment for any data applications built, especially those that rely on visualizations, while providing the user with our industry-differentiated ability to deep dive into the data powering those visuals and unlocking the power of your data warehouse.
Building the analytics front-end In Sigma provides:
- End users a familiar, spreadsheet-like interface.
- No Code or Semantic knowledge required.
- Full Role-based Access Control Support.
- Data Governance and Lineage.
- Full Feature Set While Embedded.
- Ability to leverage massive datasets
For more information on Sigma's product release strategy, see Sigma product releases.
Target Audience
Snowflake customers who are using (or interested in using) Streamlit and want to also embed Sigma content in a Streamlit application. Sigma customer who are looking to rapidly develop and deploy data applications in Streamlit.
Prerequisites
- A computer with a current browser. It does not matter which browser you want to use.
- Access to your Sigma environment. A Sigma trial environment is acceptable and preferred.
- A development environment (or RTE) of your choice. In this QuickStart we use Microsoft VSCode with related extensions.
- A Python 3.8, or later, environment. In this QuickStart we use Miniconda for the required Python environment and packages as a Python Virtual Environment is recommended.
What You'll Learn
What is Snowflake Streamlit and how can we embed Sigma content into it.
What You'll Build
We will use Streamlit and Sigma to build a webpage that embeds a Sigma dashboard:


We will start by setting up our local Python environment based on Miniconda, which is a "thin" version of Conda (Anaconda). If you already have an existing Python environment, you may make use of that or proceed with Miniconda as well.
Conda is an open-source, cross-platform, language-agnostic package manager and environment management system. It was originally developed to solve difficult package management challenges faced by Python data scientists, and today is a popular package manager for Python and R.
Miniconda is the much smaller (~200 MB vs. ~4+ GB) installer version of Conda and will save us time and disk-space compared with installing the full Conda application.
It includes only Conda, Python, the packages they depend on, and a small number of other useful packages, including pip, zlib and a few others. Packages that are not included, have to be called at runtime or installed individually.
Use the following link to download the Miniconda. Download the version that includes Python 3.8 or above based on your operating system and its processor (x86 32 bit or 64 bit, Apple Silicon, or etc.)
Use the following link to download the Miniconda. Download the version that includes Python 3.8 or above based on your operating system and its configuration (32 bit or 64 bit).
After downloading the operation system appropriate version from Miniconda, go ahead and run the installation, accepting the license and all the defaults.
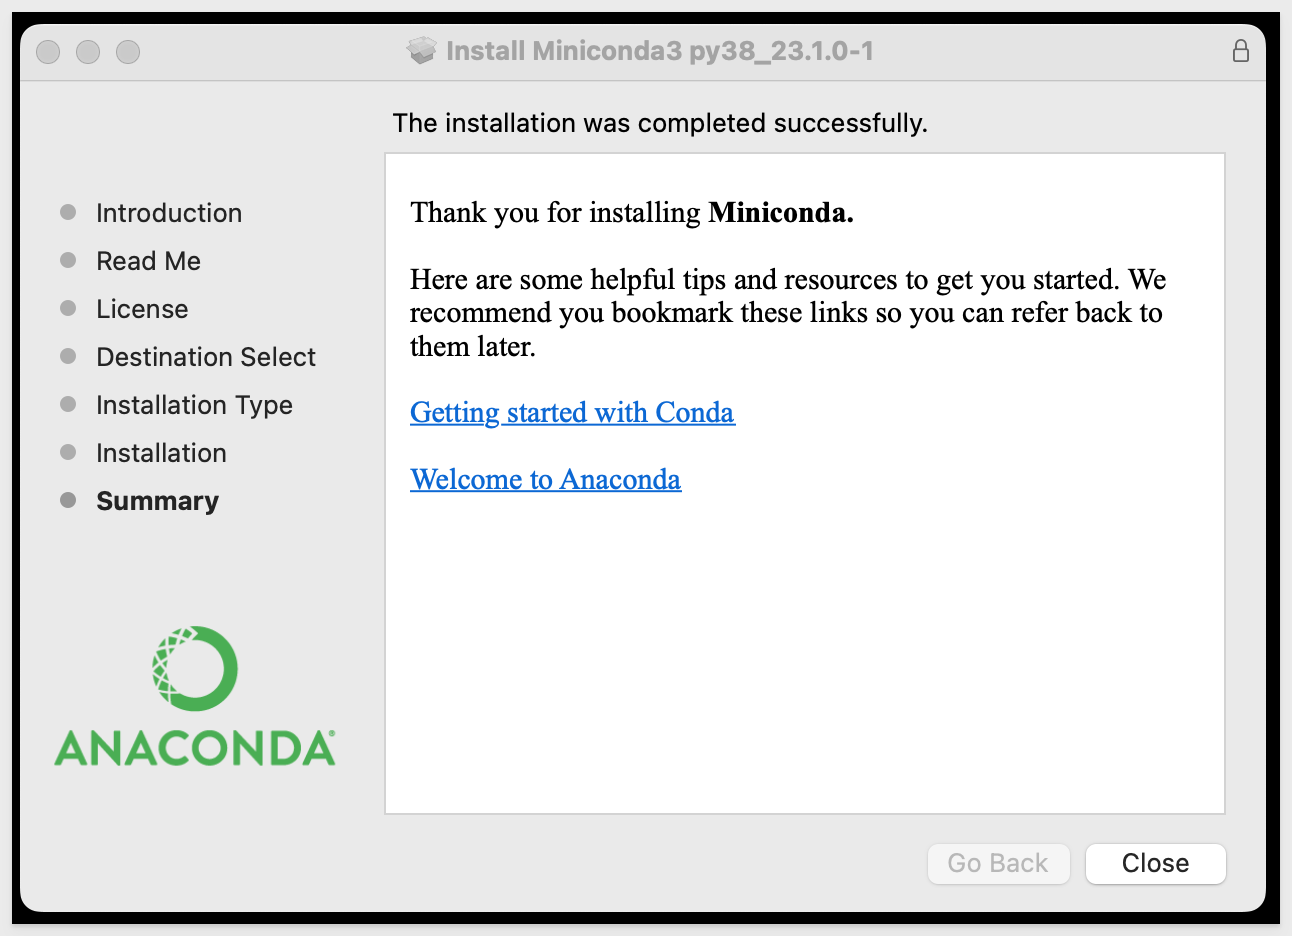
Now that Miniconda is installed (along with our selected version of Python; v3.8), we can move to the next step.
Install VSCode from Microsoft's download site.
Run the installation with all defaults.
Once the software is installed, we need to configure it for our use case.
Open VSCode and click the sidebar icon for Extentions.
Search for Python and select the extension from the list as shown. Click Install:
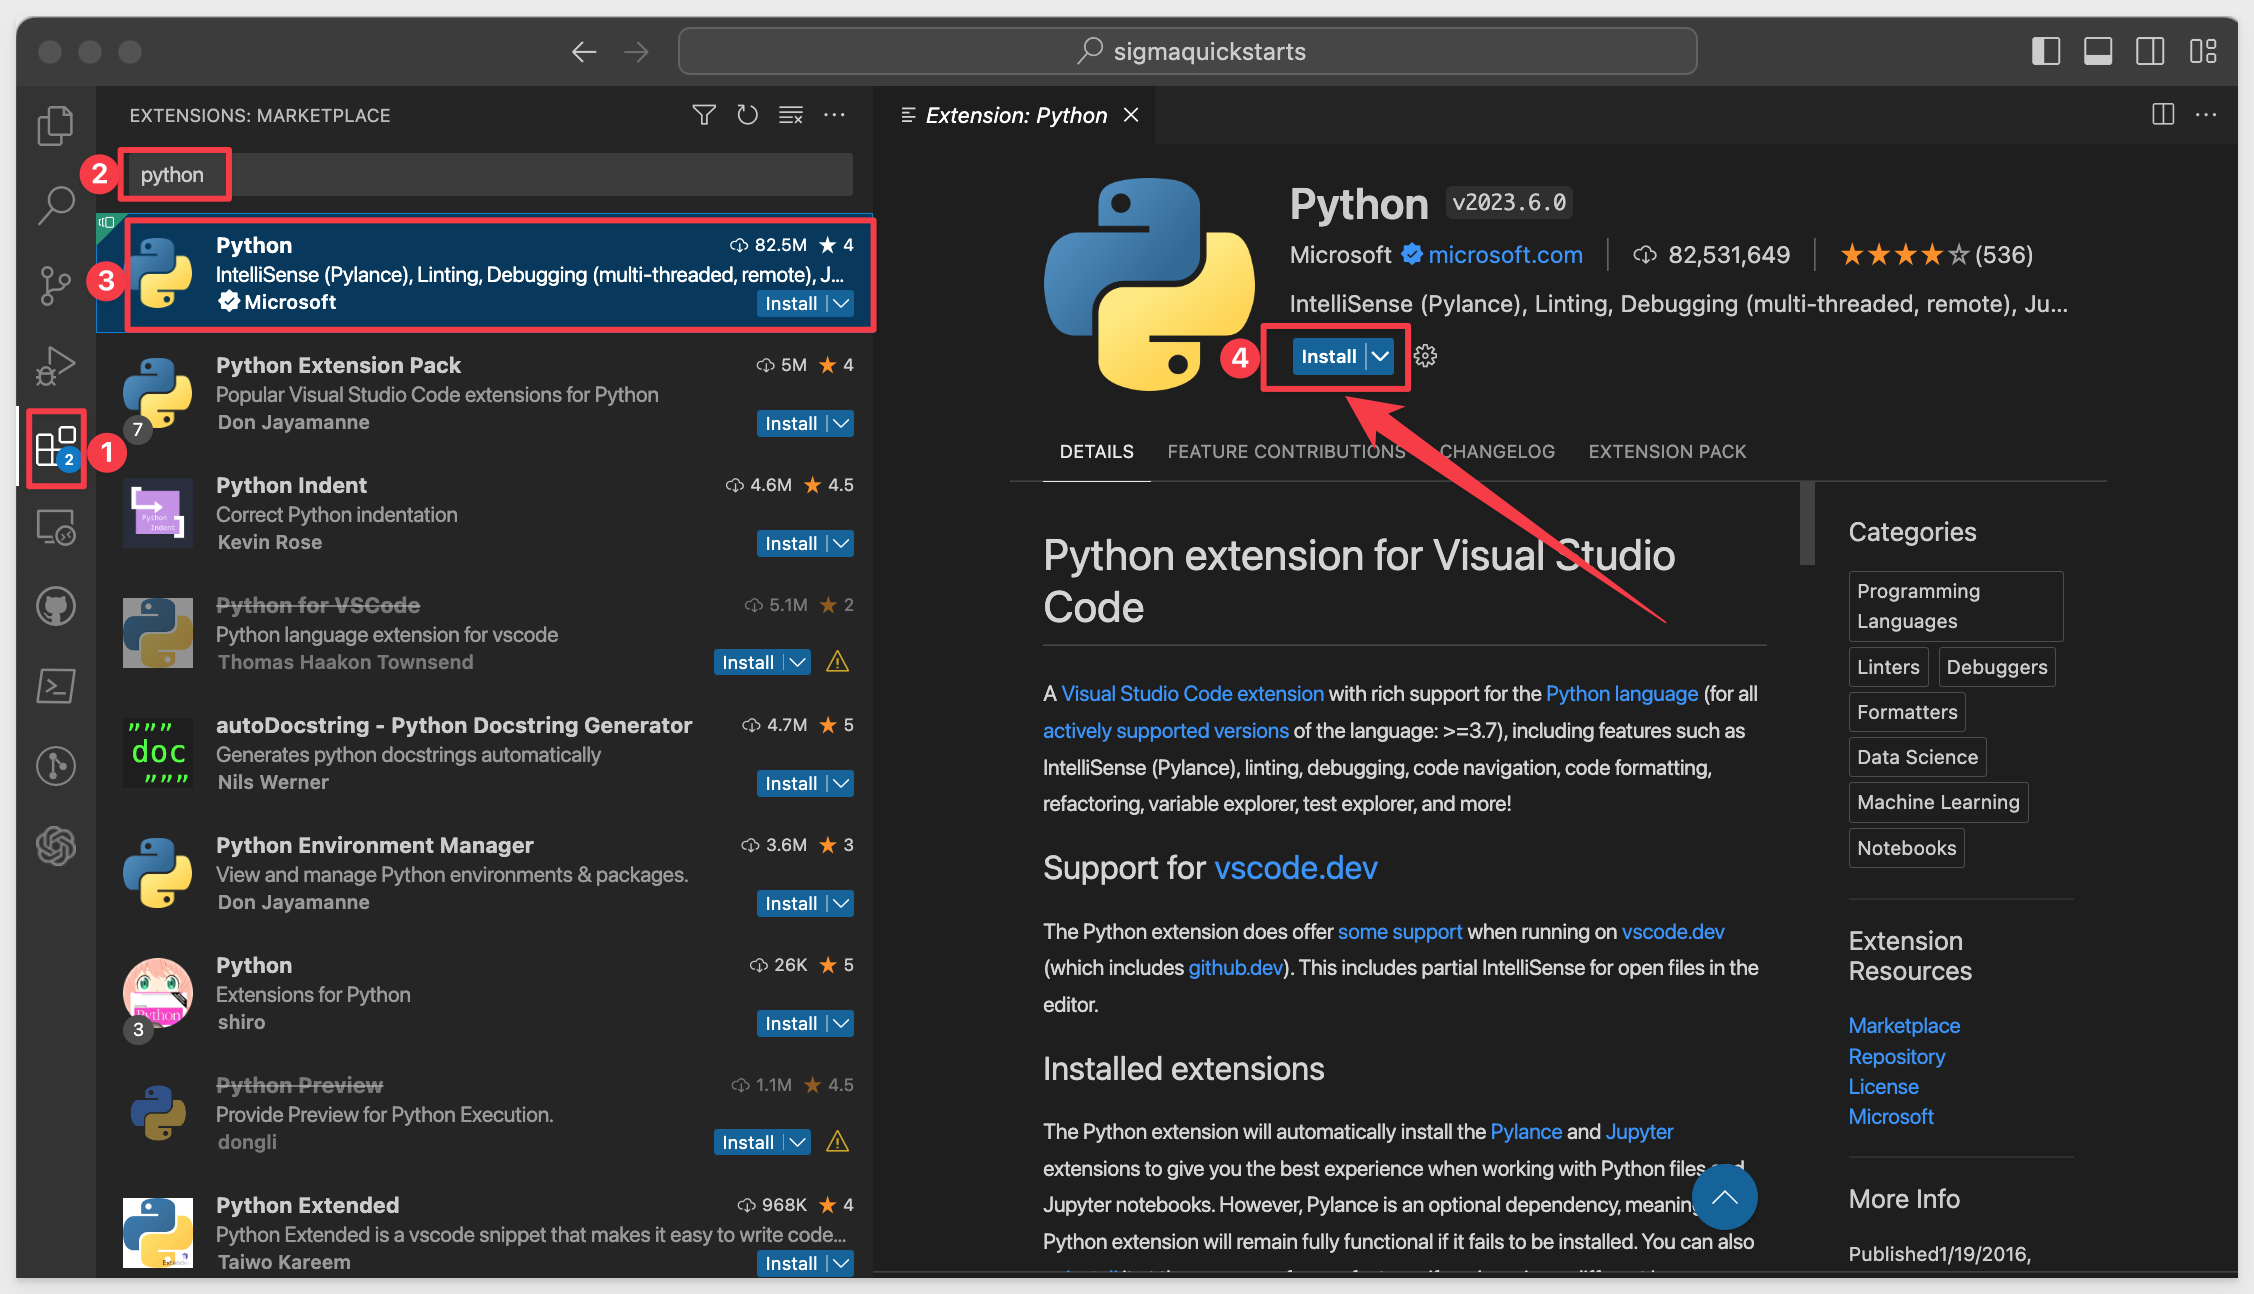
Link to Pylance Extension page.
We now have a development environment ready, but we need to do a few more steps.
Since we installed Miniconda, every available Conda package is not present in our system. While this saves install time and saves disk-space, we will have to be aware that each VScode project will need to have required package dependencies installed at runtime.
We could solve this by installing packages globally, but we prefer to avoid that and maintain tight control of our development environment.
To properly support this control, we will make use of Python environments to create project/package isolation.
For our first project, we will create a Python environment called streamlit.
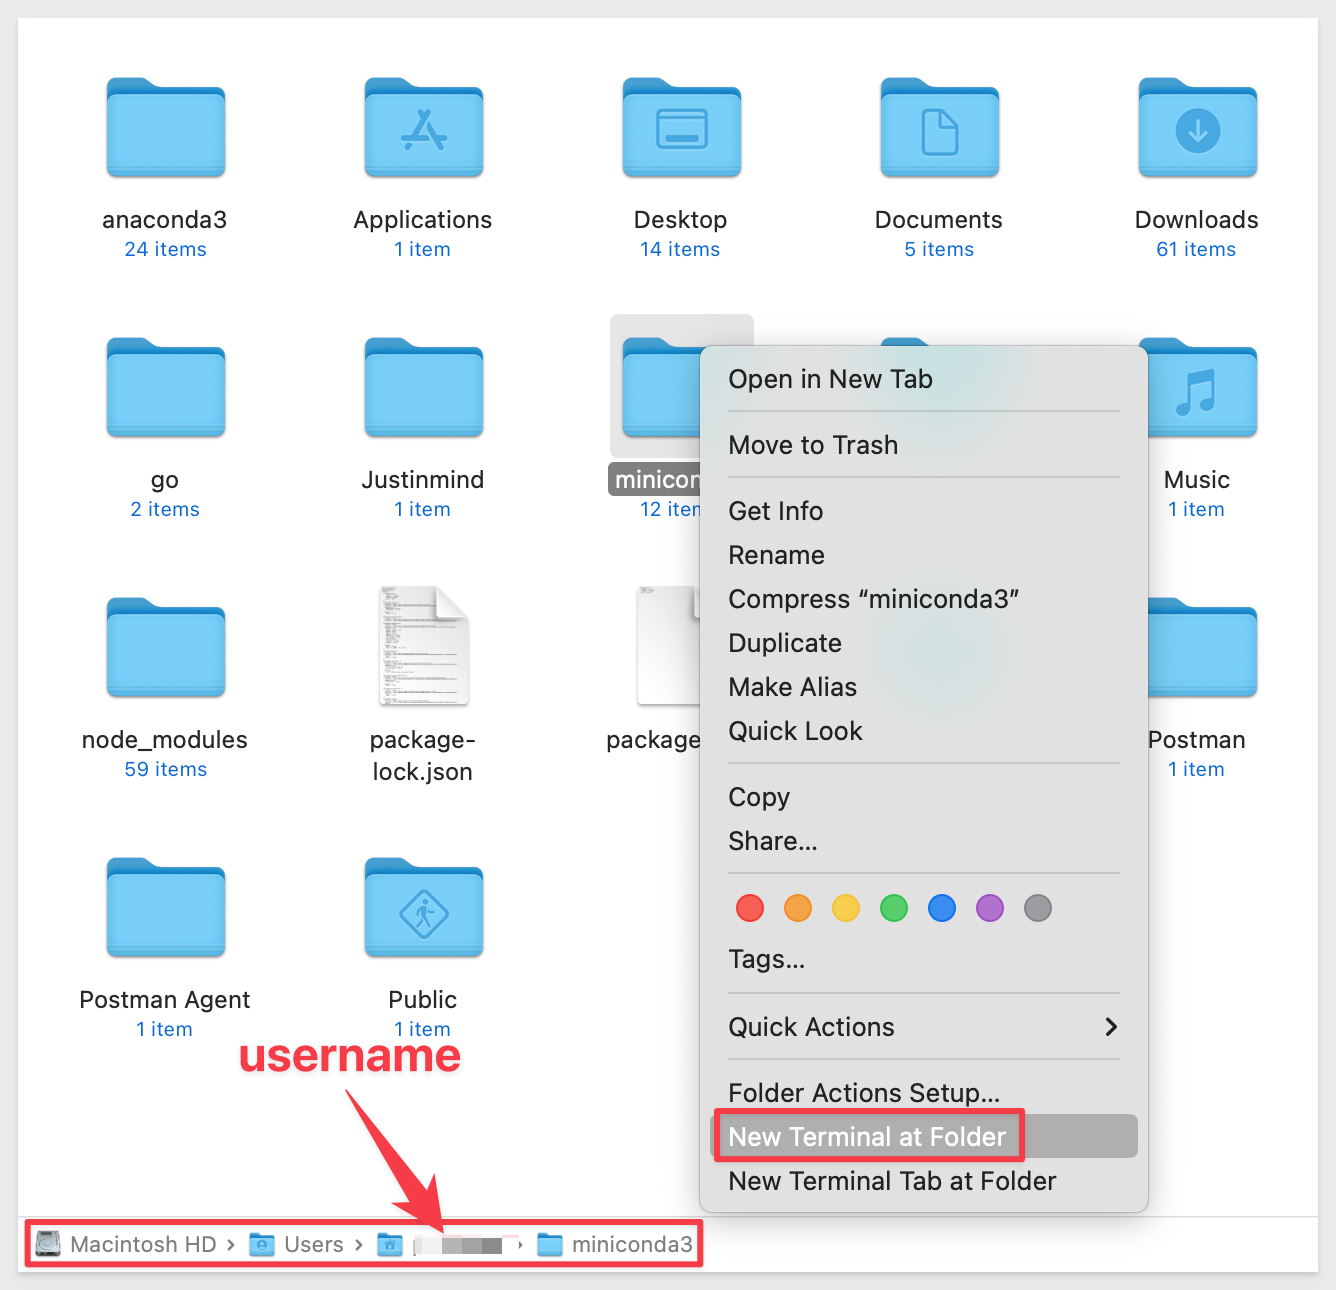
In our local computer, navigate to where Miniconda is installed. The default is based on your computer username.
Right-click and open a terminal session:
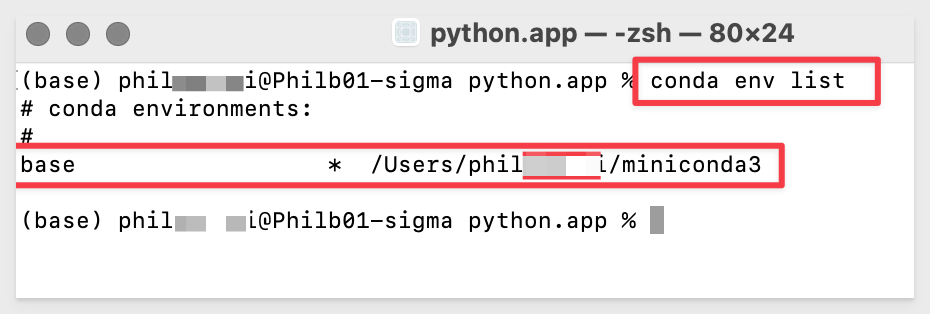
First, let's see what environments already exist. Run the command:
conda env list
We should see the "base" environment that is included with Miniconda.
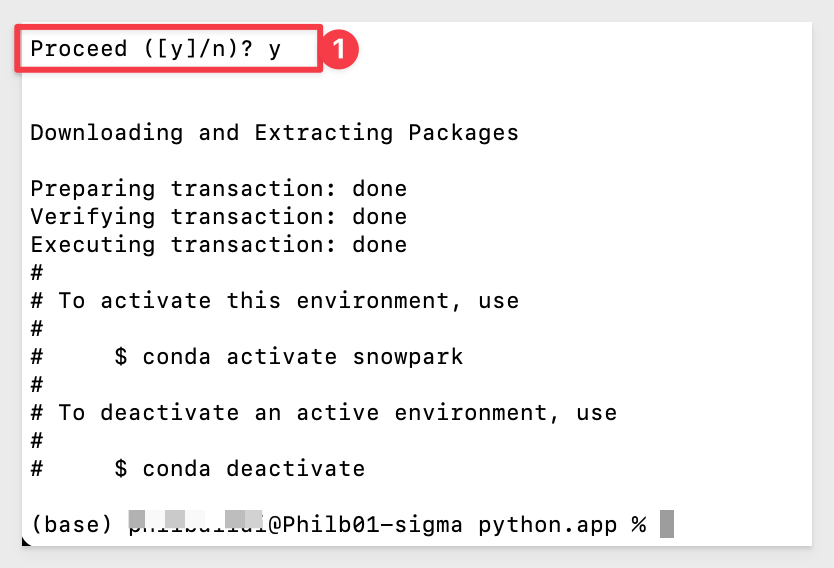
Now let's create our "streamlit" environment for our VSCode project. Run the command:
conda create --name streamlit python=3.8
When prompted to proceed, type y and hit return:
We need to activate our new environment. Run the command:
conda activate streamlit
Listing the environments again, we should see streamlit being the current select noted by the "*":
conda env list
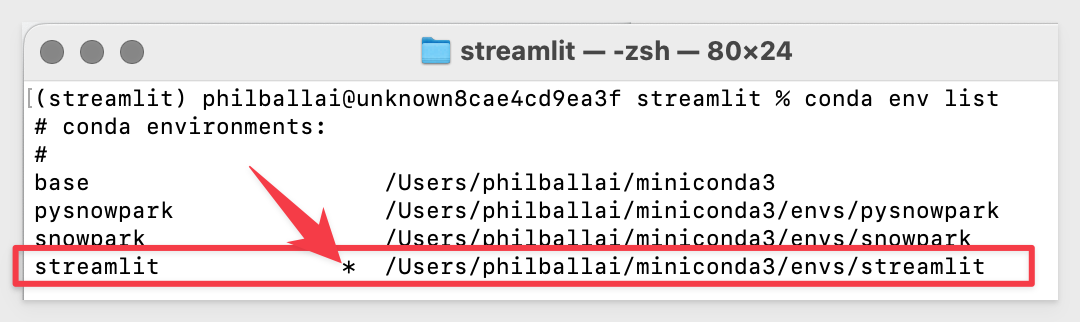
We are ready with our new Conda environment called streamlit.
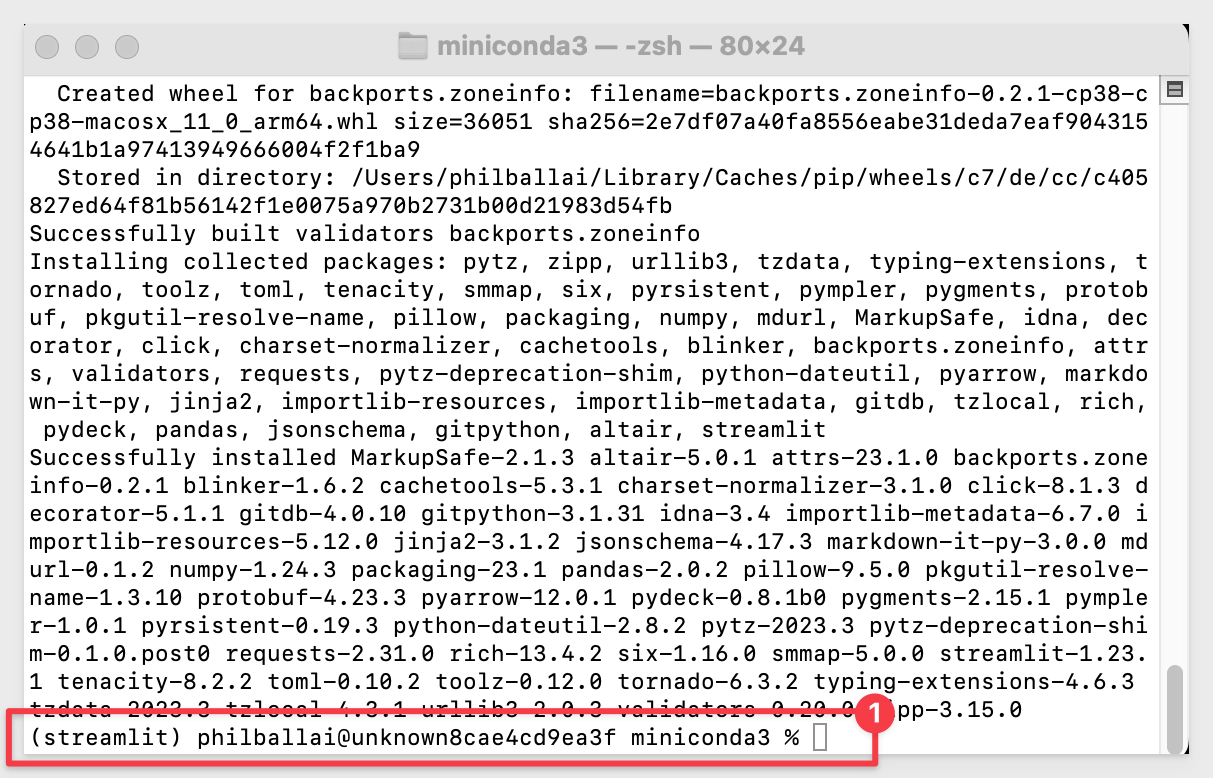
To install Streamlit on our local computer, execute the following command in Terminal:
pip install streamlit
A lot of information will be displayed and the command prompt will appear when done. There should be no error messages:
Now we can test our local Streamlit environment. Execute the following command in Terminal:
streamlit hello
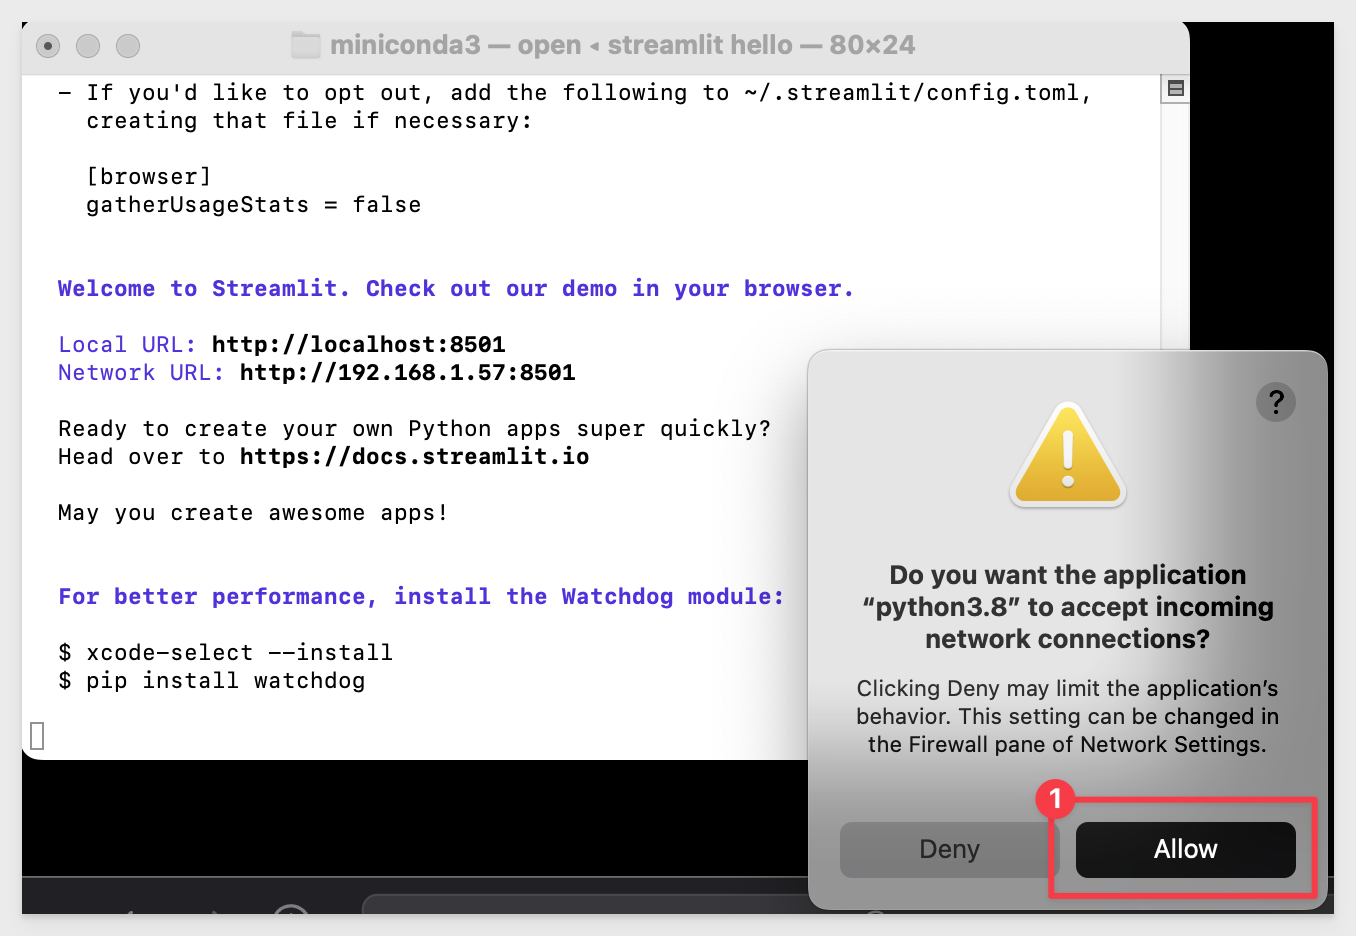
Click the Allow button to allow Python to accept incoming network connections:
The following prompt should appear in terminal asking for email address (we will skip over that, so leave it blank and press Enter):

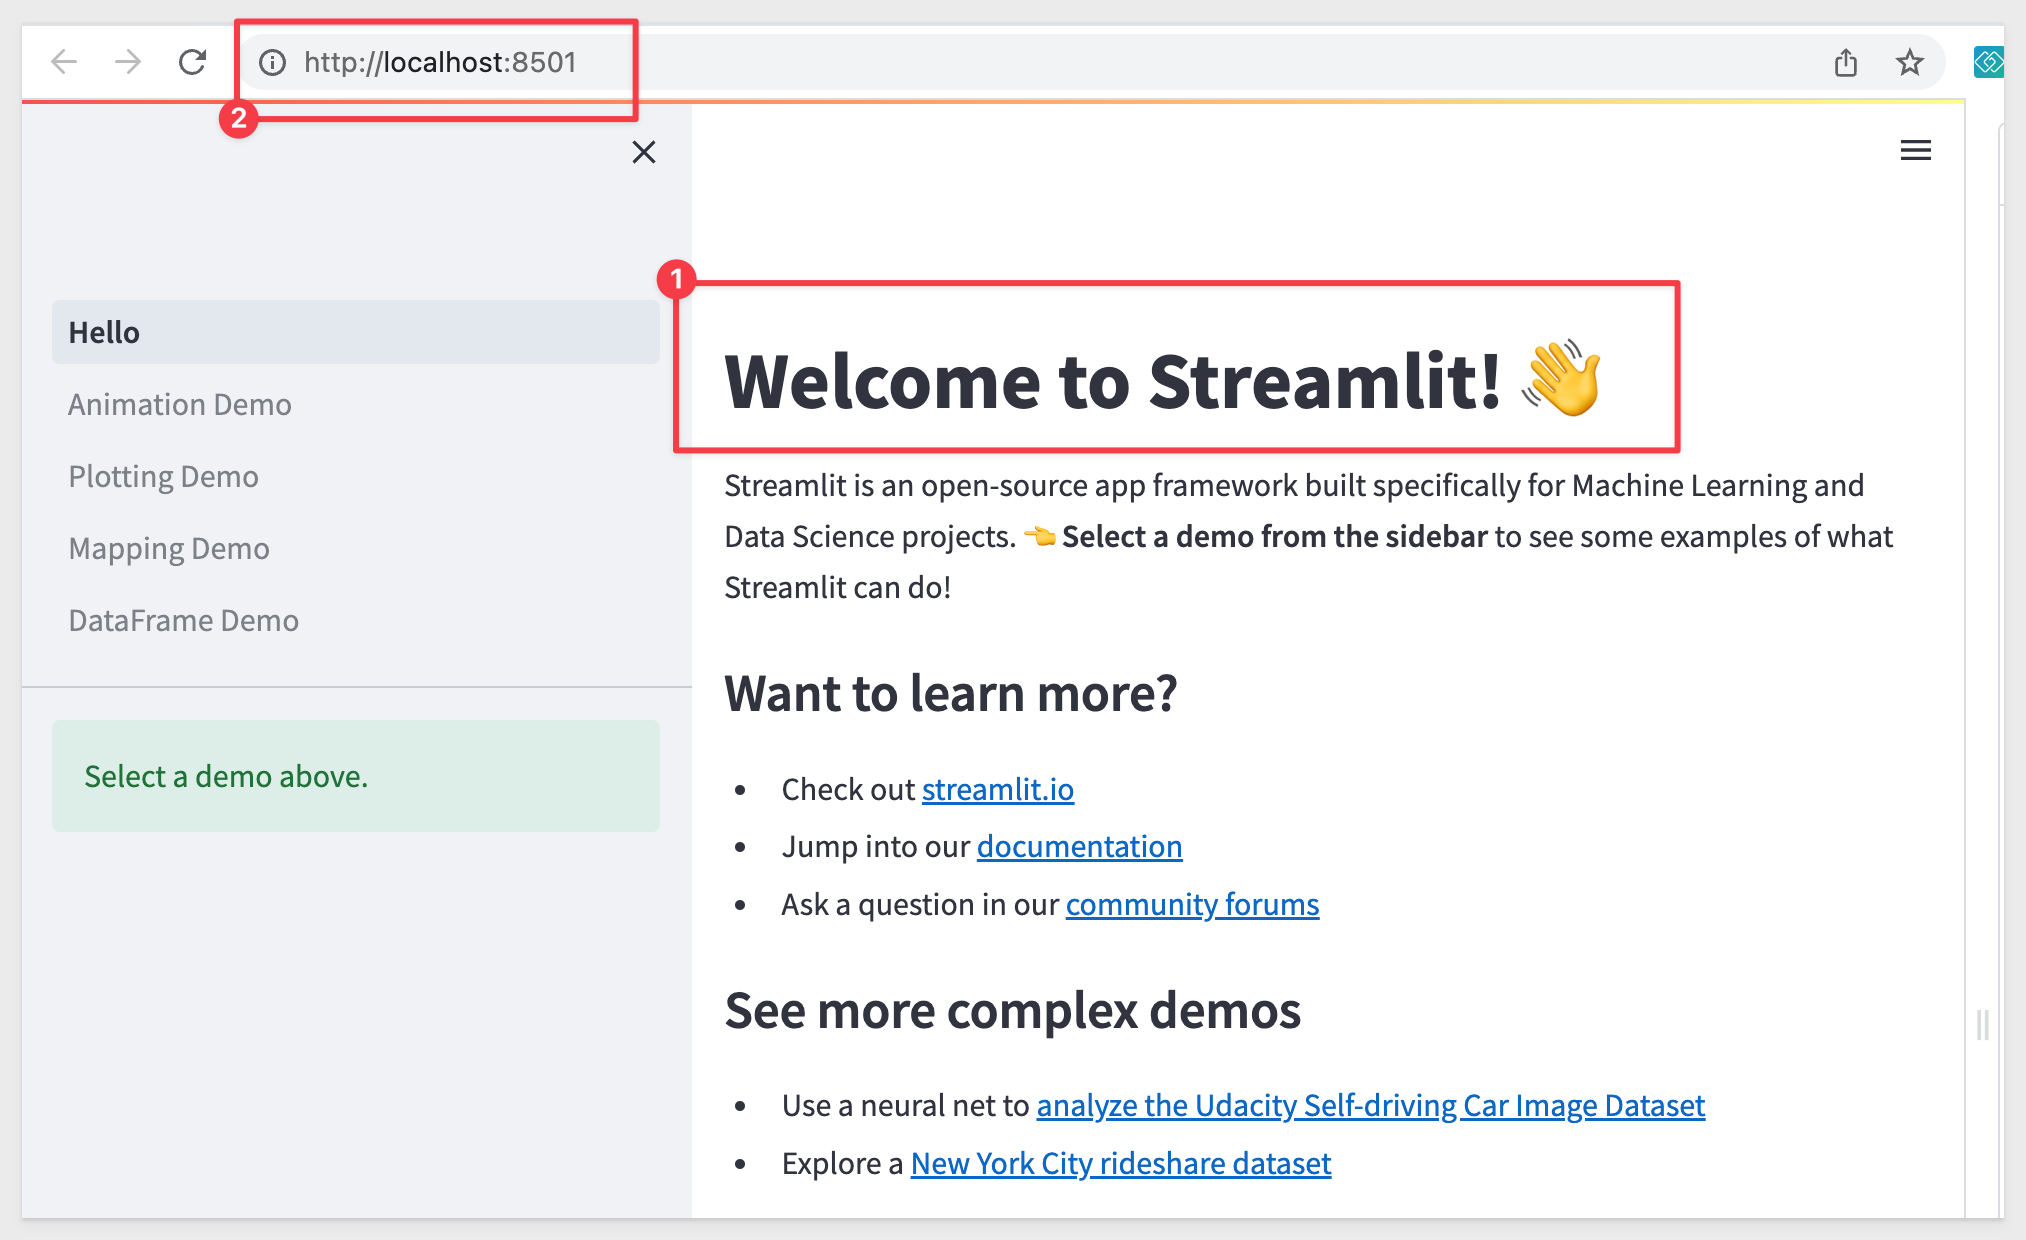
Streamlit will automatically open your default browser to the standard webpage that comes with Streamlit:
To make this easier, we have stored the project code in Git. While you may clone the entire repository (it is not that large), we want to avoid cloning sections of the repository that are not of immediate interest.
Instead, we will use VSCode and terminal to perform a git sparse-checkout of the specific project folder we are interested in. A few extra steps, but cleaner local project folder.
Open VSCode and a new terminal session.
In terminal, navigate to the desired directory where we want to clone the repo folder into.
For example:
cd {/path/to/your/directory}
Make a new directory:
mkdir embedding_streamlit
Change to the new directory:
cd embedding_streamlit
Execute the terminal command:
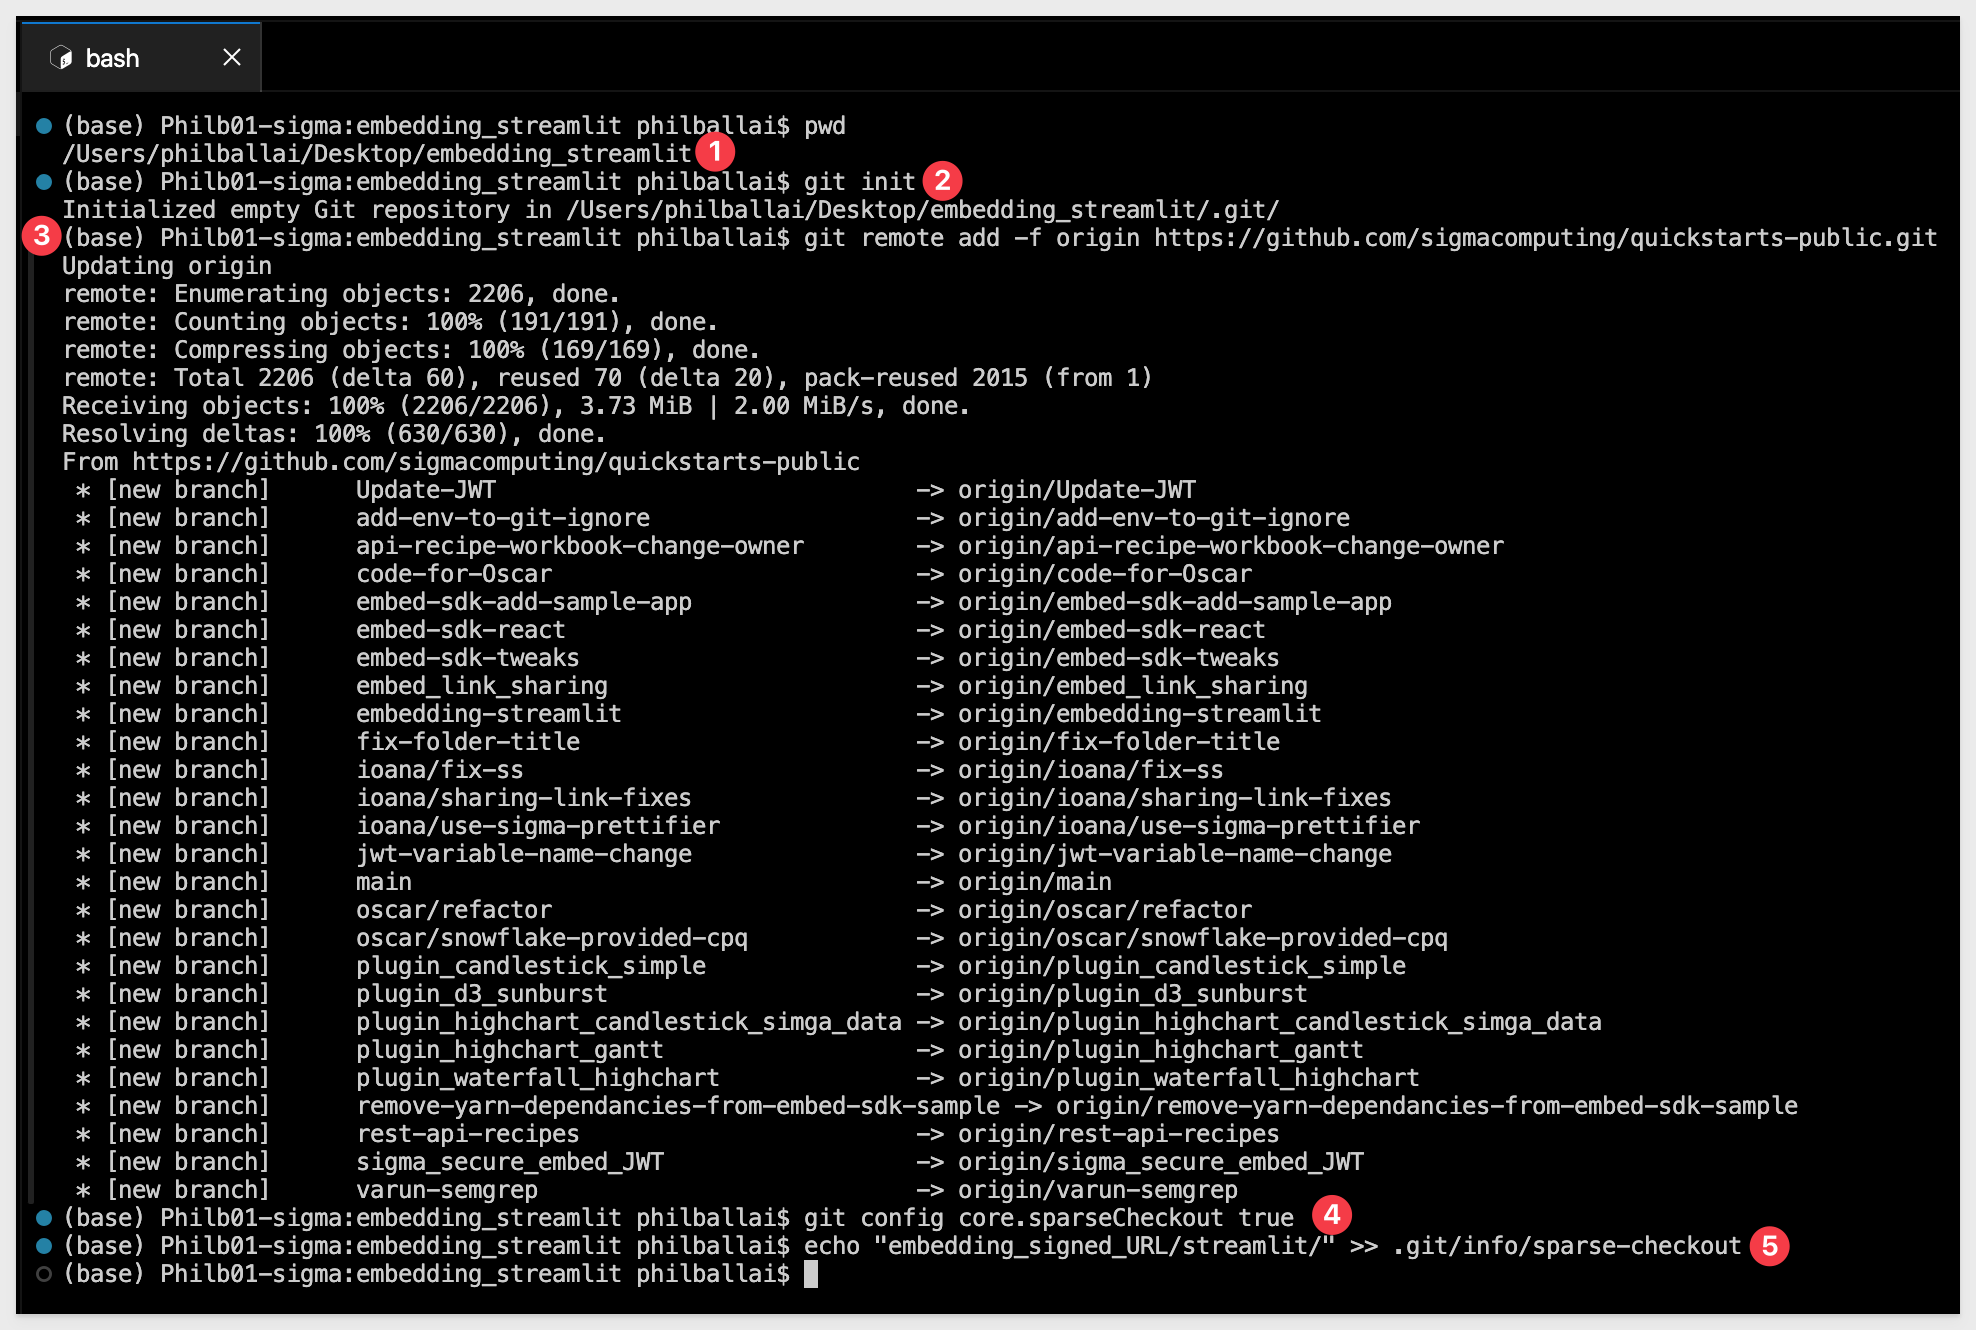
git init
Add the remote repository as the origin:
git remote add -f origin https://github.com/sigmacomputing/quickstarts-public.git
Enable sparse checkout:
git config core.sparseCheckout true
Specify the folder you want to clone by adding it to the sparse-checkout configuration:
echo "embedding_signed_URL/streamlit/" >> .git/info/sparse-checkout
At this point, we have run each command and not seen any errors:
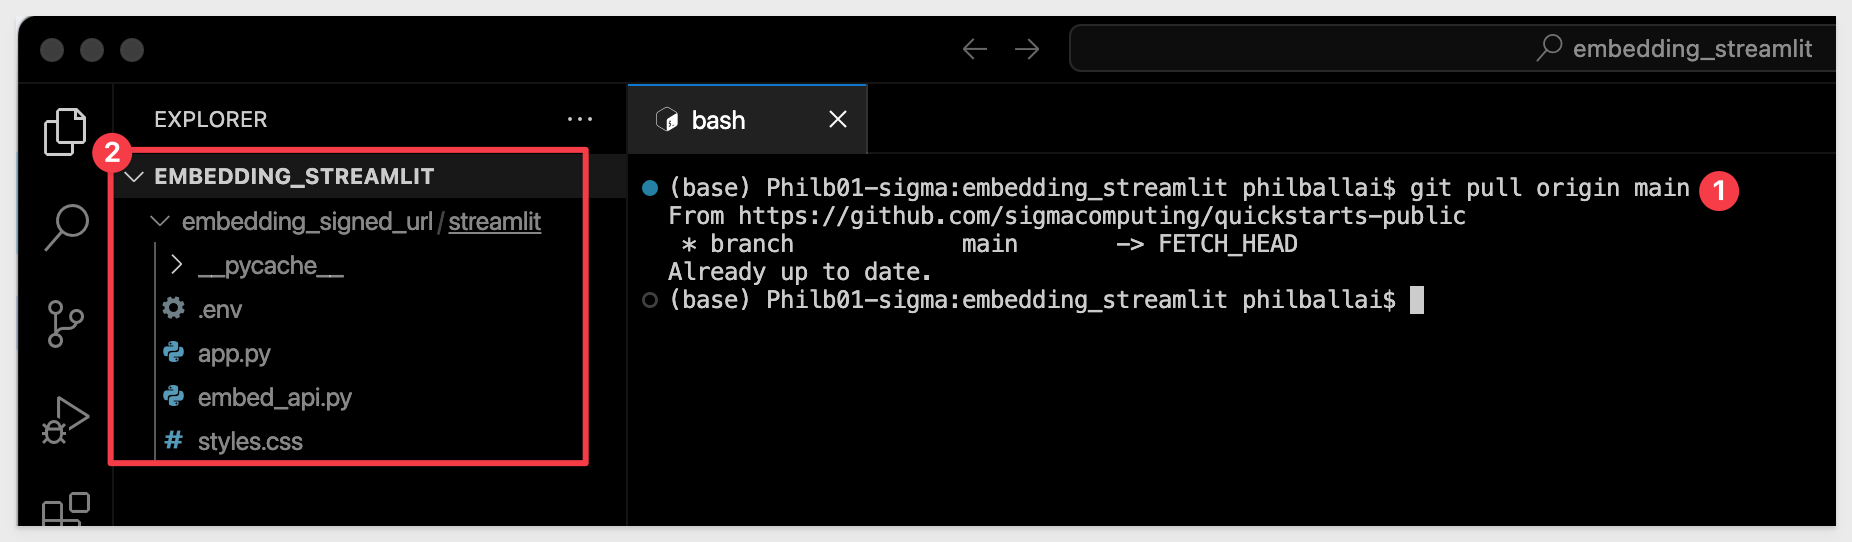
Finally, pull the specified folder from the repository:
git pull origin main
We can now see the project called streamlit:
The project has almost everything we need, but we will need some embedded content and credentials from Sigma before we can test this out.
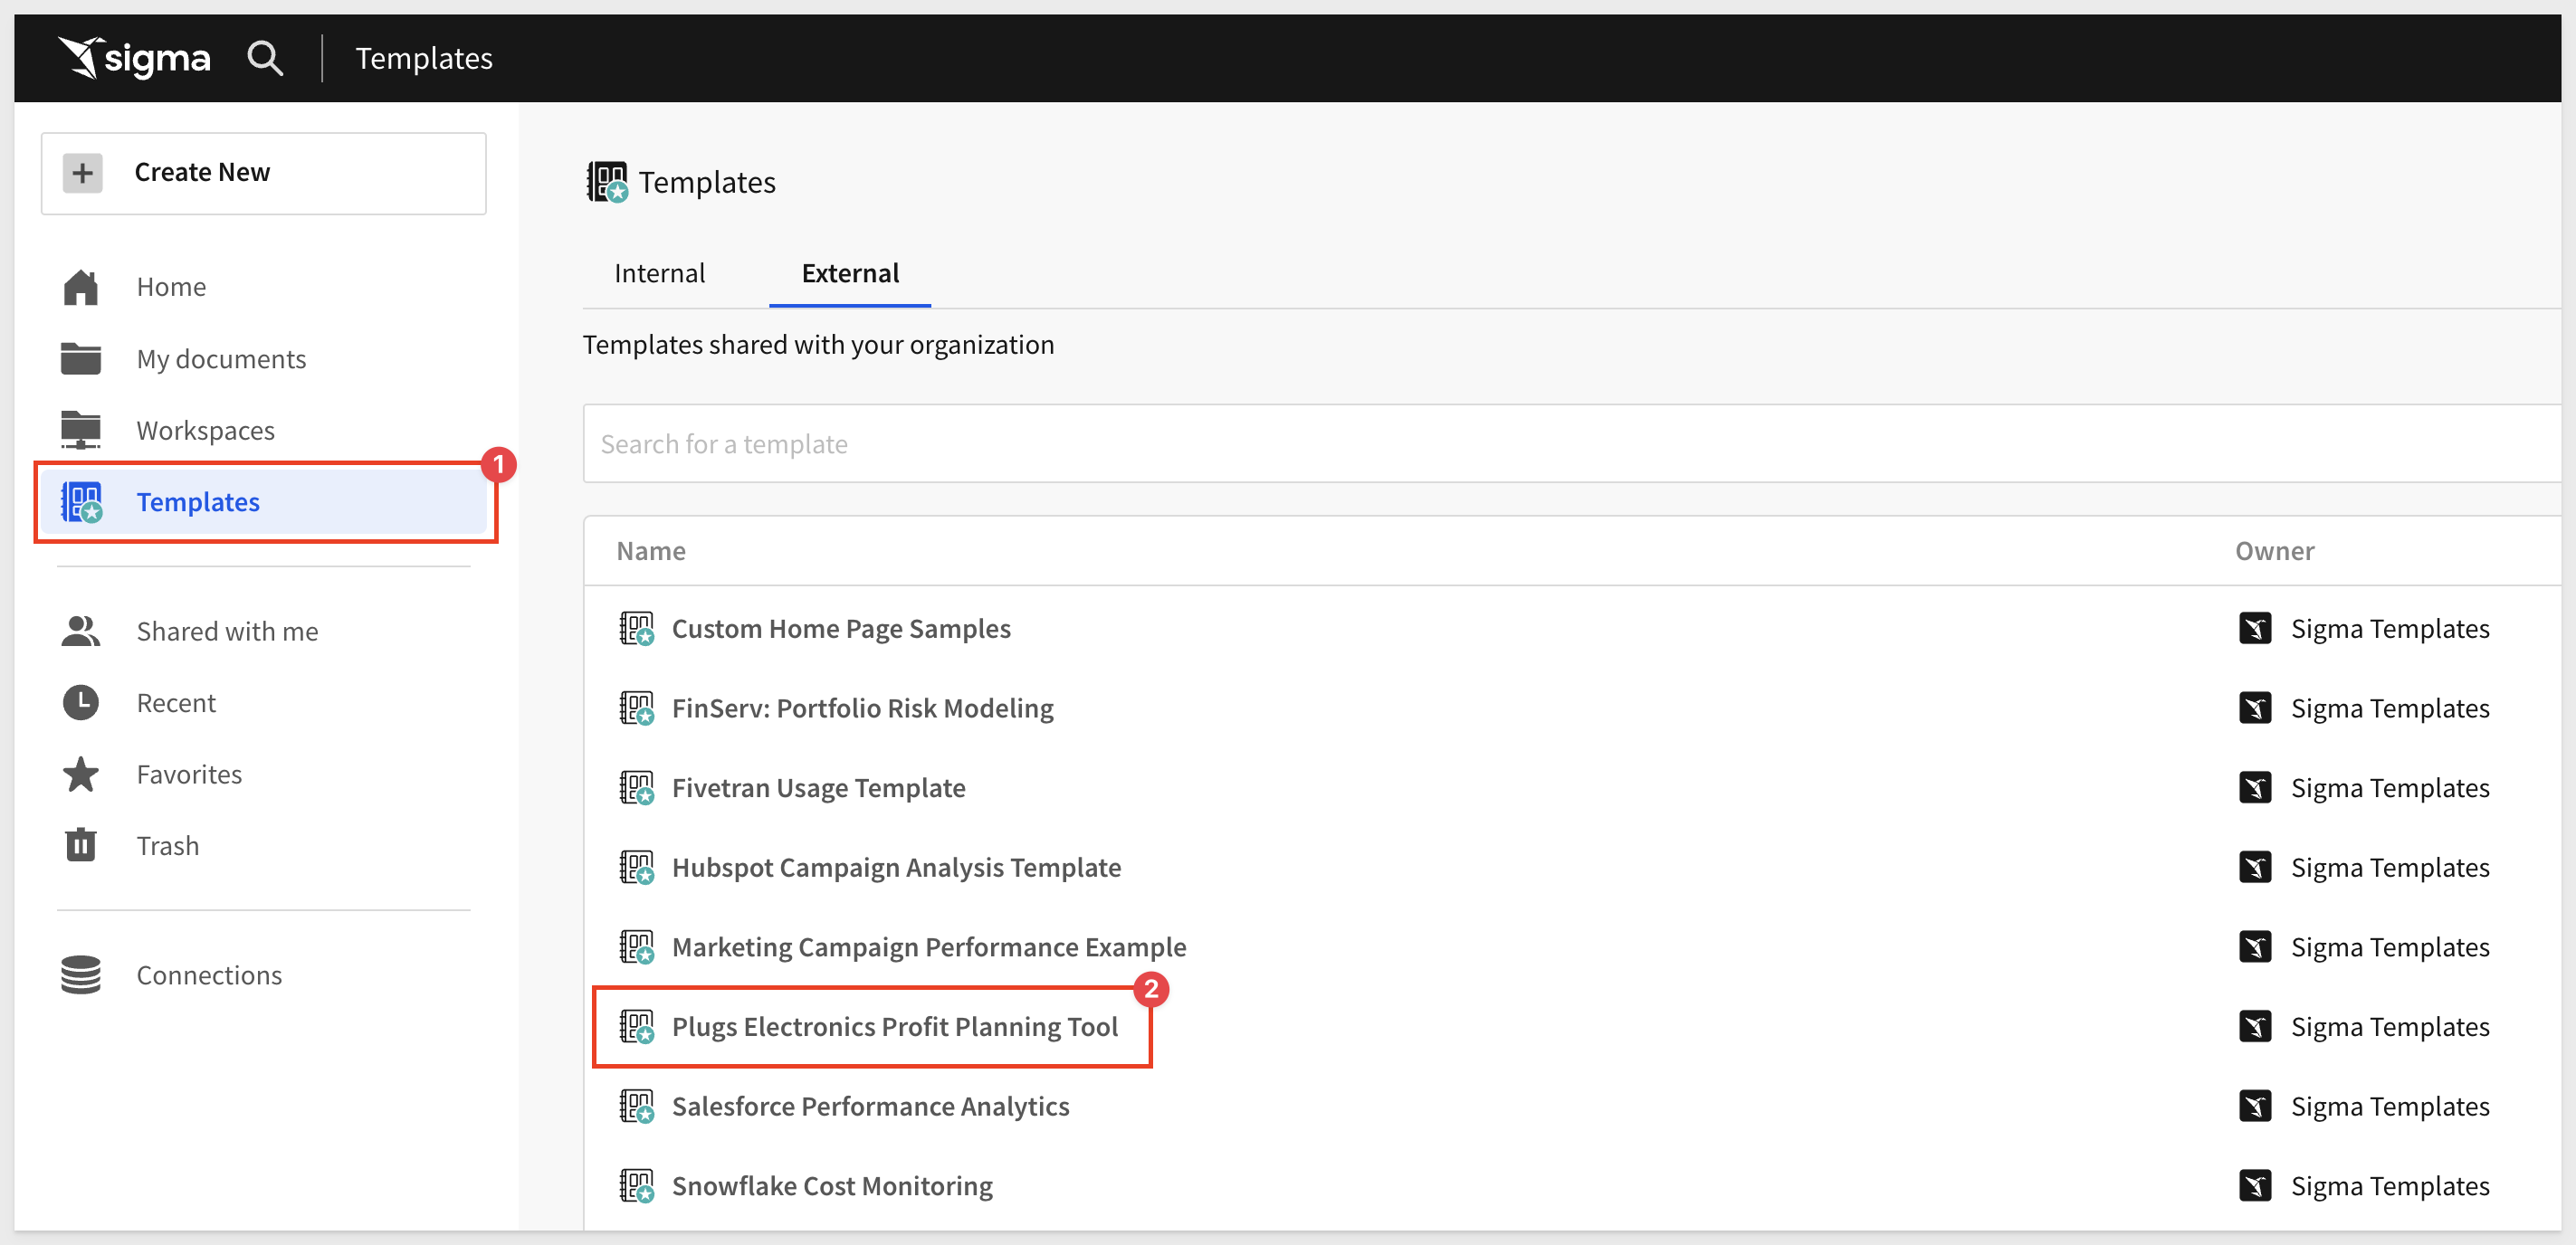
We will need something to embed into Streamlit from Sigma. To keep this simple, we will embed the Plugs Electronics Profit Planning Tool Template.
Log into Sigma (as Administrator) and navigate to Templates and click the Plugs Profit Planning Tool Template:
Dismiss the pop-up help regarding swapping of data sources. We will just use the sample data provided.
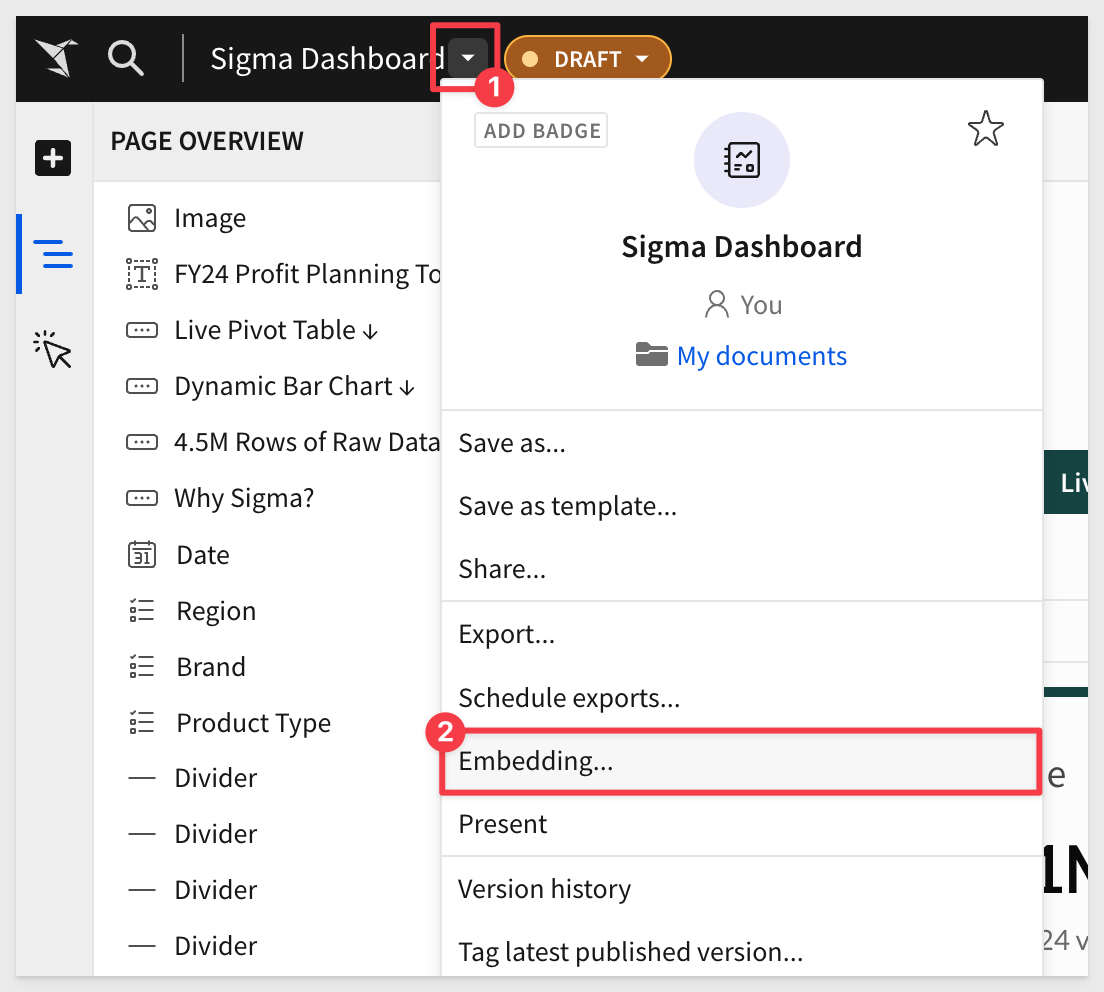
Click the Save As button in the upper right corner and use the name Sigma Dashboard; click Save.
Now click the drop menu (as shown below) and select Embedding:
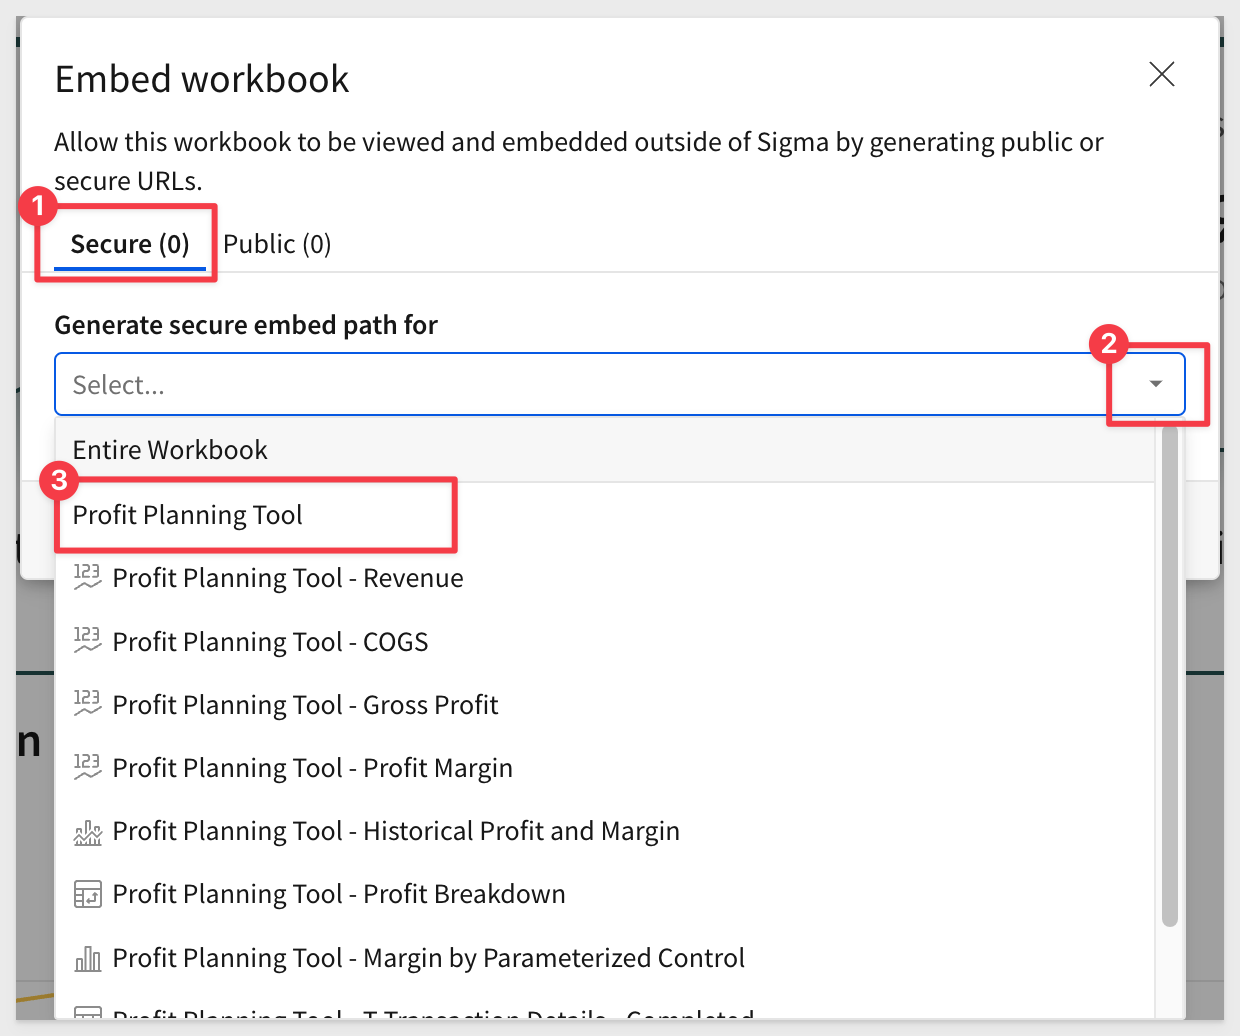
In the Embed workbook pop-up, click the Secure tab, and then the drop arrow, followed by the Profit Planning Tool. This will define all the elements on the Workbook's Dashboard page to be embedded.
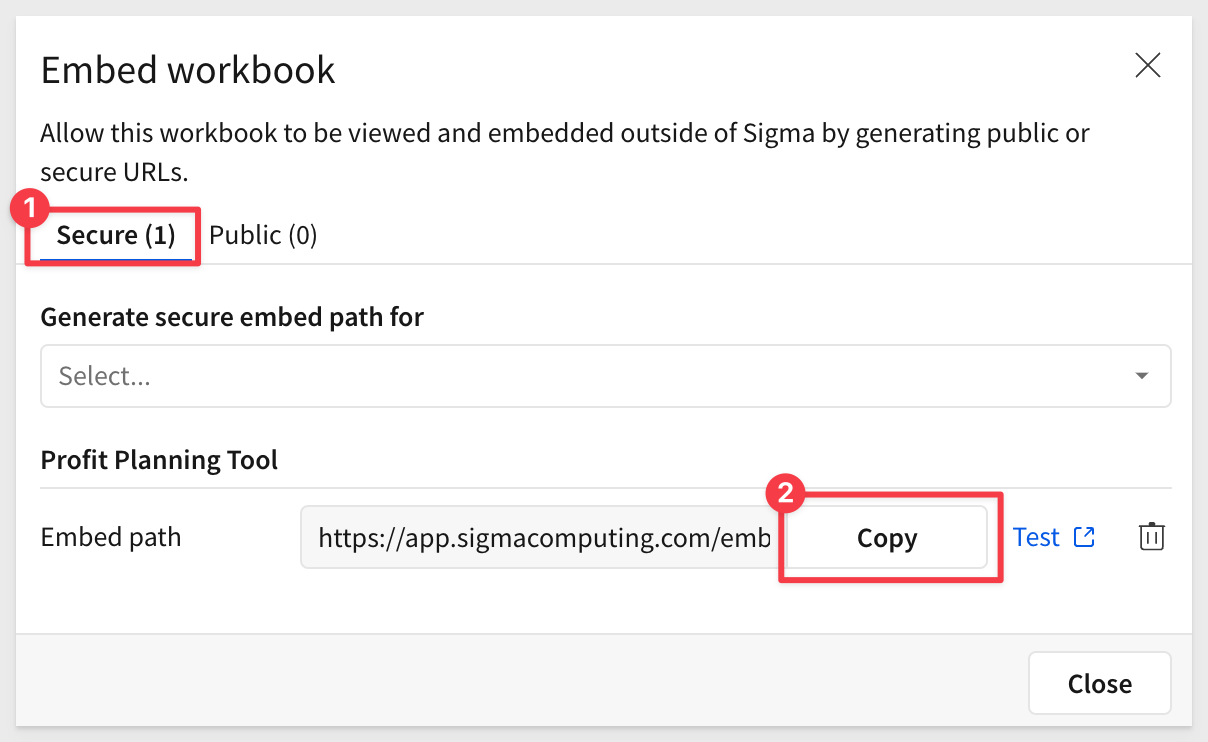
Once we selected to embed the Profit Planning Tool, we are presented with the Embed path.
Click Copy to select the Embed path and paste it into a text file; we will use it in the next step:
Share with Team
We need to share our workbook with a Sigma team. Creating a team is an Administration function in Sigma. To learn how to to create a team in Sigma, see here.
Sigma Embed Credentials
We will now create credentials that will be used to secure the embed in Streamlit.
Navigate to Administration > Developer Access:
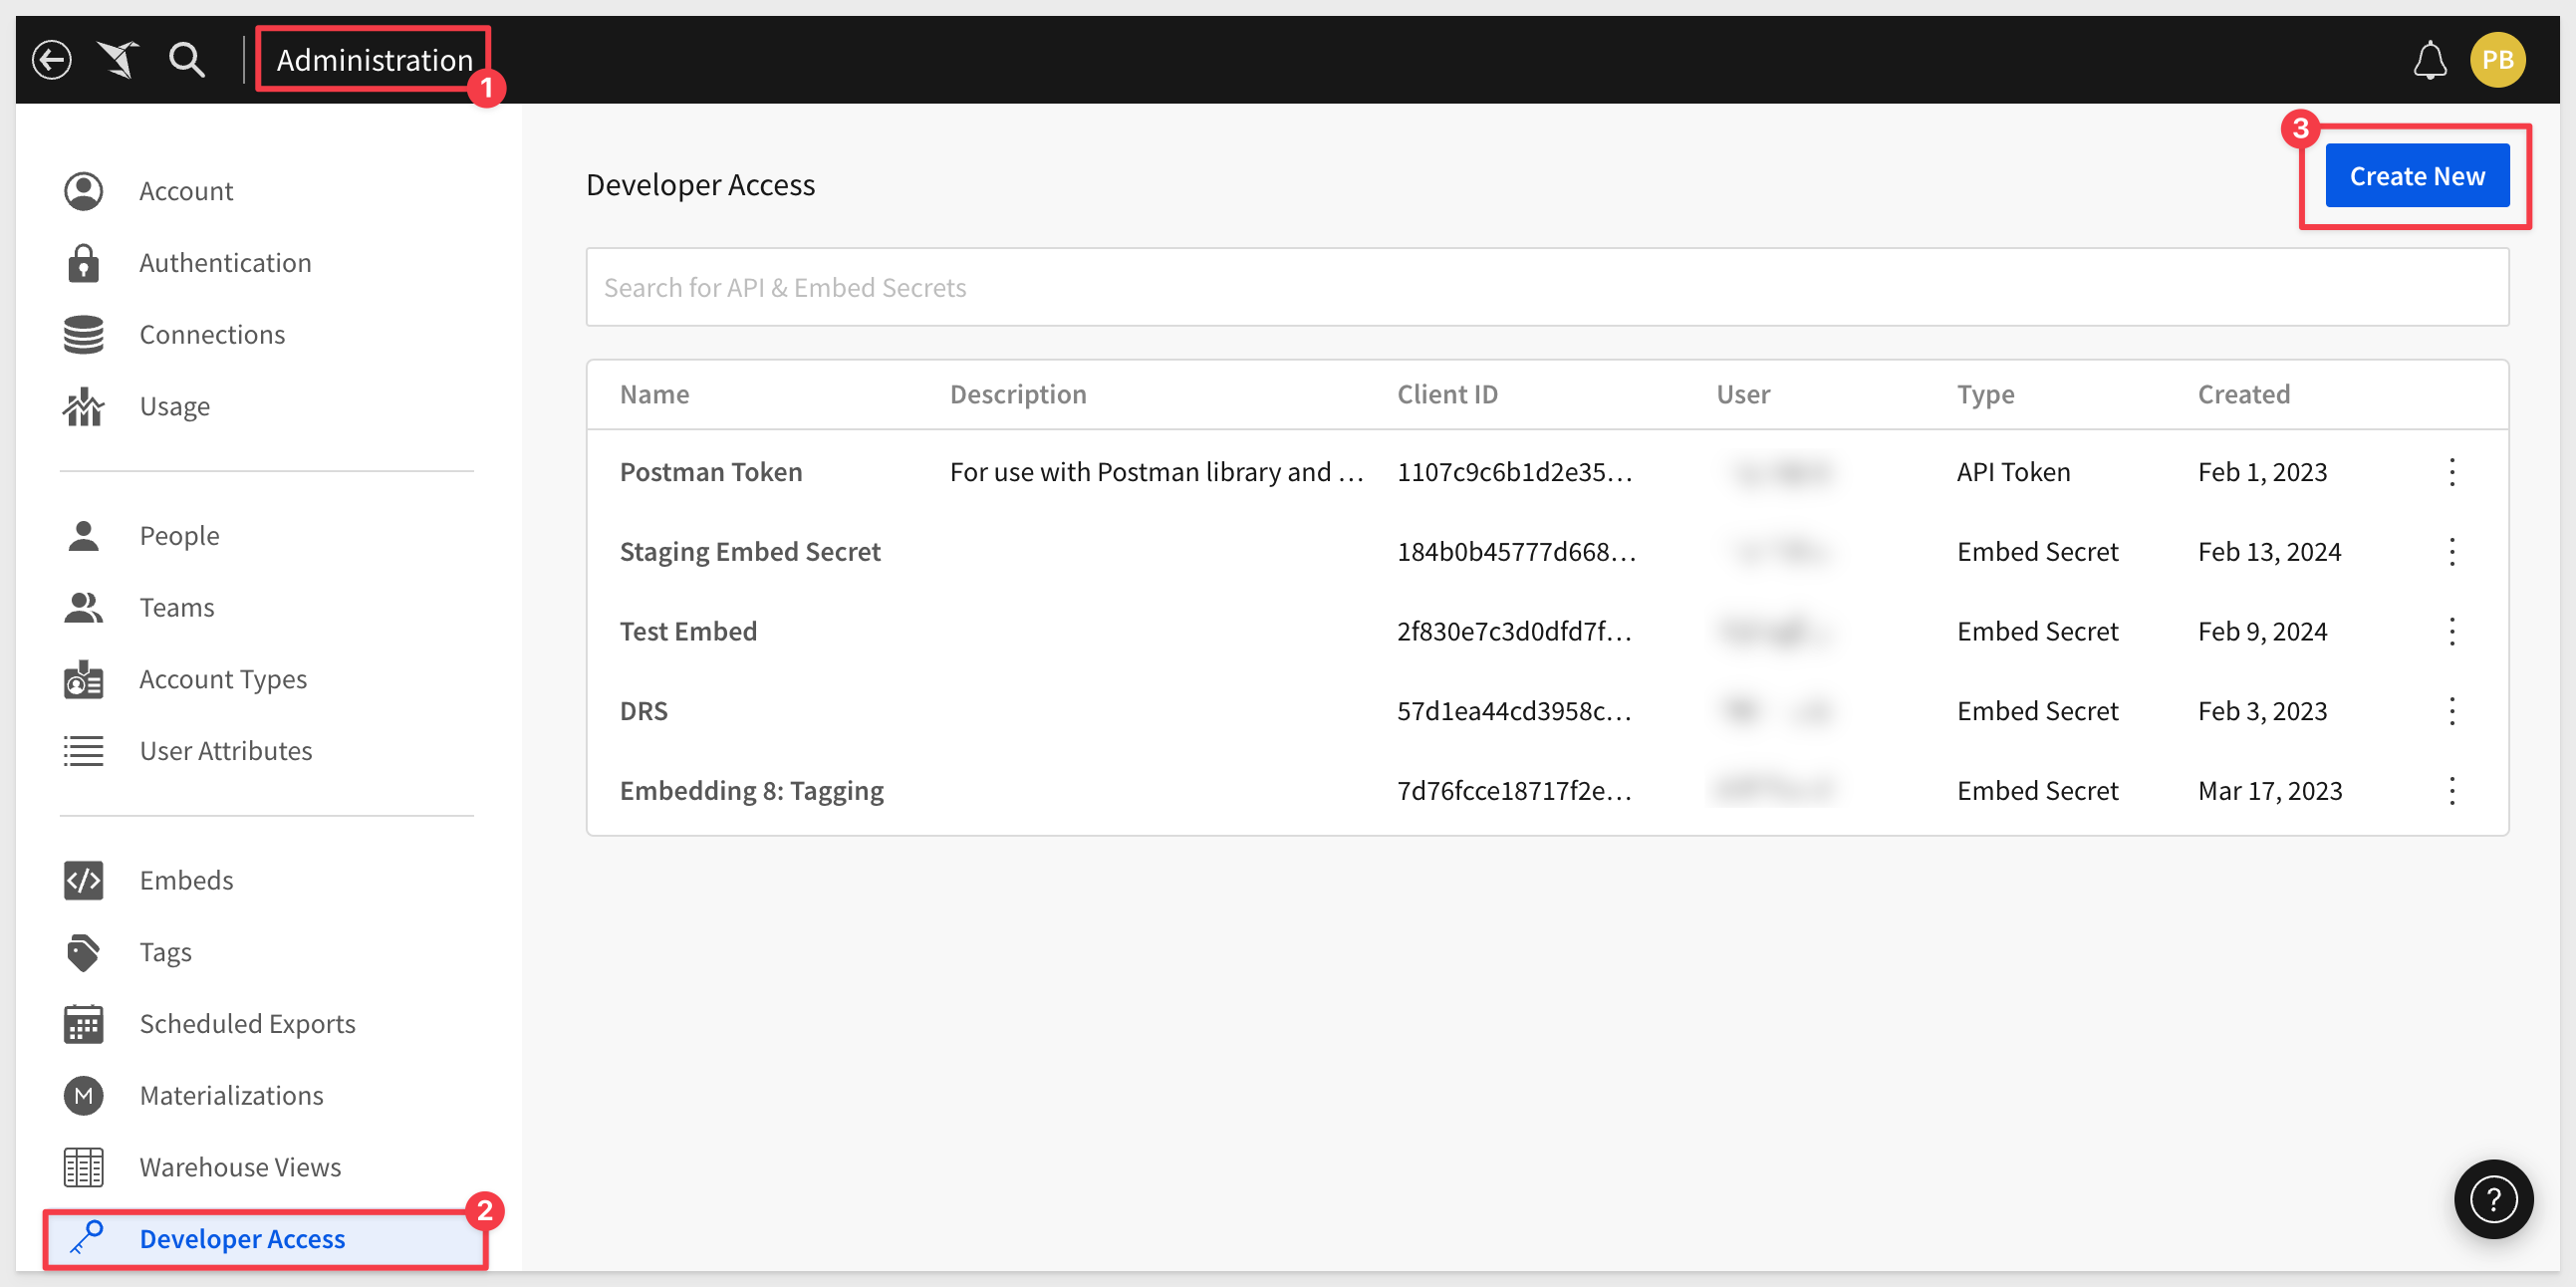
Click Create New, located in the page's top right corner. This will open the Create client credentials modal.
Under Select privileges select Embedding.
Enter a Name and Description as you see fit.
Under Owner, select an organization member with the account type you would like to associate with the embed secret. For now, just select yourself or an Administrator.
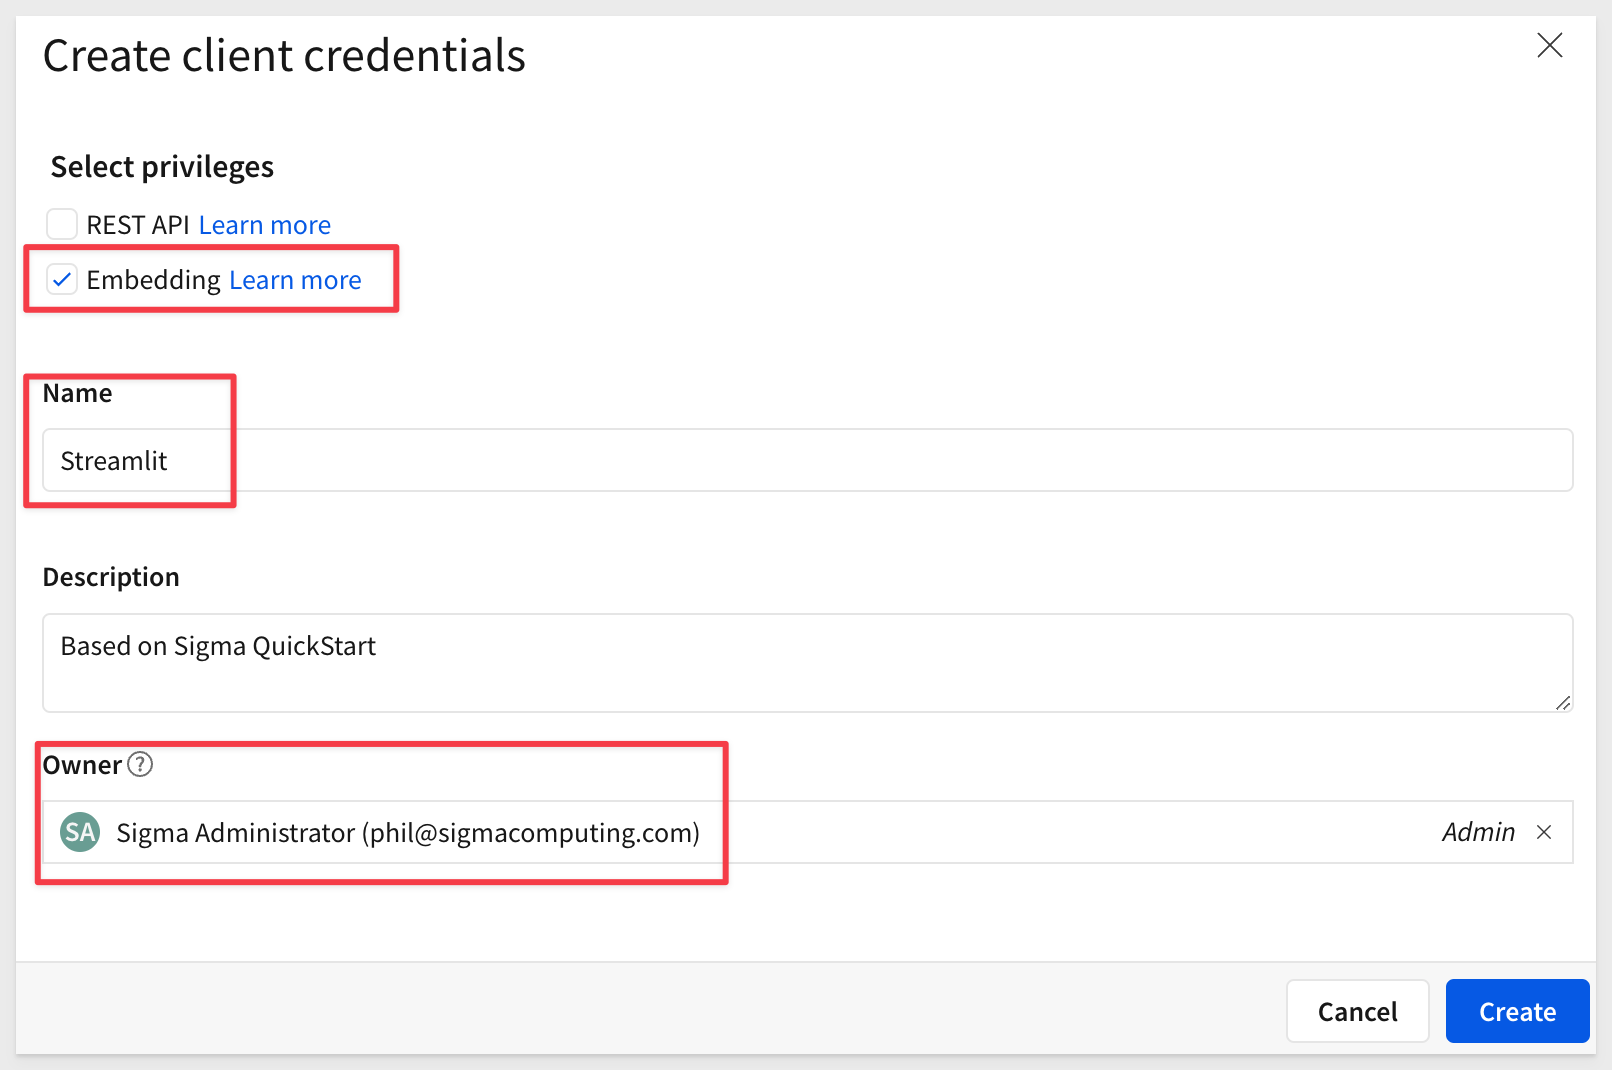
Click Create.
Copy the provided ClientID and Secret and store them:
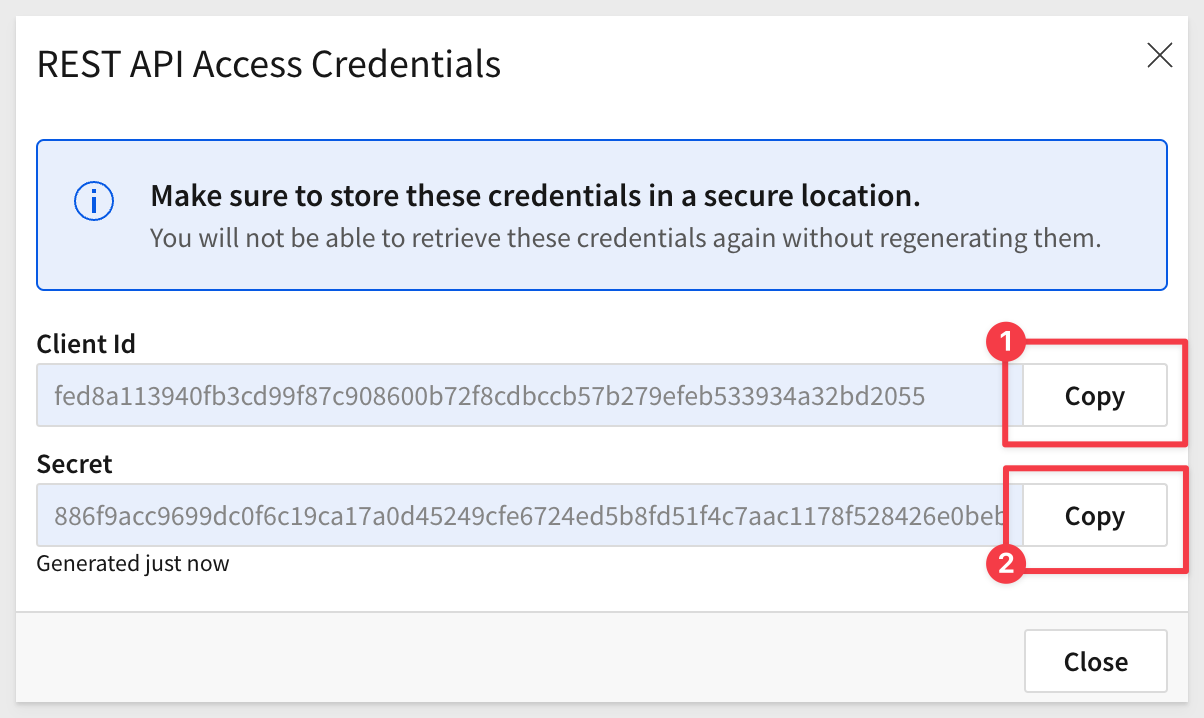
Click Close.
Paste the credentials into a known safe location in case they are needed again in the future.
We can use these credentials for all embeds, but you may create as many credentials as you prefer.
Open the embedding-streamlit folder in VSCode and open the .env file.
Replace the placeholder values for EMBED_PATH, CLIENT_ID, EMBED_SECRET, EMAIL and EXTERNAL_USER_TEAM to match your values created earlier.
For ACCOUNT_TYPE use Pro for now.
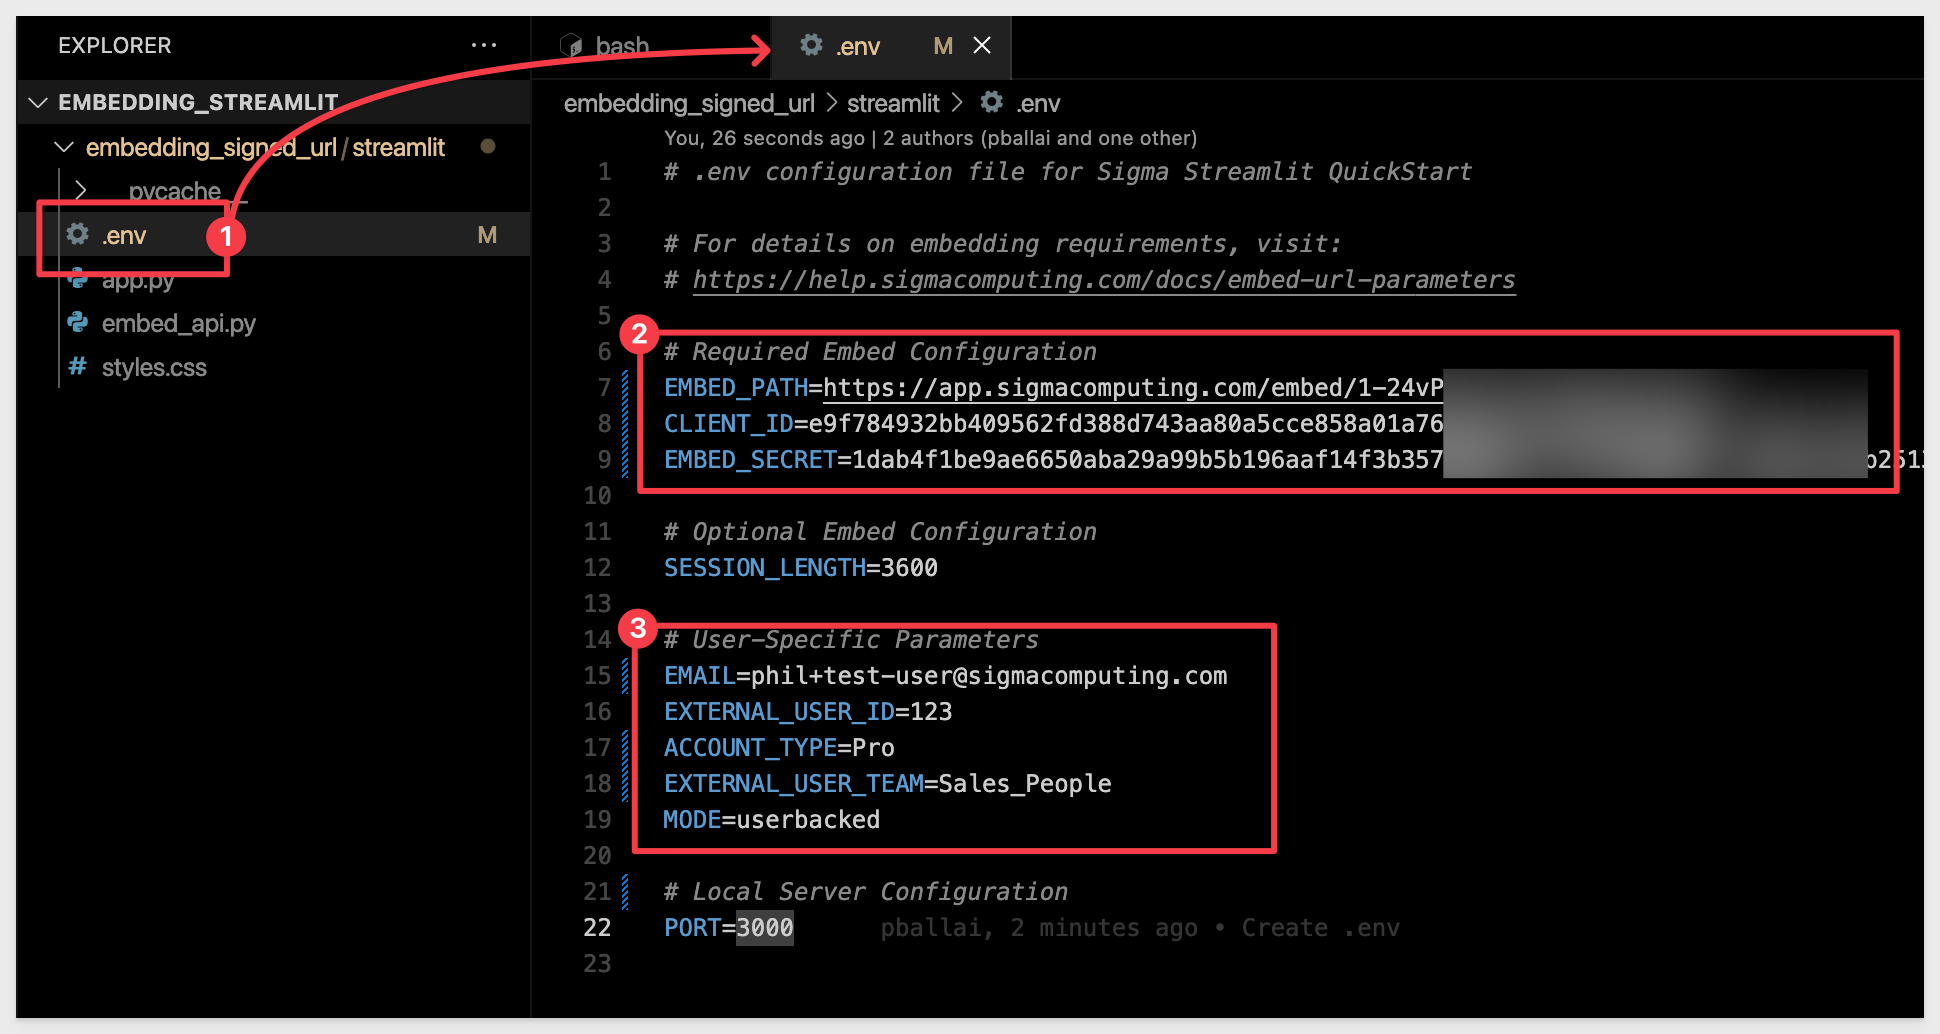
After updating .env with your values, save the file.
In VSCode terminal run the command:
conda activate streamlit
Variables management
Our project separates variables into a file called .env.
This approach is helpful for storing configuration variables and secrets (like API keys and database passwords) outside of your main codebase, enhancing security and flexibility.
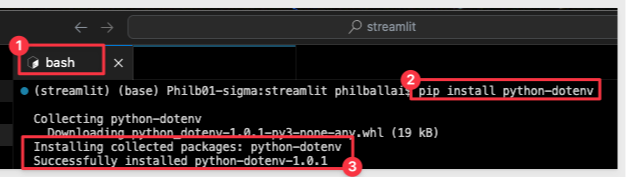
We need to install the python-dotenv package to load environment variables from a .env file.
Run the following command in a VSCode terminal session to install the python-dotenv package:
pip install python-dotenv
Start the Streamlit app:
streamlit run app.py
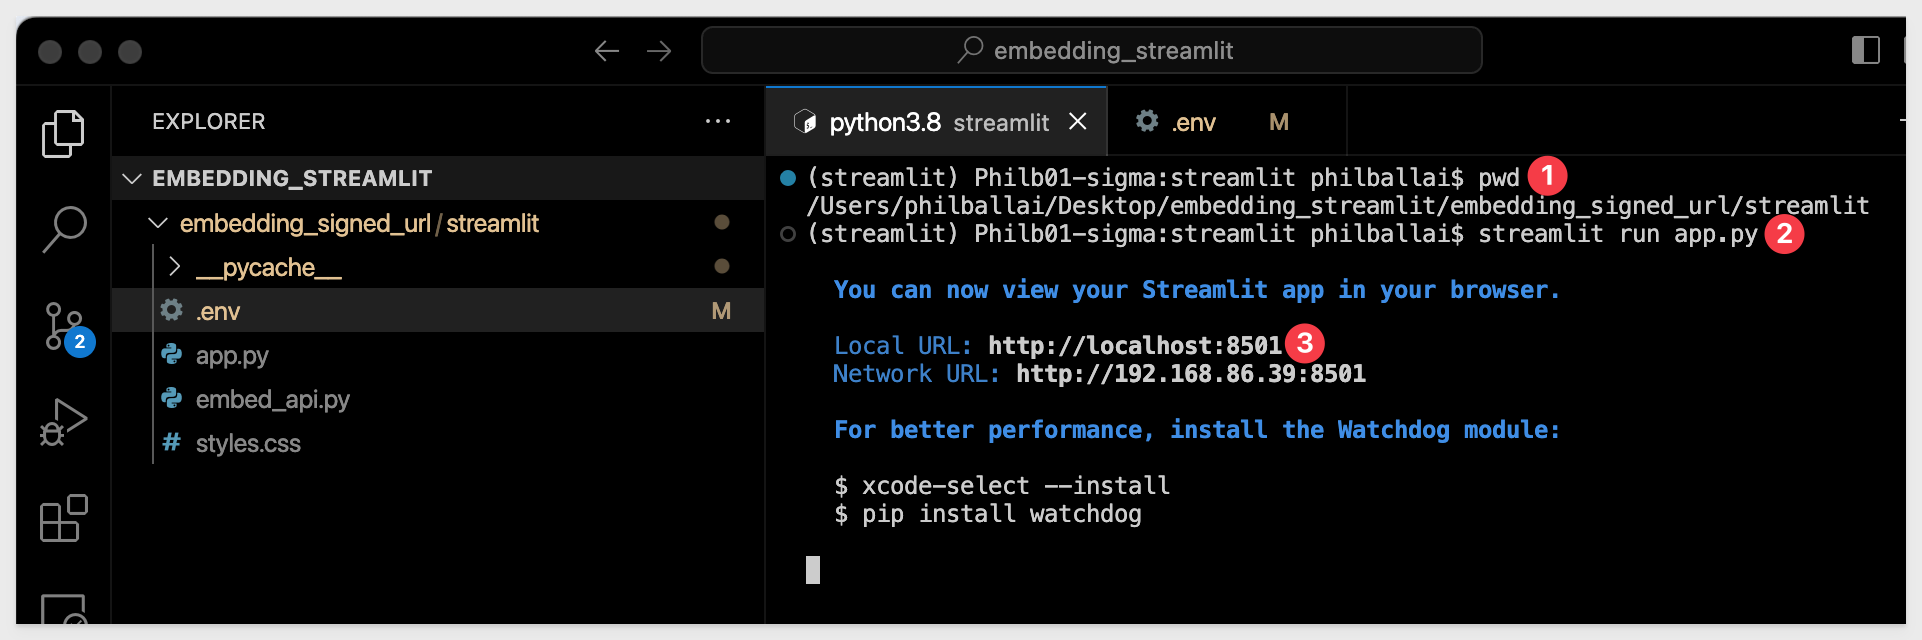
The default browser should open and display the webpage with the Sigma embed inside it:
Congratulations, you have setup your Streamlit app with a secure Sigma embed.
In this lab we learned what is Streamlit and how to Embed Sigma into Streamlit application that we built together.
If you would like to learn more about Streamlit, there is a video series available.
Additional Resource Links
Be sure to check out all the latest developments at Sigma's First Friday Feature page!
Streamlit Documentation
Get started with Streamlit
Help Center Home
Sigma Community
Sigma Blog