In this QuickStart, you'll learn how to securely embed a Sigma workbook into Microsoft SharePoint Online using JWT authentication.
You'll deploy an Azure Function that mints short-lived JWTs and deploy a SharePoint Framework (SPFx) web part that automatically gets the current user's identity, calls the function, and displays the Sigma workbook.
This is the production-ready pattern most customers use. It leverages SharePoint's built-in authentication and ensures the correct user identity and permissions flow through to Sigma without requiring additional login steps.
For more information on Sigma's product release strategy, see Sigma product releases
If something doesn't work as expected, here's how to contact Sigma support
Target Audience
IT administrators, SharePoint developers, and business intelligence teams who need to securely embed analytics into their organization's SharePoint environment. This QuickStart is ideal for those implementing a production-ready embedding solution that leverages existing Microsoft 365 authentication.
Prerequisites
- Access to your Sigma environment with administrative privileges.
- Microsoft 365 tenant with SharePoint Online (E3/E5 or trial).
- Azure subscription (free tier is sufficient for this QuickStart).
- Node.js 20 LTS installed on your development machine.
- Basic familiarity with SharePoint administration (App Catalog access).

We need to create a few things in Sigma to embed into Sharepoint. We will keep this part simple, as it is not the primary focus of this QuickStart.
Client Credentials
Client credentials (a unique Client ID and Embed Secret) are the foundation of secure embedding.
Sigma uses the Client ID to determine which Embed Secret is referenced in a request. Each time a request is made, the server-side embed API uses the Embed Secret to generate an encrypted signature.
Together, the Client ID and Embed Secret create a robust security framework for server-side interactions with Sigma.
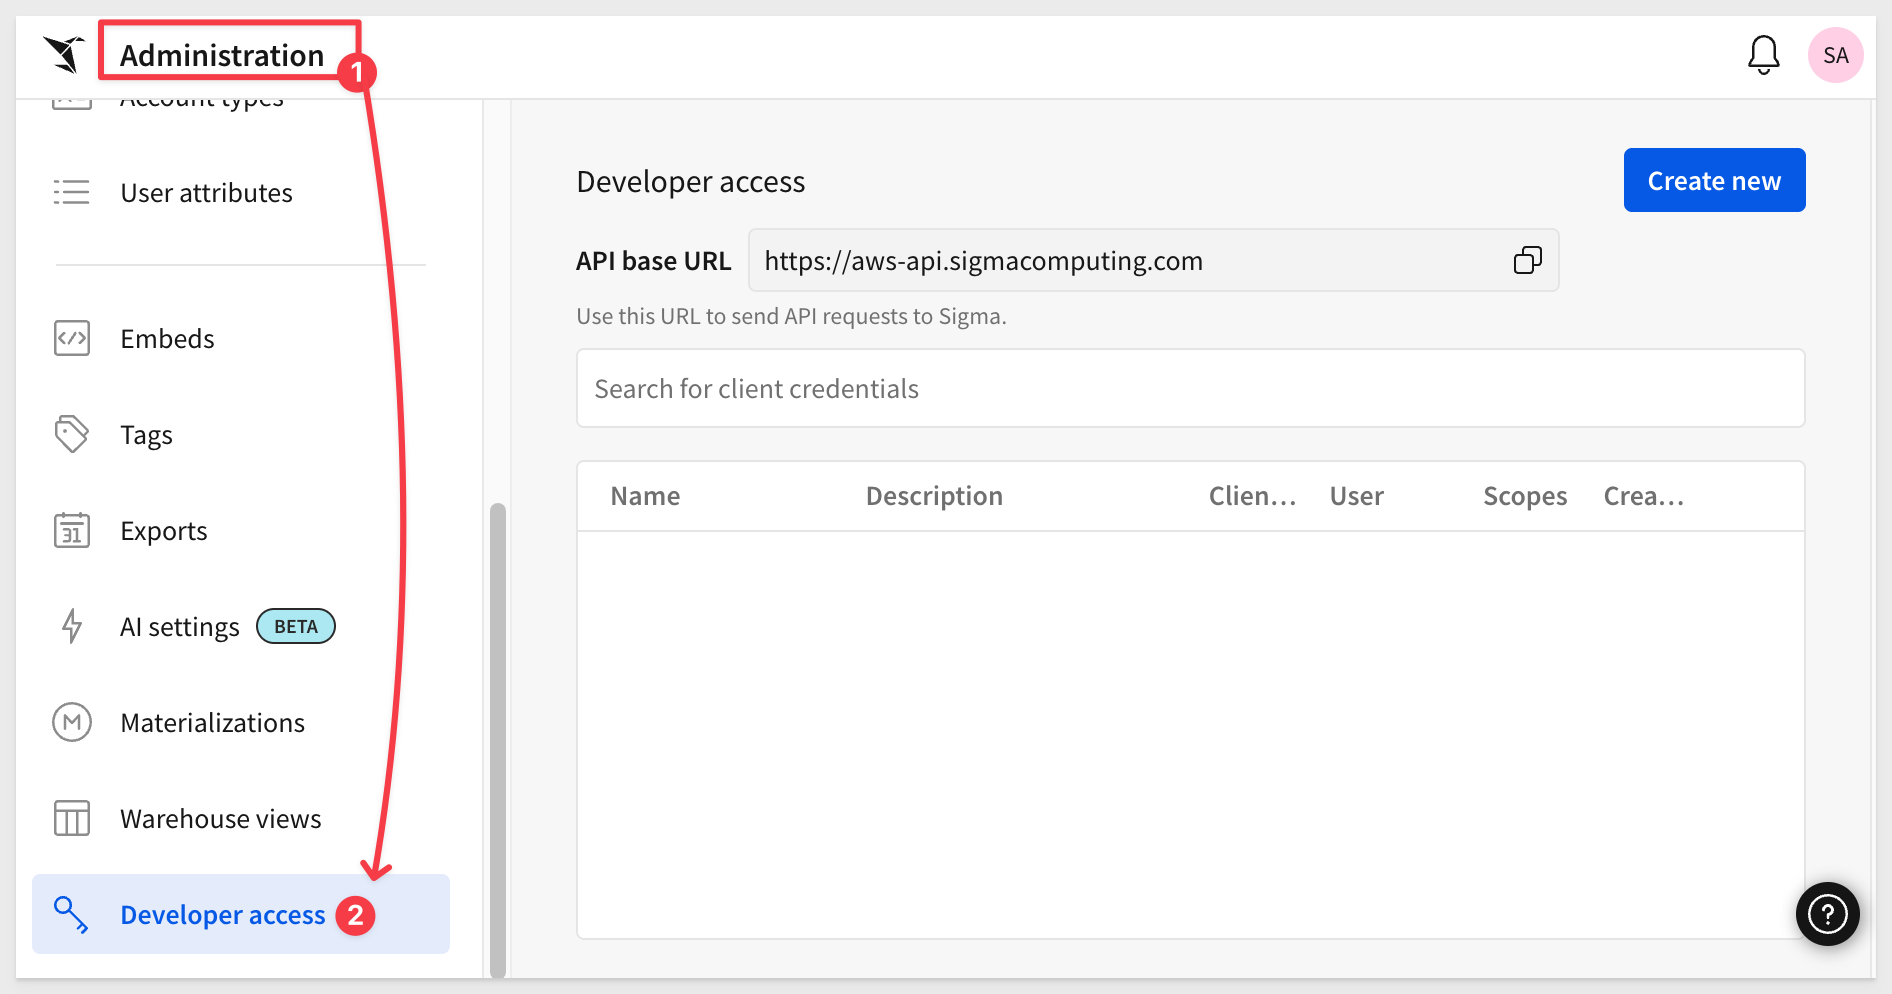
Navigate to Administration and scroll down to Developer Access.
Click Create New:
In the Create client credentials modal, select the Embedding checkbox, provide a name, and assign an administrative user as the owner:
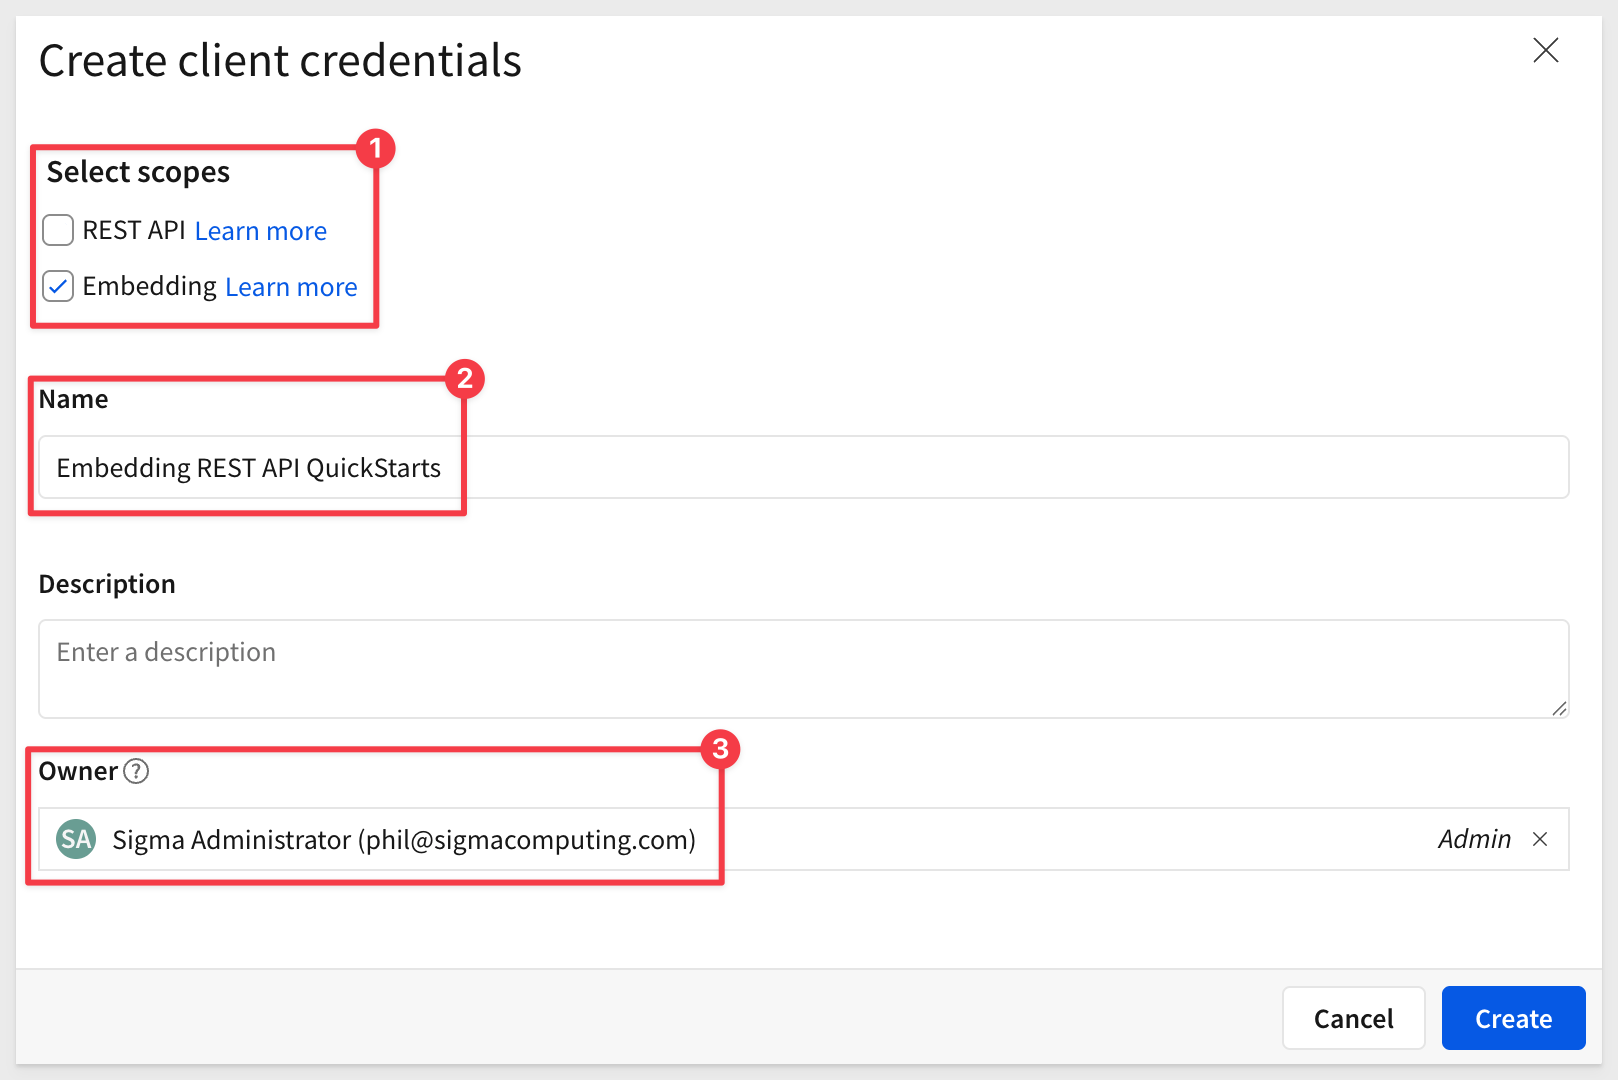
Click Create.
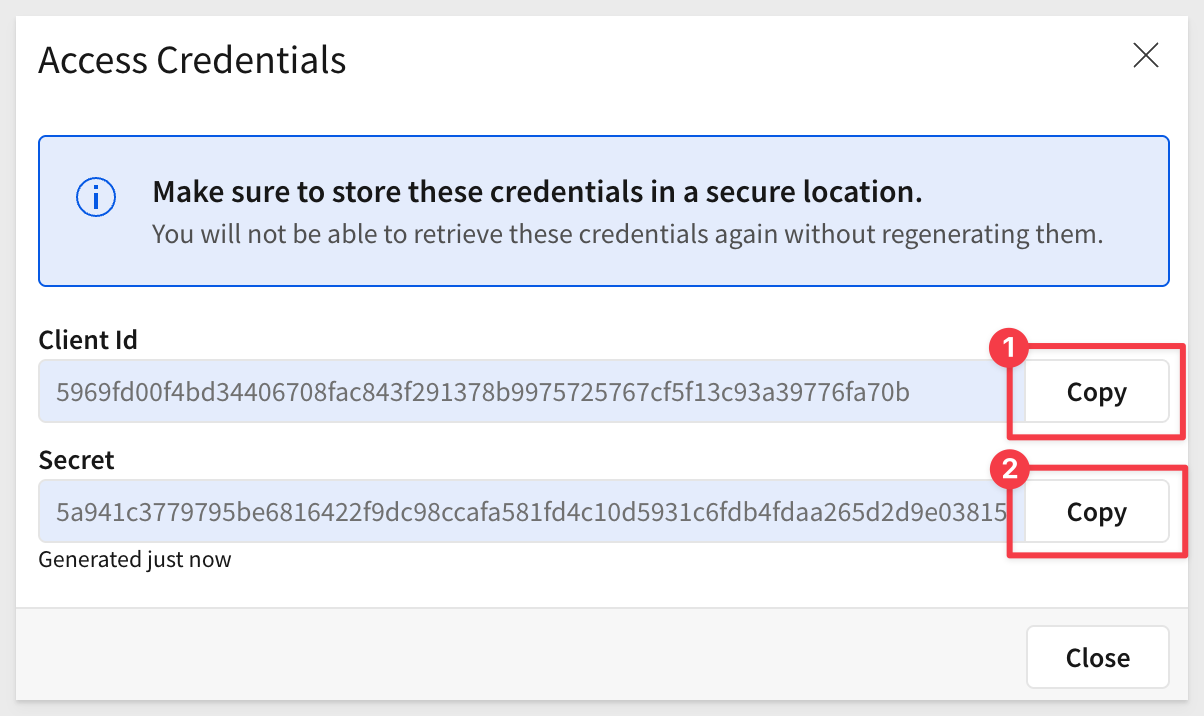
Copy and paste the Client ID and Secret into a text file for later use.
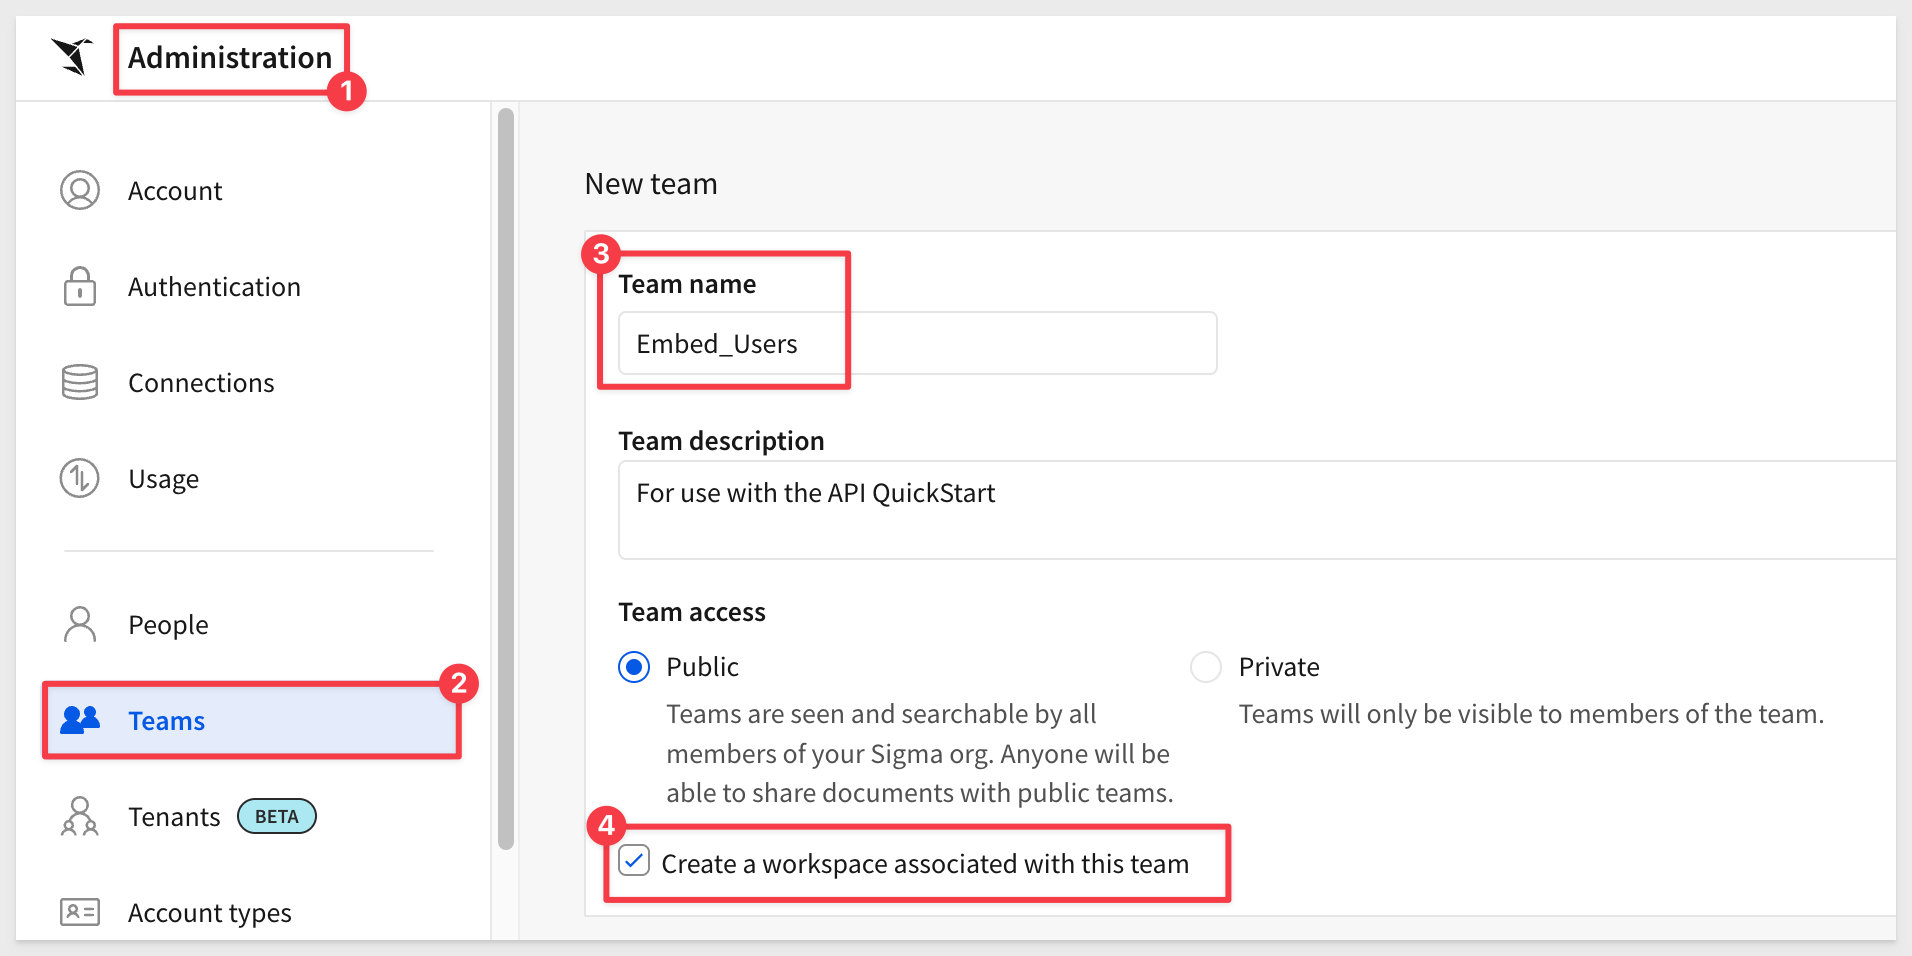
Teams
Next, we'll create a team and share the workbook with that team. The host application will then pass Sigma the team information when accessing content, along with other user details.
Create a team named Embed_Users (creating a workspace is not required):
Create Content to Embed
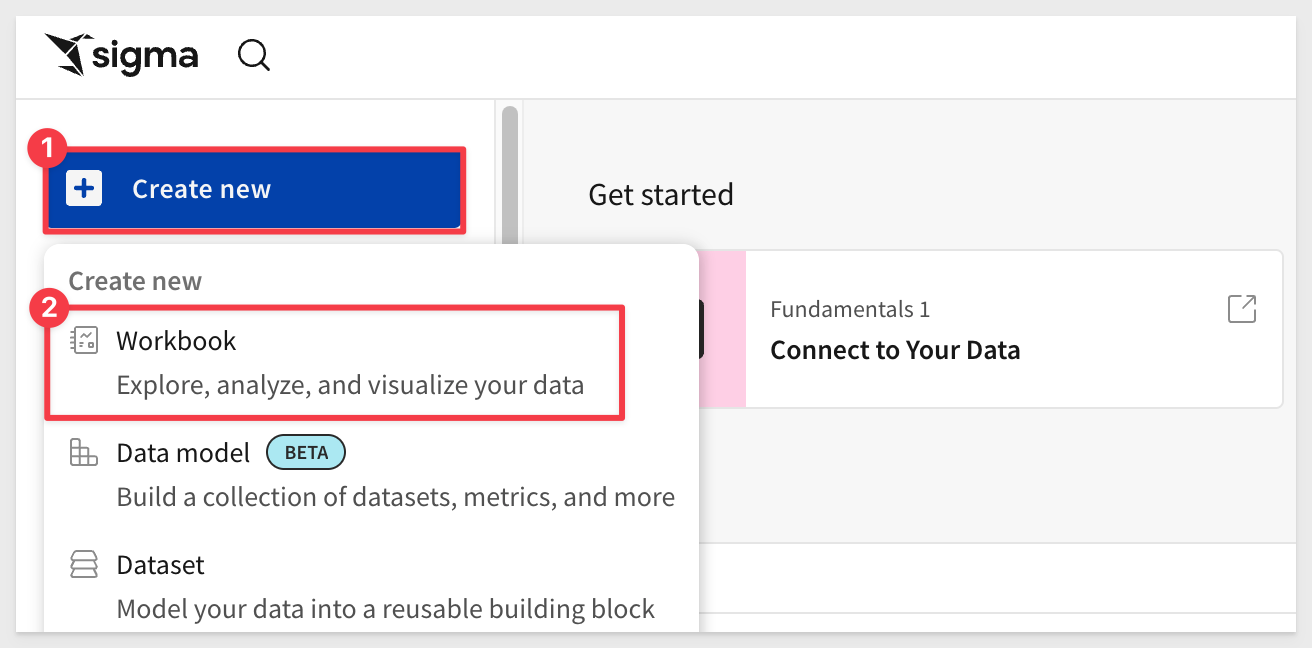
Return to the homepage and click the + Create new button, then select Workbook:
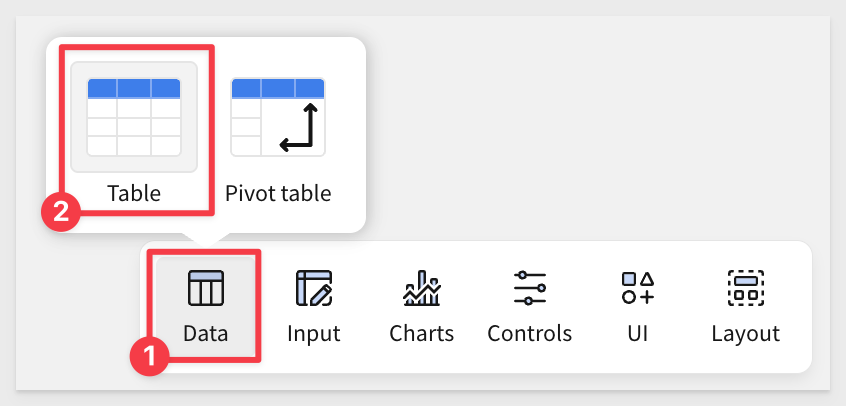
Drag a new Table from the Data group on the Element bar:
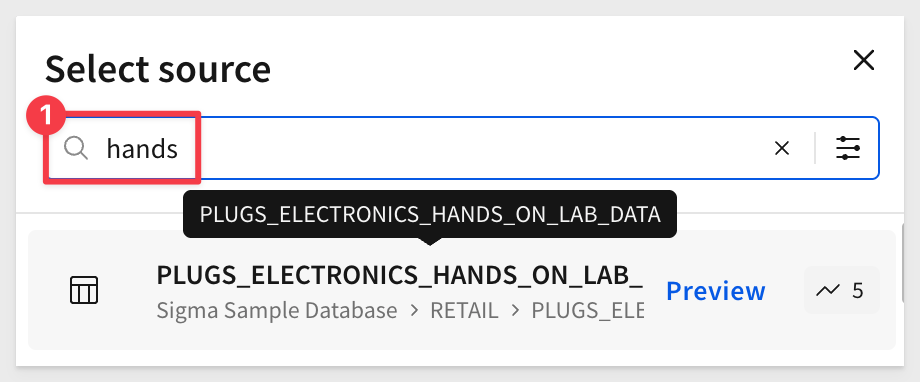
Click Select source.
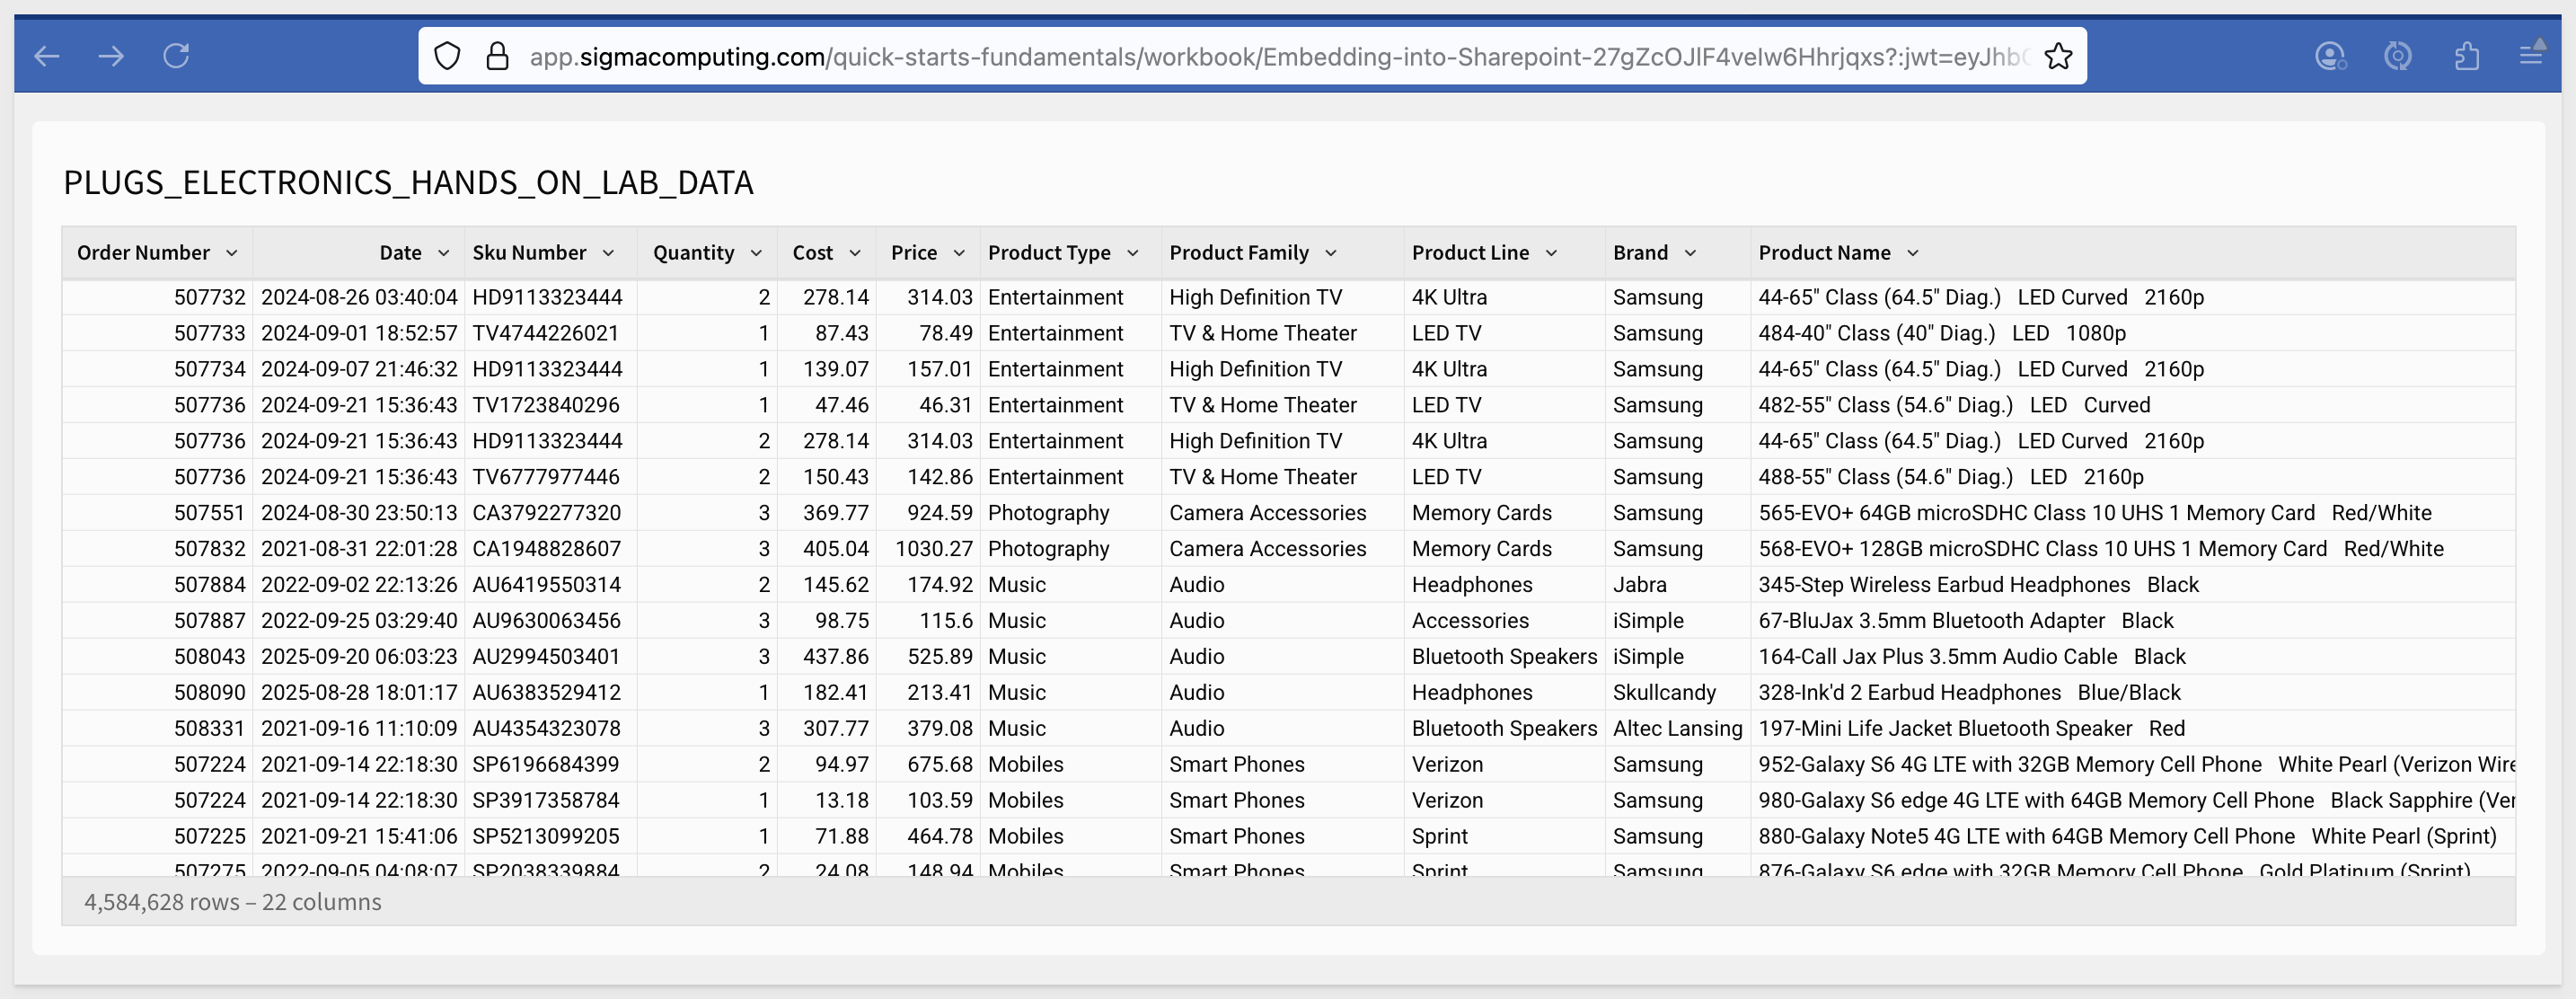
Sigma allows users to search for tables by name; type hands in the search bar and select the PLUGS_ELECTRONICS_HANDS_ON_LAB_DATA table from the RETAIL schema:
This opens the selected table in a new, unsaved workbook named Exploration:
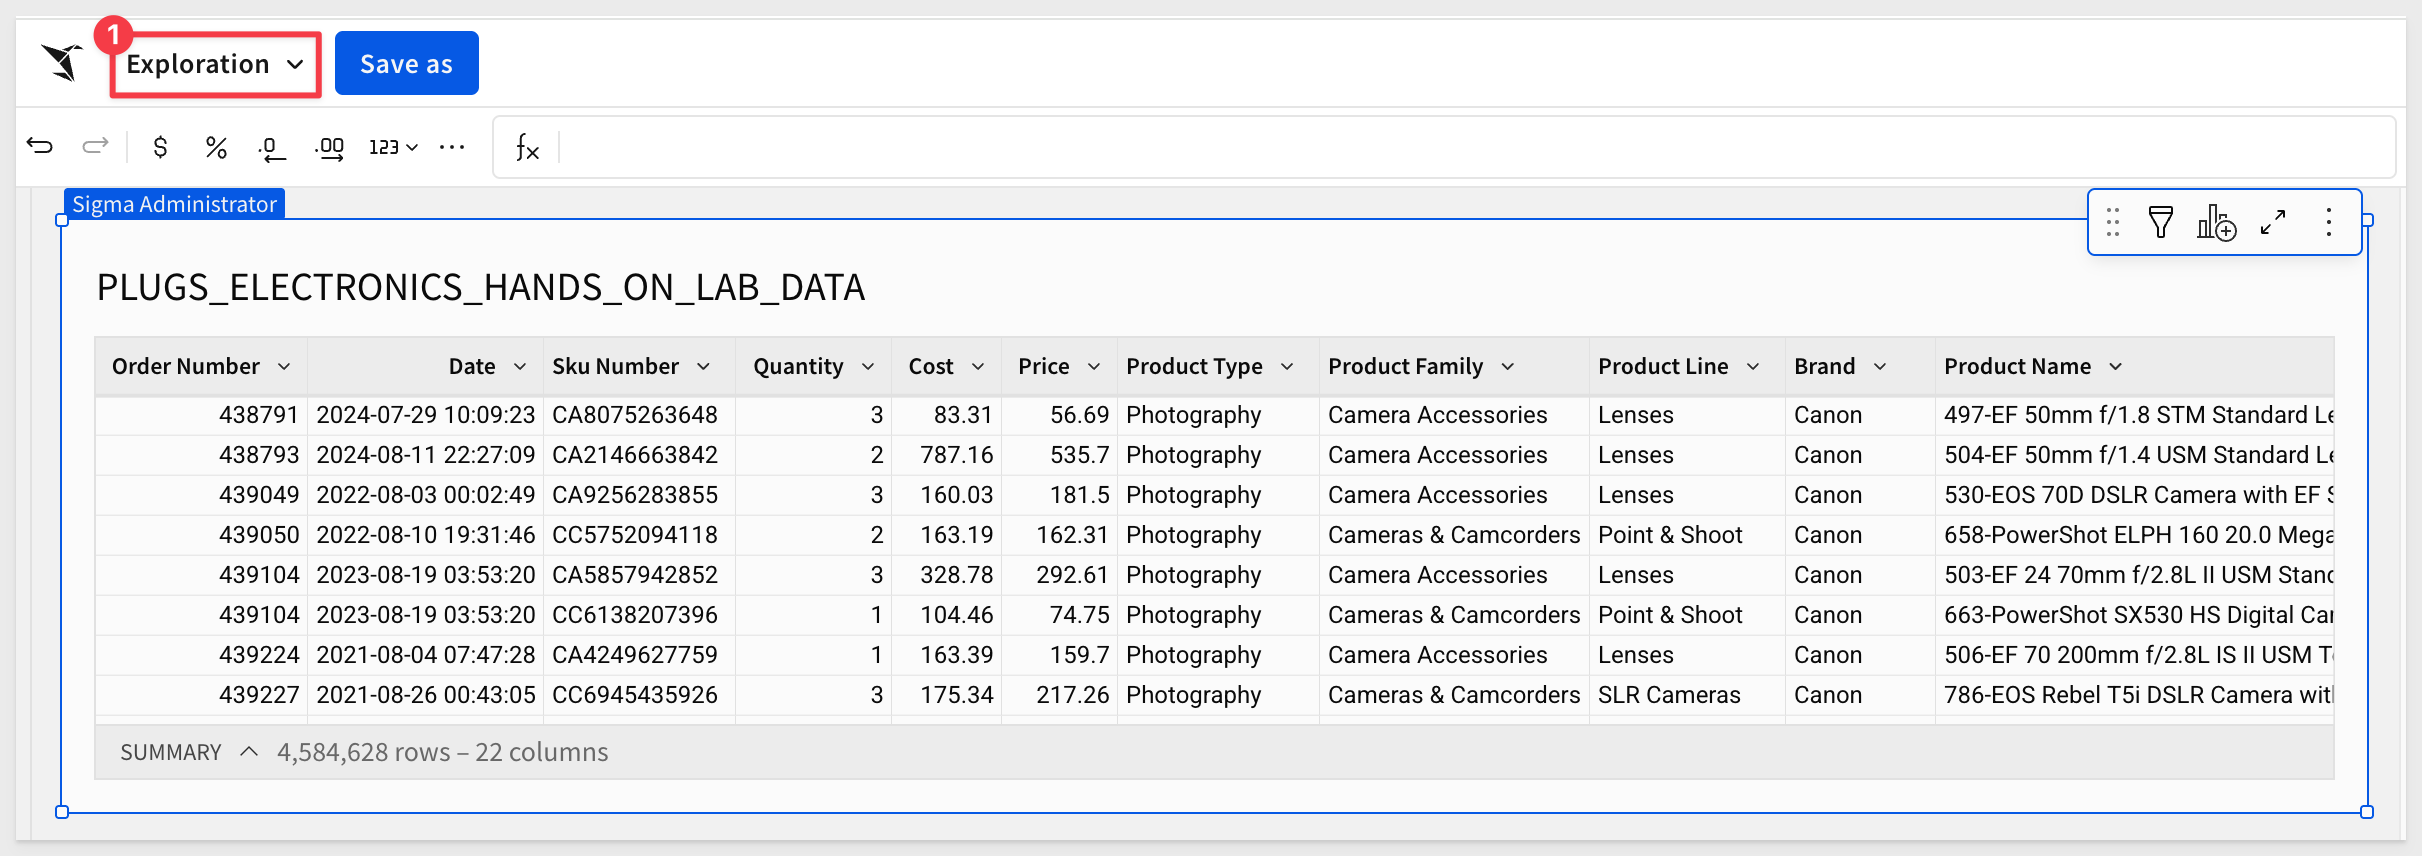
Click the Save as button and save the workbook as Embedding into Sharepoint.
Share the Workbook
Share the workbook with the Embed_Users team, setting the permission level to View:

This will allow the View user to look at the workbook and perform basic actions like sorting and filtering.
For more information on Sigma default account types, see Default account types
Workbook baseURL
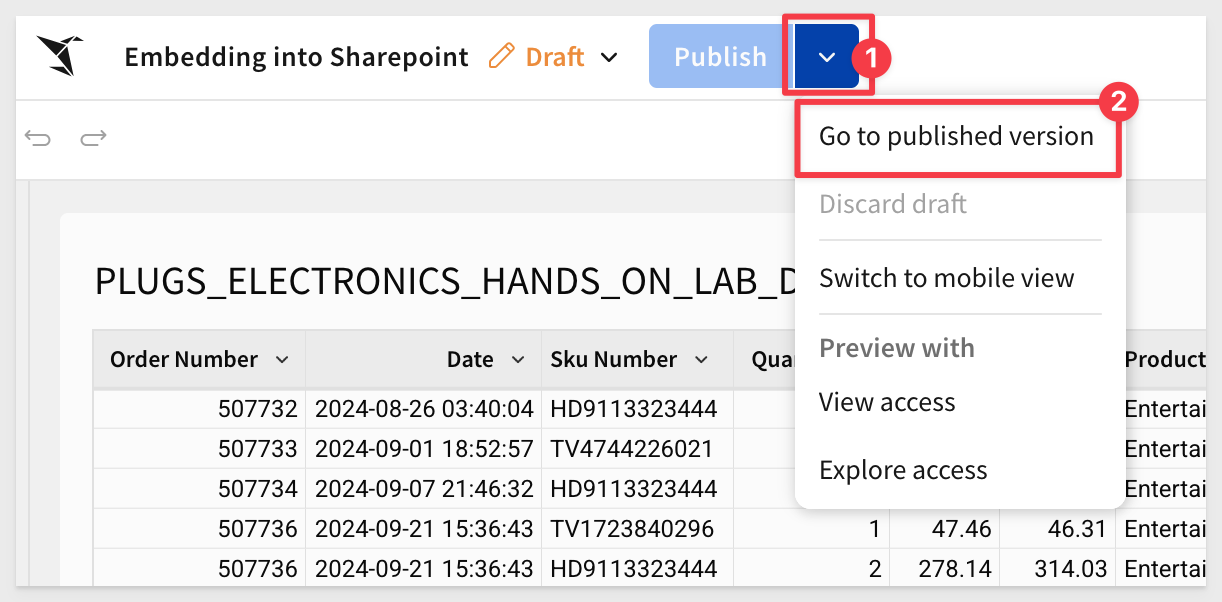
Open the workbook's menu and select Go to published version:
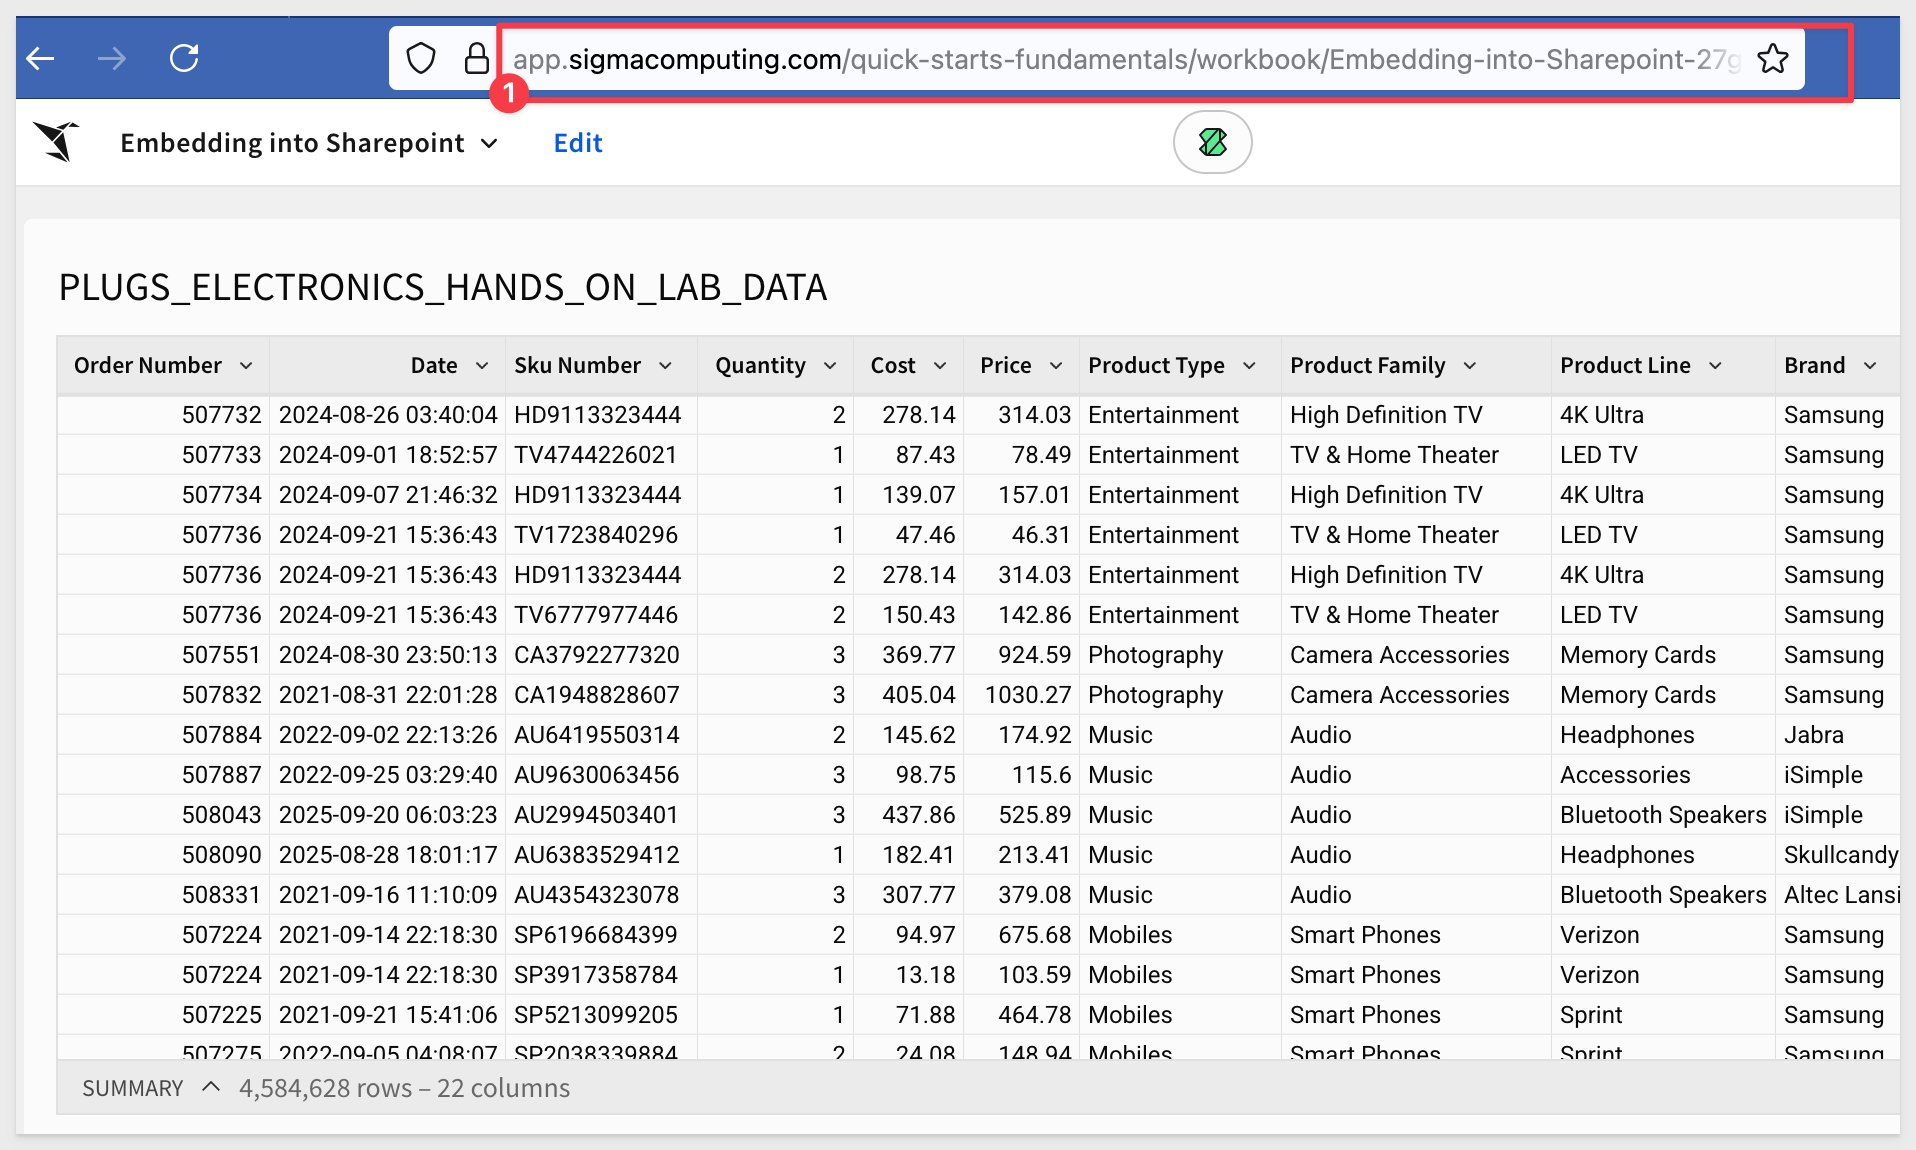
Copy the entire URL from the browser and paste into a text file for later use:
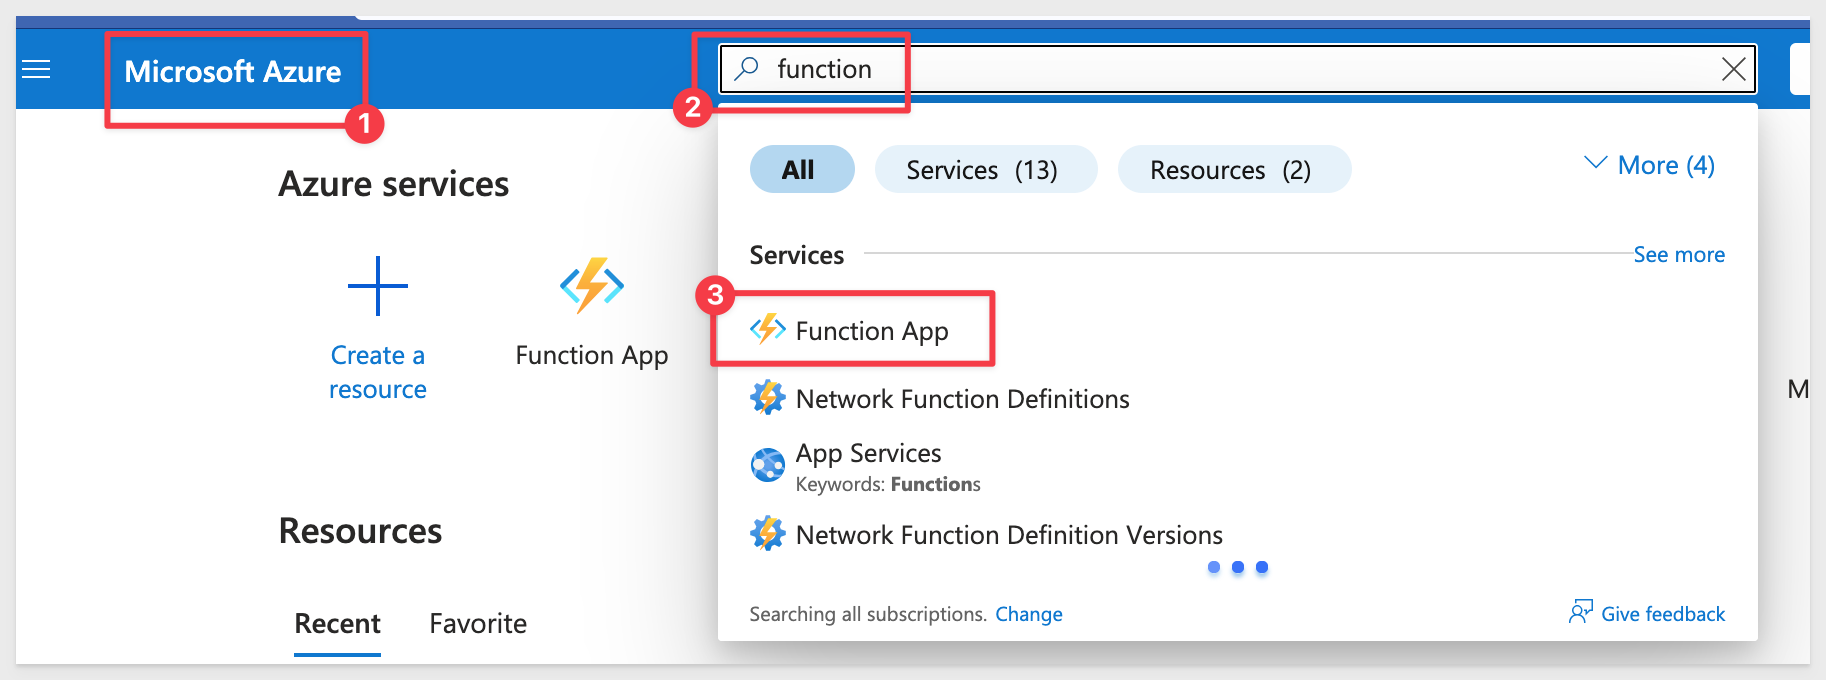
Create Function App in Azure Portal
Log into Azure search for Function App and click into that:
Click + Create.
Choose the Consumption plan and click Select.
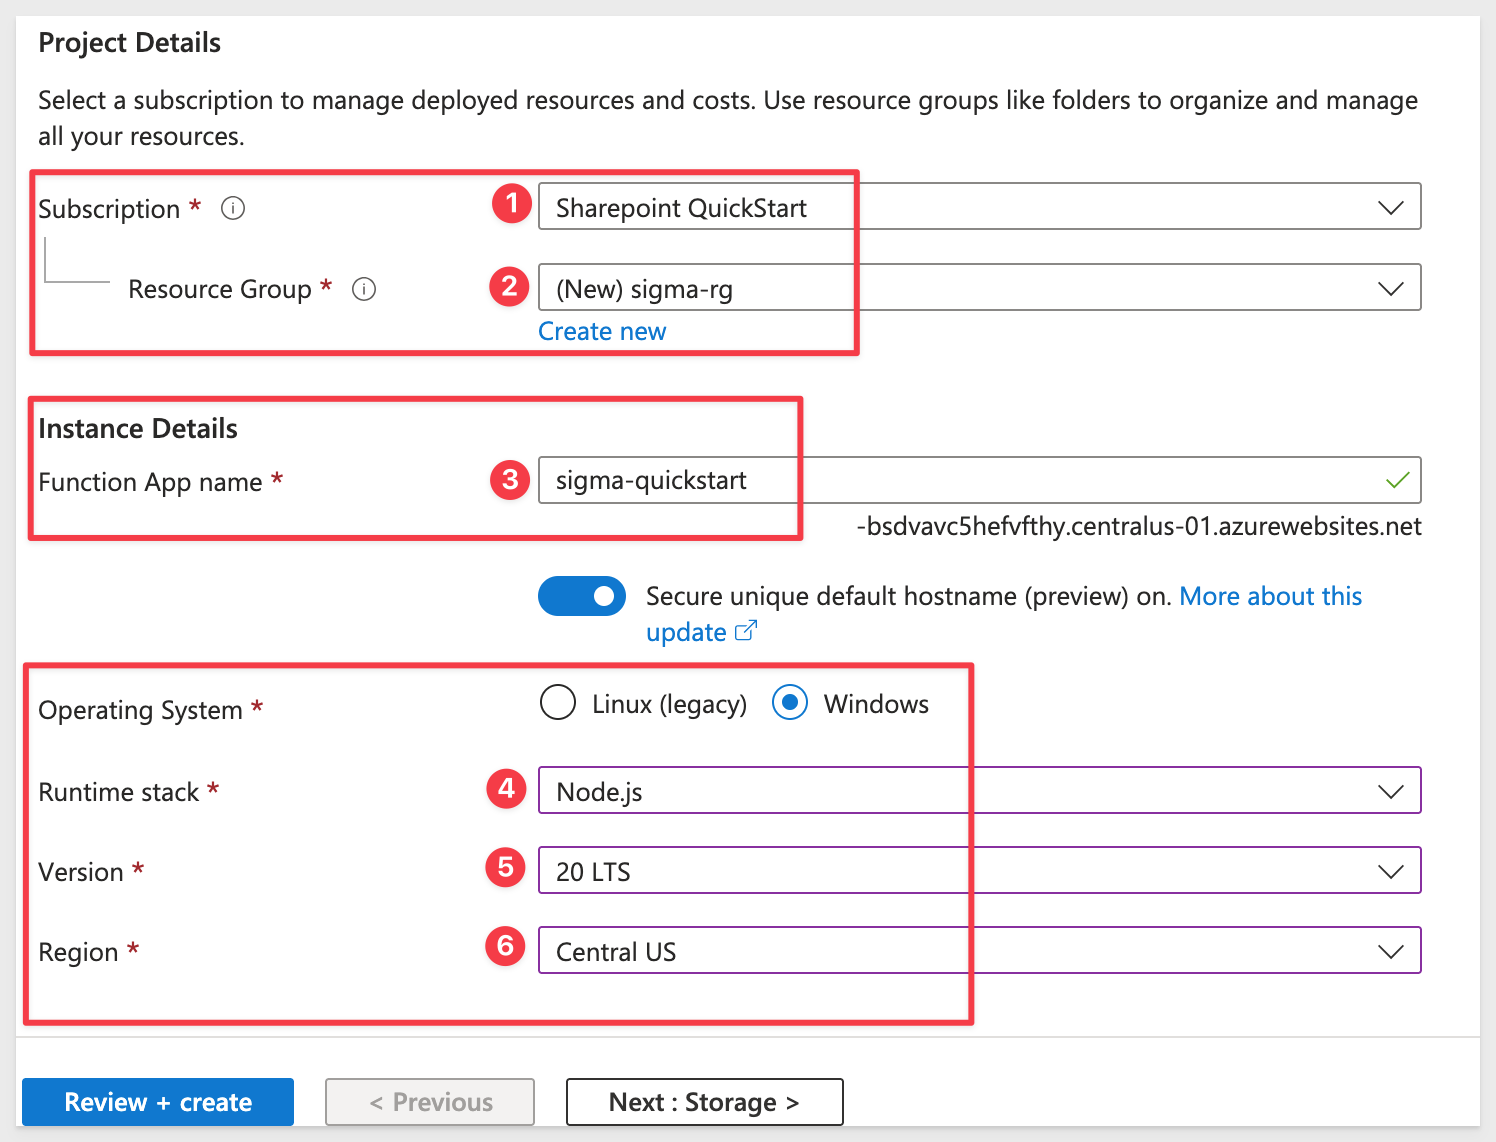
Configure the basic settings:
- Subscription: Your Azure subscription
- Resource Group: Create new or use existing
- Function App name: Something unique (e.g.,
sigma-embed-quickstart-yourname) - Operating System: Windows
- Runtime stack: Node.js
- Version: 20 LTS
- Region: Central US (or your preferred region)
Click Review + create.
On the Review + create tab click the Create button.
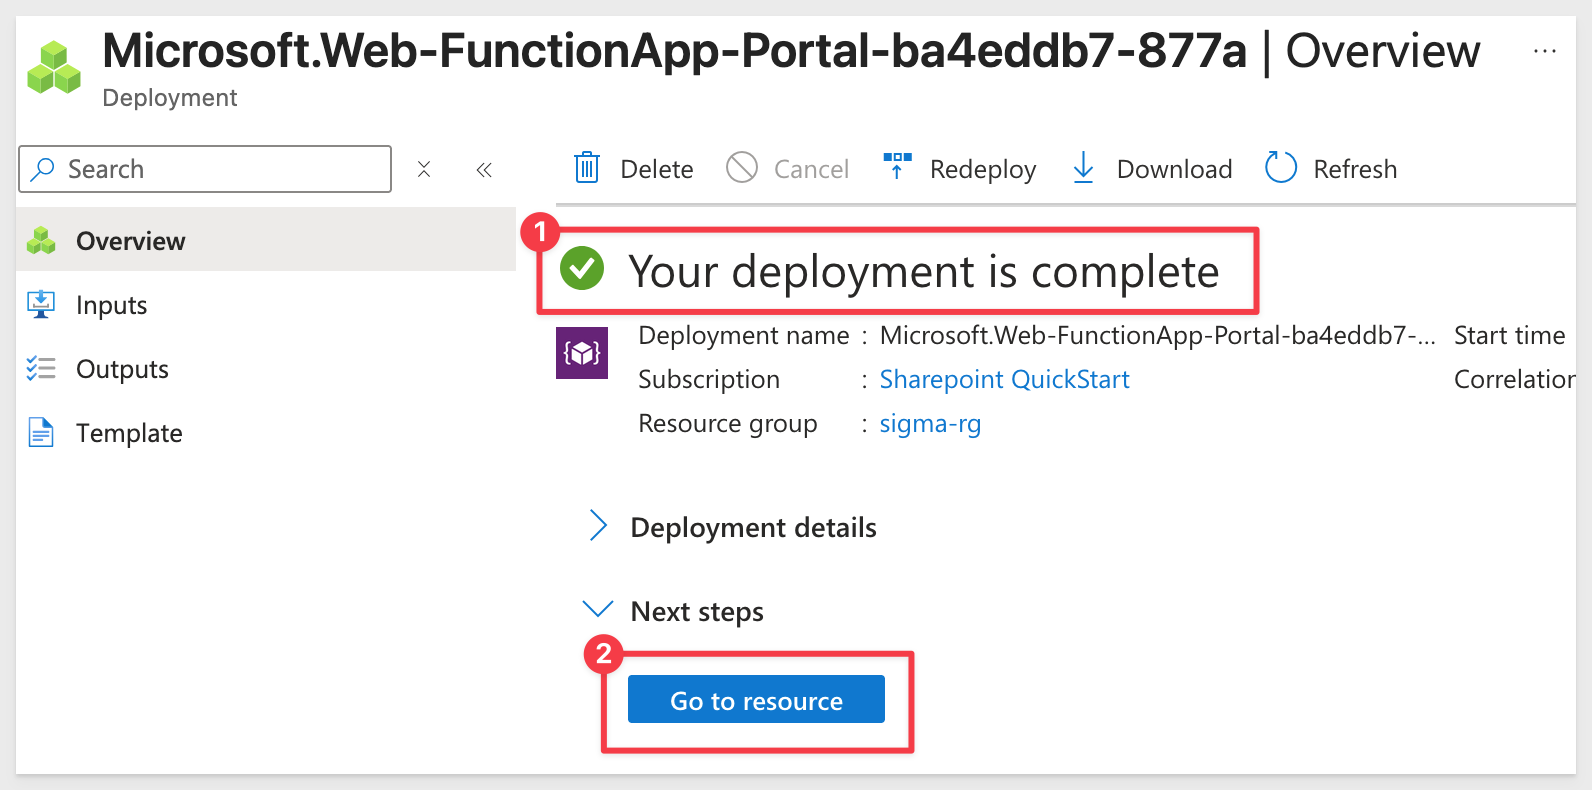
Azure will validate the configuration and if good, start a deployment. We need to wait for that to complete (usually 2-3 minutes):
Click Go to resource.
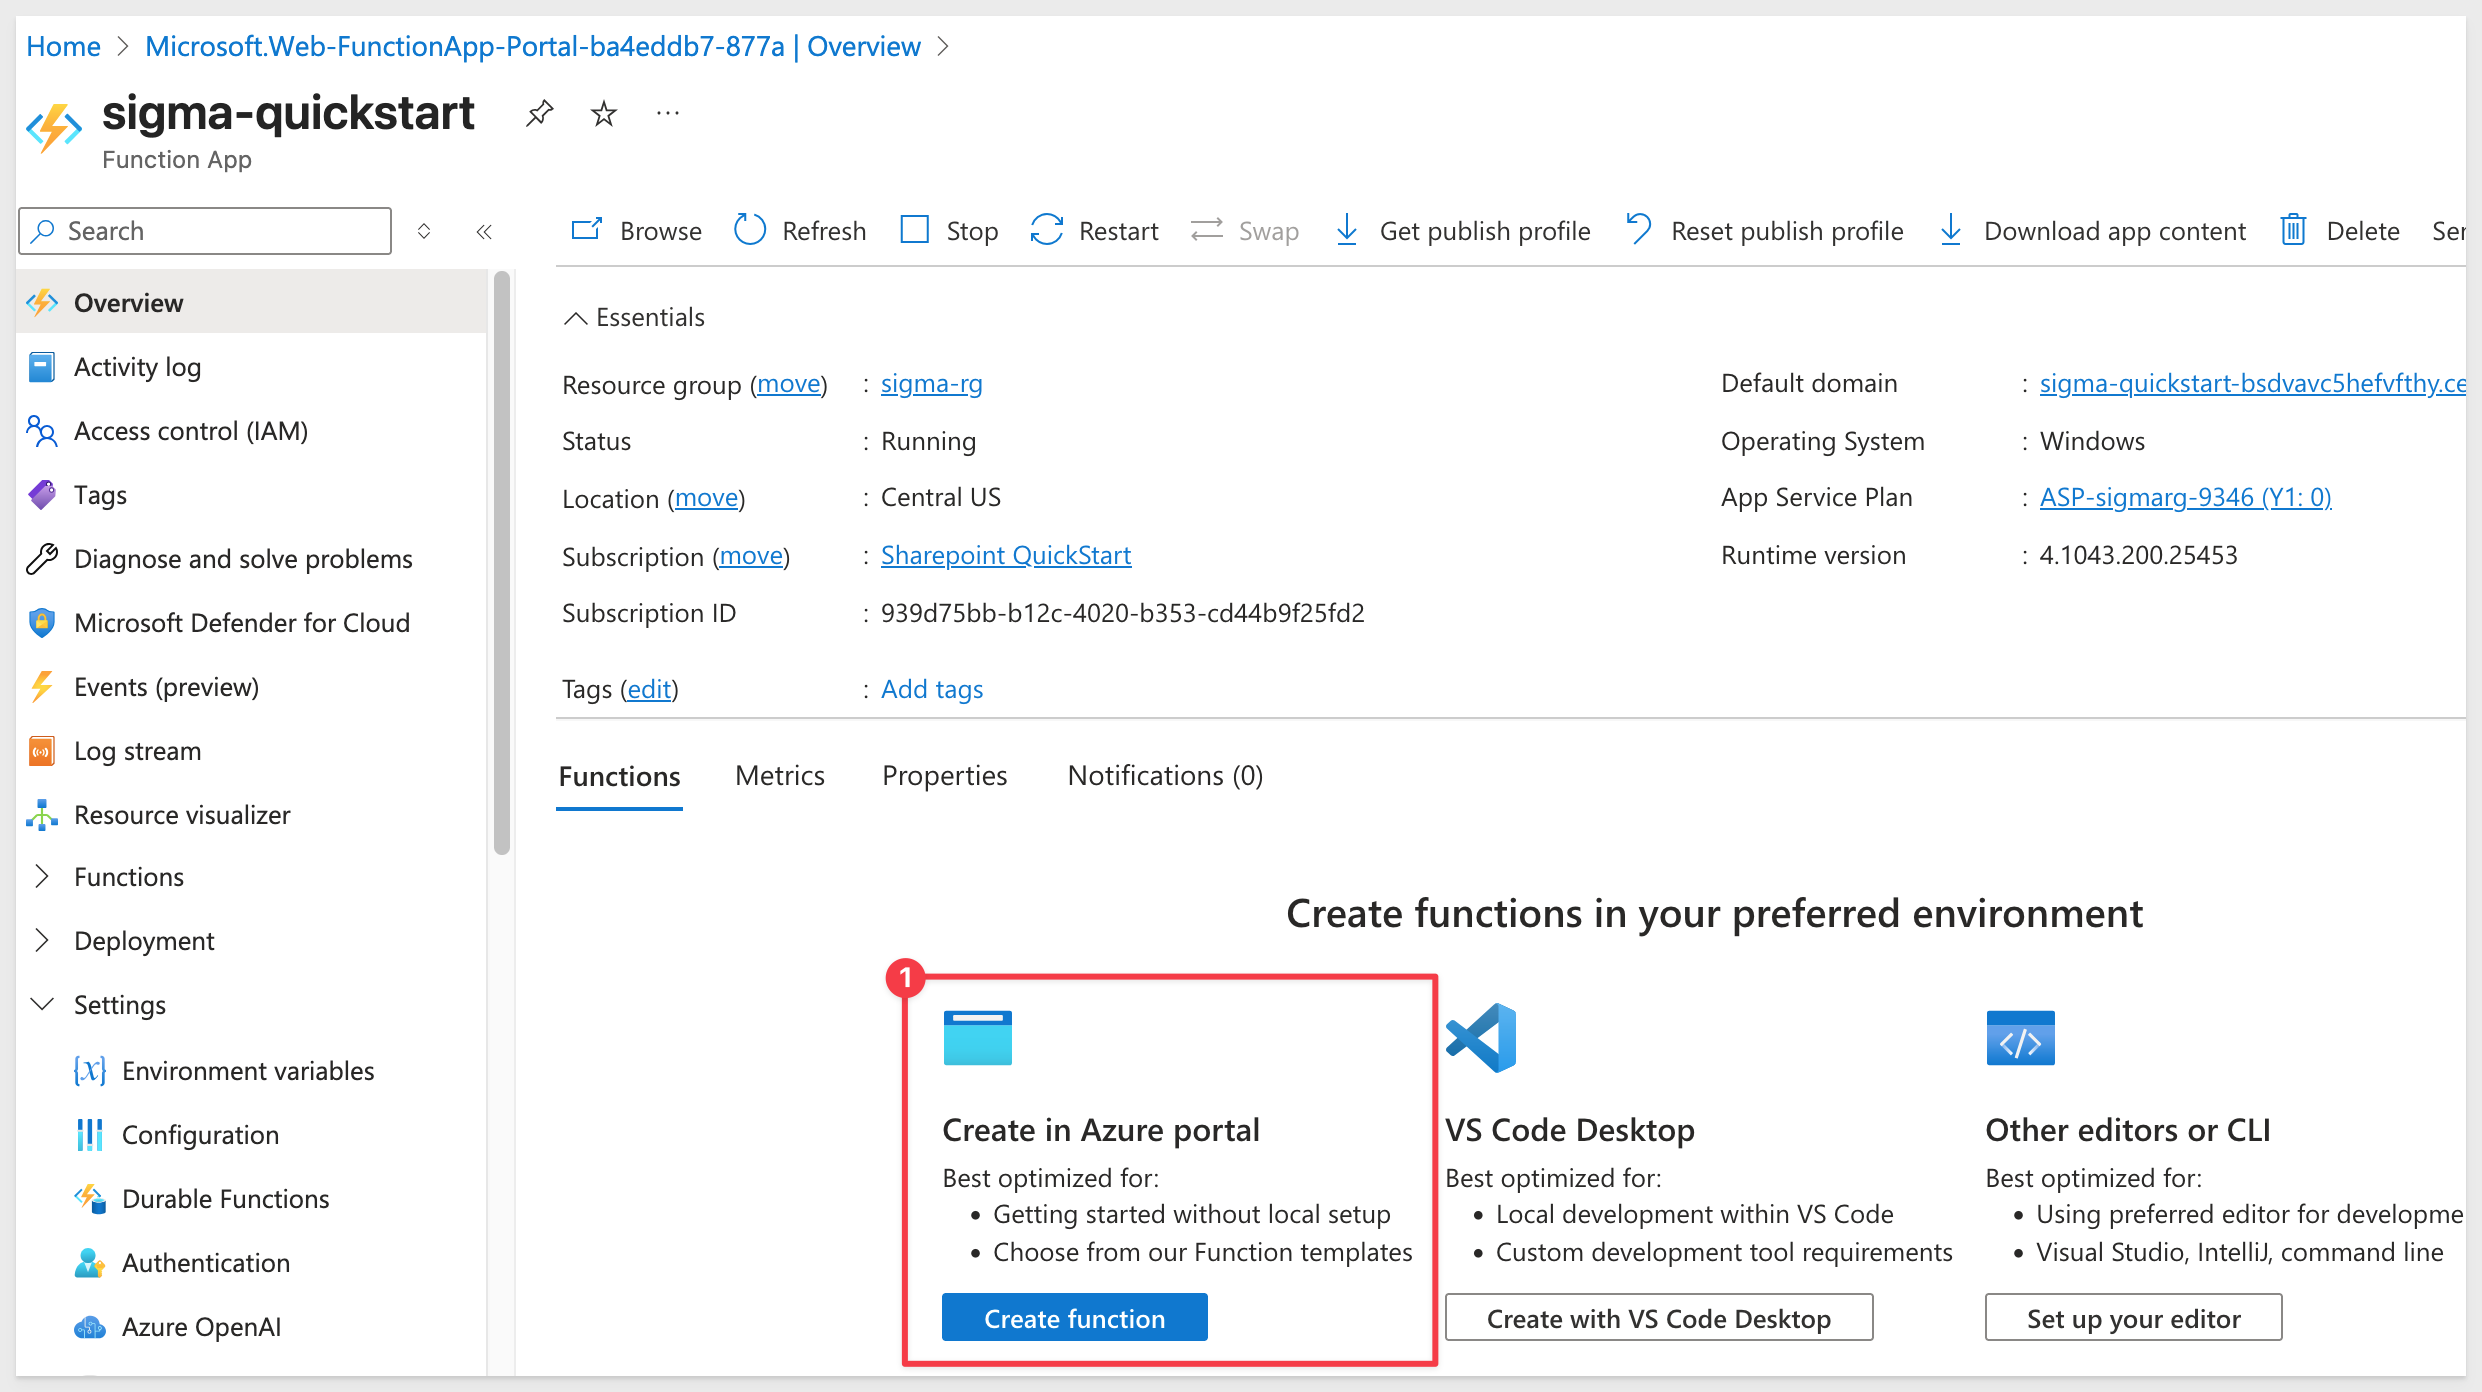
Deploy the Function Code
In your Function App, click the Create function button as shown:
Choose HTTP trigger (first on the list) and click the Next button:

Name the HTTP trigger and select Function for the Authorization level. This provides security for the function itself via a function key will we capture later.
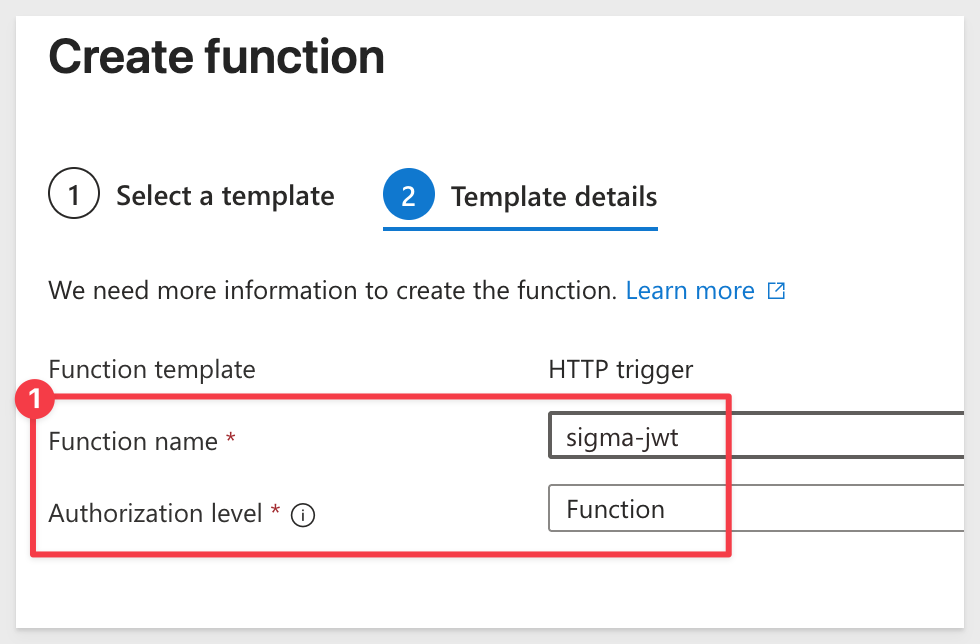
Click Create
Once created, Azure will leave us on the Code + Test page.
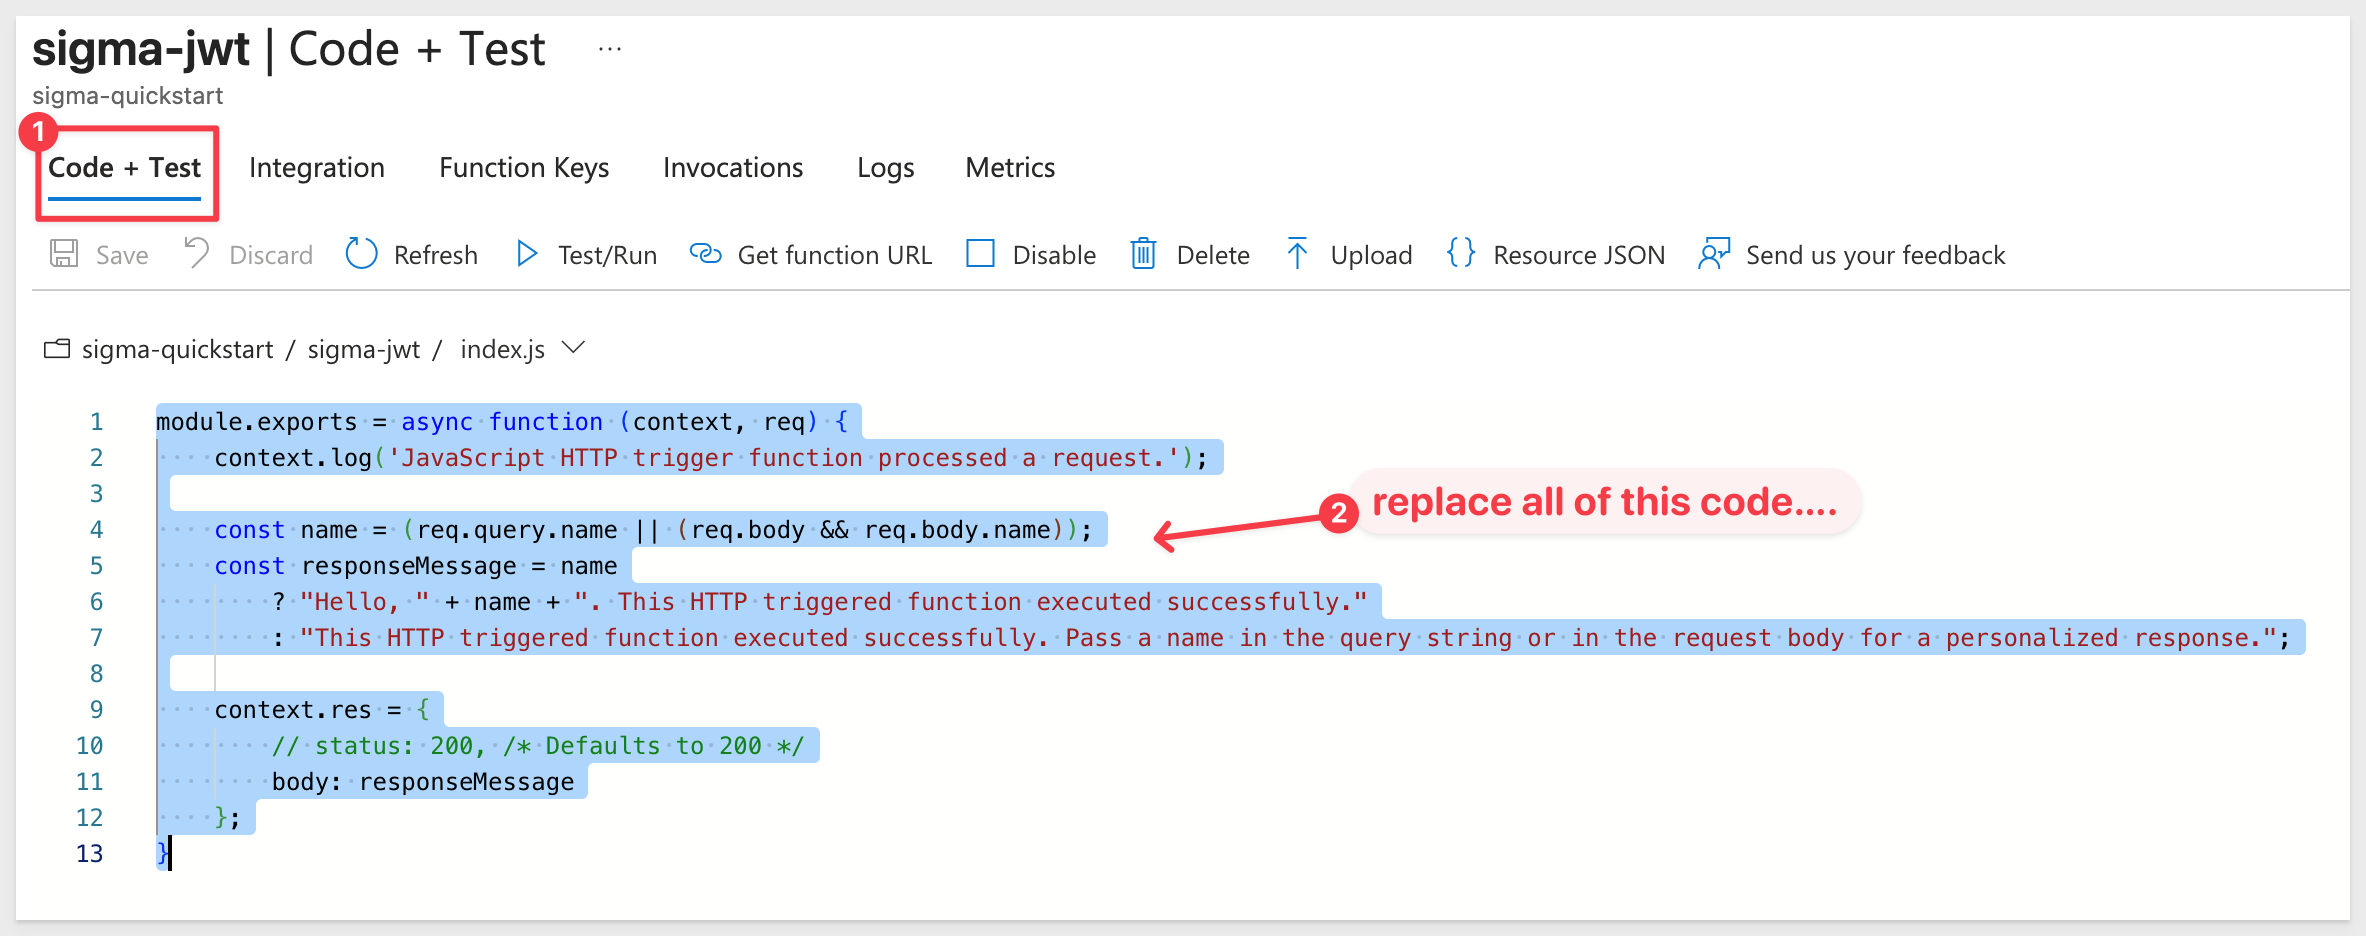
Replace the default code with this JWT implementation for Sigma:
const crypto = require("crypto");

function b64url(input) {
  return Buffer.from(input).toString("base64")
    .replace(/=/g,"").replace(/\+/g,"-").replace(/\//g,"_");
}

function signHS256(payload, secret, kid) {
  const header = { alg: "HS256", typ: "JWT" };
  if (kid) header.kid = kid;
  const encHeader = b64url(JSON.stringify(header));
  const encPayload = b64url(JSON.stringify(payload));
  const data = `${encHeader}.${encPayload}`;
  const sig = crypto.createHmac("sha256", secret).update(data).digest("base64")
    .replace(/=/g,"").replace(/\+/g,"-").replace(/\//g,"_");
  return `${data}.${sig}`;
}

function appendEmbedParams(baseUrl, jwt) {
  const sep = baseUrl.includes("?") ? "&" : "?";
  const hasEmbed = /(?:[?&]):embed=/.test(baseUrl);
  return `${baseUrl}${sep}:jwt=${encodeURIComponent(jwt)}${hasEmbed ? "" : "&:embed=true"}`;
}

module.exports = function (context, req) {
  try {
    const { BASE_URL, CLIENT_ID, SECRET, ACCOUNT_TYPE = "", TEAM = "" } = process.env;

    if (!BASE_URL || !CLIENT_ID || !SECRET) {
      context.bindings.res = {
        status: 500,
        headers: { "Content-Type": "application/json" },
        body: JSON.stringify({ error: "Missing BASE_URL, CLIENT_ID, or SECRET in Environment variables." })
      };
      context.done();
      return;
    }

    const userEmail = (req.query && req.query.user ? String(req.query.user) : "").trim();
    if (!userEmail) {
      context.bindings.res = {
        status: 400,
        headers: { "Content-Type": "application/json" },
        body: JSON.stringify({ error: "Missing 'user' (email)." })
      };
      context.done();
      return;
    }

    const now = Math.floor(Date.now()/1000);
    const exp = now + 60*10;
    const payload = {
      iss: CLIENT_ID,
      sub: userEmail,
      aud: "sigma",
      iat: now,
      exp,
      jti: `${CLIENT_ID}-${now}-${Math.random().toString(36).substr(2, 9)}`,
      ...(ACCOUNT_TYPE ? { account_type: ACCOUNT_TYPE } : {}),
      ...(TEAM ? { teams: [TEAM] } : {})
    };

    const token = signHS256(payload, SECRET, CLIENT_ID);
    const embedUrl = appendEmbedParams(BASE_URL, token);

    context.bindings.res = {
      status: 200,
      headers: { "Content-Type": "application/json" },
      body: JSON.stringify({ ok: true, embedUrl, expires_in: exp - now })
    };
    context.done();
  } catch (e) {
    context.bindings.res = {
      status: 500,
      headers: { "Content-Type": "application/json" },
      body: JSON.stringify({ error: "JWT generation failed", detail: String(e) })
    };
    context.done();
  }
};
Click Save.
Function URL
While we are here, let's copy the function URL for use later. Copy and save it to your text file:
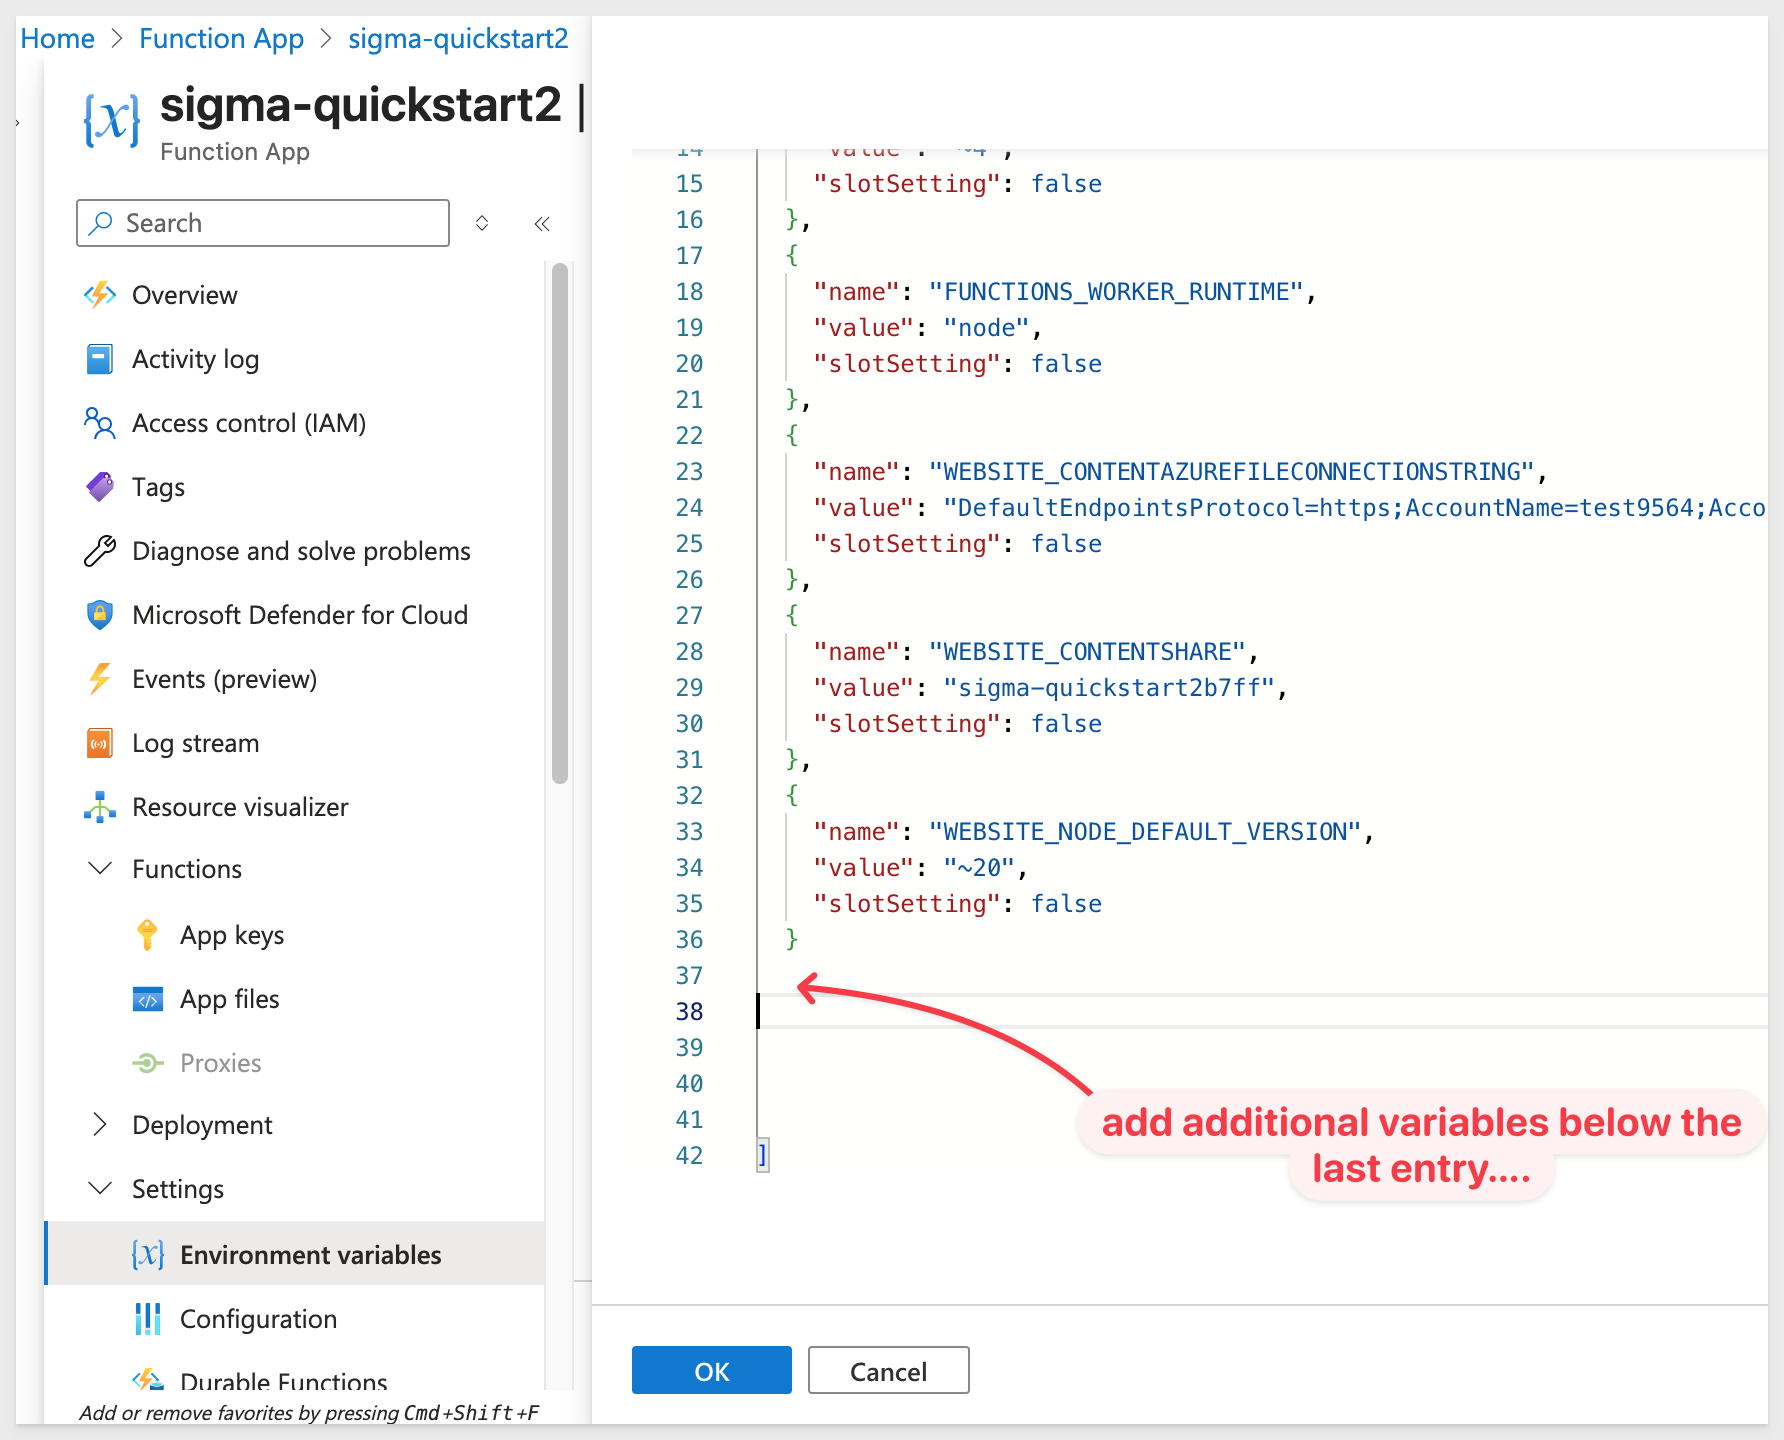
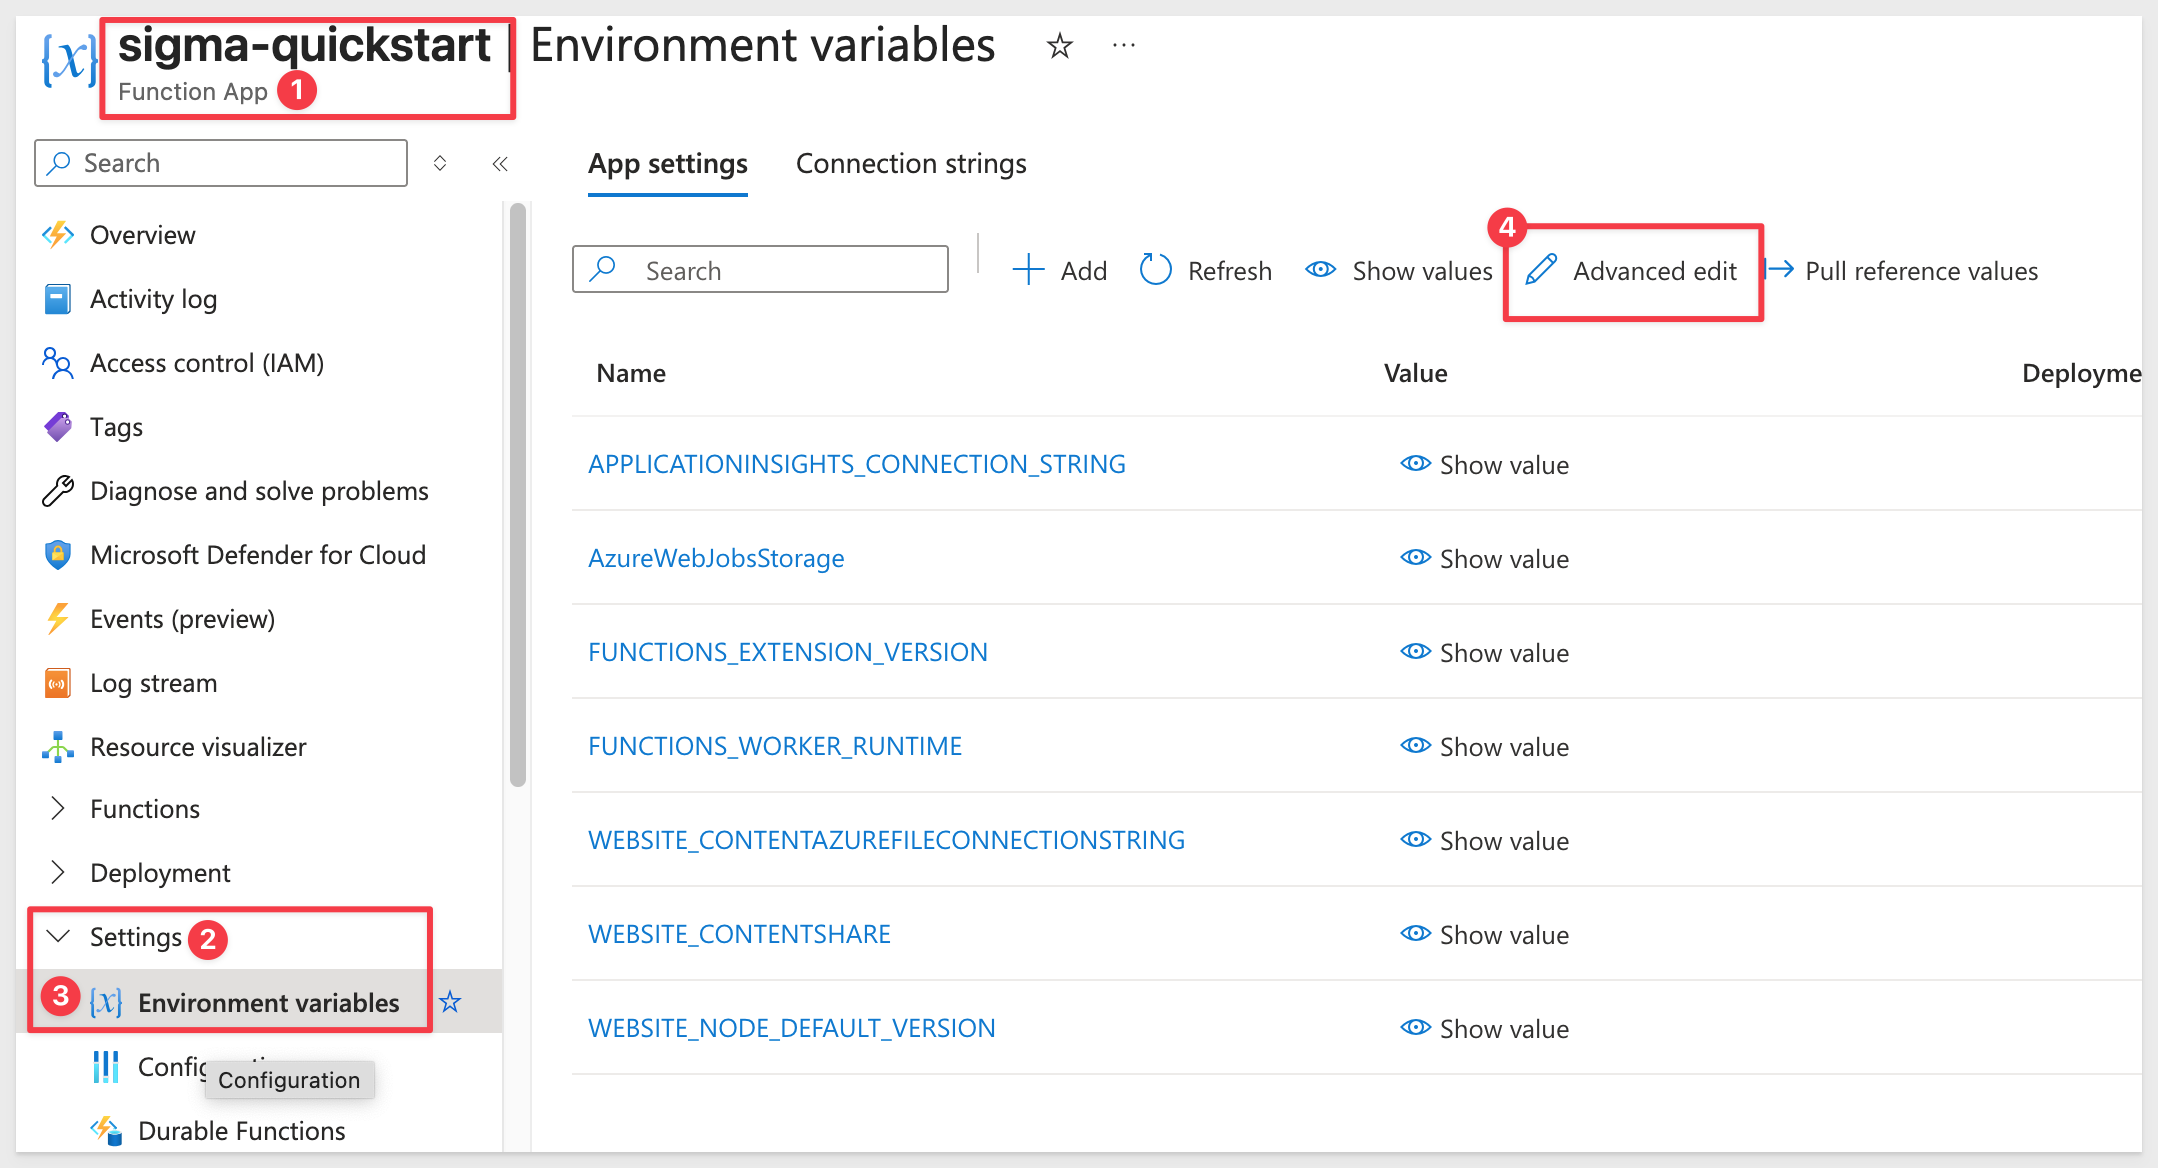
Go to your Function App > Settings > Environment variables (this is much faster than adding variables individually).
Add your additional variables beneath the existing JSON, updating the values marked with YOUR_* with the value captured earlier.
Update these specific values:
YOUR_SIGMA_WORKBOOK_URL: Your complete Sigma workbook URLYOUR_SIGMA_CLIENT_ID: Client ID from earlier Sigma setupYOUR_SIGMA_SECRET: Secret from earlier Sigma setupYOUR_TEAM_NAME:Embed_Usersis provided for you but if you shared to a different team, adjust accordingly.
,
{
    "name": "ACCOUNT_TYPE",
    "value": "View",
    "slotSetting": false
  },
  {
    "name": "BASE_URL",
    "value": "YOUR_SIGMA_WORKBOOK_URL",
    "slotSetting": false
  },
  {
    "name": "CLIENT_ID",
    "value": "YOUR_SIGMA_CLIENT_ID",
    "slotSetting": false
  },
  {
    "name": "SECRET",
    "value": "YOUR_SIGMA_SECRET",
    "slotSetting": false
  },
  {
    "name": "TEAM",
    "value": "Embed_Users",
    "slotSetting": false
  }
Click OK to save all settings at once and then click Apply and Confirm. Once the screen reloads, we can proceed to the next step.
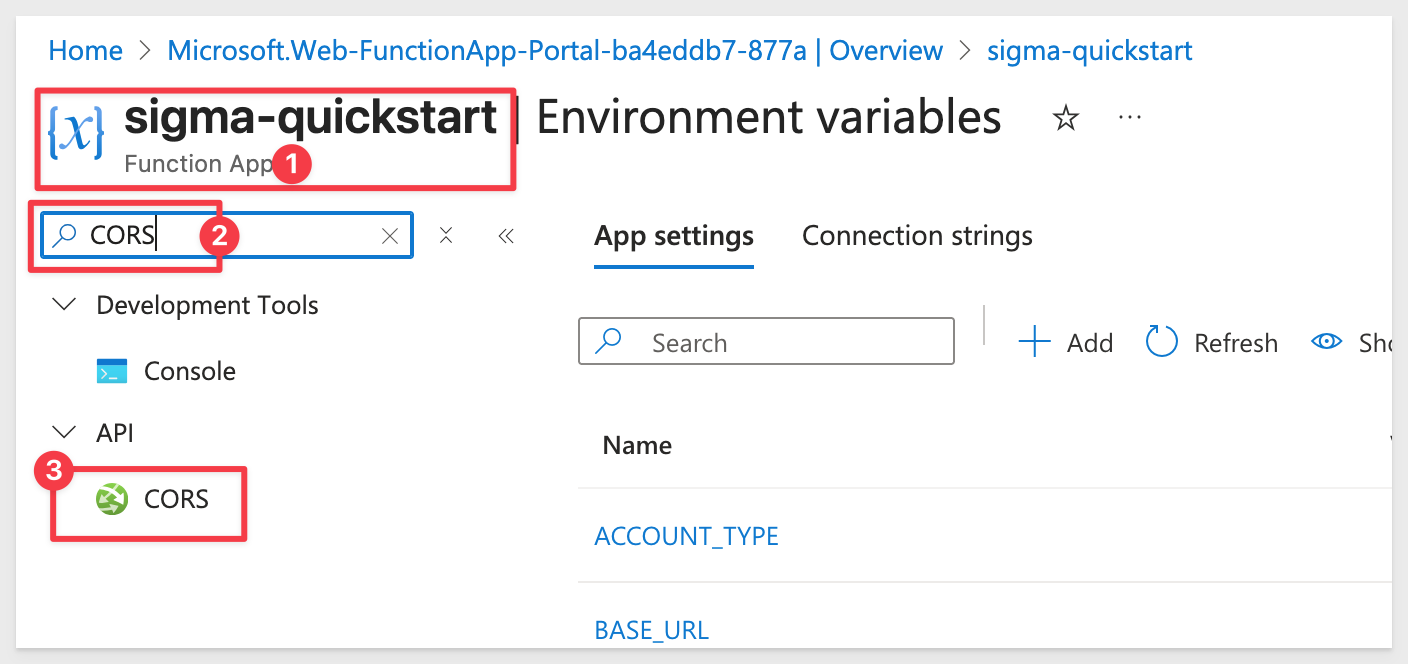
SharePoint needs to be able to call your Azure Function:
Search for CORS in the function app and select it:
Add your SharePoint tenant origin (replace yourtenant with your actual tenant name).
https://yourtenant.sharepoint.com
Click Save and wait for the save confirmation.
Test the Function
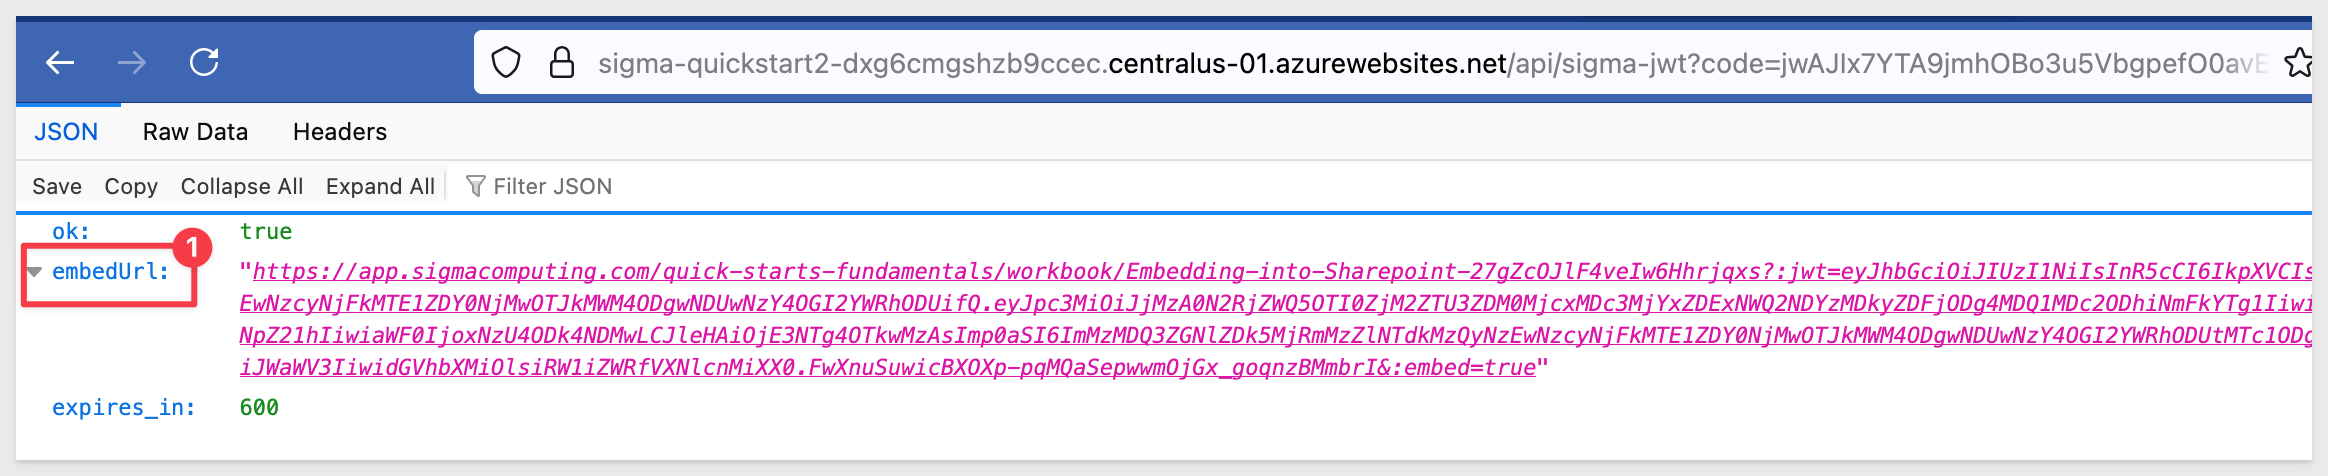
We can manually test our function in a browser using the function URL captured earlier but we need to add a user to it since that is required.
For example, our url is:
https://sigma-quickstart2-dxg6cmgshzb9ccec.centralus-01.azurewebsites.net/api/sigma-jwt?code=jwAJIx7YTA9jmhOBo3u5VbgpefO0avE-Nr48sTjCYK1RAPBIg==
To include a user as a URL parameter we simply append:
&user=test@example.com
Sending that in the browser results in a valid embedUrl which we can also click one-time to see the Sigma embed:
Now let's configure and deploy the SharePoint web part that calls your Azure Function. SPFx provides automatic user authentication and native SharePoint integration.
Clone the Git Repository Project Folder
We have made sample SPFx project code available in a public GitHub repository to save time.
While you may clone the entire repository (it is not that large), we want to avoid cloning portions of the repository that aren't immediately relevant.
Instead, we will use VSCode and terminal to perform a git sparse-checkout of the specific project folder we are interested in. This involves a few extra steps, but results in a cleaner local project folder.
Open VSCode and a new Terminal session.
Create a new directory in a location of your choice, using the command:
For example:
mkdir sigma_quickstarts
Change to the new directory:
cd sigma_quickstarts
Execute the terminal command:
git init
Add the remote repository as the origin:
git remote add -f origin https://github.com/sigmacomputing/quickstarts-public.git
No errors should show:
Enable sparse checkout:
git config core.sparseCheckout true
Specify the folder you want to clone by adding it to the sparse-checkout configuration:
echo "sigma-embed-sharepoint" >> .git/info/sparse-checkout
Pull the specified folder from the repository:
git pull origin main
Configure Your Function URL
Open src/webparts/sigmaEmbed/components/SigmaEmbed.tsx
Update the functionUrl with your Azure Function details (line 32):
const functionUrl = `https://YOUR_FUNCTION_NAME.azurewebsites.net/api/HttpTrigger1?code=YOUR_FUNCTION_KEY&user=${encodeURIComponent(userEmail)}`;
Replace:
YOUR_FUNCTION_NAMEwith your actual Azure Function App nameYOUR_FUNCTION_KEYwith the function key from Azure Portal
Build and Deploy to SharePoint
Open a terminal session in the sigma-embed-sharepoint folder.
Install project dependencies:
npm install
Build for deploy:
gulp build --ship
gulp bundle --ship
gulp package-solution --ship
Deploy to SharePoint:
We need to add our SPFx webpart to Sharepoint.
Navigate to the Apps page in Sharepoint:
https://[yourtenant].sharepoint.com/sites/appcatalog
Replace [yourtenant] with your actual tenant name.
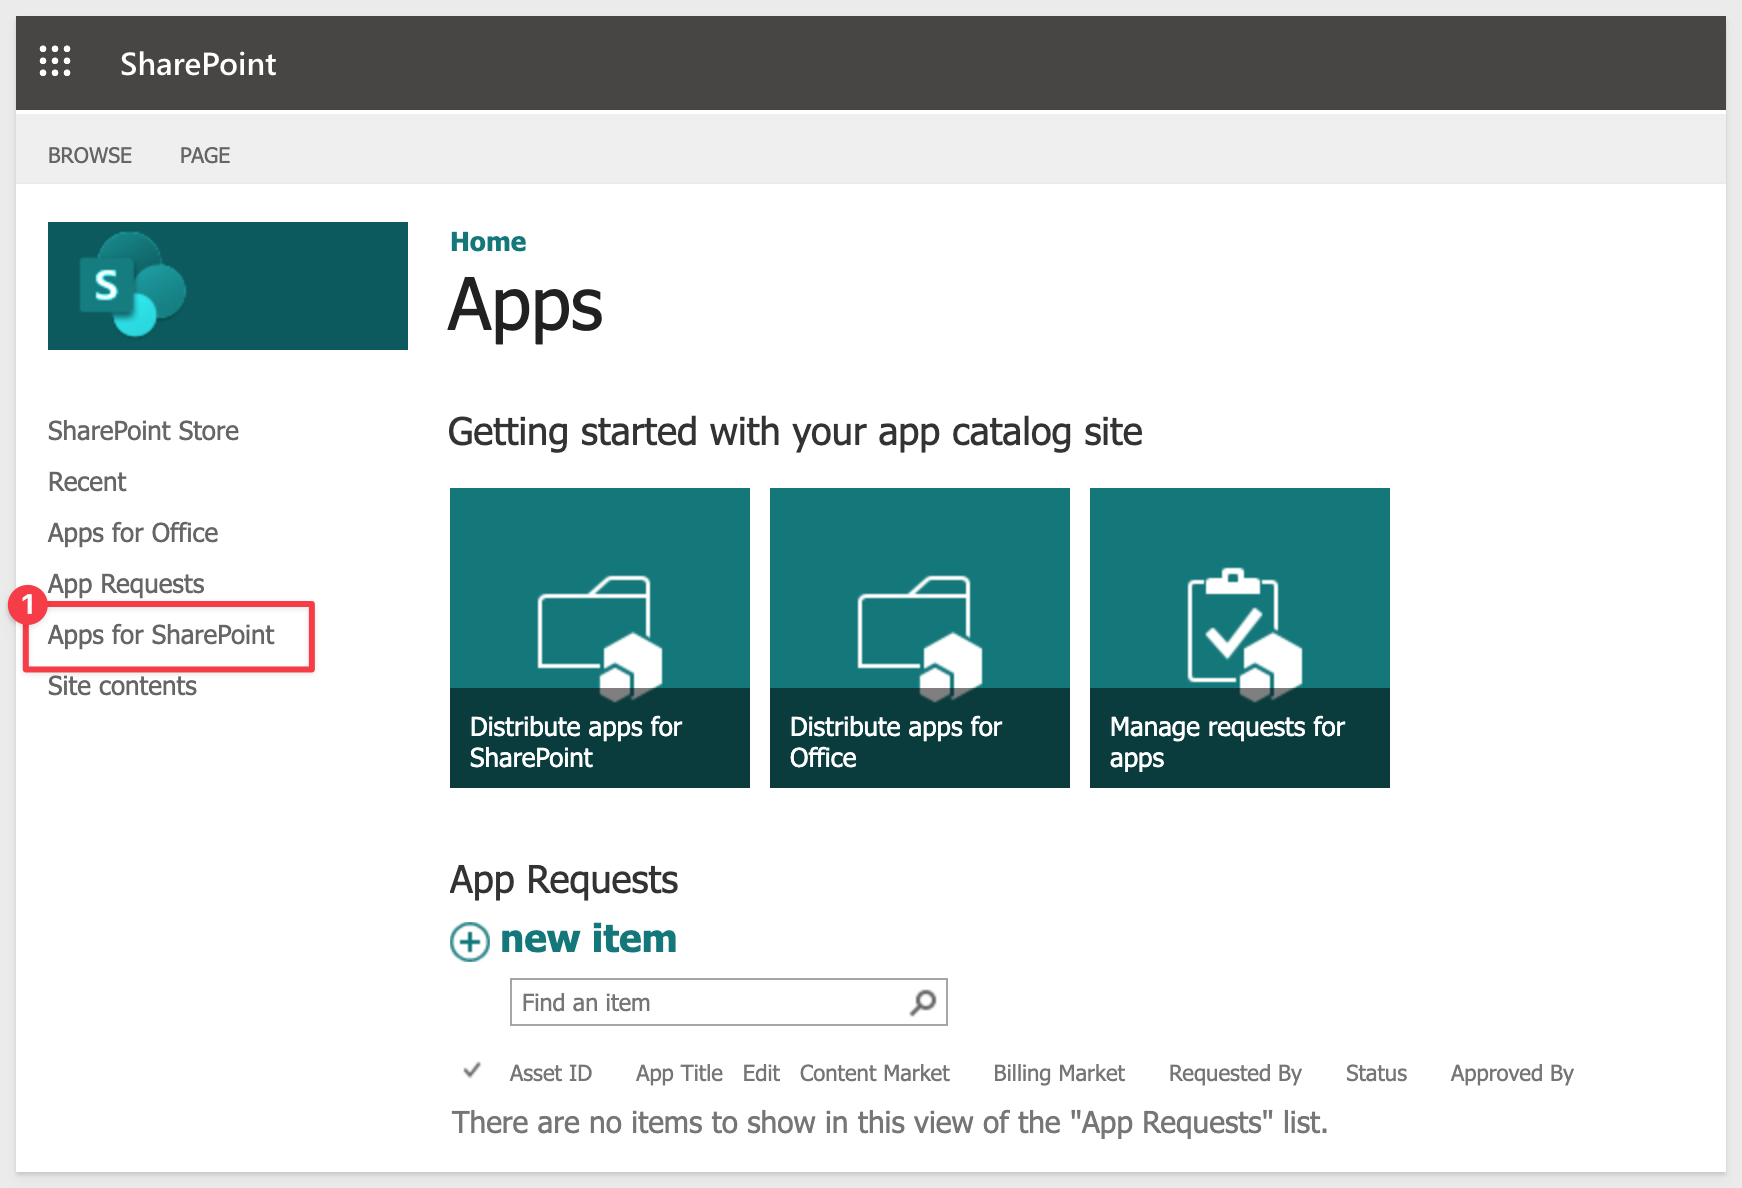
Once on the page, click Apps for Sharepoint:
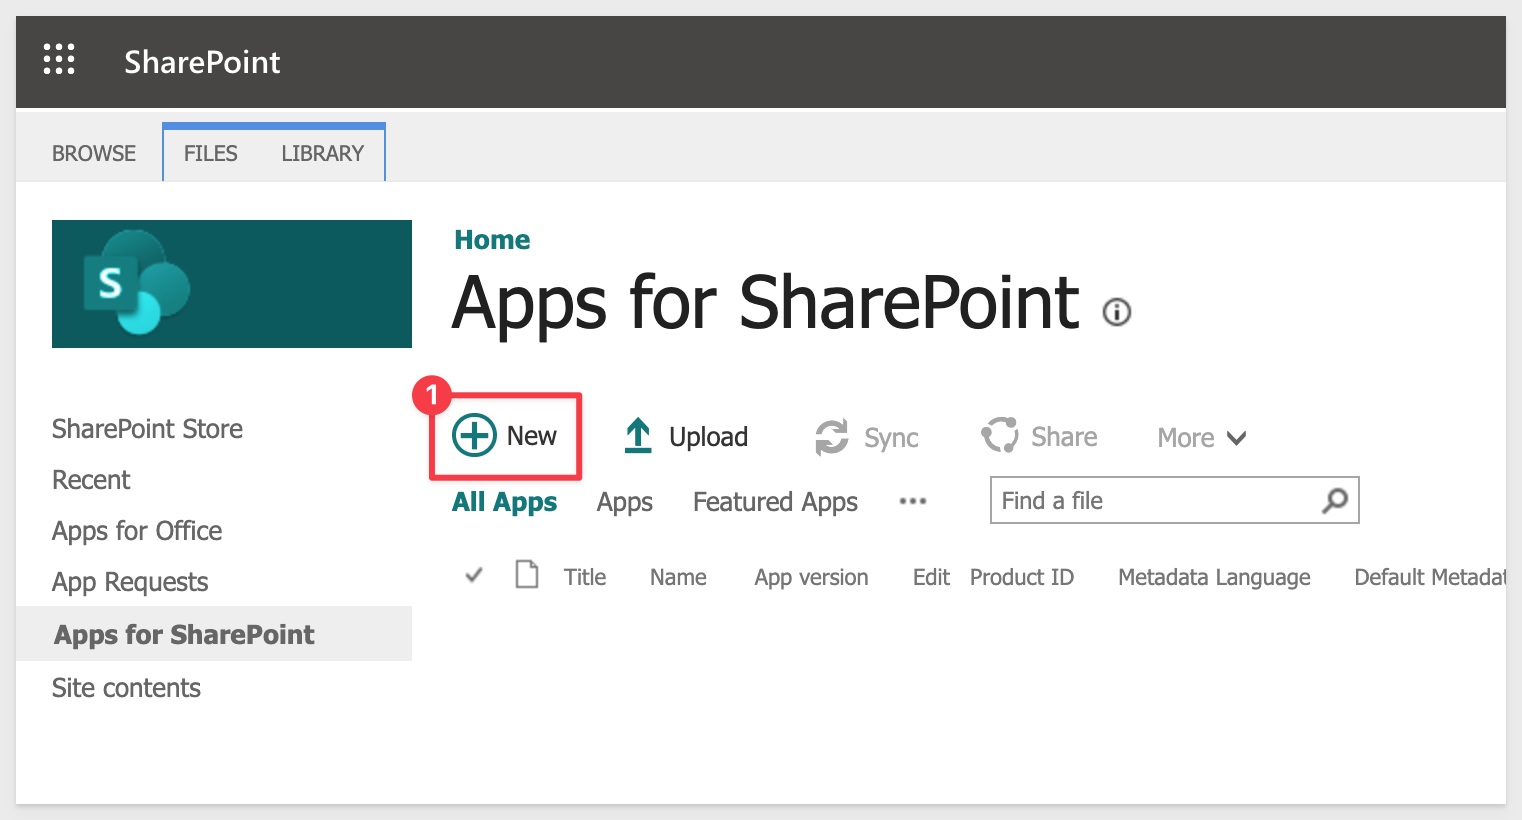
Click + New:
Browse to the sigma-sharepoint-webpart.sppkg file in the VSCode project folder and select it.
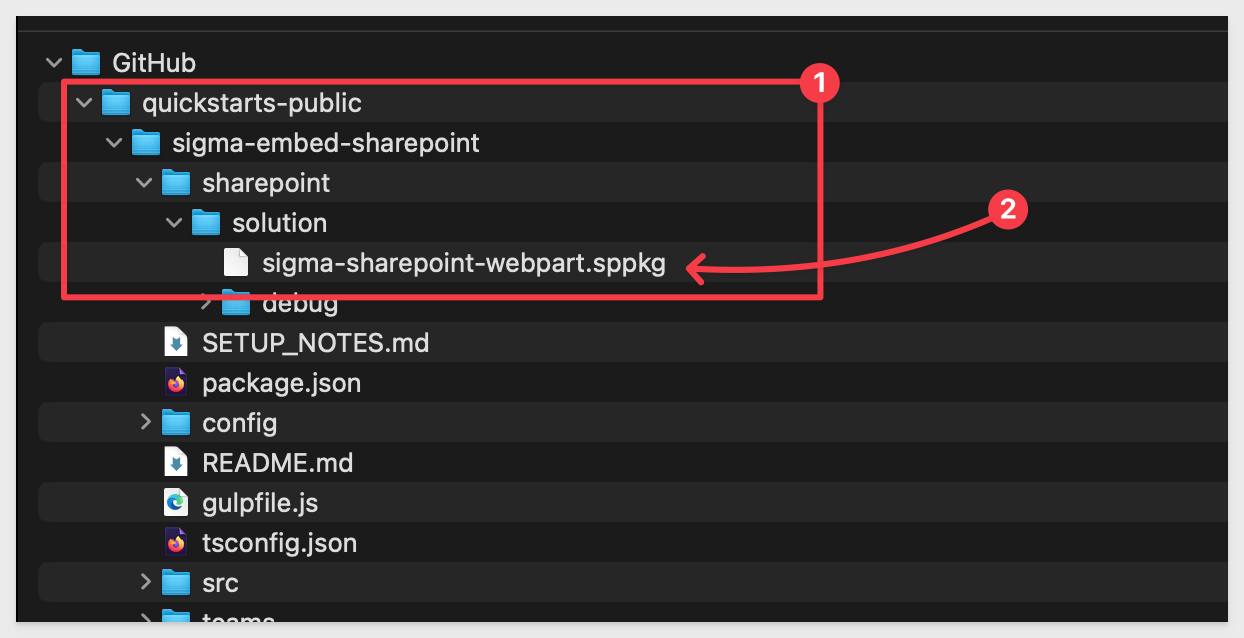
Click OK to upload the file to your SharePoint App Catalog.
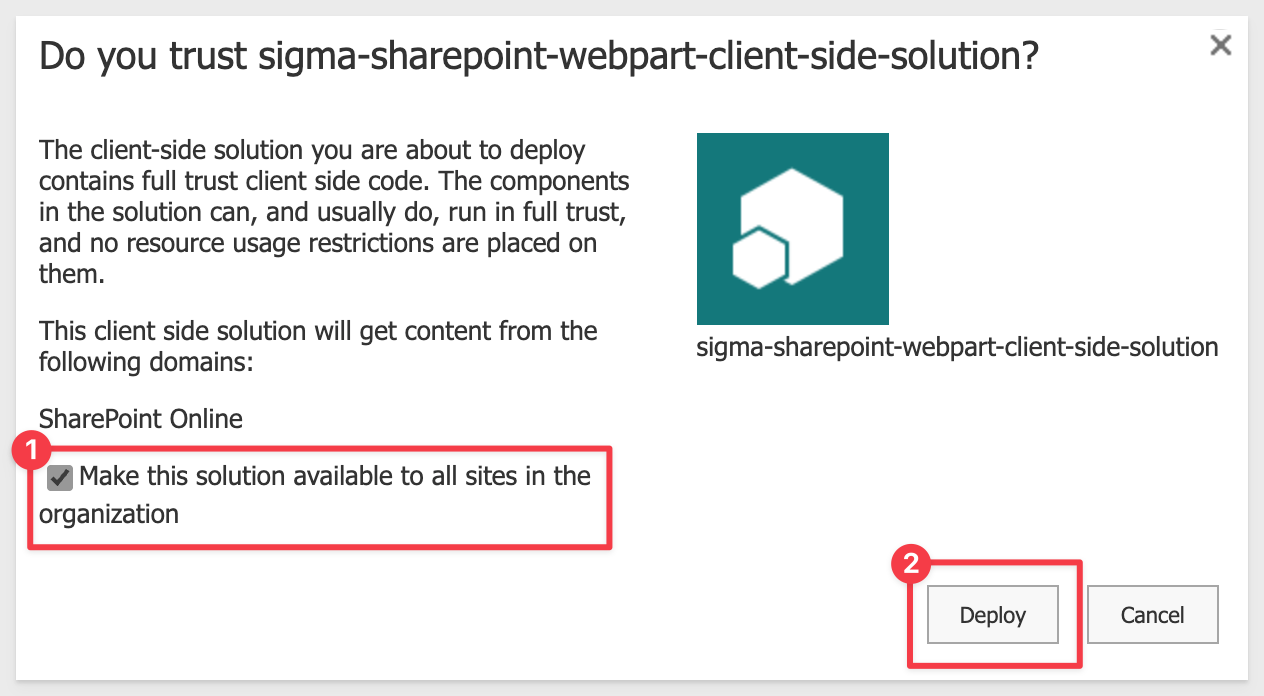
When prompted, click Deploy:
Create a new page in Sharepoint:

Select the Communications site (if you are in a Sharepoint trial only).
Click Create blank.
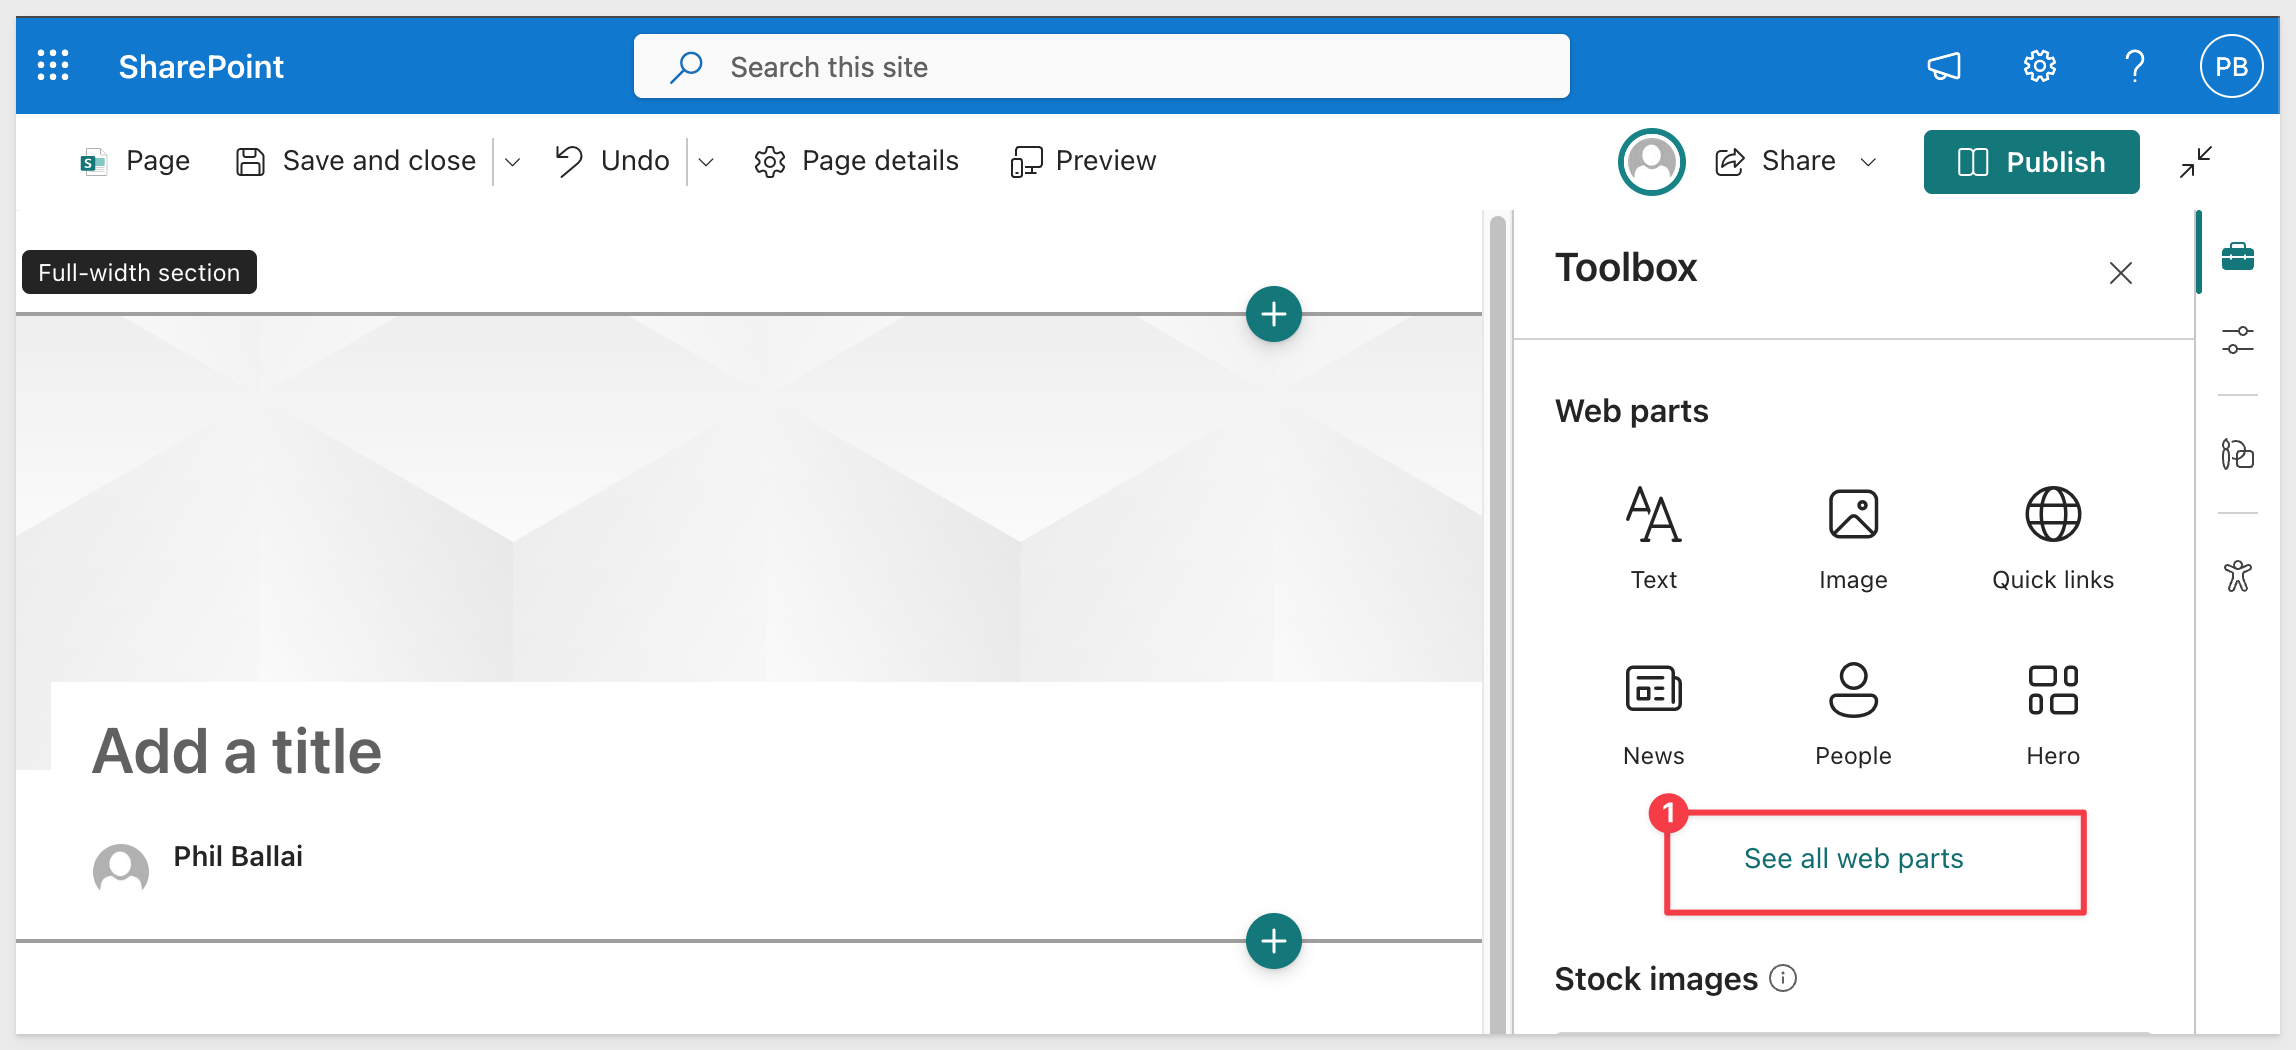
Once on the blank page, click See all web parts:
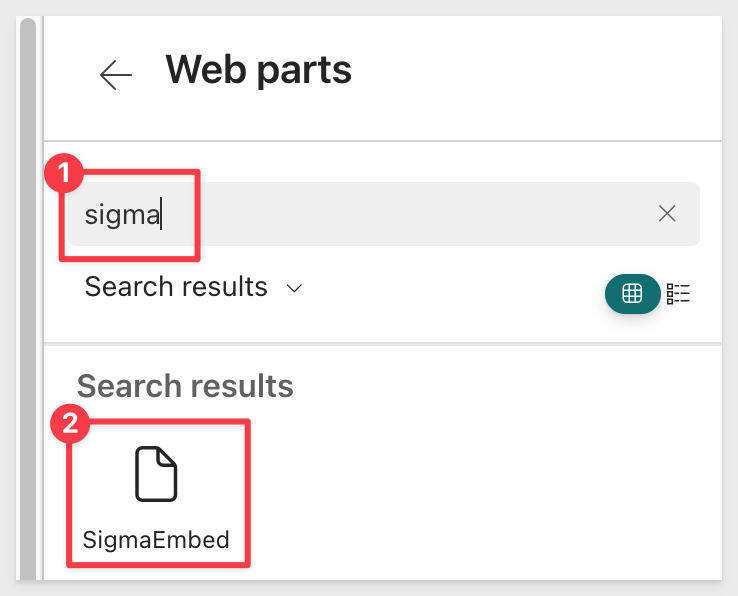
Search for Sigma and select the SigmaEmbed SPFx web part:
The page will then render the web part and we are done!
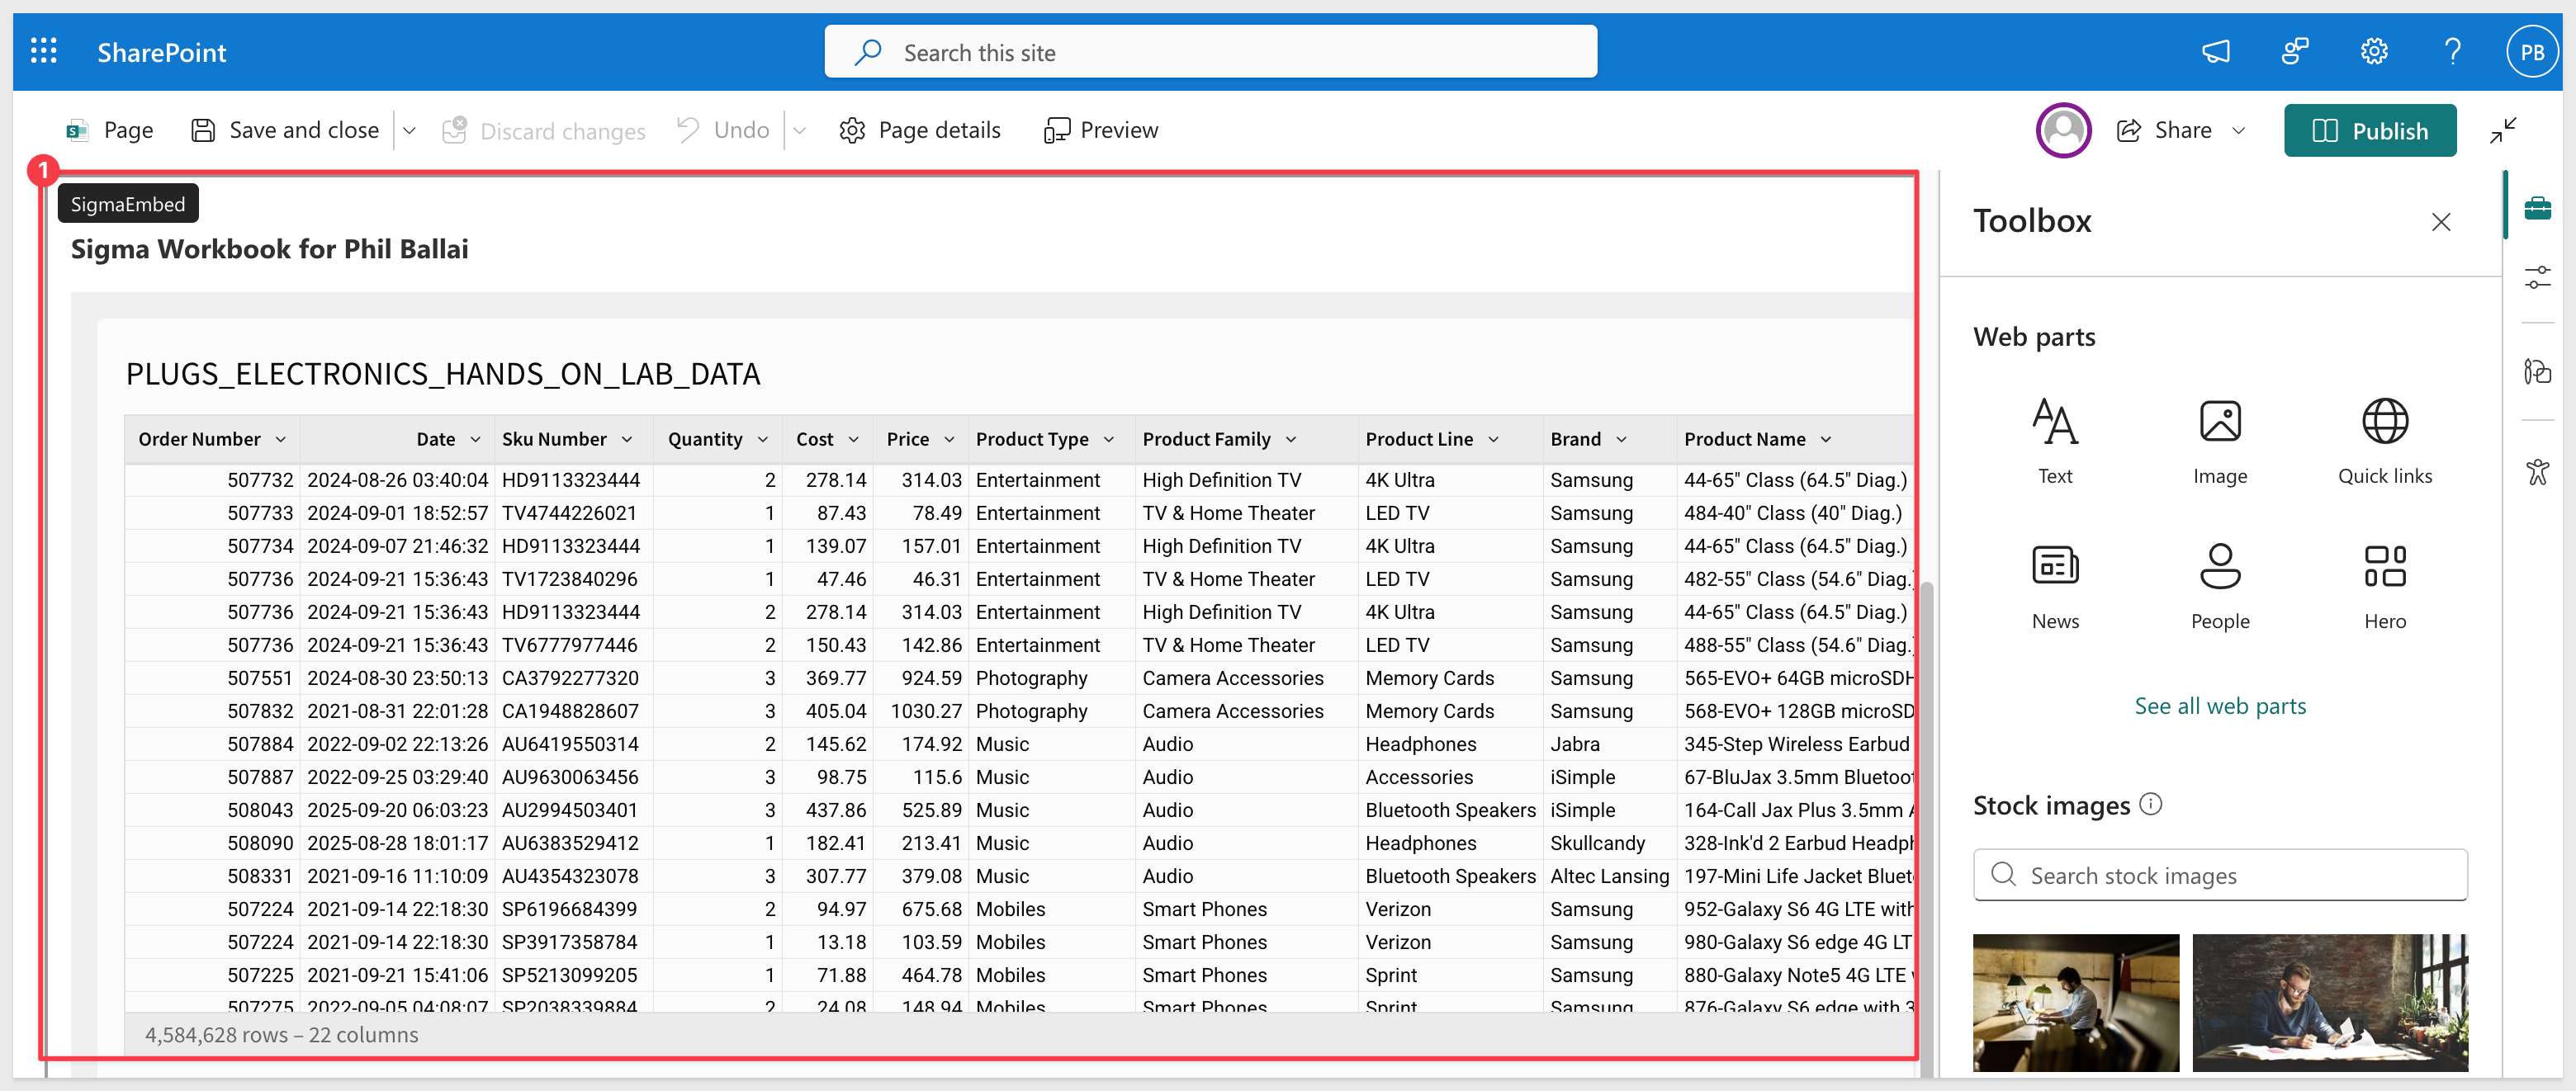
The web part will automatically:
- Get the current SharePoint user's email
- Call your Azure Function to get a JWT token
- Display the Sigma workbook with proper user authentication
Troubleshooting
CORS errors: Ensure your SharePoint domain is added to Azure Function CORS settings.
Blank embed: Check that the user has access to the Sigma workbook or team.
Function errors: Verify environment variables are set correctly in Azure.
If a mistake was made in the SigmaEmbed.tsx file (the URL specifically), edit and save the file again, rebuild the project and upload it again into the Apps for Sharepoint page, over writing the existing SigmaEmbed web part.
In this QuickStart, we built a complete Sigma SharePoint embedding solution with a simplified approach that:
- Created Azure Function with copy/paste JWT code - No Git repository needed for the function
- Deployed SharePoint Framework web part from a single Git repository
- Configured secure authentication that automatically gets SharePoint user context
- Established proper CORS to allow SharePoint to call your Azure Function
- Enabled seamless workbook access based on Sigma team membership
This streamlined approach eliminates complexity while providing enterprise-grade security. Your users can now access Sigma workbooks directly within SharePoint with their existing identity!
Additional Resource Links
Blog
Community
Help Center
QuickStarts
Be sure to check out all the latest developments at Sigma's First Friday Feature page!