This QuickStart provides instructions on how to set up Sigma's Google Analytics 4 template.
This template gives you a prebuilt analytics package for Google Analytics 4 events data, including detailed page-level metrics for every page and the ability to dive into event-level details, and is based on reports from Universal Analytics/GA3.
The template can run on top of any cloud data warehouse, but this guide details how to use the template on top of Snowflake's Google Analytics connector.
There are 4 steps to setting up the template:
- Prepare your Google Analytics and Google Cloud Platform (GCP) accounts
- Install and configure Snowflake's Google Analytics Raw Data connector
- Transform the Google Analytics events data using the provided SQL script
- Launch the template in Sigma and Swap Sources to the table created in step 3
For more information on Sigma's product release strategy, see Sigma product releases.
Target Audience
Anyone who is trying to gain better insight into Google Analytics 4 data.
Prerequisites
- Access to your Google Analytics and GCP accounts.
- Access to your Snowflake account with the ability to create tables and grant access to the role used in your Sigma connection.
- Access to your Sigma account with the ability to create a workbook.
What You'll Learn
How to deploy Sigma's Google Analytics 4 template.
What You'll Build
- An up-to-date, analytics-ready Google Analytics events table in your Snowflake account.
- A Sigma workbook that tracks website activity with full visibility into granular event-level metrics.

Before configuring the Snowflake Connector for Google Analytics Raw Data (GARD), you will need to perform some one-time setup in your Google account. This process requires access to both Google Analytics and Google Cloud Platform (GCP).
At a high level, the necessary actions in your Google account are
- Migrate your Google Analytics from Universal Analytics to GA4. This is done inside the GA platform.
- Configure a BigQuery link for GA4 data. This is done inside the GA platform and allows raw GA data to be dumped into a GCP project. Note that you should use the Daily export option.
- Configure a service account or OAuth authentication to allow Snowflake to read data from BigQuery storage. This is done in the GCP platform.
For a detailed step-by-step process, we refer to Snowflake's documentation on Preparing your Google analytics and GCP accounts for the GARD Connector.
Once your Google Analytics data is in BigQuery, it's time to install the GARD Connector. To do that, find the Snowflake Connector for Google Analytics Raw Data listing on the Snowflake Marketplace.
You will be prompted to configure a few fields for the connector (Warehouse, Destination Database, Destination Schema and Role) as well as the authentication (either service account or OAuth).
Follow this Snowflake Documentation for setup, and make sure to note the Destination Database and Destination Schema as we will reference them again later.
Once the connector is installed, you'll need to set up Data Ingestion. This is a quick process and Snowflake provides directions here.
Now the GA4 raw data will sync into your Snowflake account at the desired cadence.
The Google Analytics data that the Snowflake Connector loads into your account is raw events data. Each row represents a unique event, but that data is wrapped in nested JSON.
To make it analytics-ready, we provide you with a SQL script that transforms the data into the format needed for the template. The script requires you to input a few fields, then creates a new table called events and a stored procedure to update the events table with new rows each day. It will also grant access on the table to the role used in your Sigma connection.
Download the SQL script here and copy/paste it into a new worksheet in Snowflake. Input the required fields and run the script.
The necessary input fields are:
- ga_raw_data_dest_db: the destination database you specified in Snowflake when setting up the GARD connector
- ga_raw_data_dest_schema: the destination schema you specified in Snowflake when setting up the GARD connector
- ga_raw_data_dest_table: the table that contains raw GA4 events data (created by the connector, named like ANALYTICS_123546)
- ga_modeled_data_target_db: the target database for the modeled Google Analytics data (must exist already)
- ga_modeled_data_target_schema: the target schema for modeled Google Analytics data (must exist already)
- materialization_role_name: the Snowflake role that will own the modeled GA data and materialization
- materialization_warehouse_name: the warehouse used to create and update the modeled events table
- materialization_CRON_string: the materialization schedule. Default is every weekday at 3am PT
- sigma_role_name: the role used in your Sigma connection
You will be instructed how to input these fields in Section 1 of the SQL script. For each variable, delete the placeholder text and enter the desired value inside the single quotes.
Then, you'll need to set the argument for the stored procedure called by the task task_call_usp_materialize_ga_events. At the end of Section 1, you will see the following statement:
create or replace task task_call_usp_materialize_ga_events
warehouse = $materialization_warehouse_name
schedule = $materialization_CRON_string
as
call usp_materialize_ga_events('raw_database.raw_schema.raw_table');
You need to replace the argument passed to usp_materialize_ga_events() with the name of your raw Google Analytics events table. For example, if your raw table (the one created by the GARD connector) is located at GA_RAW_DATA_DEST_DB.GA_RAW_DATA_DEST_SCHEMA.ANALYTICS_123456, you would edit the argument in the stored procedure like so:
create or replace task task_call_usp_materialize_ga_events
warehouse = $materialization_warehouse_name
schedule = $materialization_CRON_string
as
call usp_materialize_ga_events('GA_RAW_DATA_DEST_DB.GA_RAW_DATA_DEST_SCHEMA.ANALYTICS_123456');
Once you've set this value, you can run the entire script and verify that you can see the new events table in your Sigma connection browser. 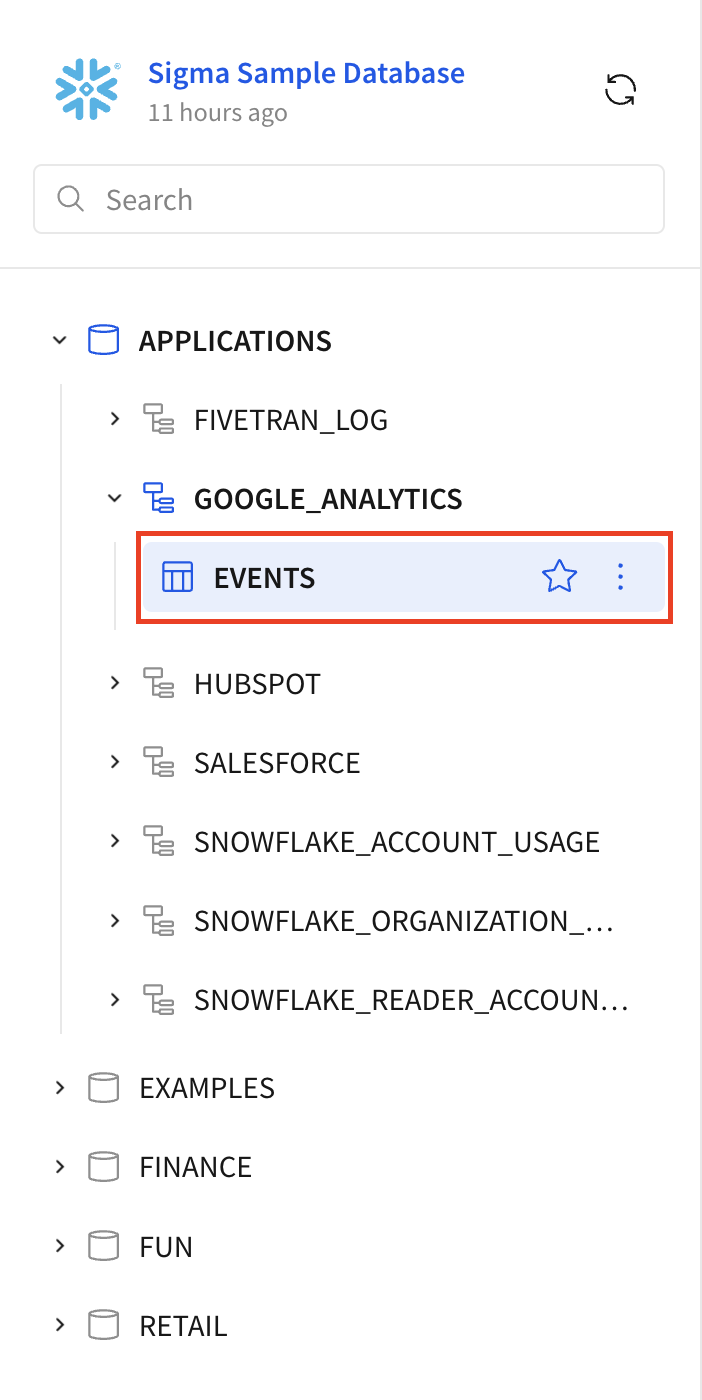
Once you have created the events table, go to Sigma.
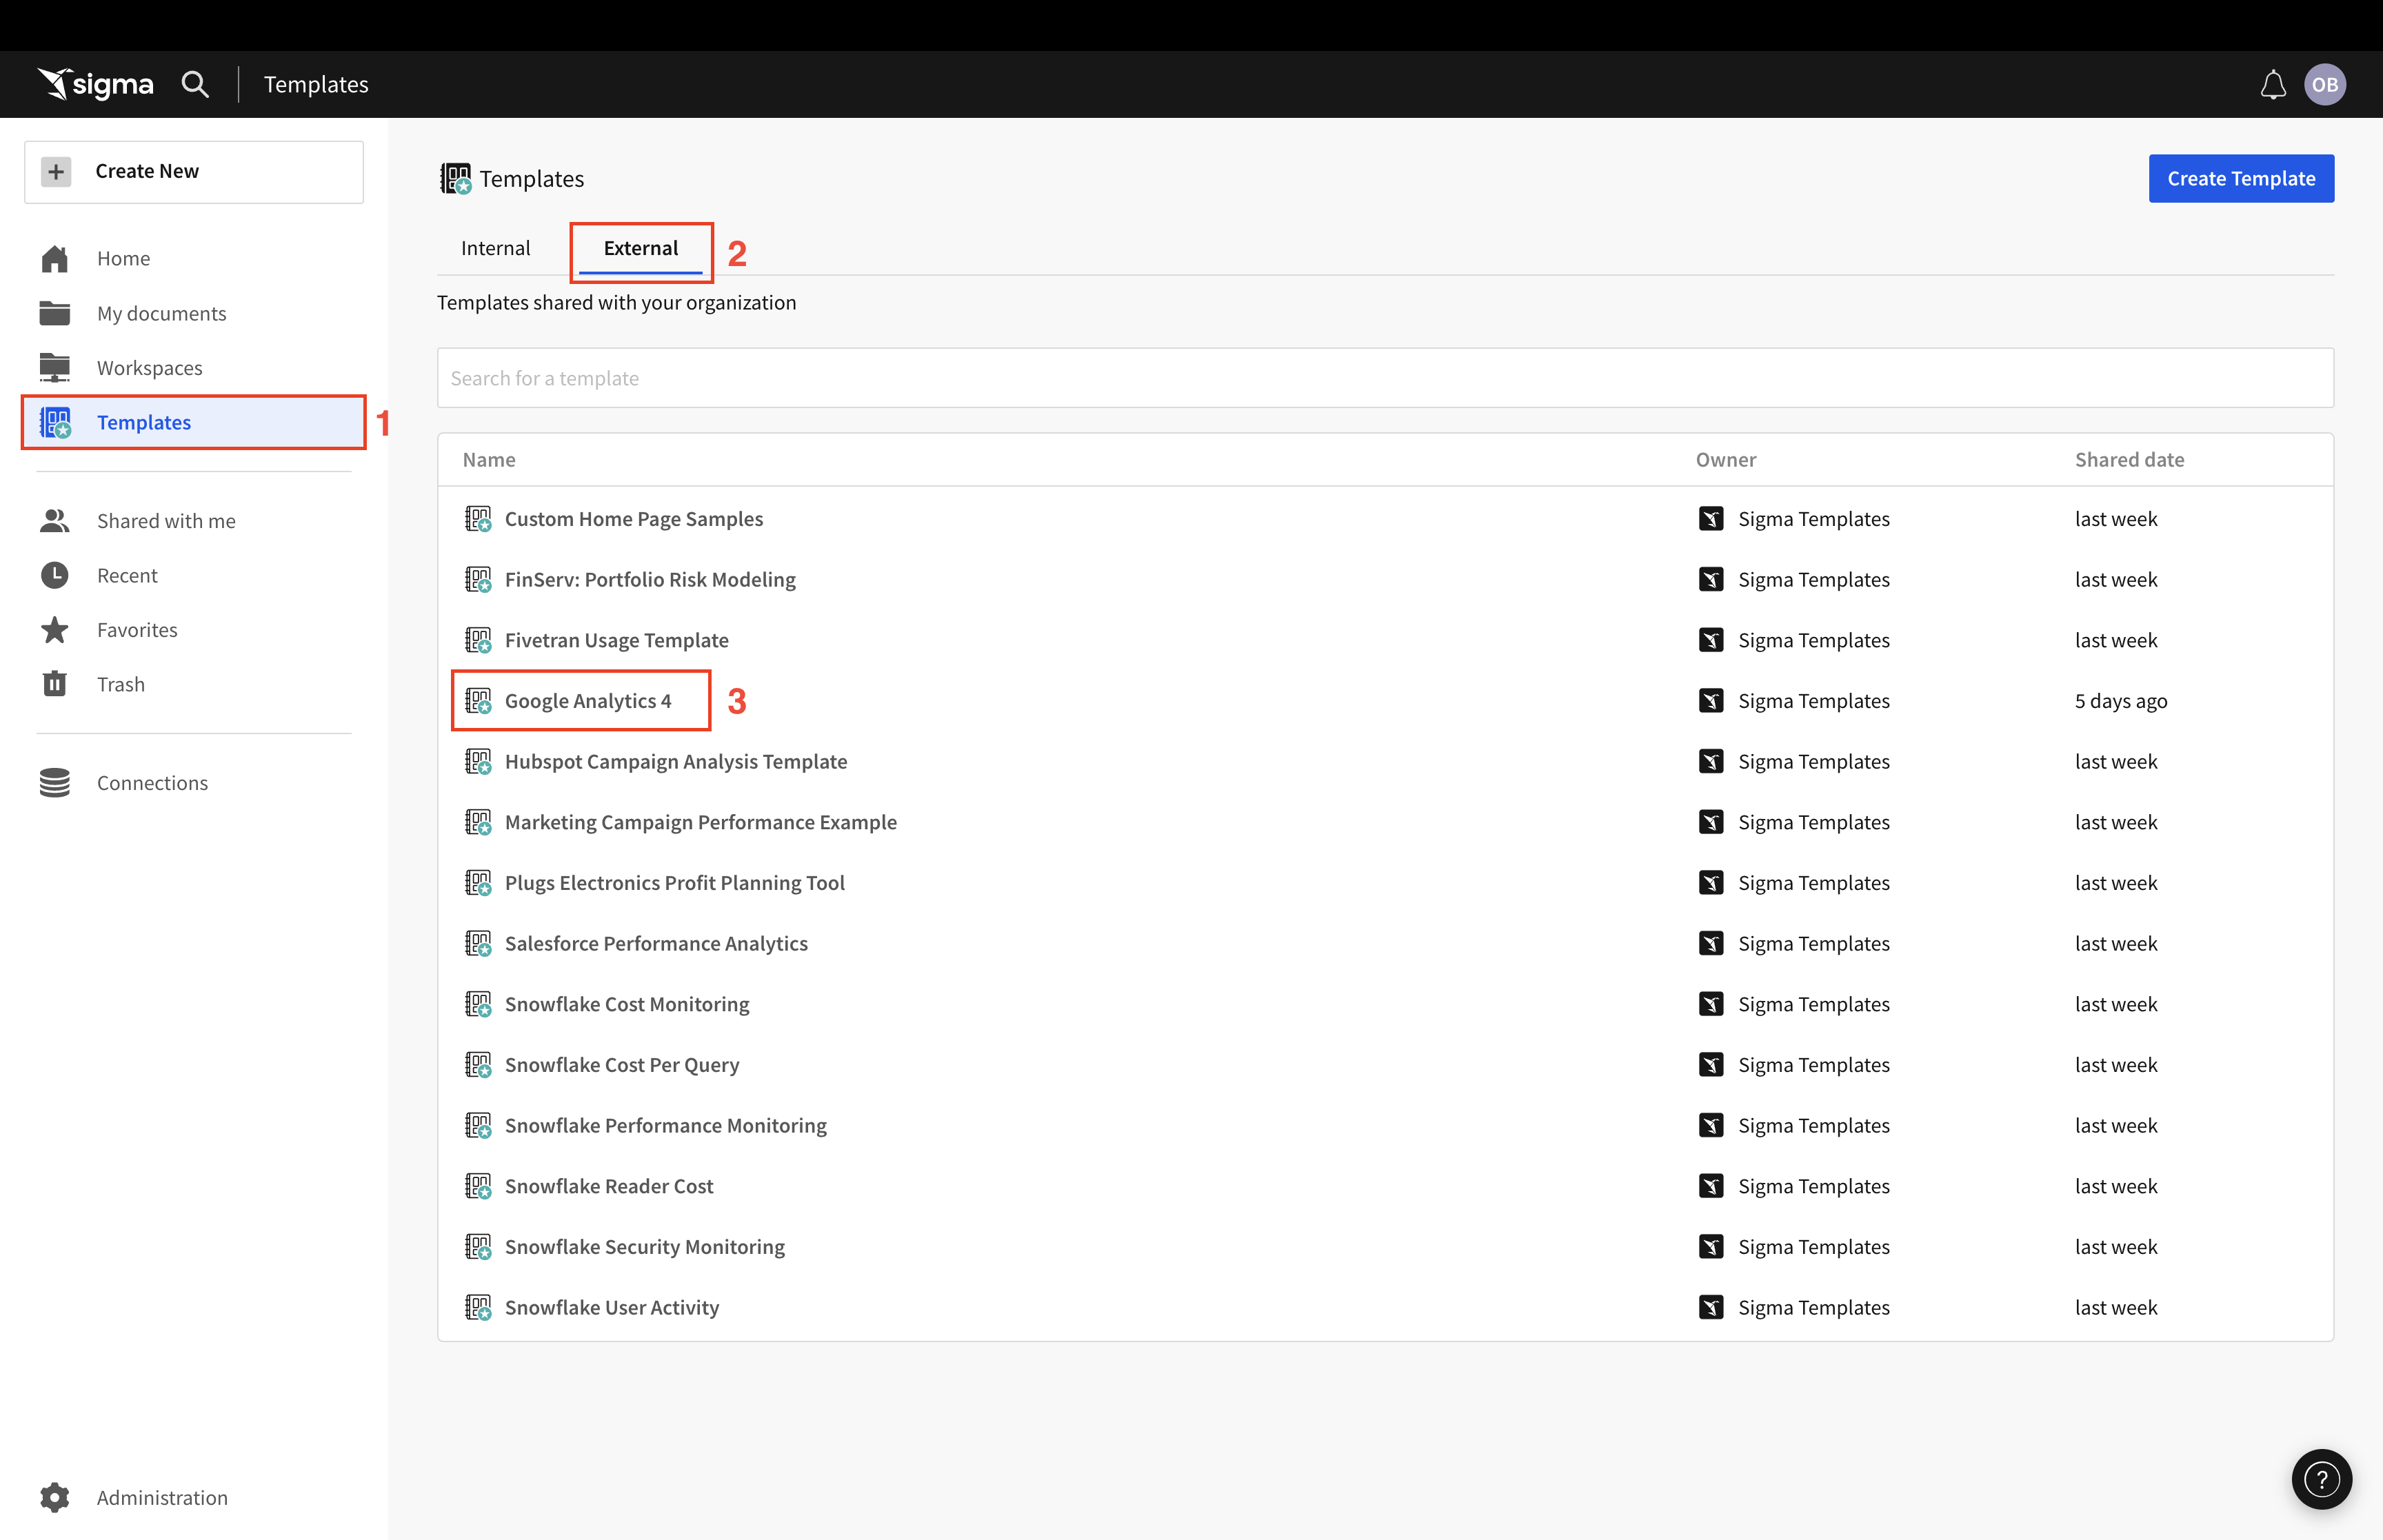
From the home page, navigate to the Templates section, then to External.
Click on the Google Analytics 4 template:
You will be prompted to swap data sources. Click Swap Now:
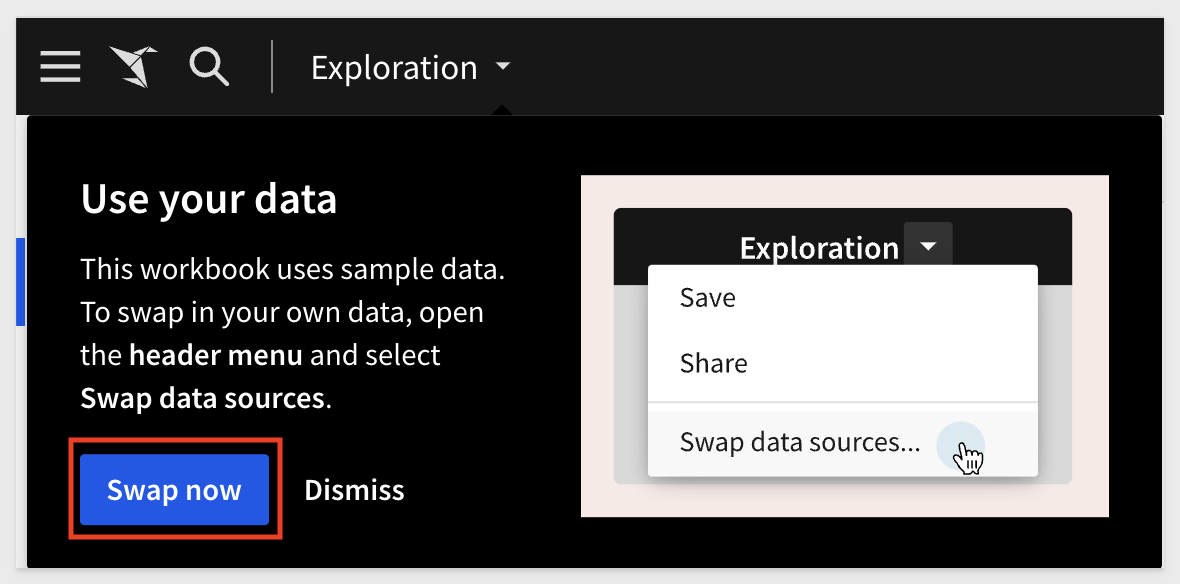
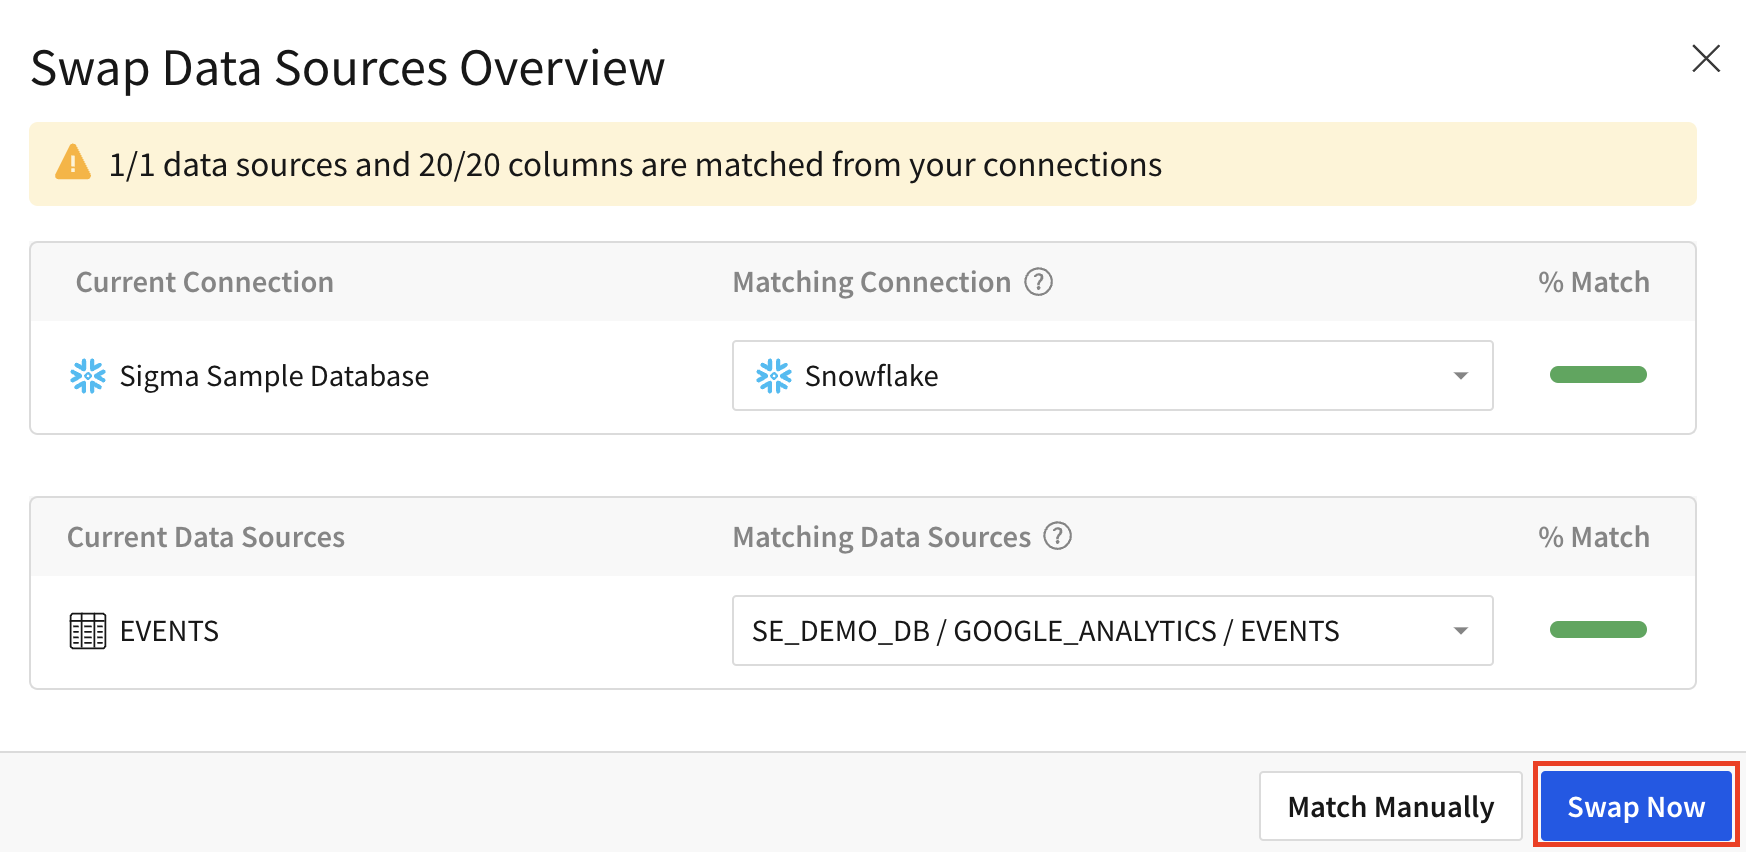
Verify that Sigma has found the events table and click Swap Now:
Click Save As and give your workbook a title.
That's all there is to it!
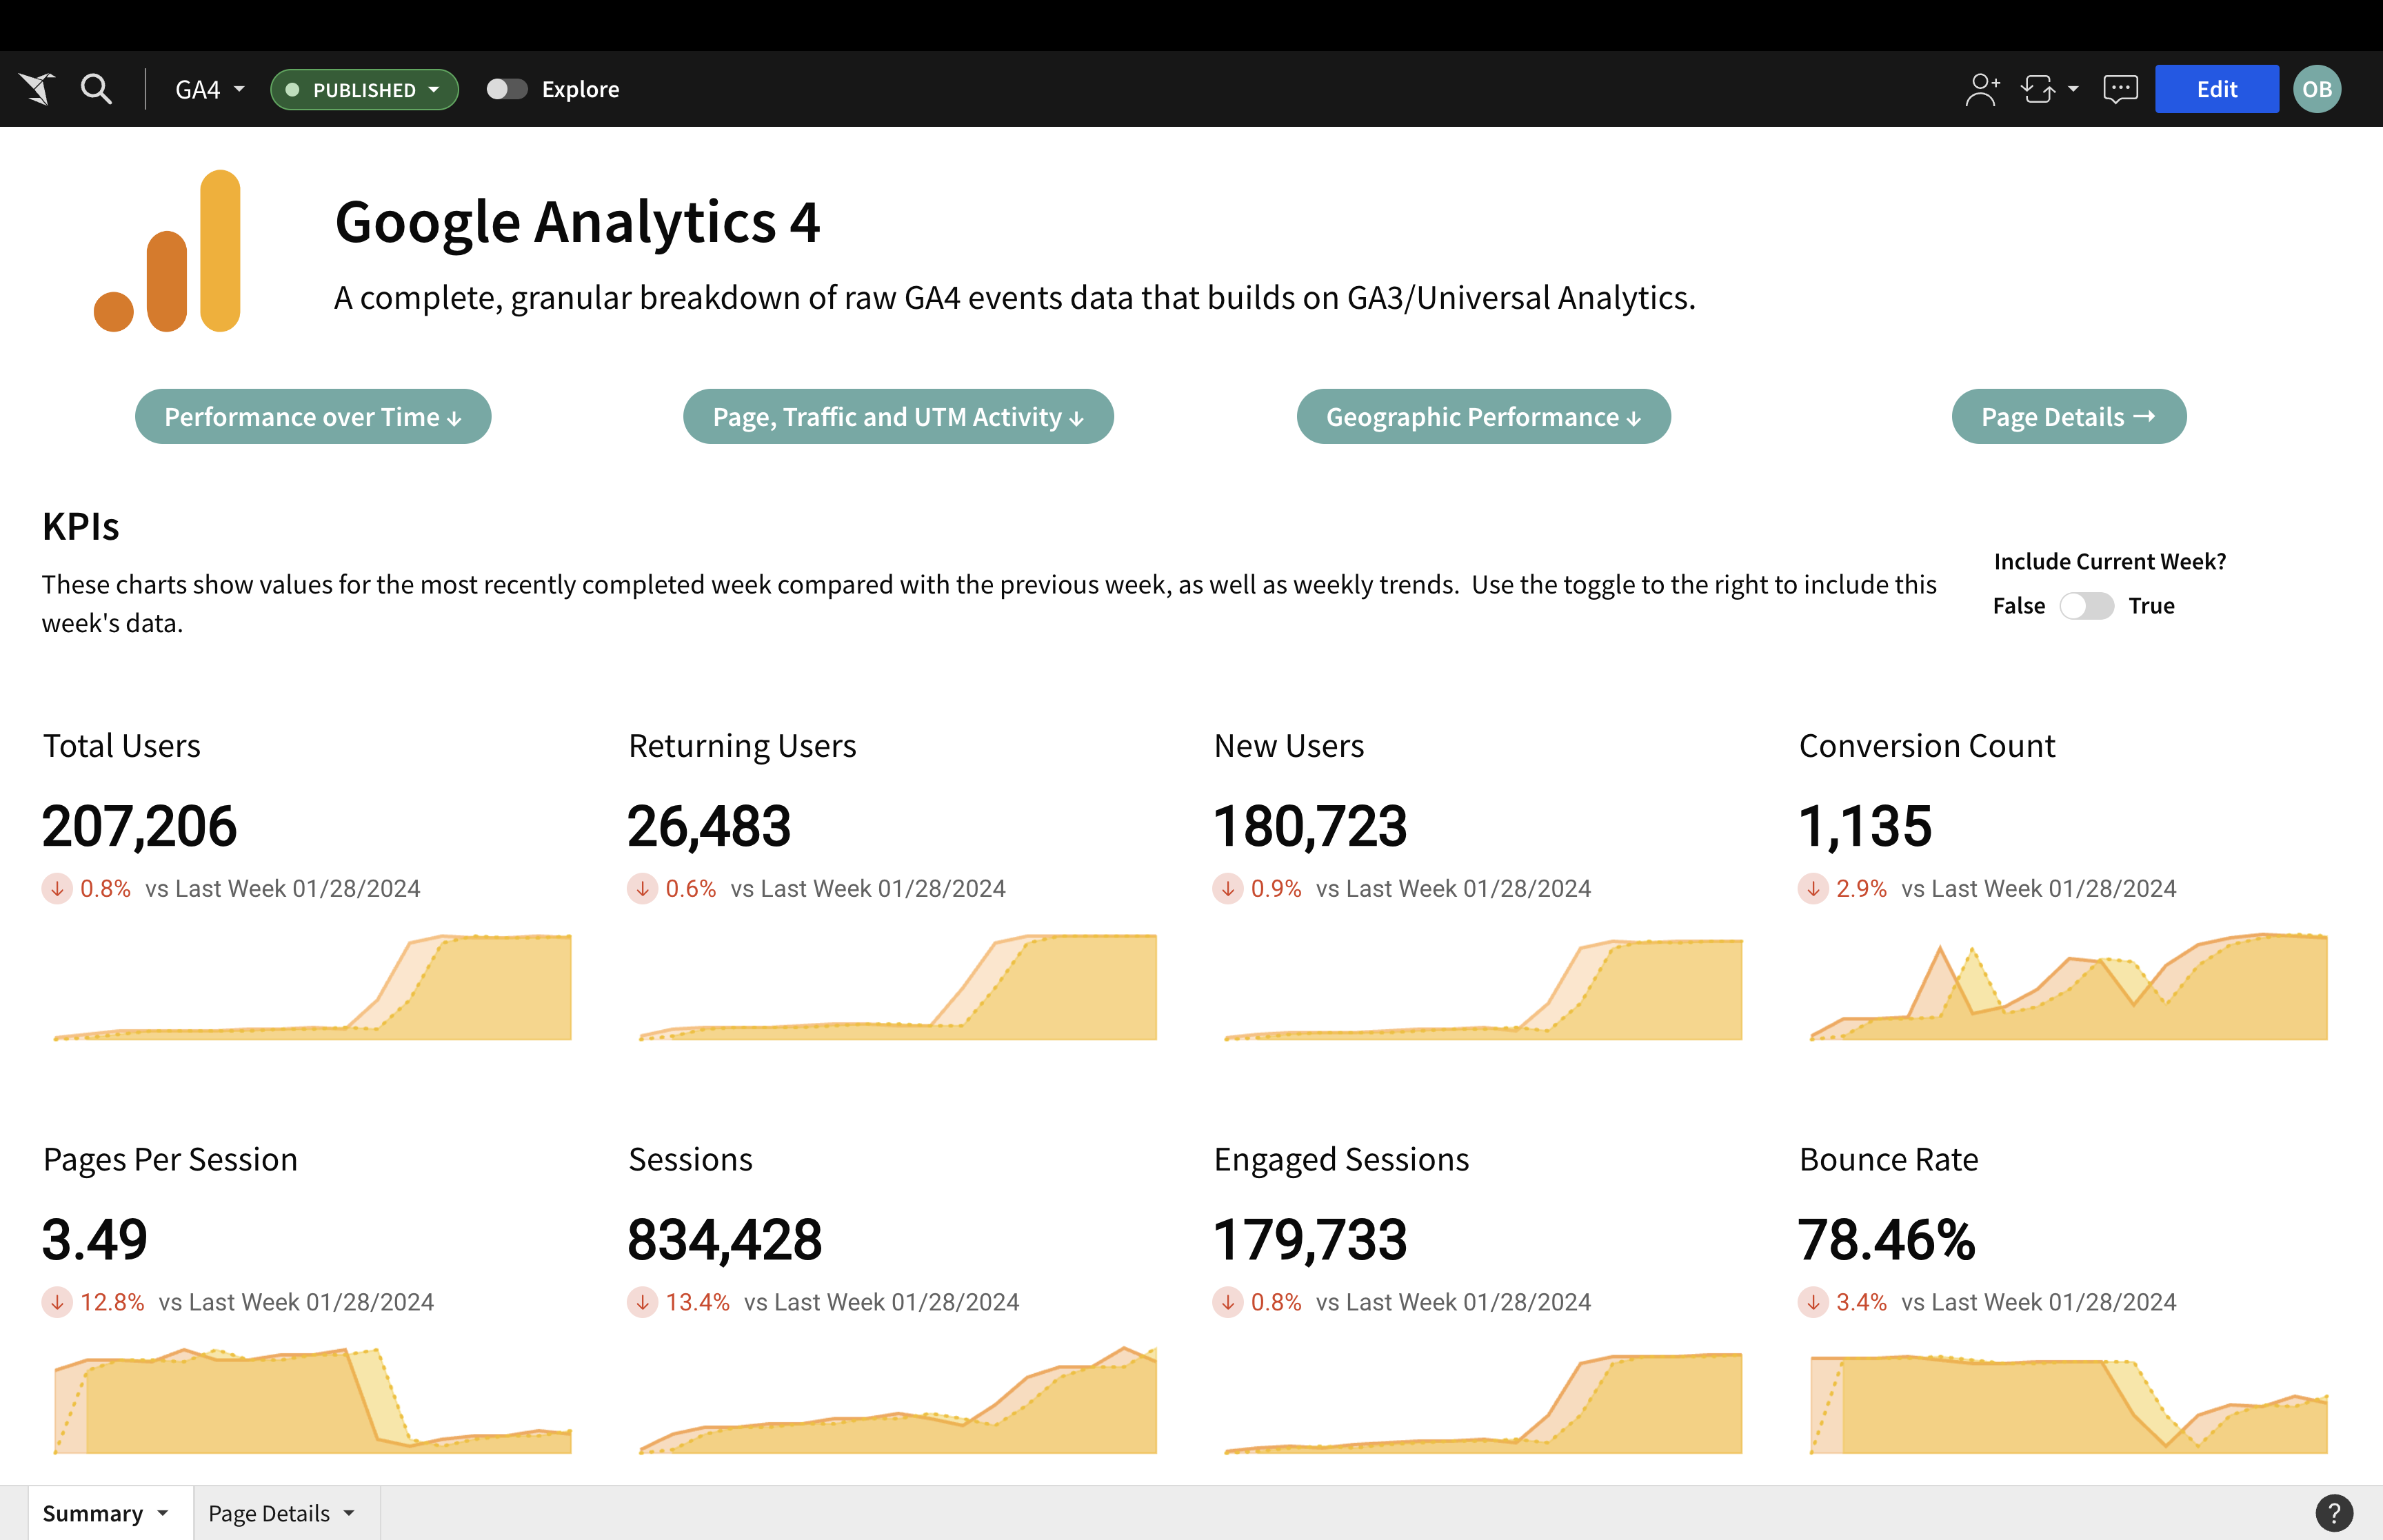
You should now see the Google Analytics 4 Template on top of your own data.
For example:
In this QuickStart we created a table called events with analytics-ready GA4 data and launched Sigma's Google Analytics 4 template.
Additional Resource Links
Be sure to check out all the latest developments at Sigma's First Friday Feature page!
Help Center Home
Sigma Community
Sigma Blog