The Sigma Health Check Native App is designed to provide insights into the overall health and performance of your Snowflake environment. This native app includes insights into architecture, user and role grants, as well as warehouse performance and sizing recommendation.
This Quickstart is designed to provide guidance in the set up of the Sigma Health Check Native App for Snowflake.
For more information on Sigma's product release strategy, see Sigma product releases.
### Target Audience Sigma Administrators and other users who are interested in monitoring the performance of their Snowflake environment and how Sigma is leveraging the resources in Snowflake.
Prerequisites
The Health Check Native App is currently only available to existing Sigma customers.
If your SNOWFLAKE instance is hosted in GCP, this functionality is not available. This is due to the Snowflake Native App framework not being currently available on the Google Cloud Platform.
Basic Requirements:
- A computer with a current browser. It does not matter which browser you want to use.
- Access to your Sigma environment.
- Some familiarity with Sigma is assumed. Not all steps will be shown as the basics are assumed to be understood.
- Access to your Sigma Environment with Sigma Admin Permissions.
- Access to your Snowflake Environment with access to the ACCOUNTADMIN role.
To access this native app, please contact your Sigma account team.
Your account team will process your request, and reach out when the application has been granted to your Snowflake instance.
You can find instructions for preparing your Snowflake account here: Become a Consumer of Snowflake Listings..
Once your Snowflake account is ready to consume listings and the Native App has been granted to your Snowflake instance, you are ready to begin installing the application with this Quickstart.
What You'll Learn
In this guide you will learn how to set up and configure the Sigma Health Check Native app in your Snowflake environment, as well as how to connect it to the front end of the application that lives in Sigma.
If you prefer, you may watch a video that shows all the steps required in Snowflake for this to work:
Setting Up the Health Check Native App in Snowflake - Watch Video
Step by Step Instructions
The following will guide you through configuring a Snowflake instance in preparation of the application.
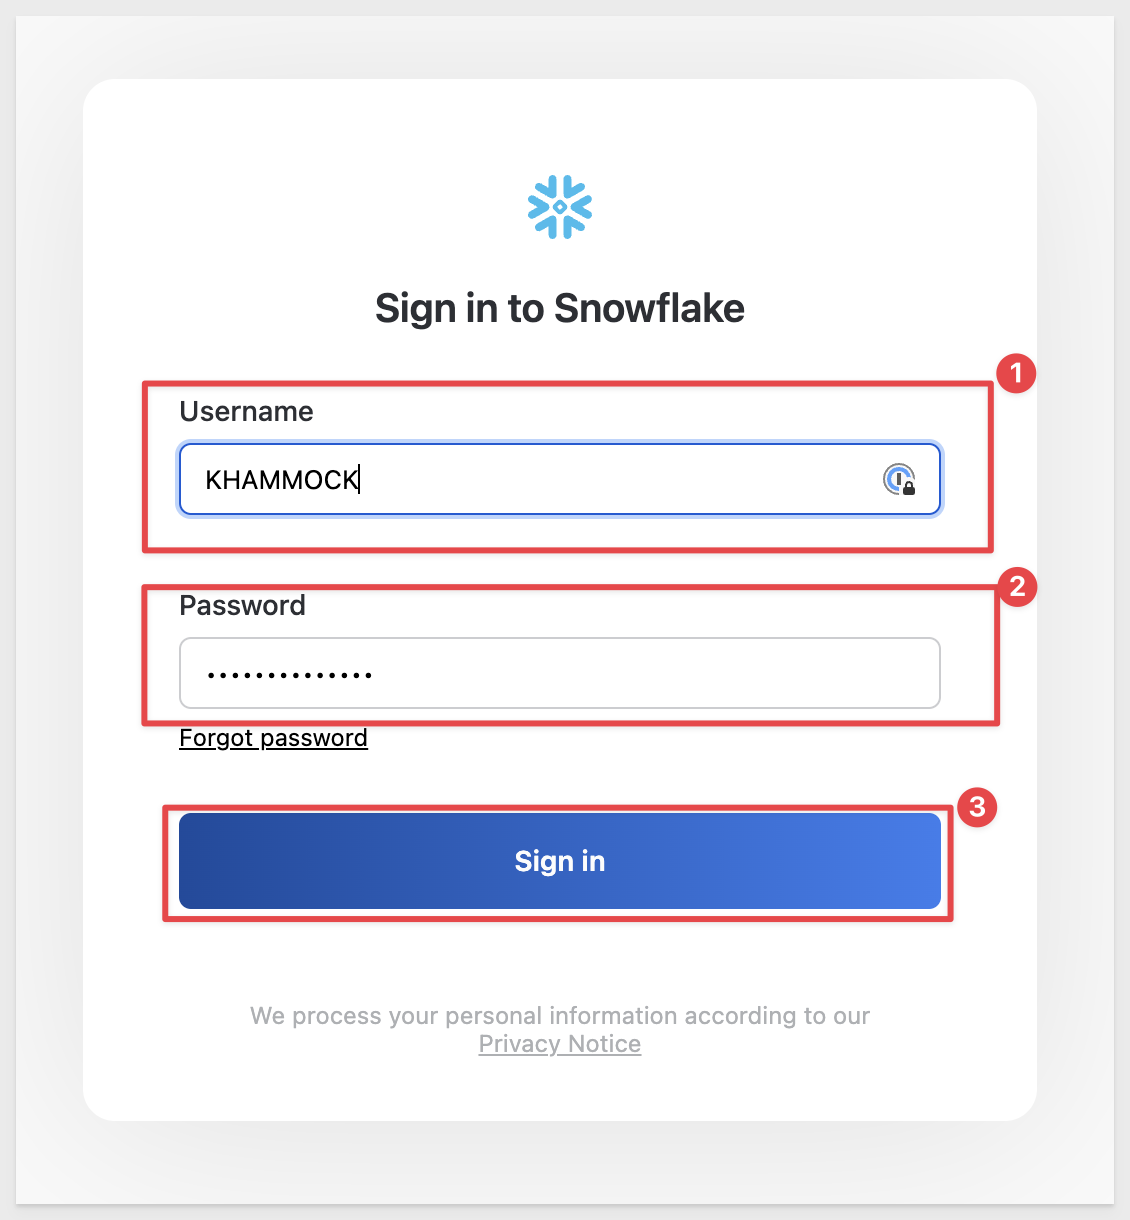
1: Sign in to your Snowflake instance by entering your Username, Password, and clicking Sign in:
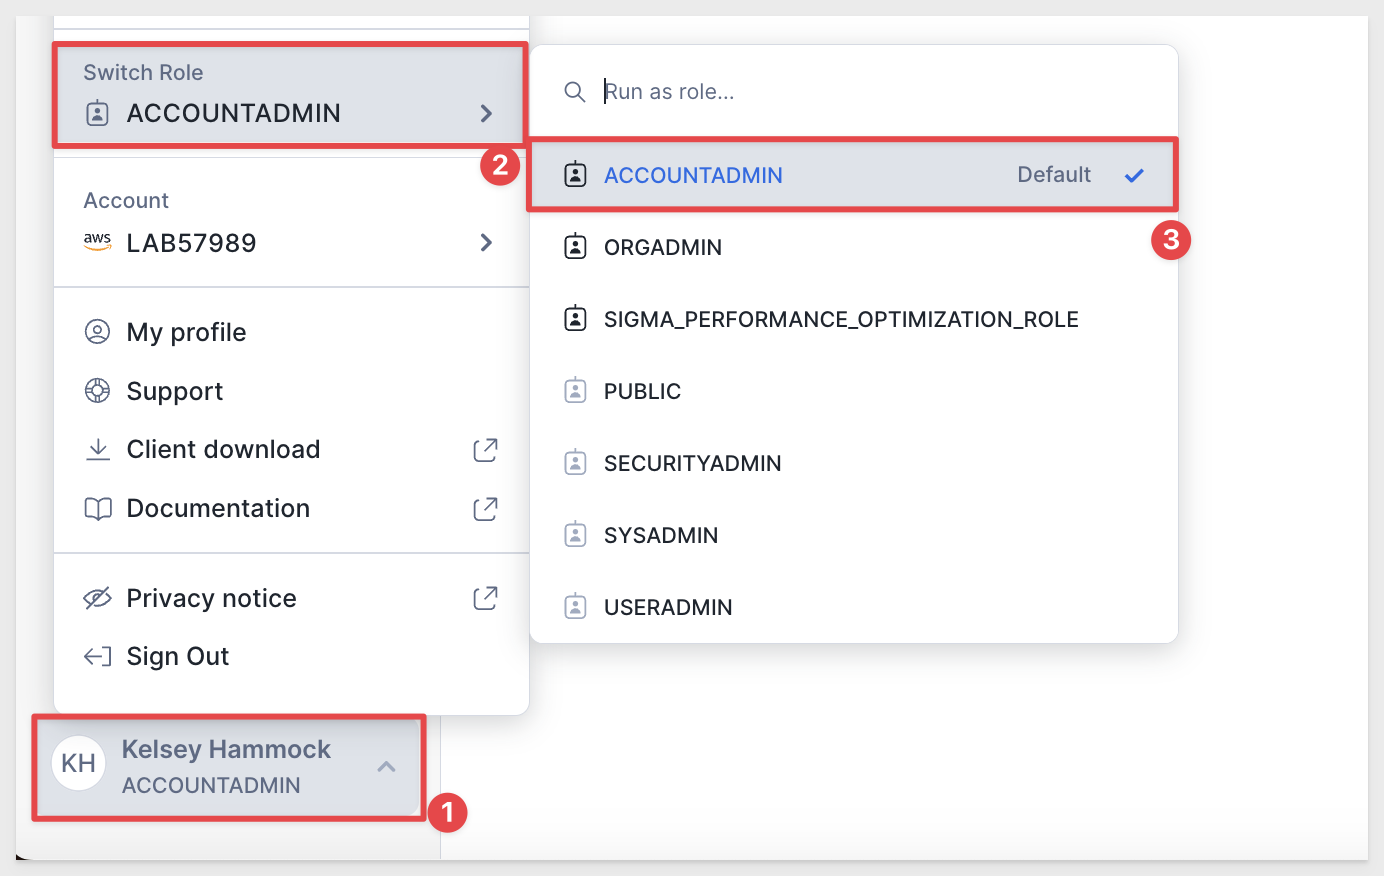
2: Ensure you are in the ACCOUNTADMIN role by clicking your username in the bottom left, scrolling up to roles, and selecting ACCOUNTADMIN.
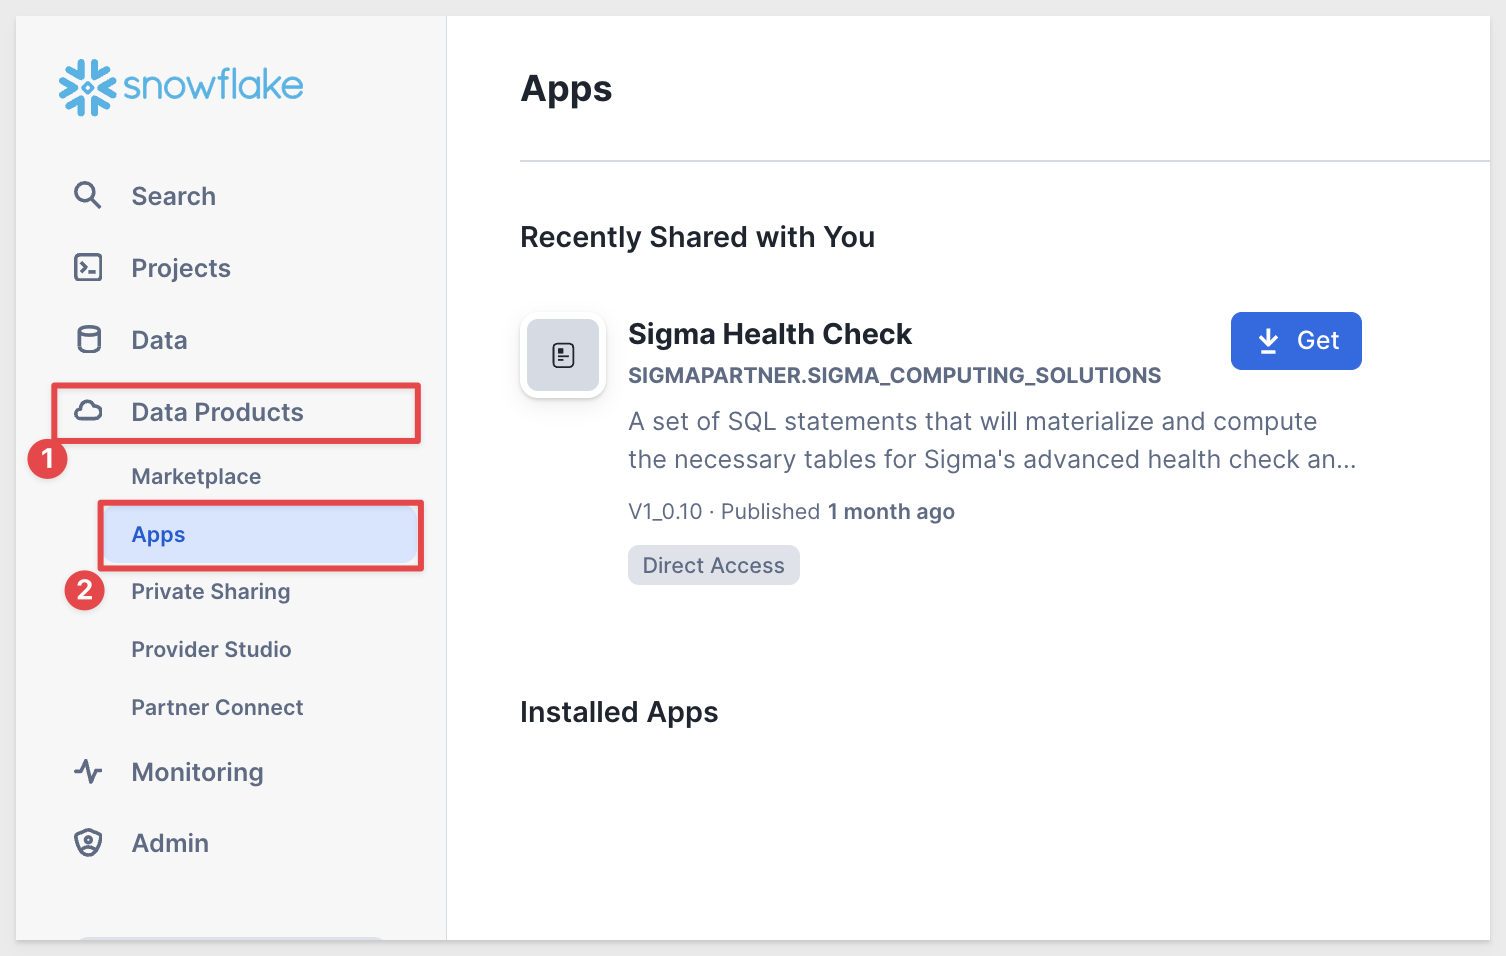
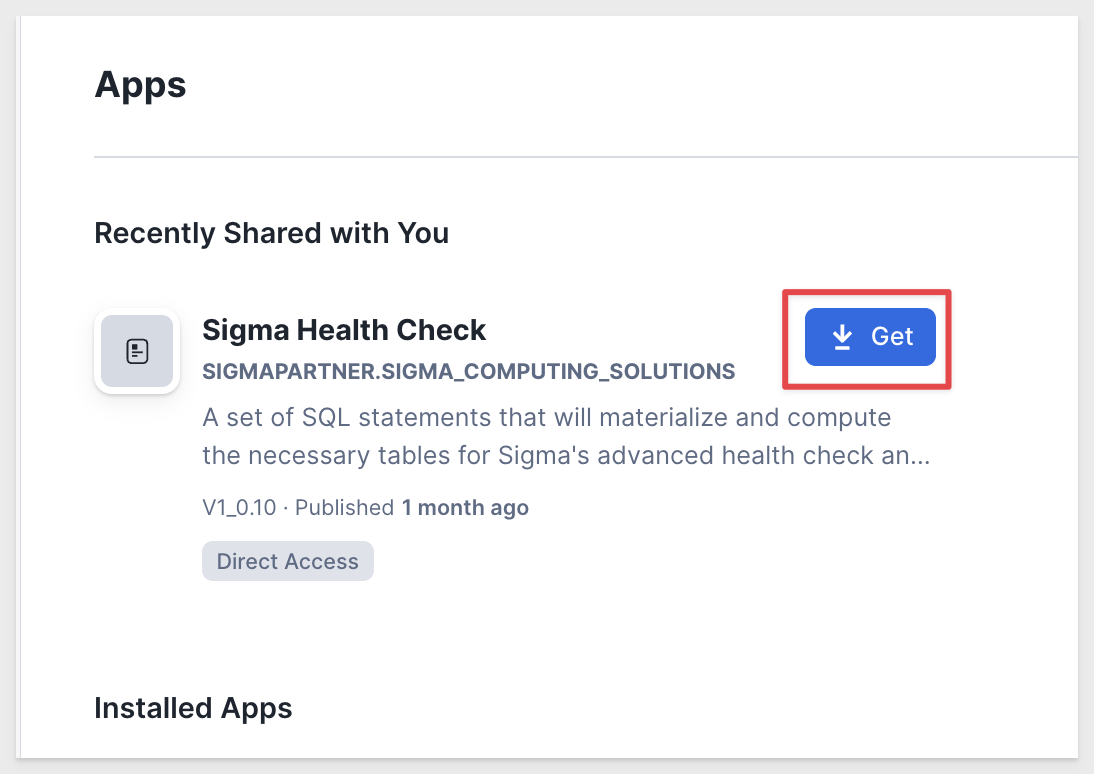
3: In the left-hand navigation menu, find Data Products, then Apps. You should see Sigma Health Check under Recently Shared with You:
4: Click Get next to Sigma Health Check:
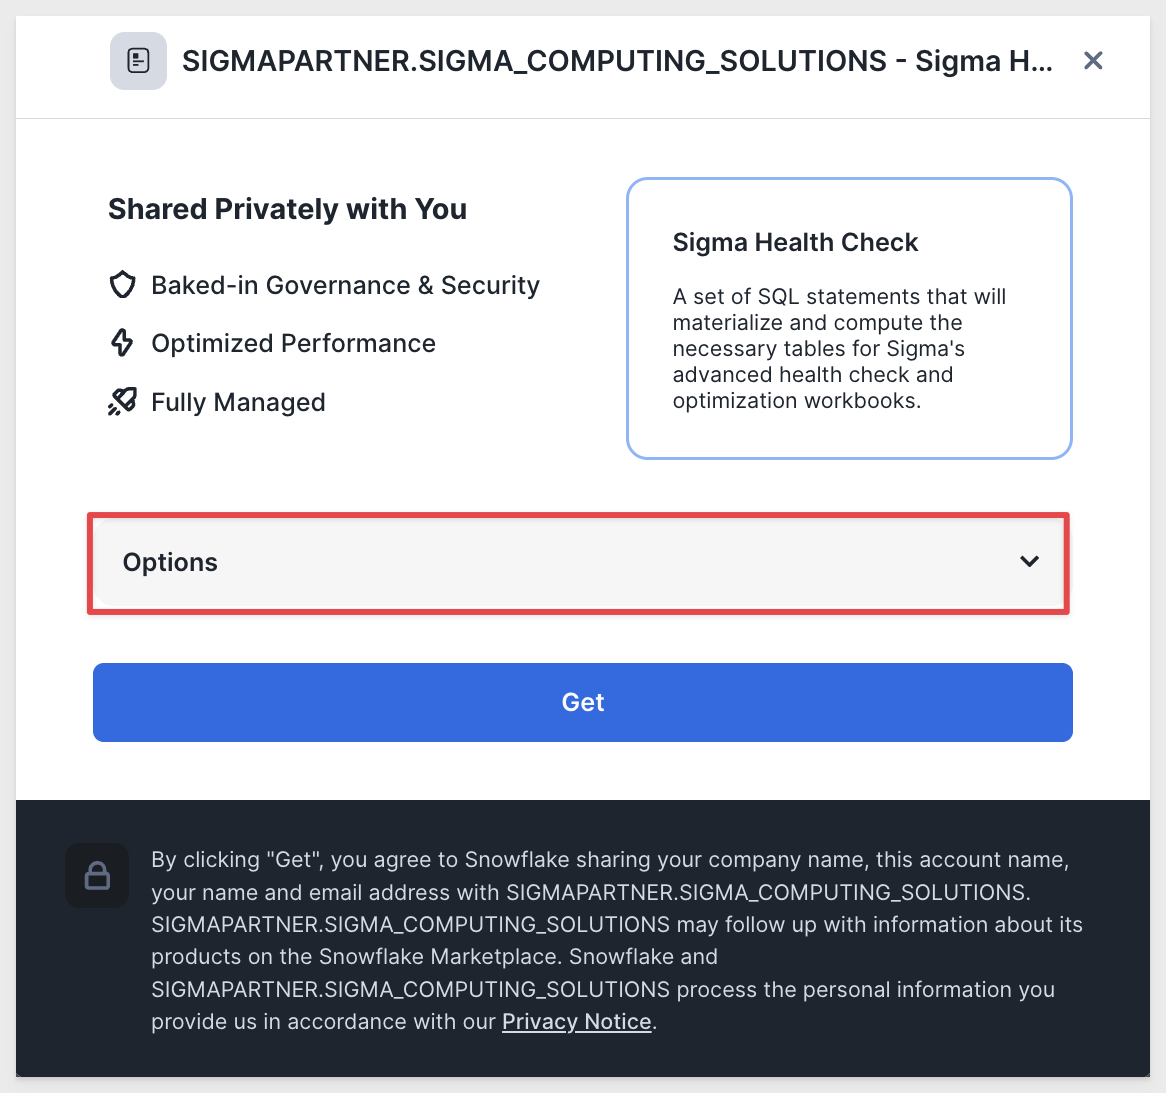
5: Select Options on the pop up window:
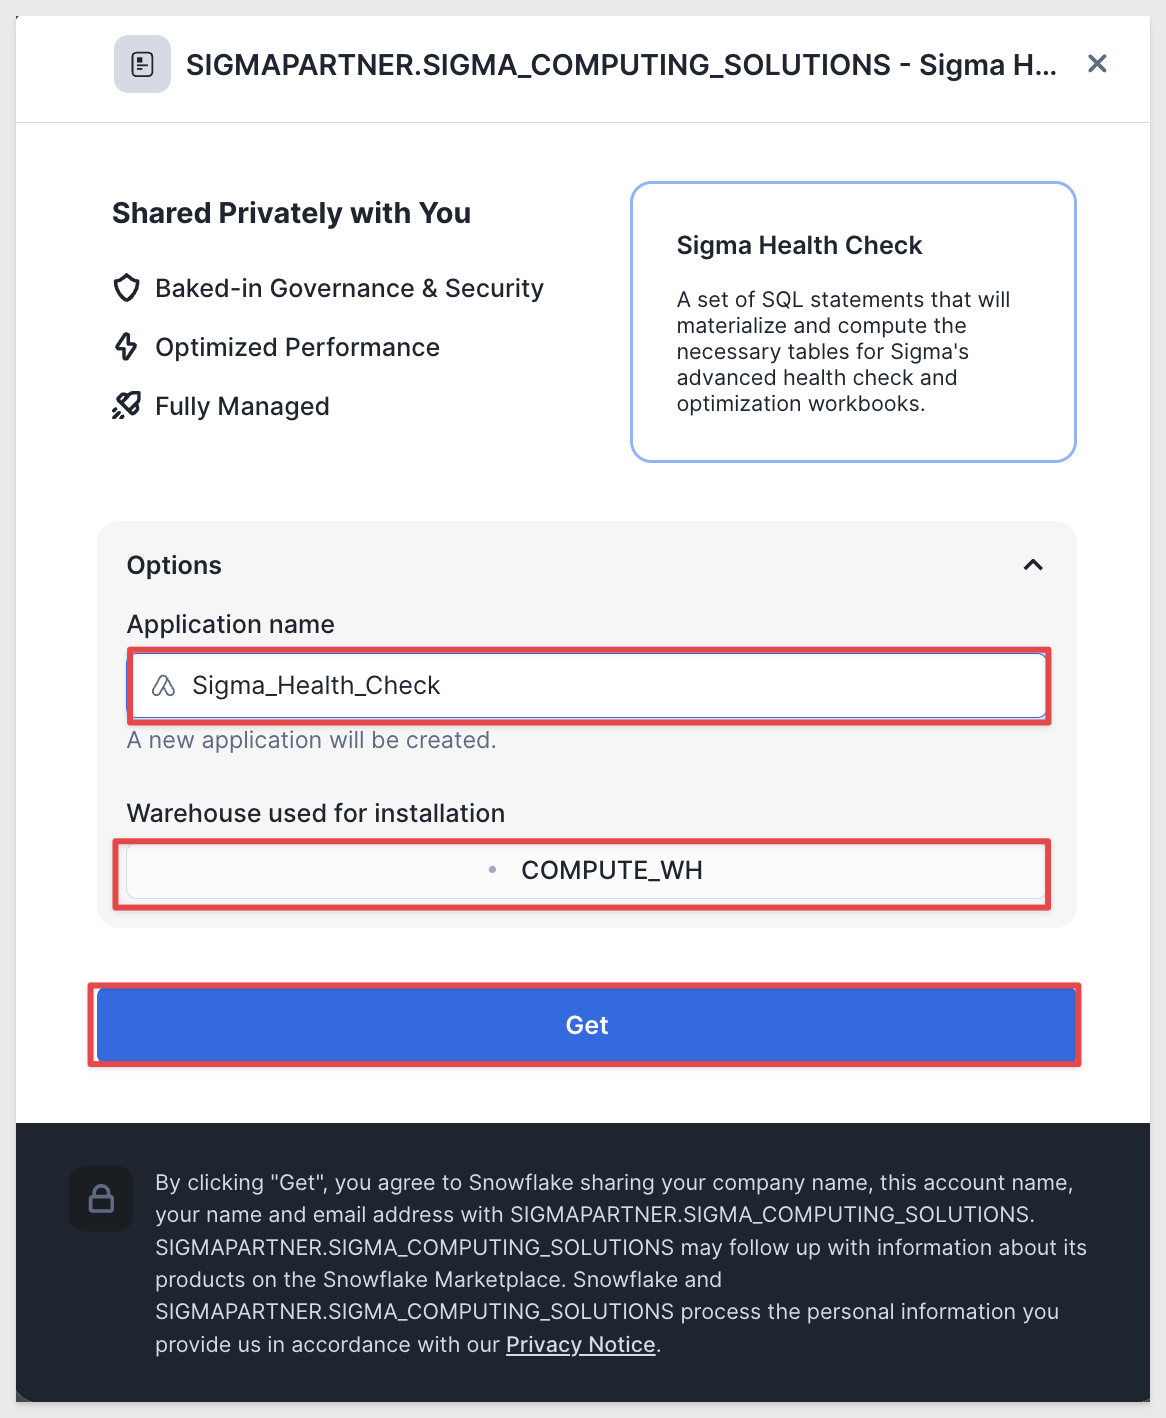
6: Ensure the application name is Sigma_Health_Check. Then assign a warehouse to use for installation, and click Get:
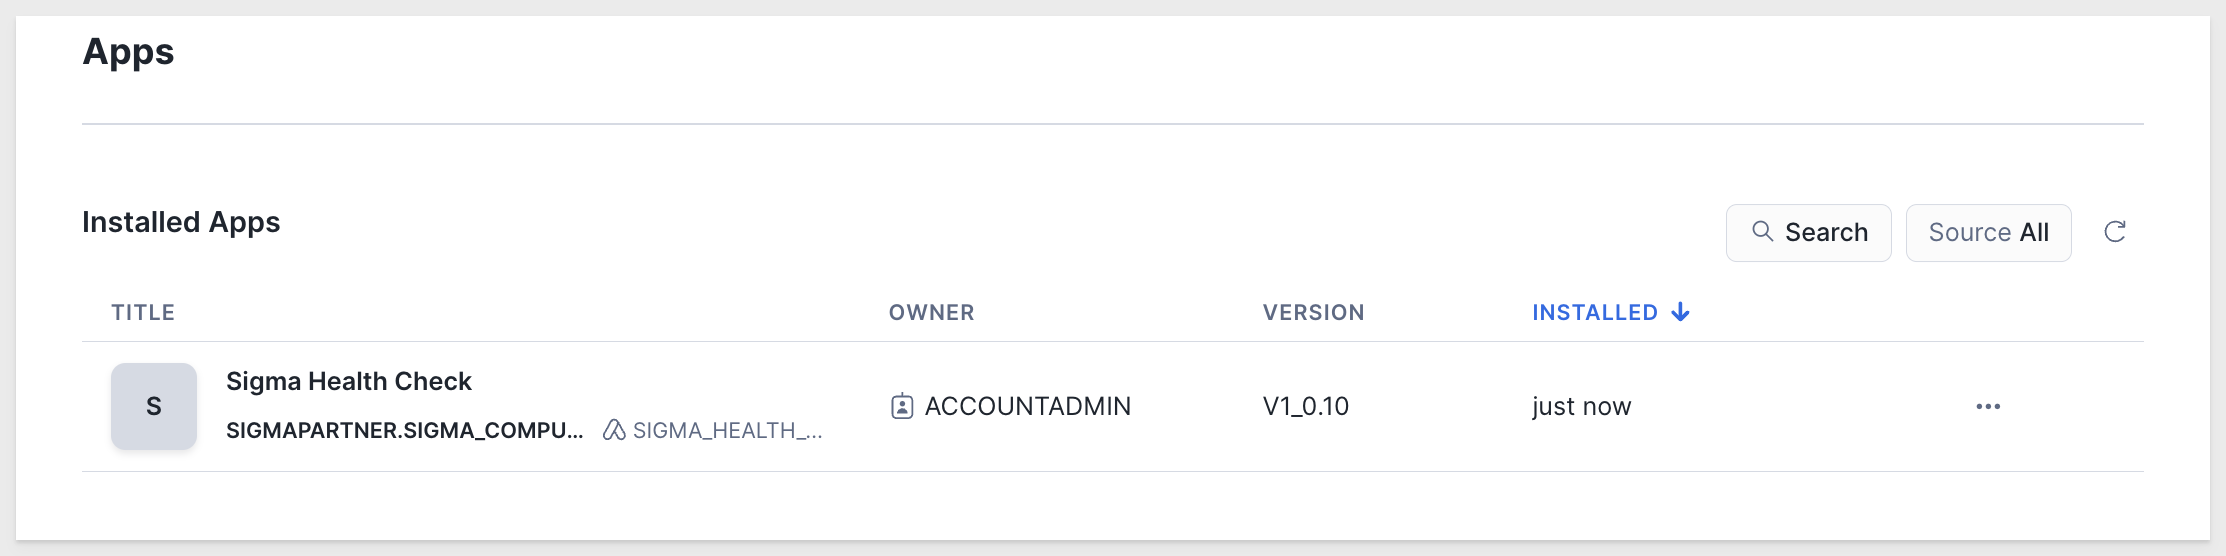
7: When the installation is complete, you will see the Sigma Health Check under Installed Apps:
8: Click on the application name. This will open a window that says Welcome to the Sigma Health Check Application:
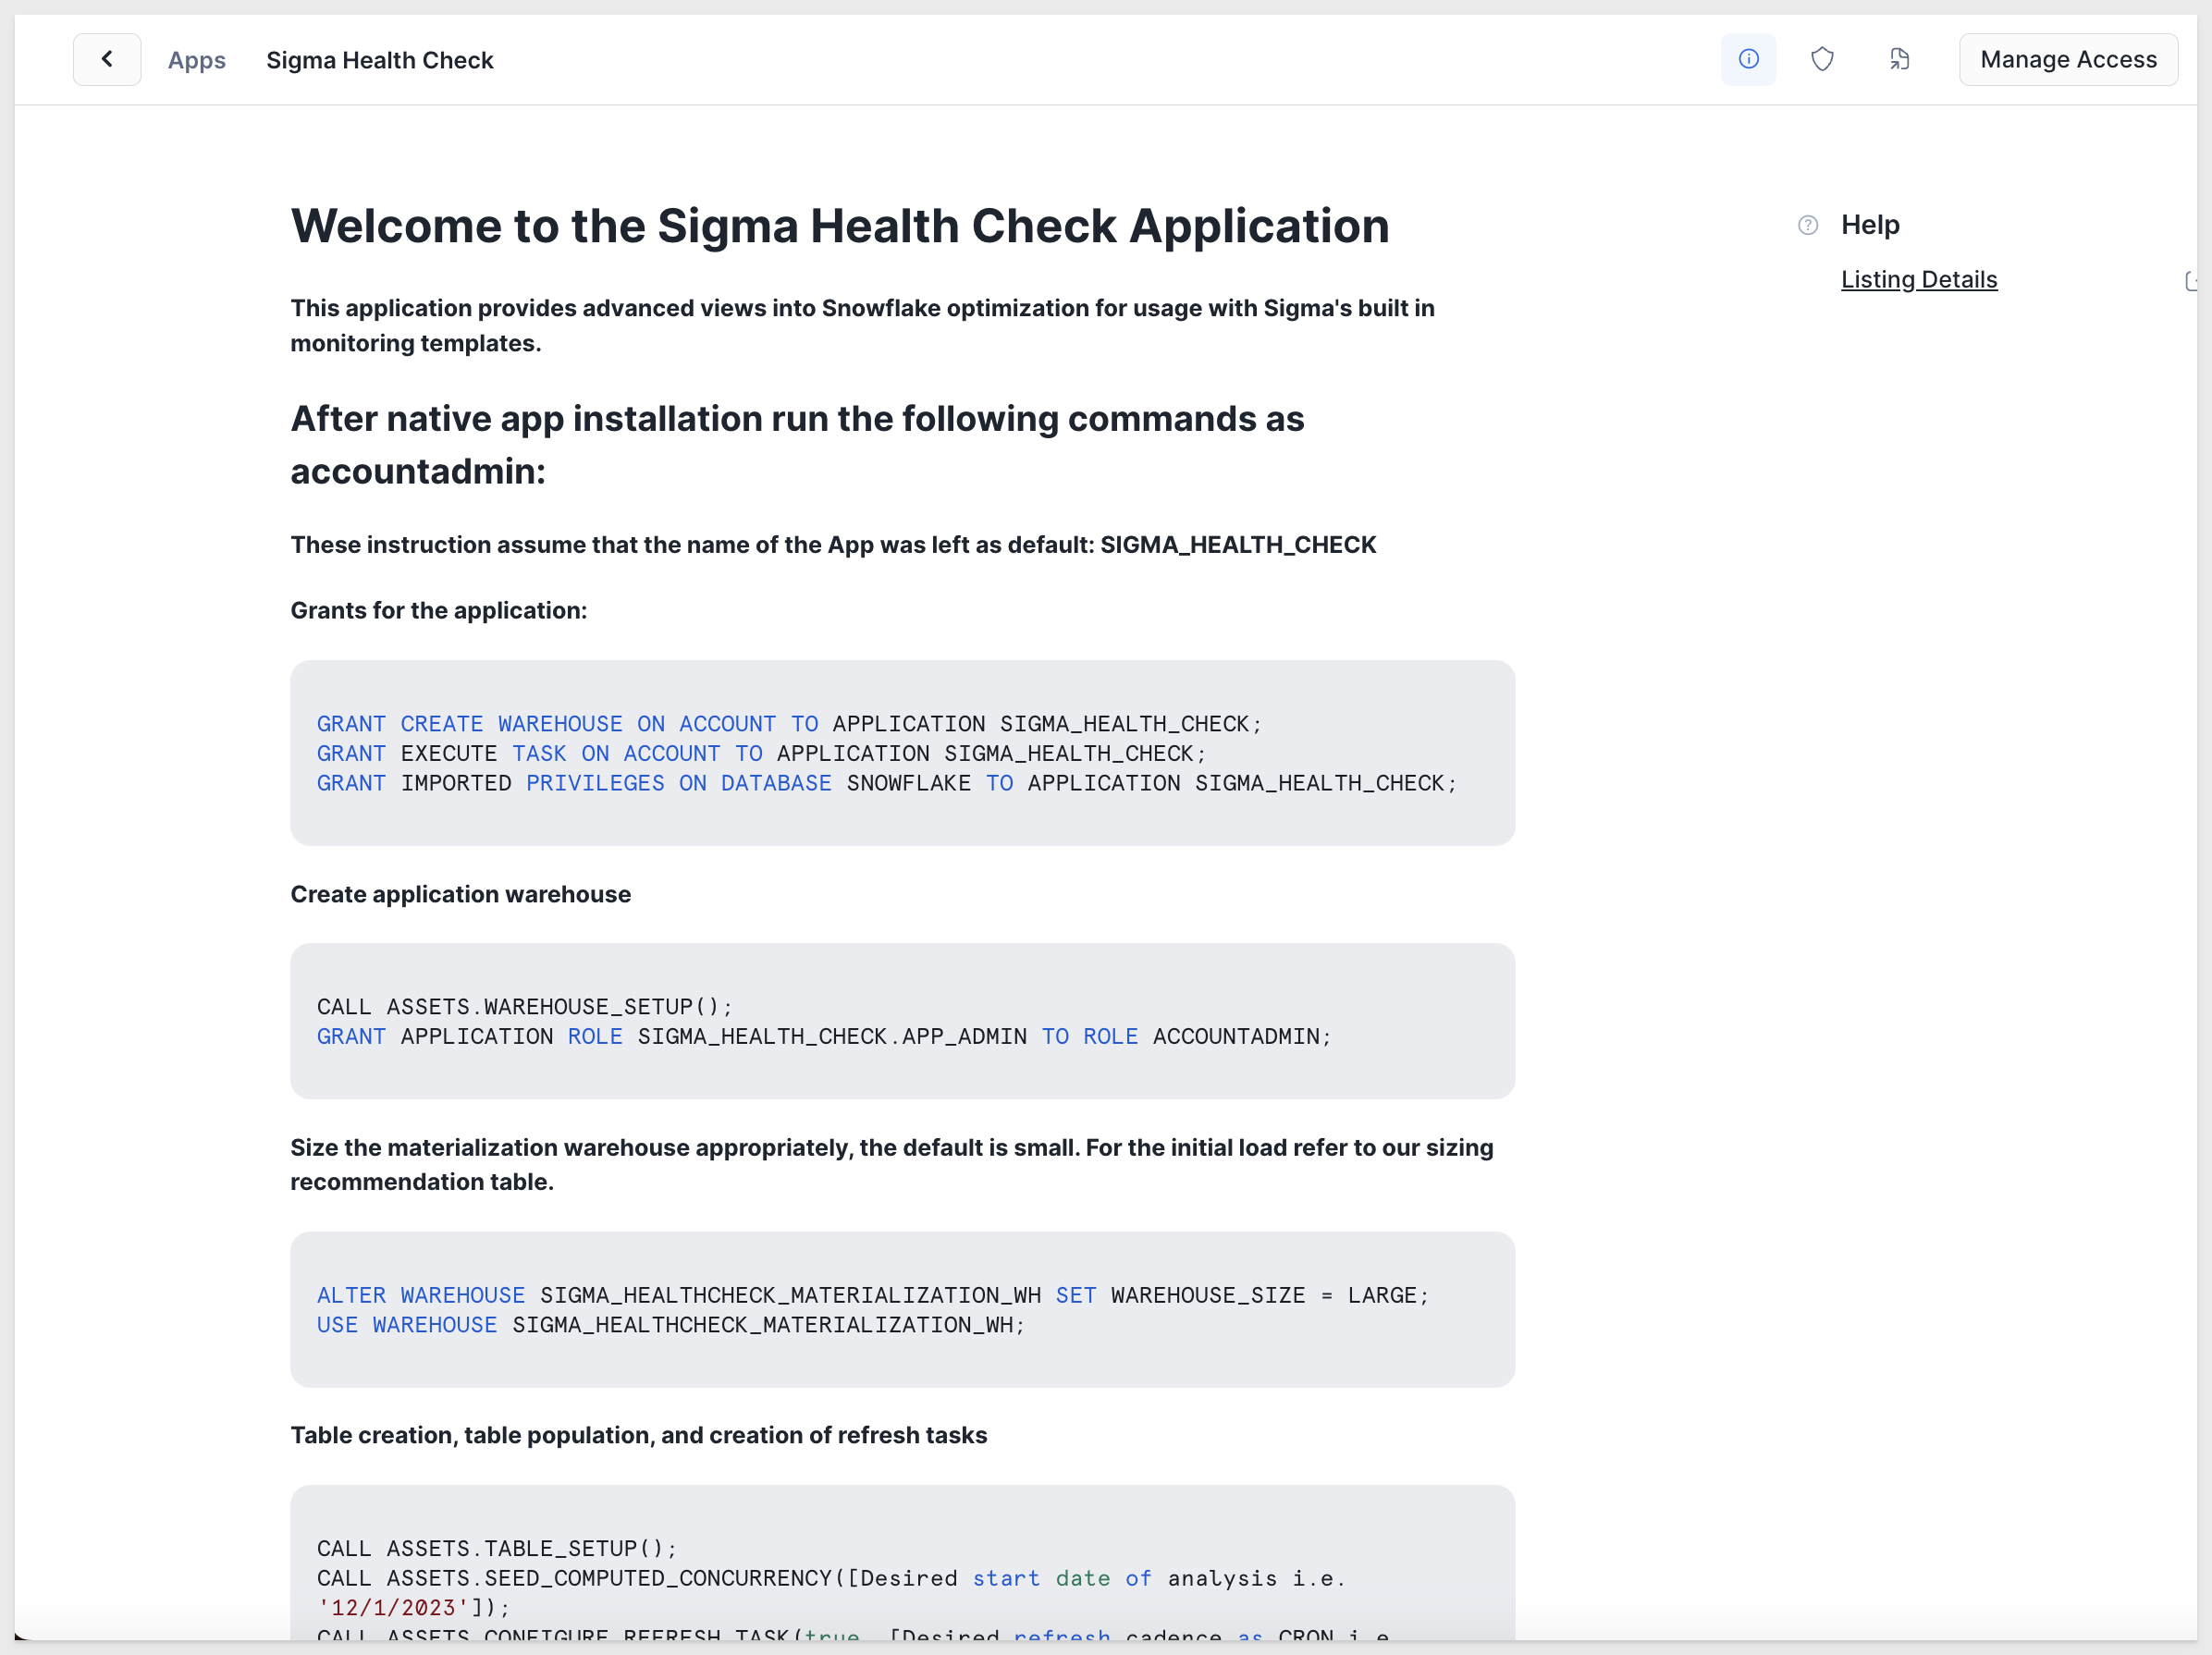
9: On this page you will notice several blocks of code.
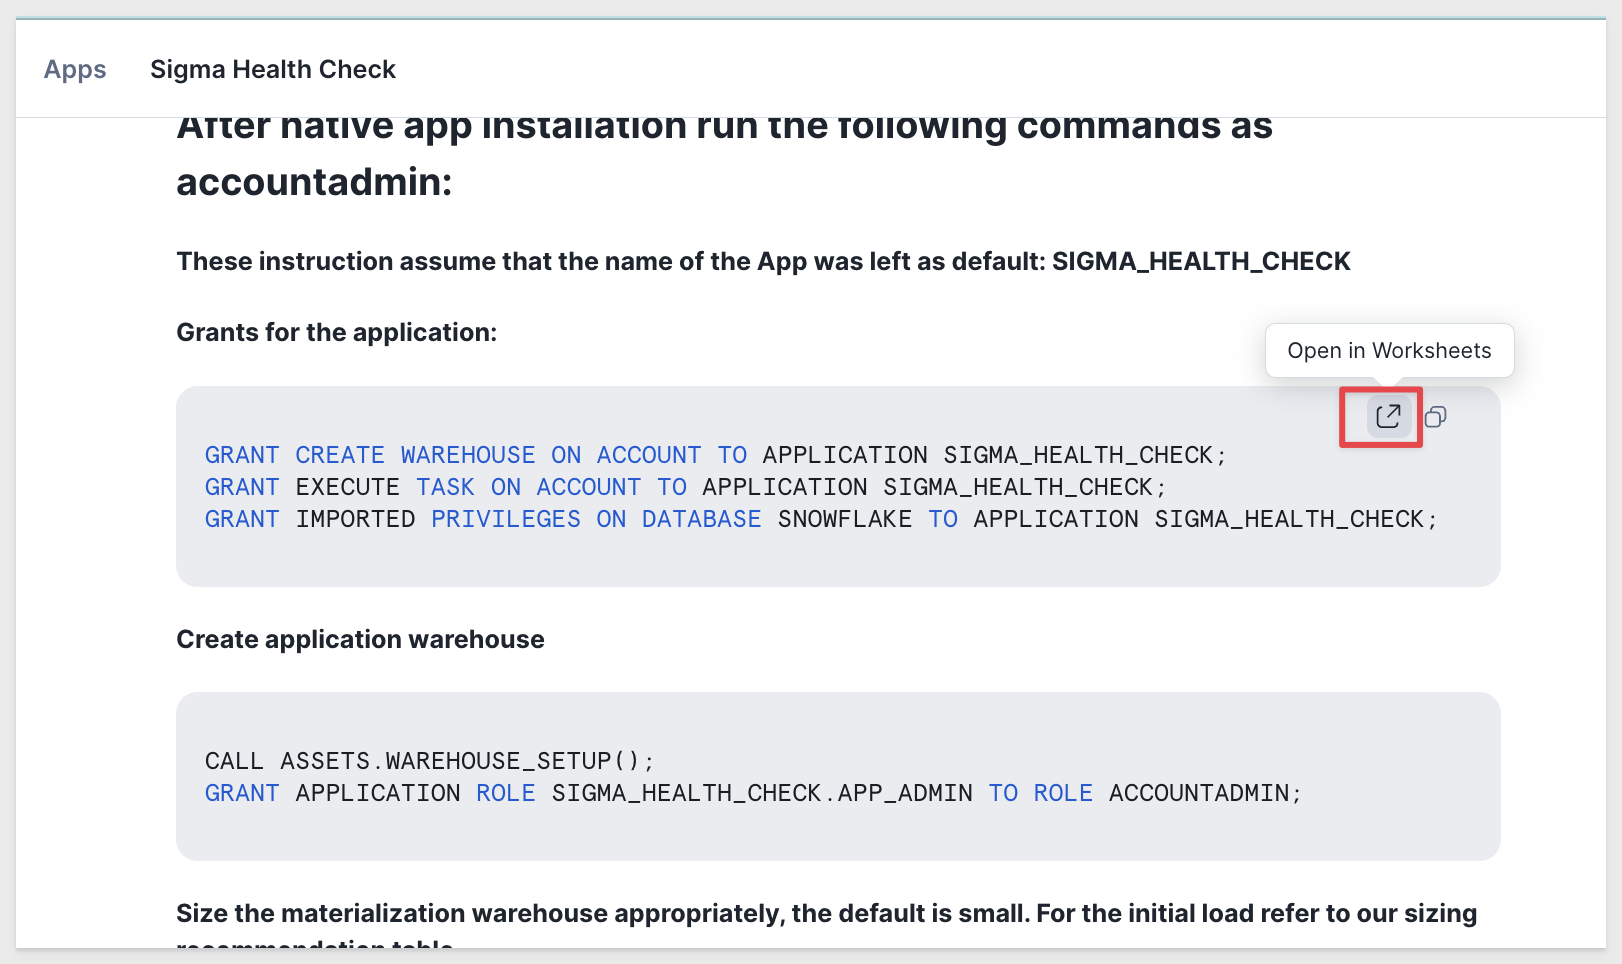
In the first block titled Grants for the application, hover over the top right corner until you see the icon for Open in Worksheets.
Click this icon:
10: Snowflake will open a new tab in your browser, with the first block of commands already loaded.
Run each command on this worksheet in the order they appear:

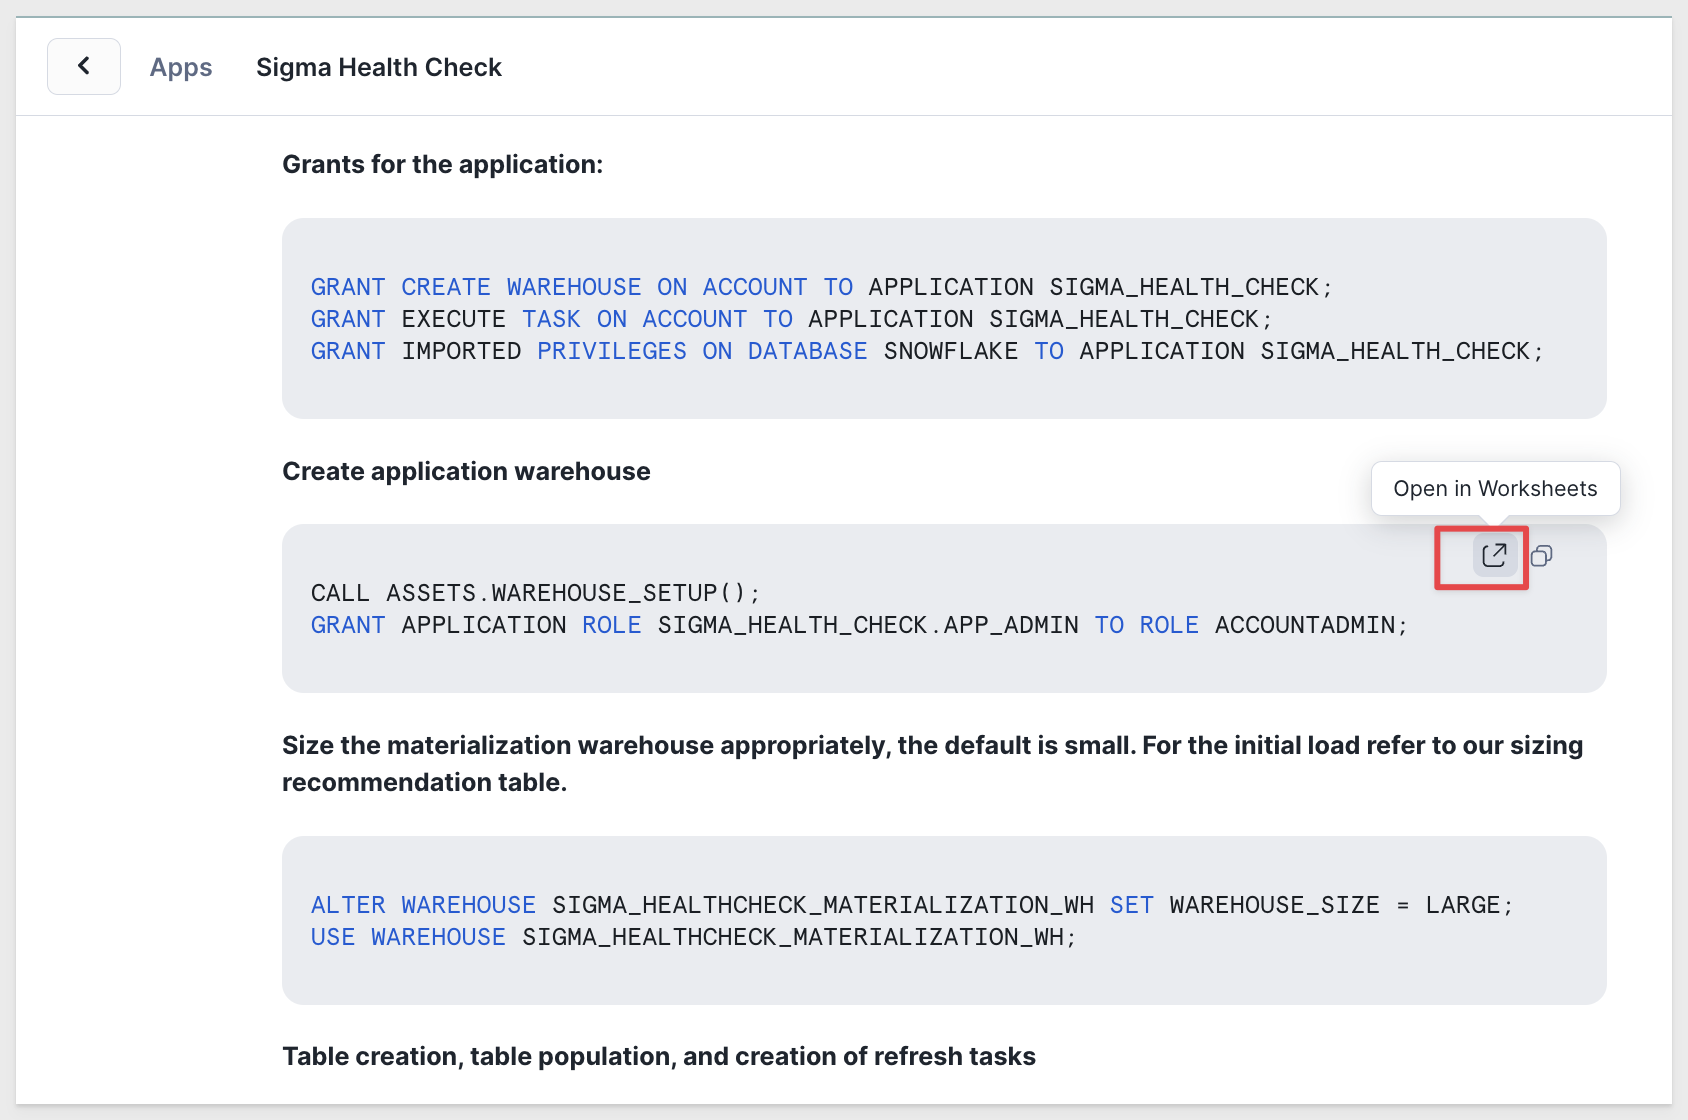
11: Return to the Sigma Health Check tab, and hover over the upper right-hand side of the second block labeled Create Application Warehouse.
Once again, click Open in Worksheets:
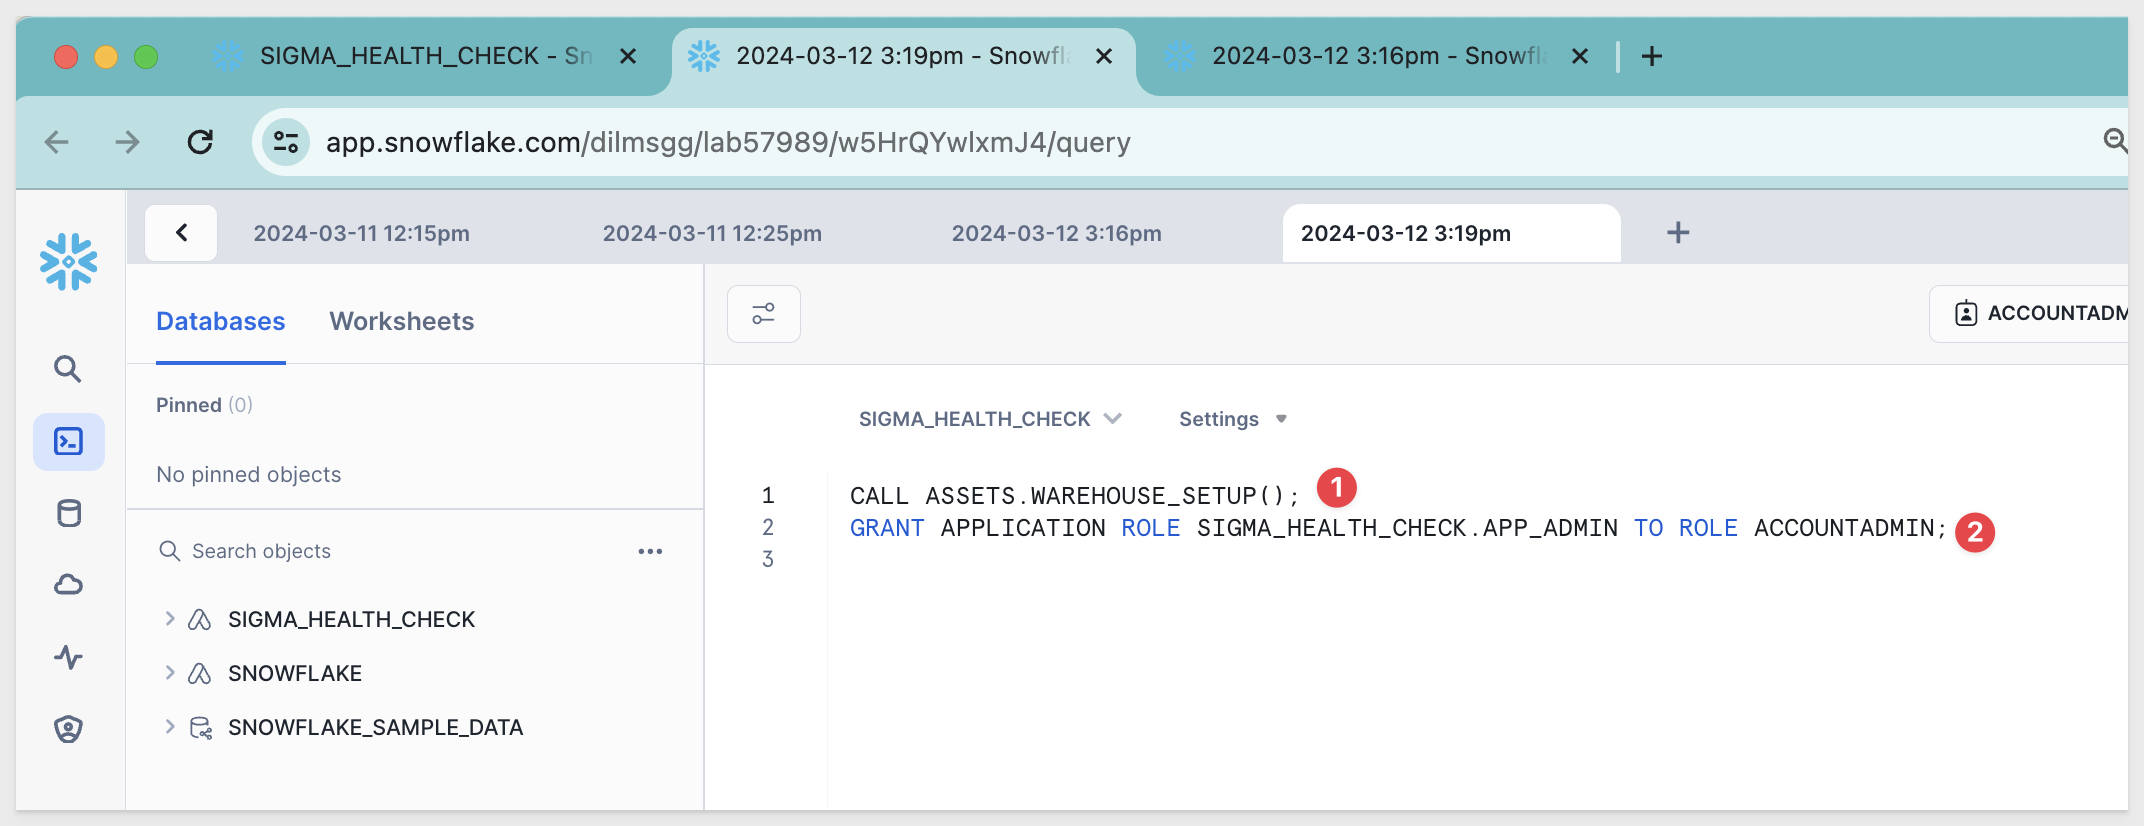
12: Once again, Snowflake will open a worksheet with the commands pre-loaded.
Run each command in the order they appear, starting with CALL ASSETS.WAREHOUSE_SETUP();:
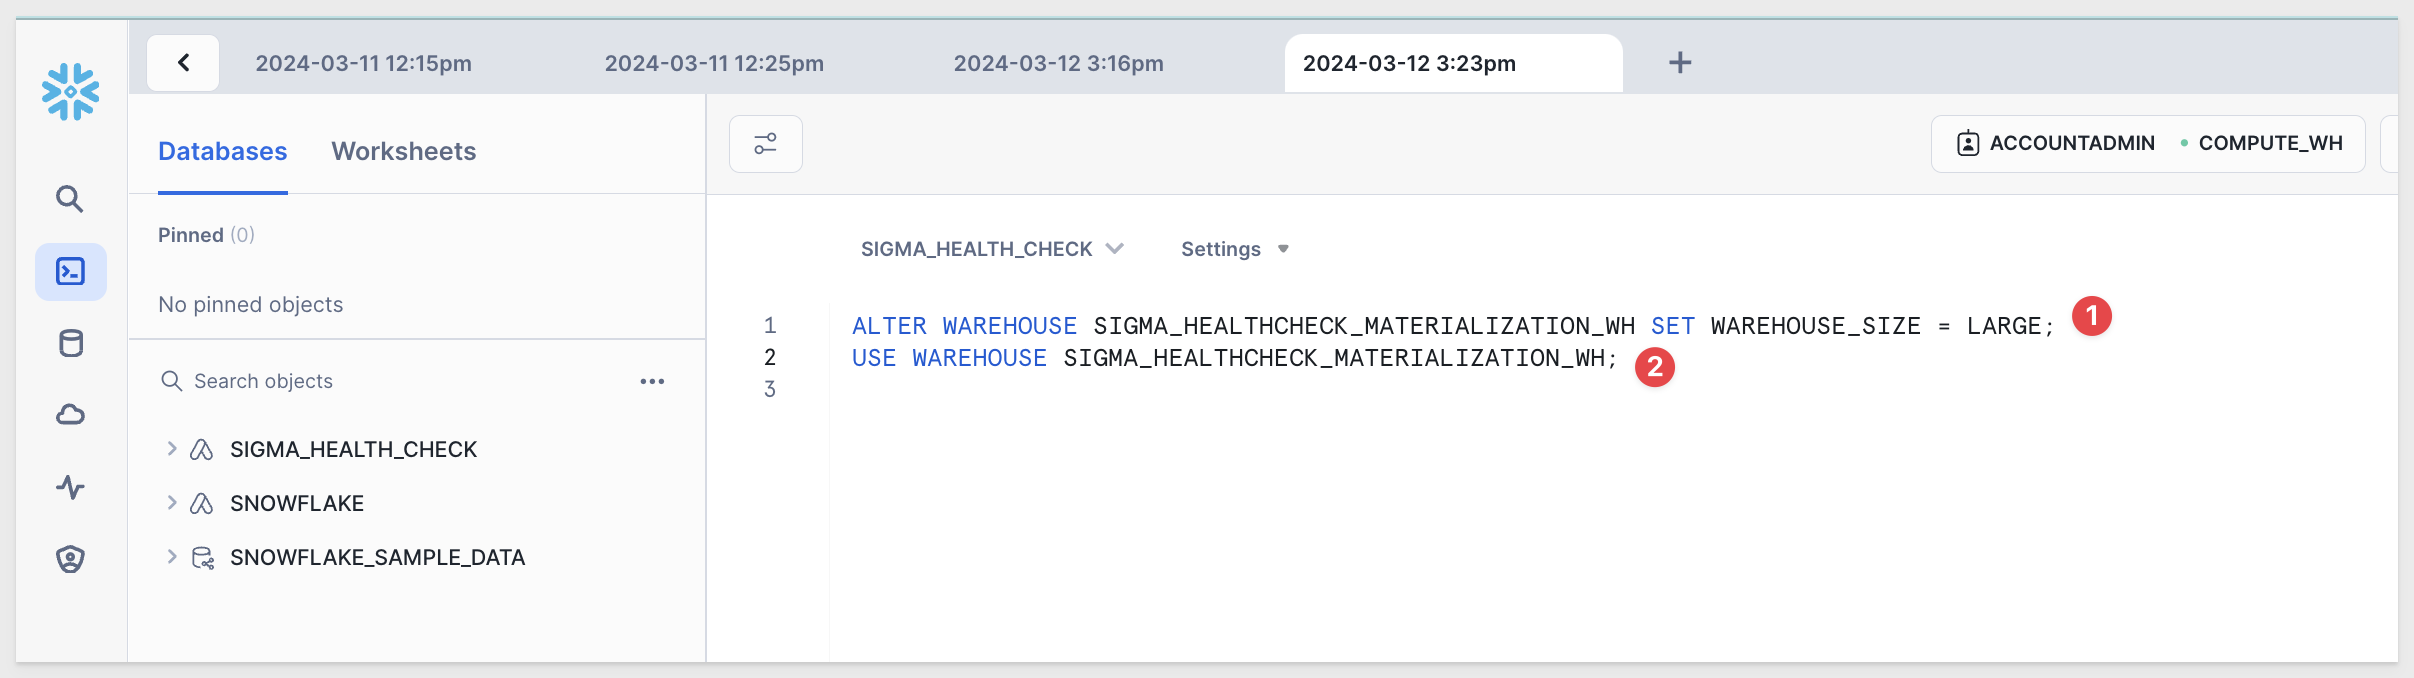
13: Return to the Sigma Health Check tab and repeat this process for the third block of code, hovering over the top right corner to select Open in worksheet.
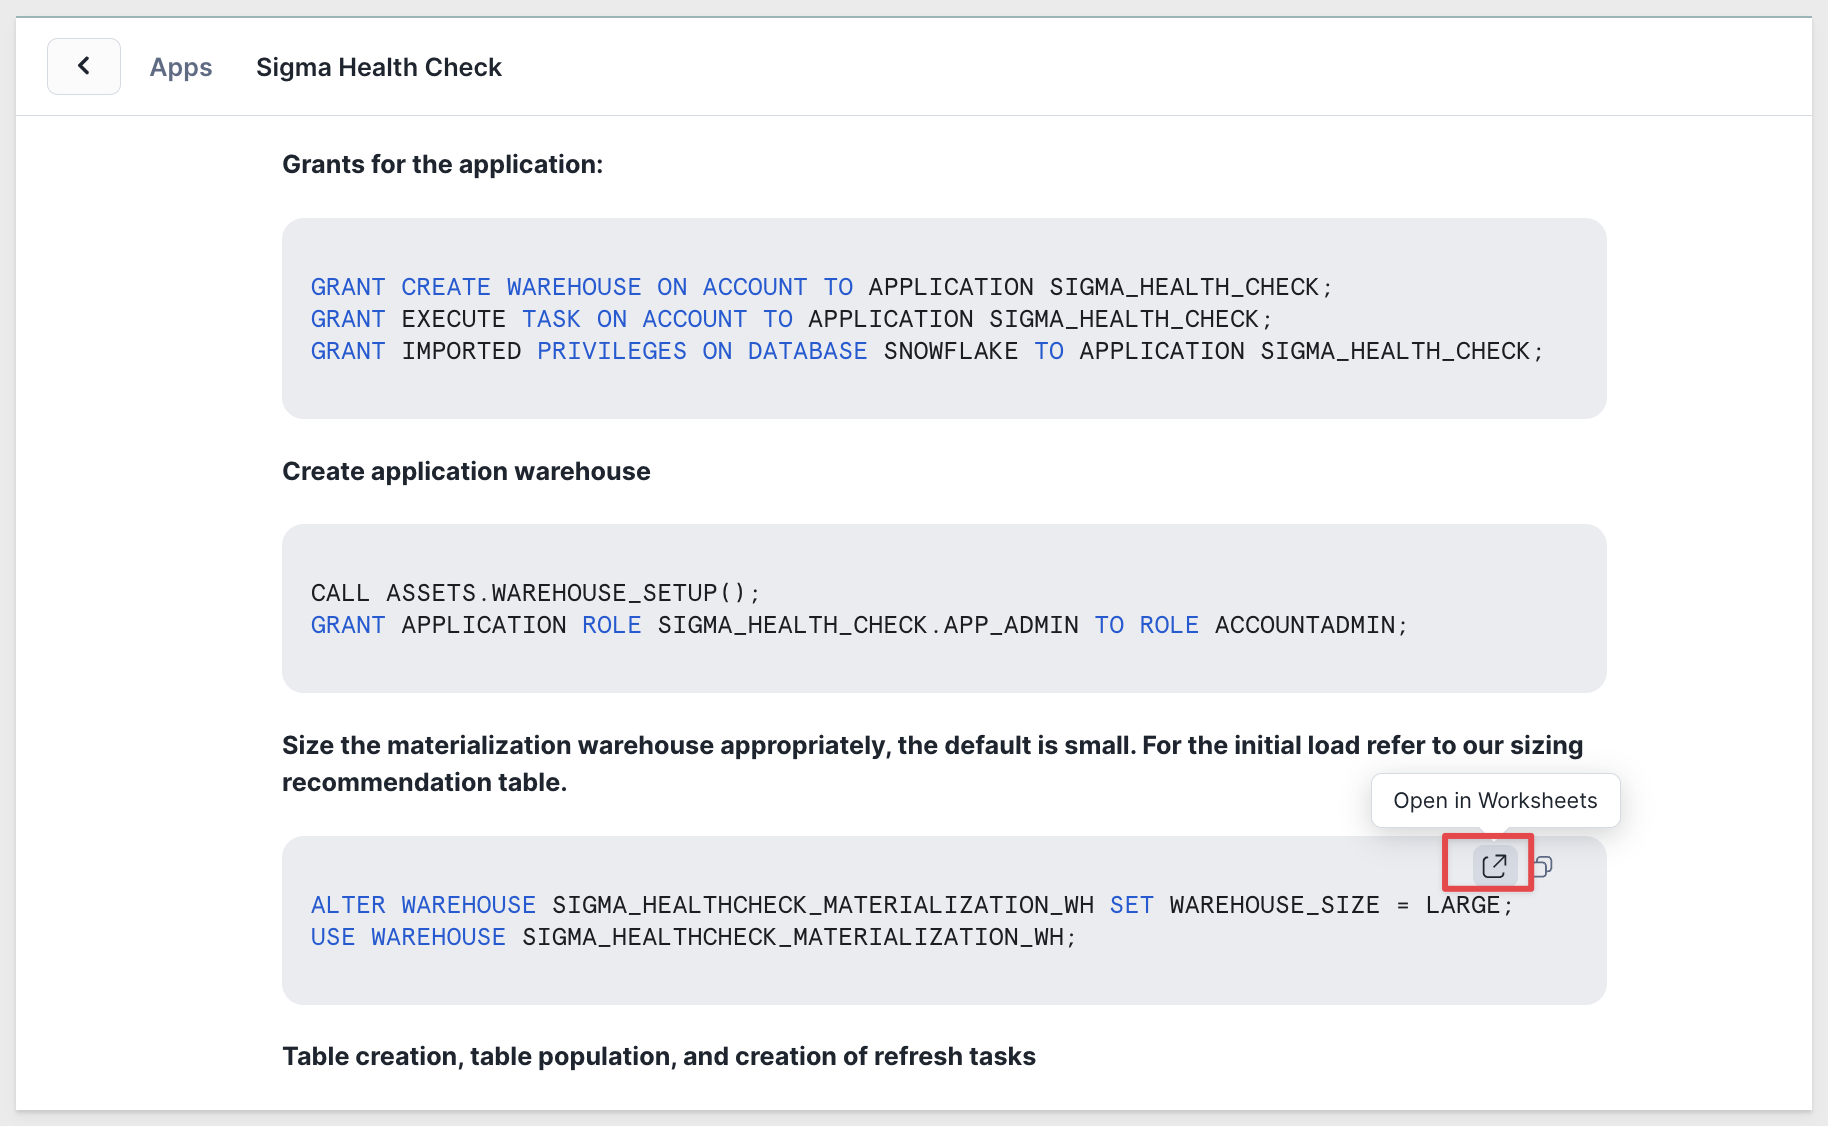
14: The warehouse created by the application for use in analysis and set up is called SIGMA_HEALTHCHECK_MATERIALIZATION_WH.
Upon creation, its size is a small.
Run the two commands in the worksheet, choosing the size for the alter warehouse statement that you prefer.
For our set up we leveraged the pre-written command and re-sized to a large warehouse.
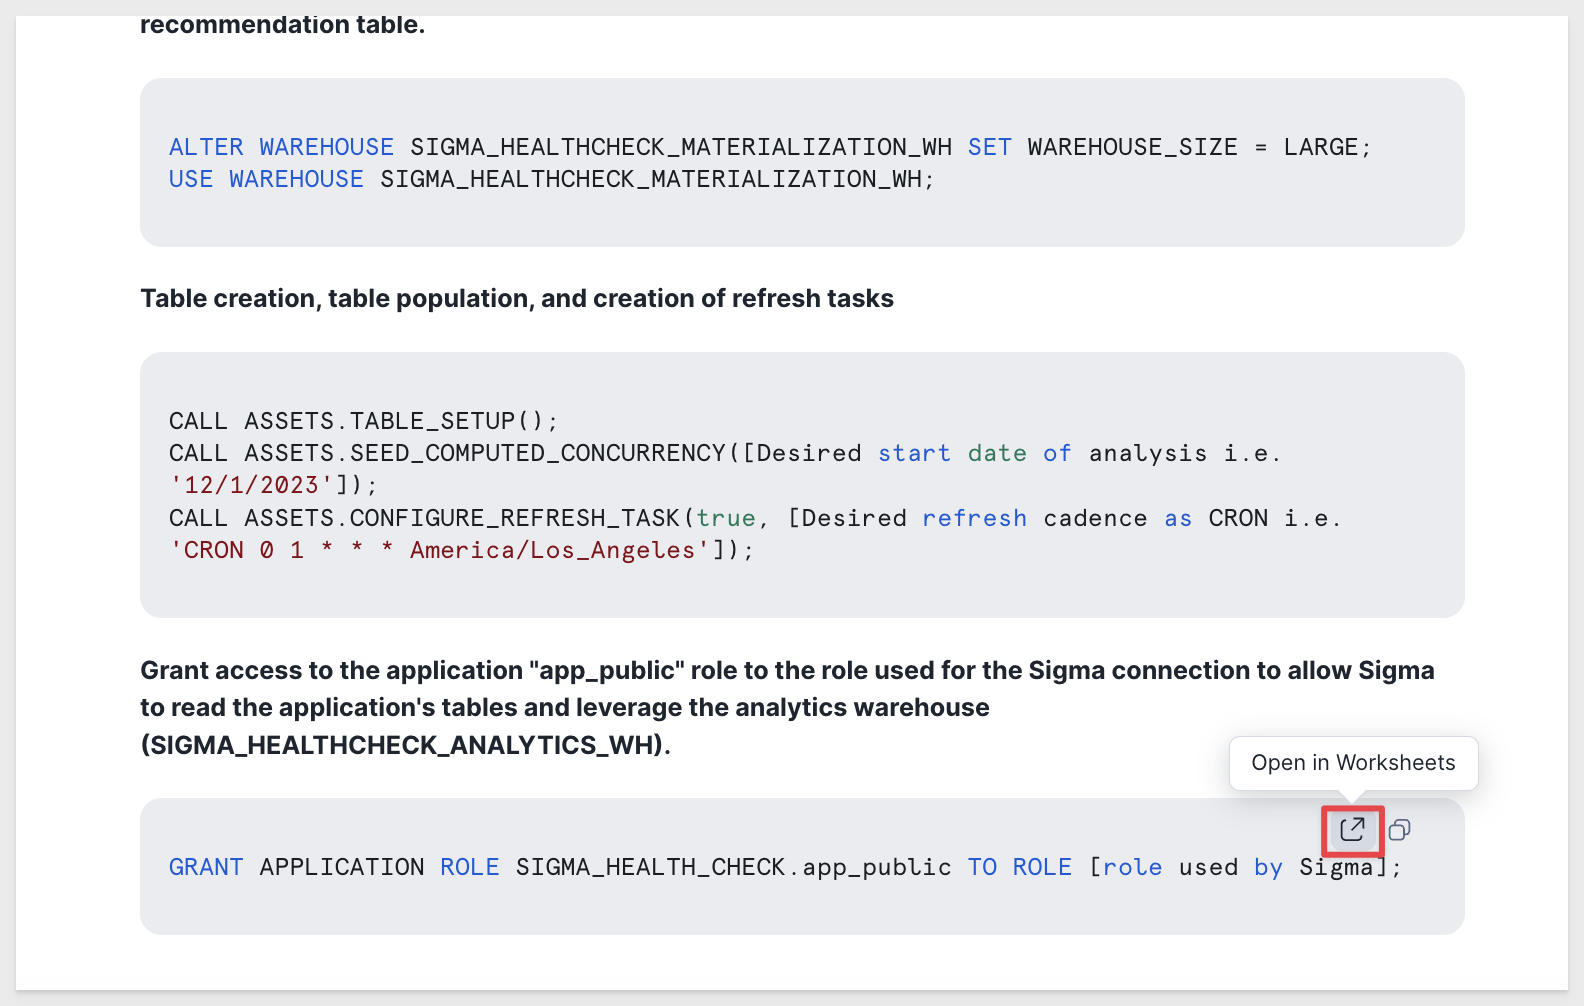
15: Return to the main Sigma Health Check tab, and locate the fourth block of code titled Table Creation, table population, and creation of refresh task.
Once again, hover over the top right corner and select Open in Worksheet:
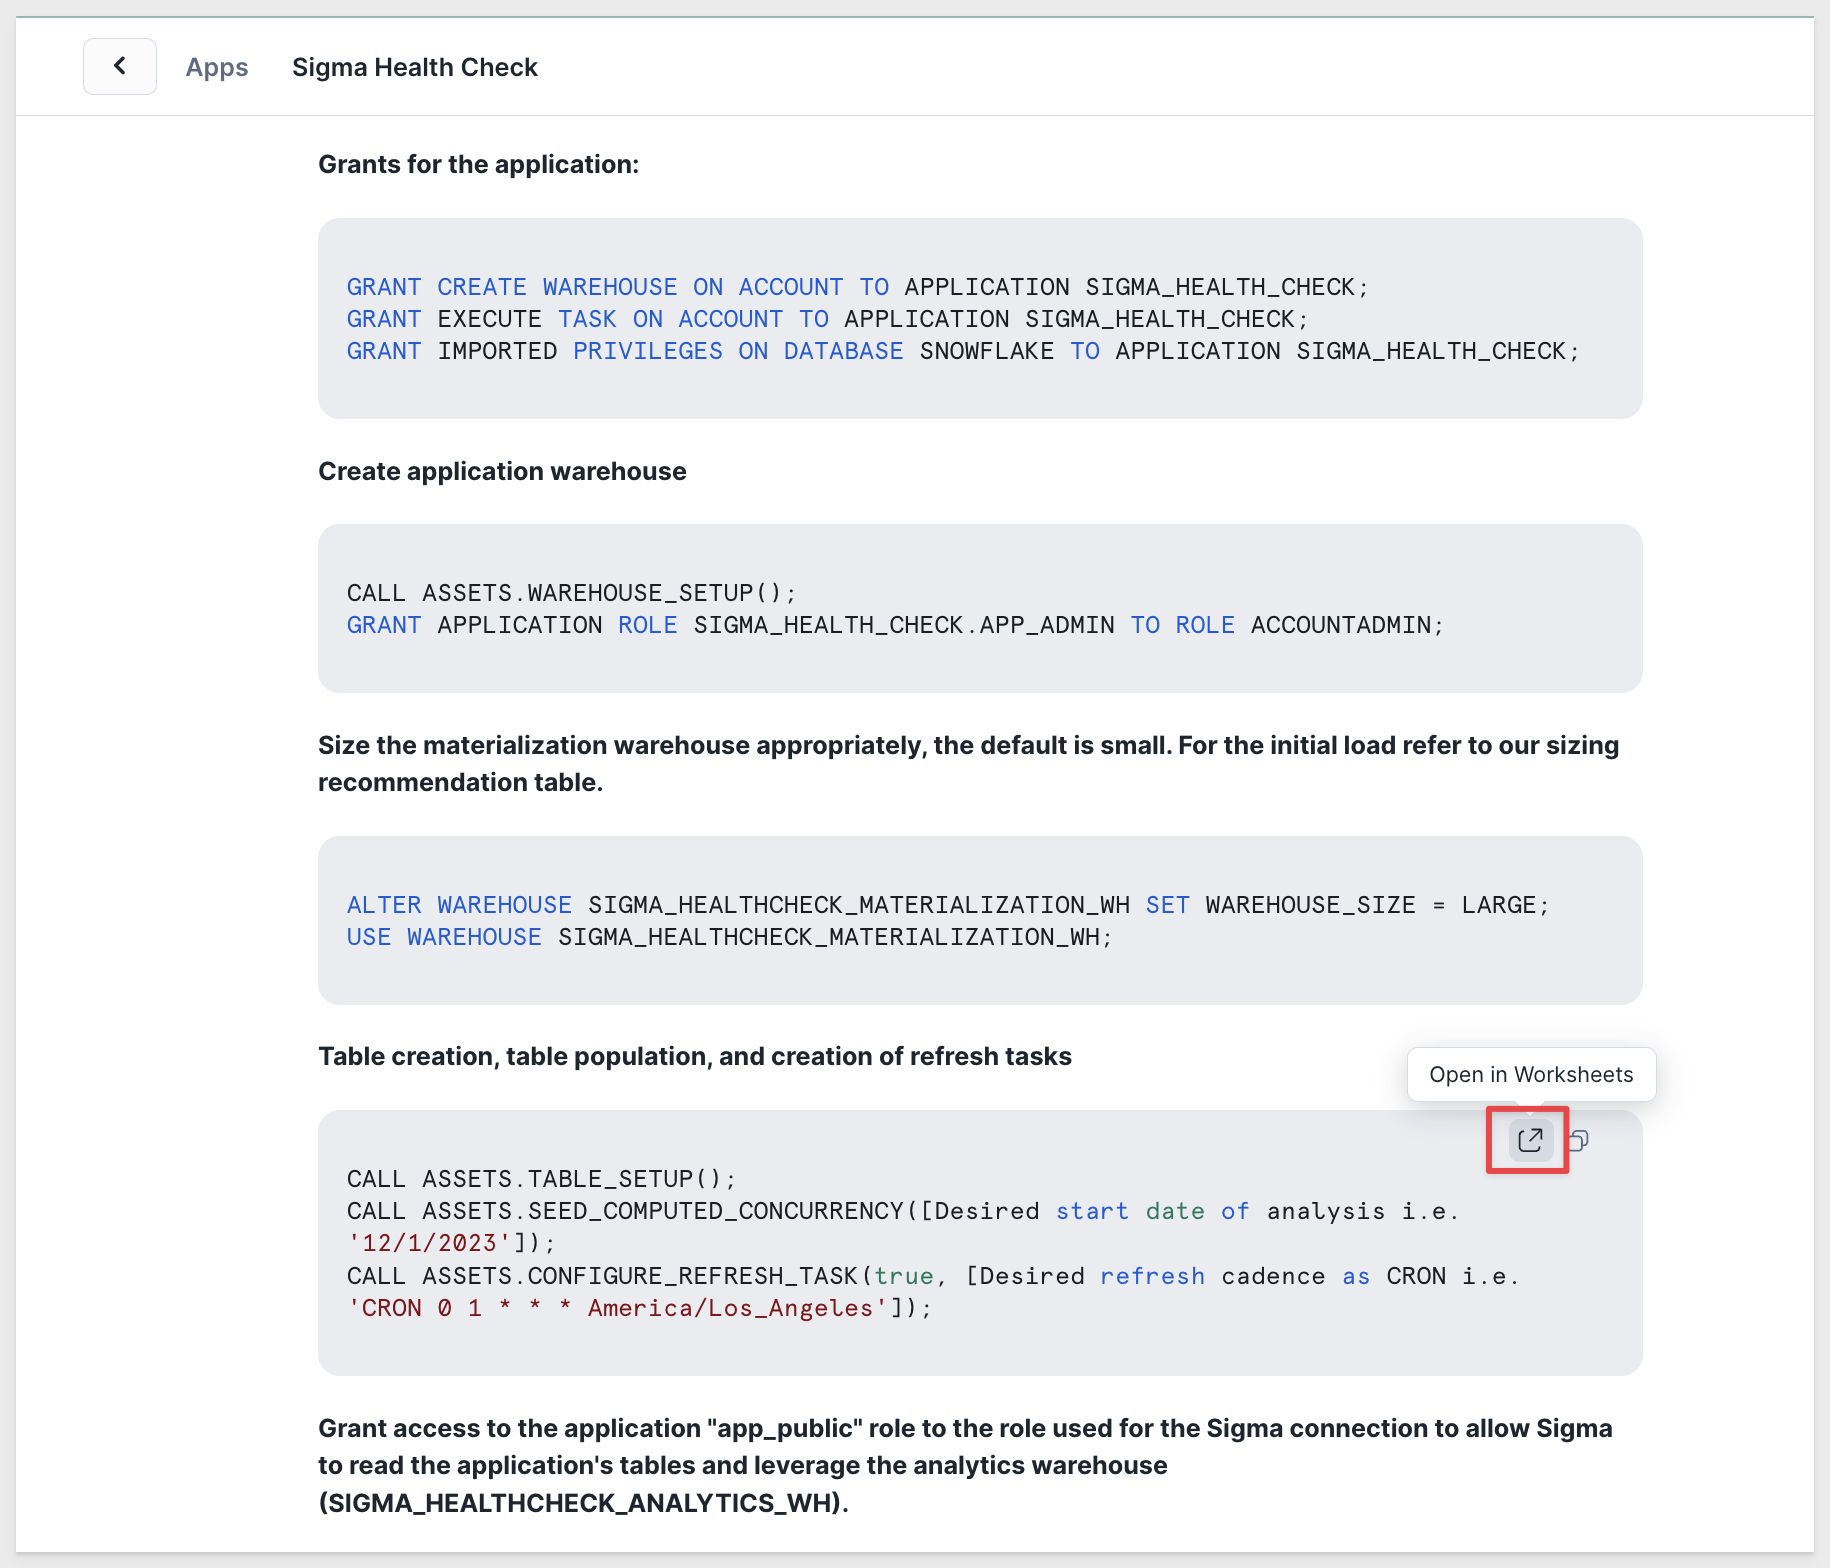
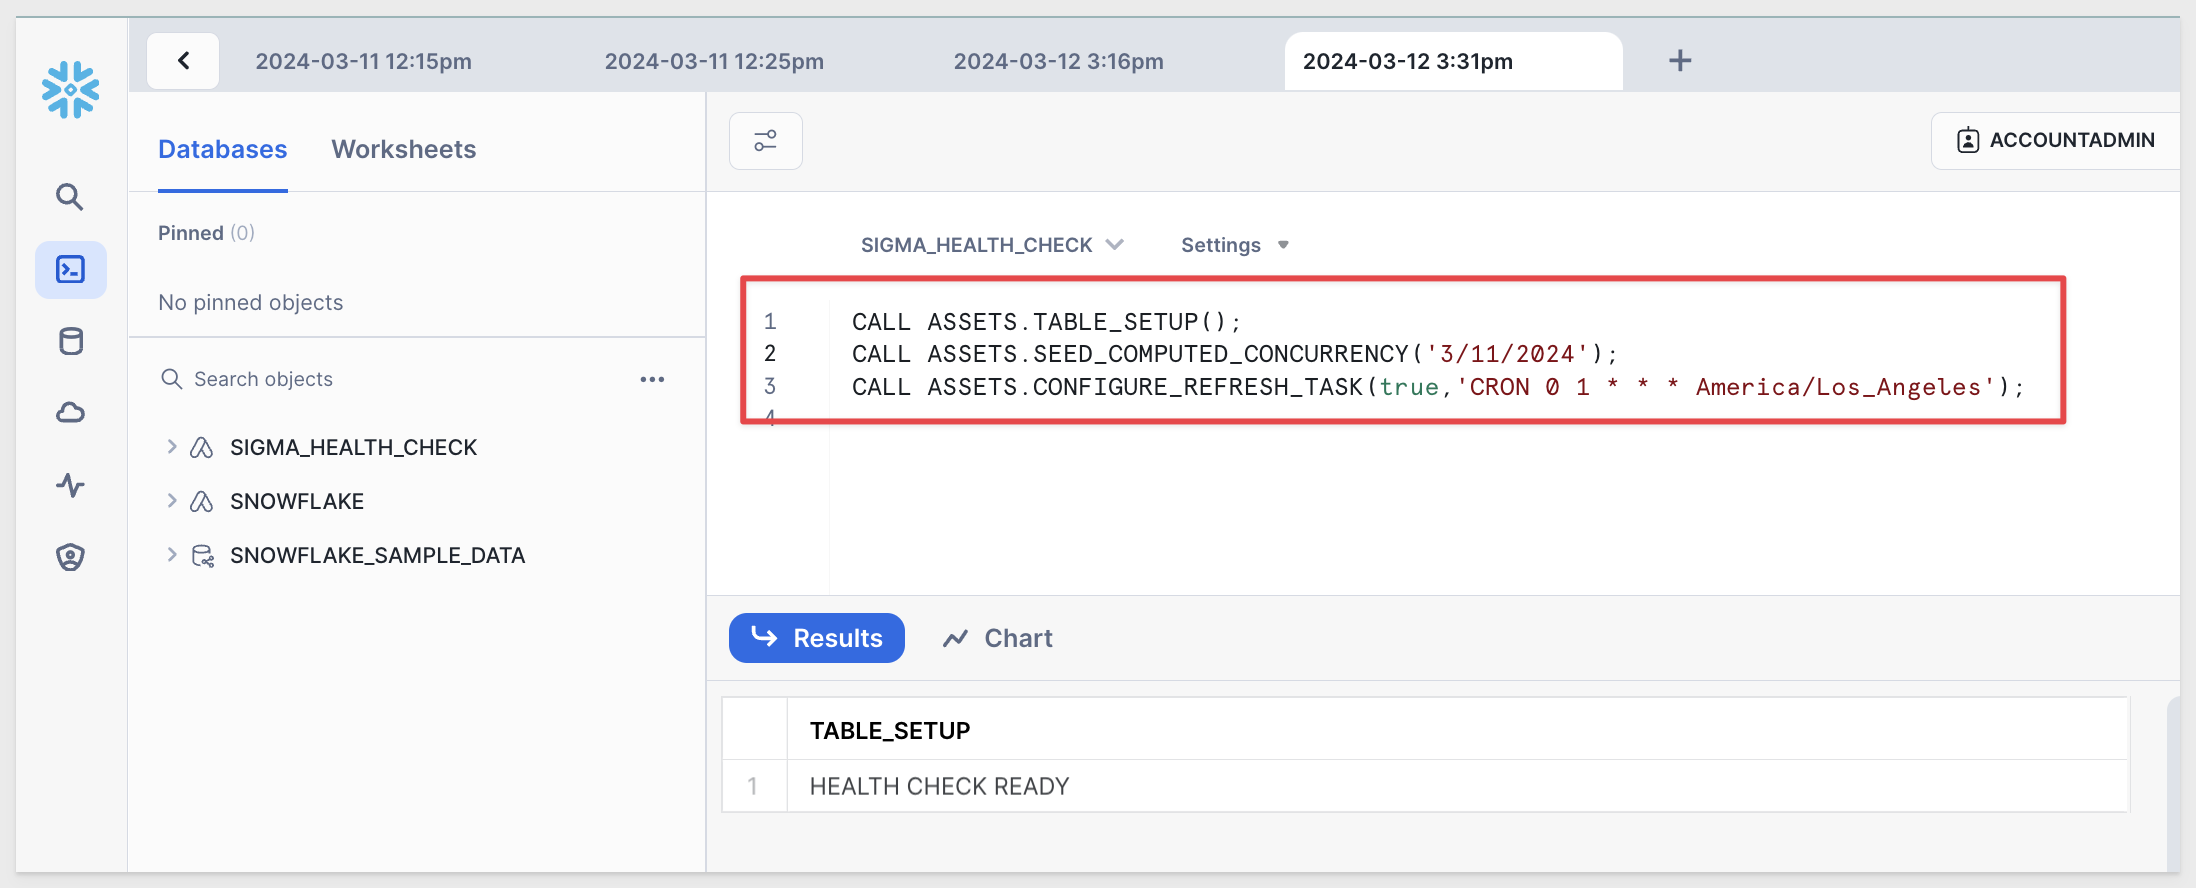
16: In the new worksheet, you will see two commands that require your input, marked 1 and 2 in the screenshot below.
For the first, input the date that you would like the workbooks analysis to begin with. This can be any date within the past year, as the application leverages data from your query history.
For the second, input a chron statement to indicate the refresh rate you would like for the data in the application. In our example, we selected March 11, 2024 as the start date, and set the task to refresh at 1 am PST:
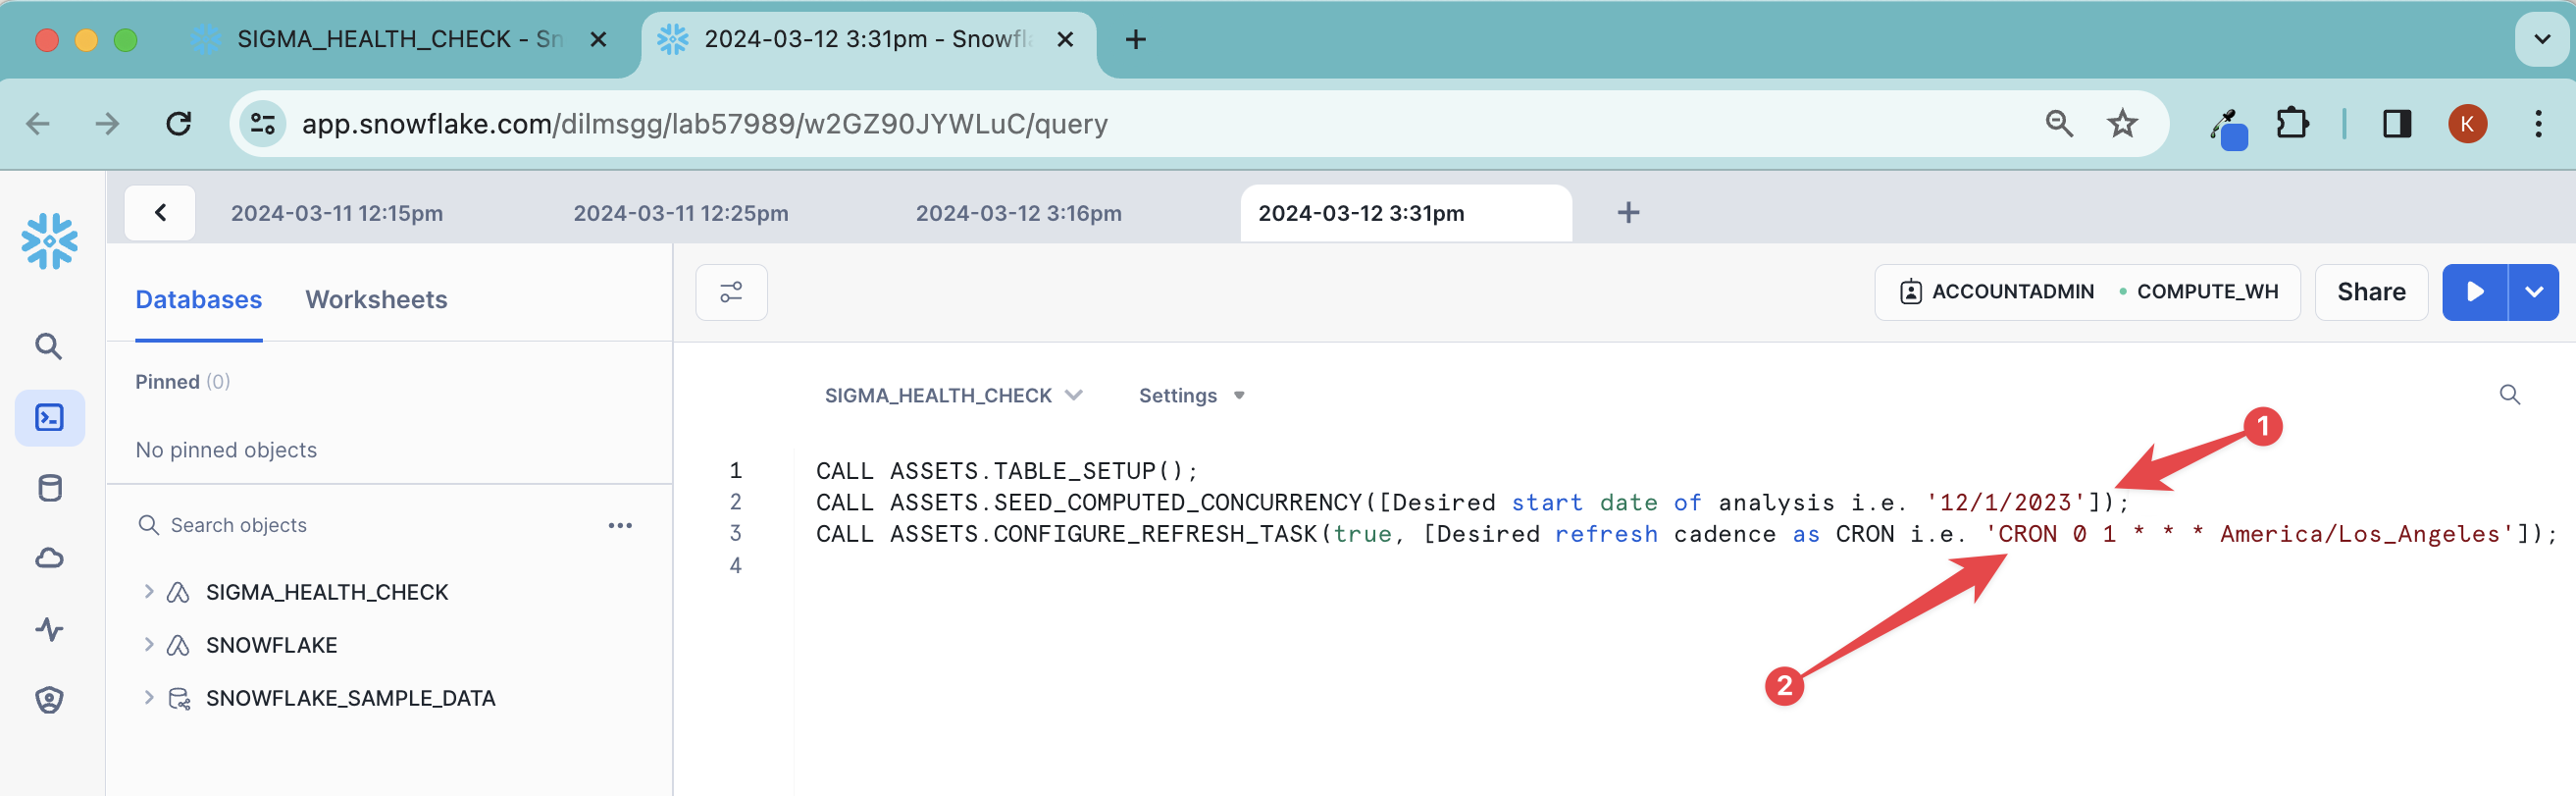
Then, run all three statements:
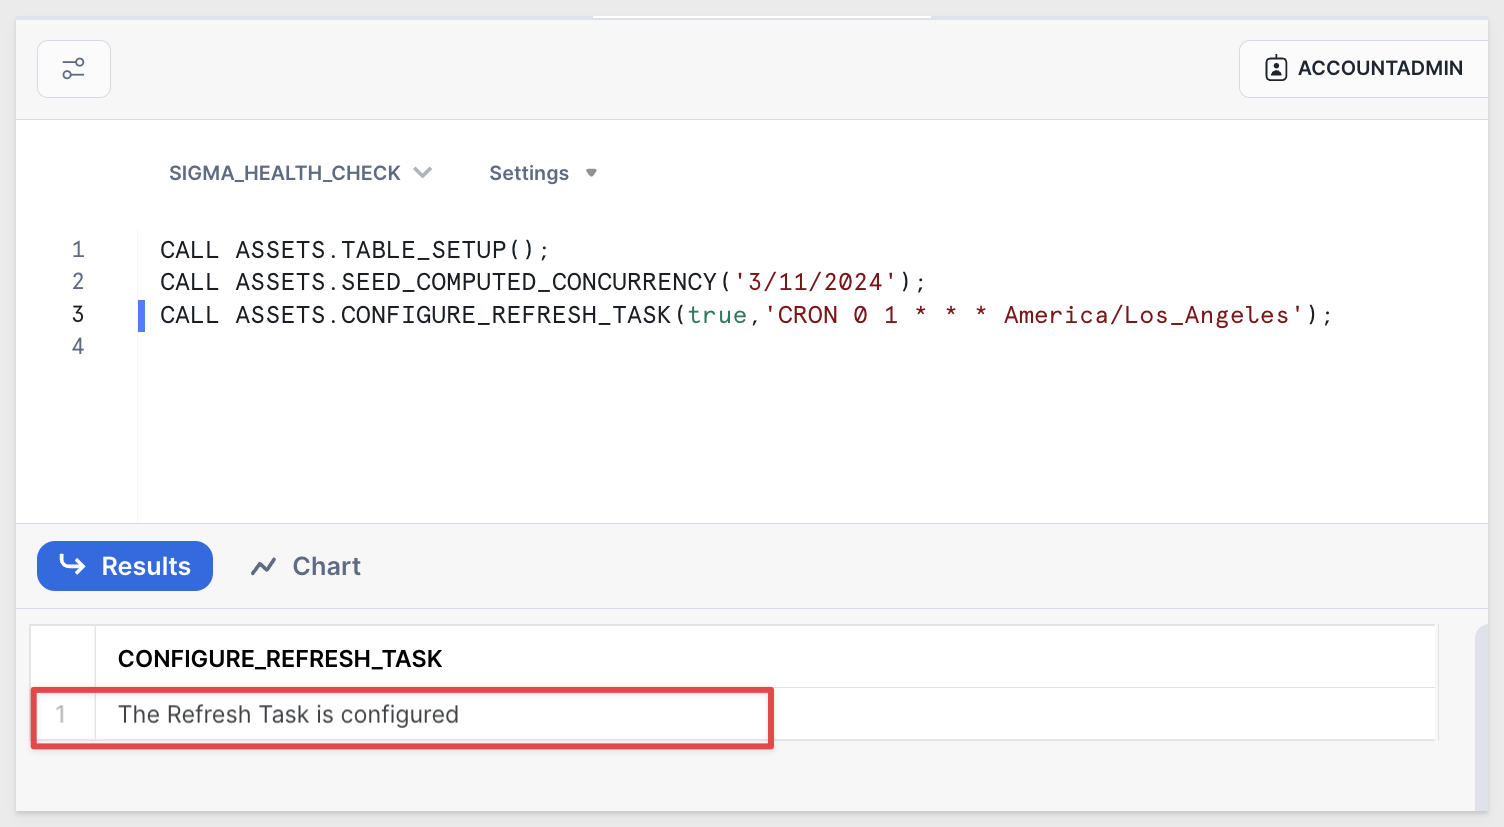
17: You will know the set up was successful when you see The Refresh Task is configured:
18: Once more, return to the main Sigma Health Check tab, and scroll to the final block of code.
Hover over the top right corner and select Open in Worksheets:
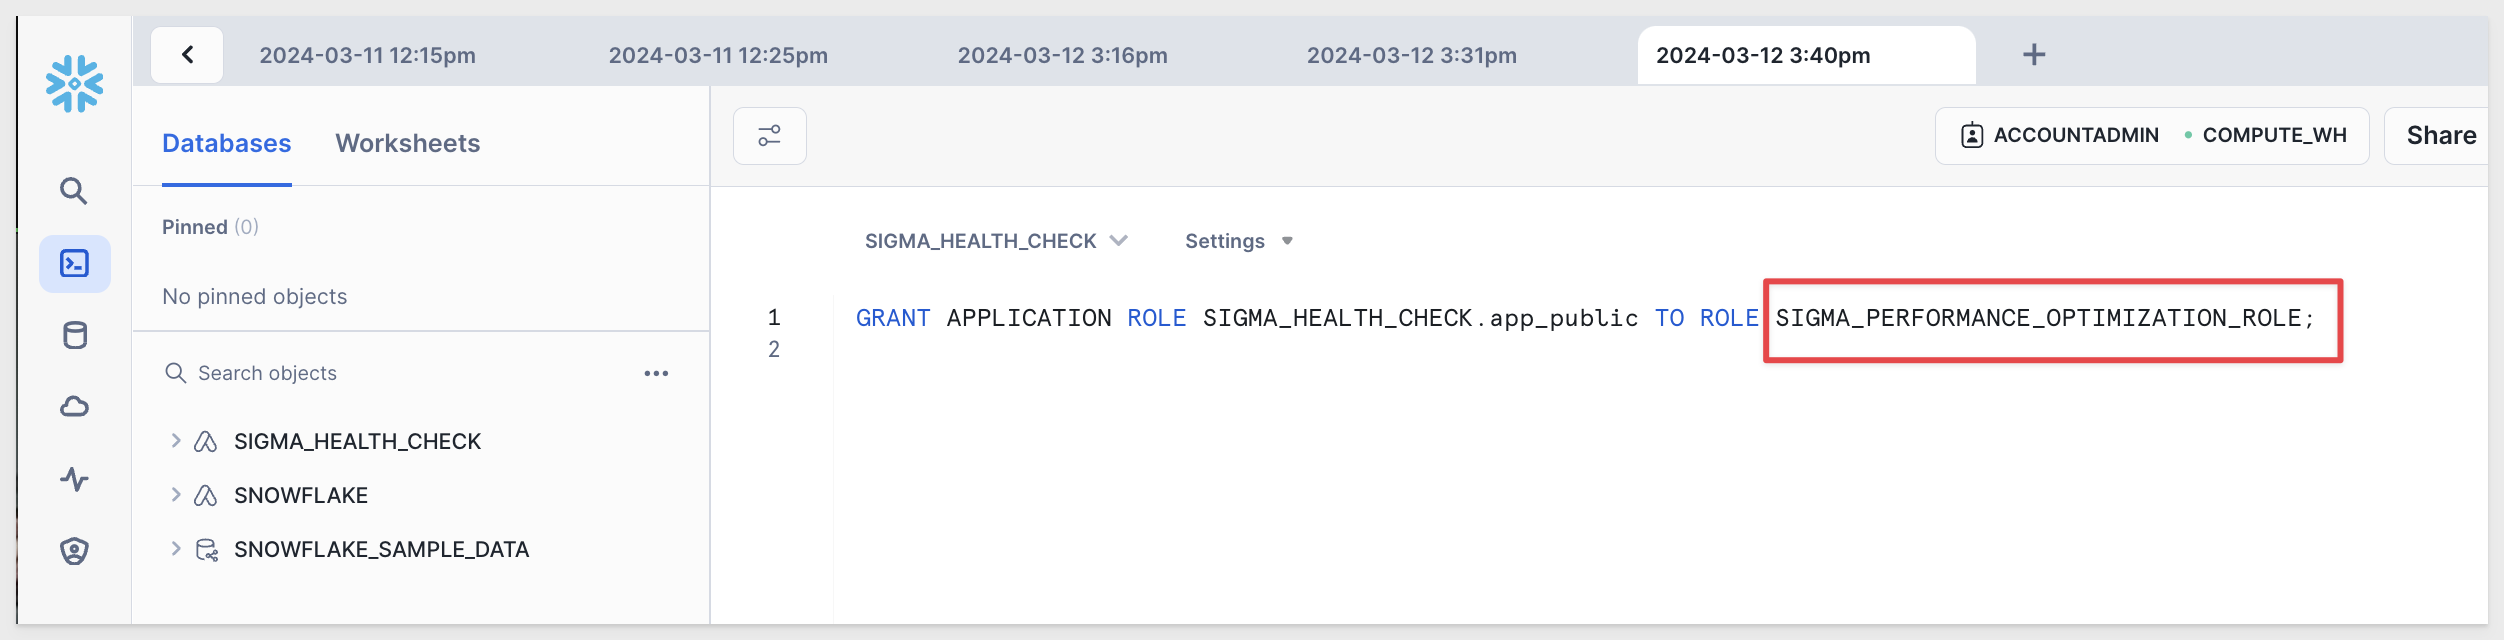
19: Update the command shown to reflect which user role you use to connect to Sigma, and run the command.
In the example below, we grant the application role to the SIGMA_PERFORMANCE_OPTIMIZATION_ROLE role in our Snowflake account.
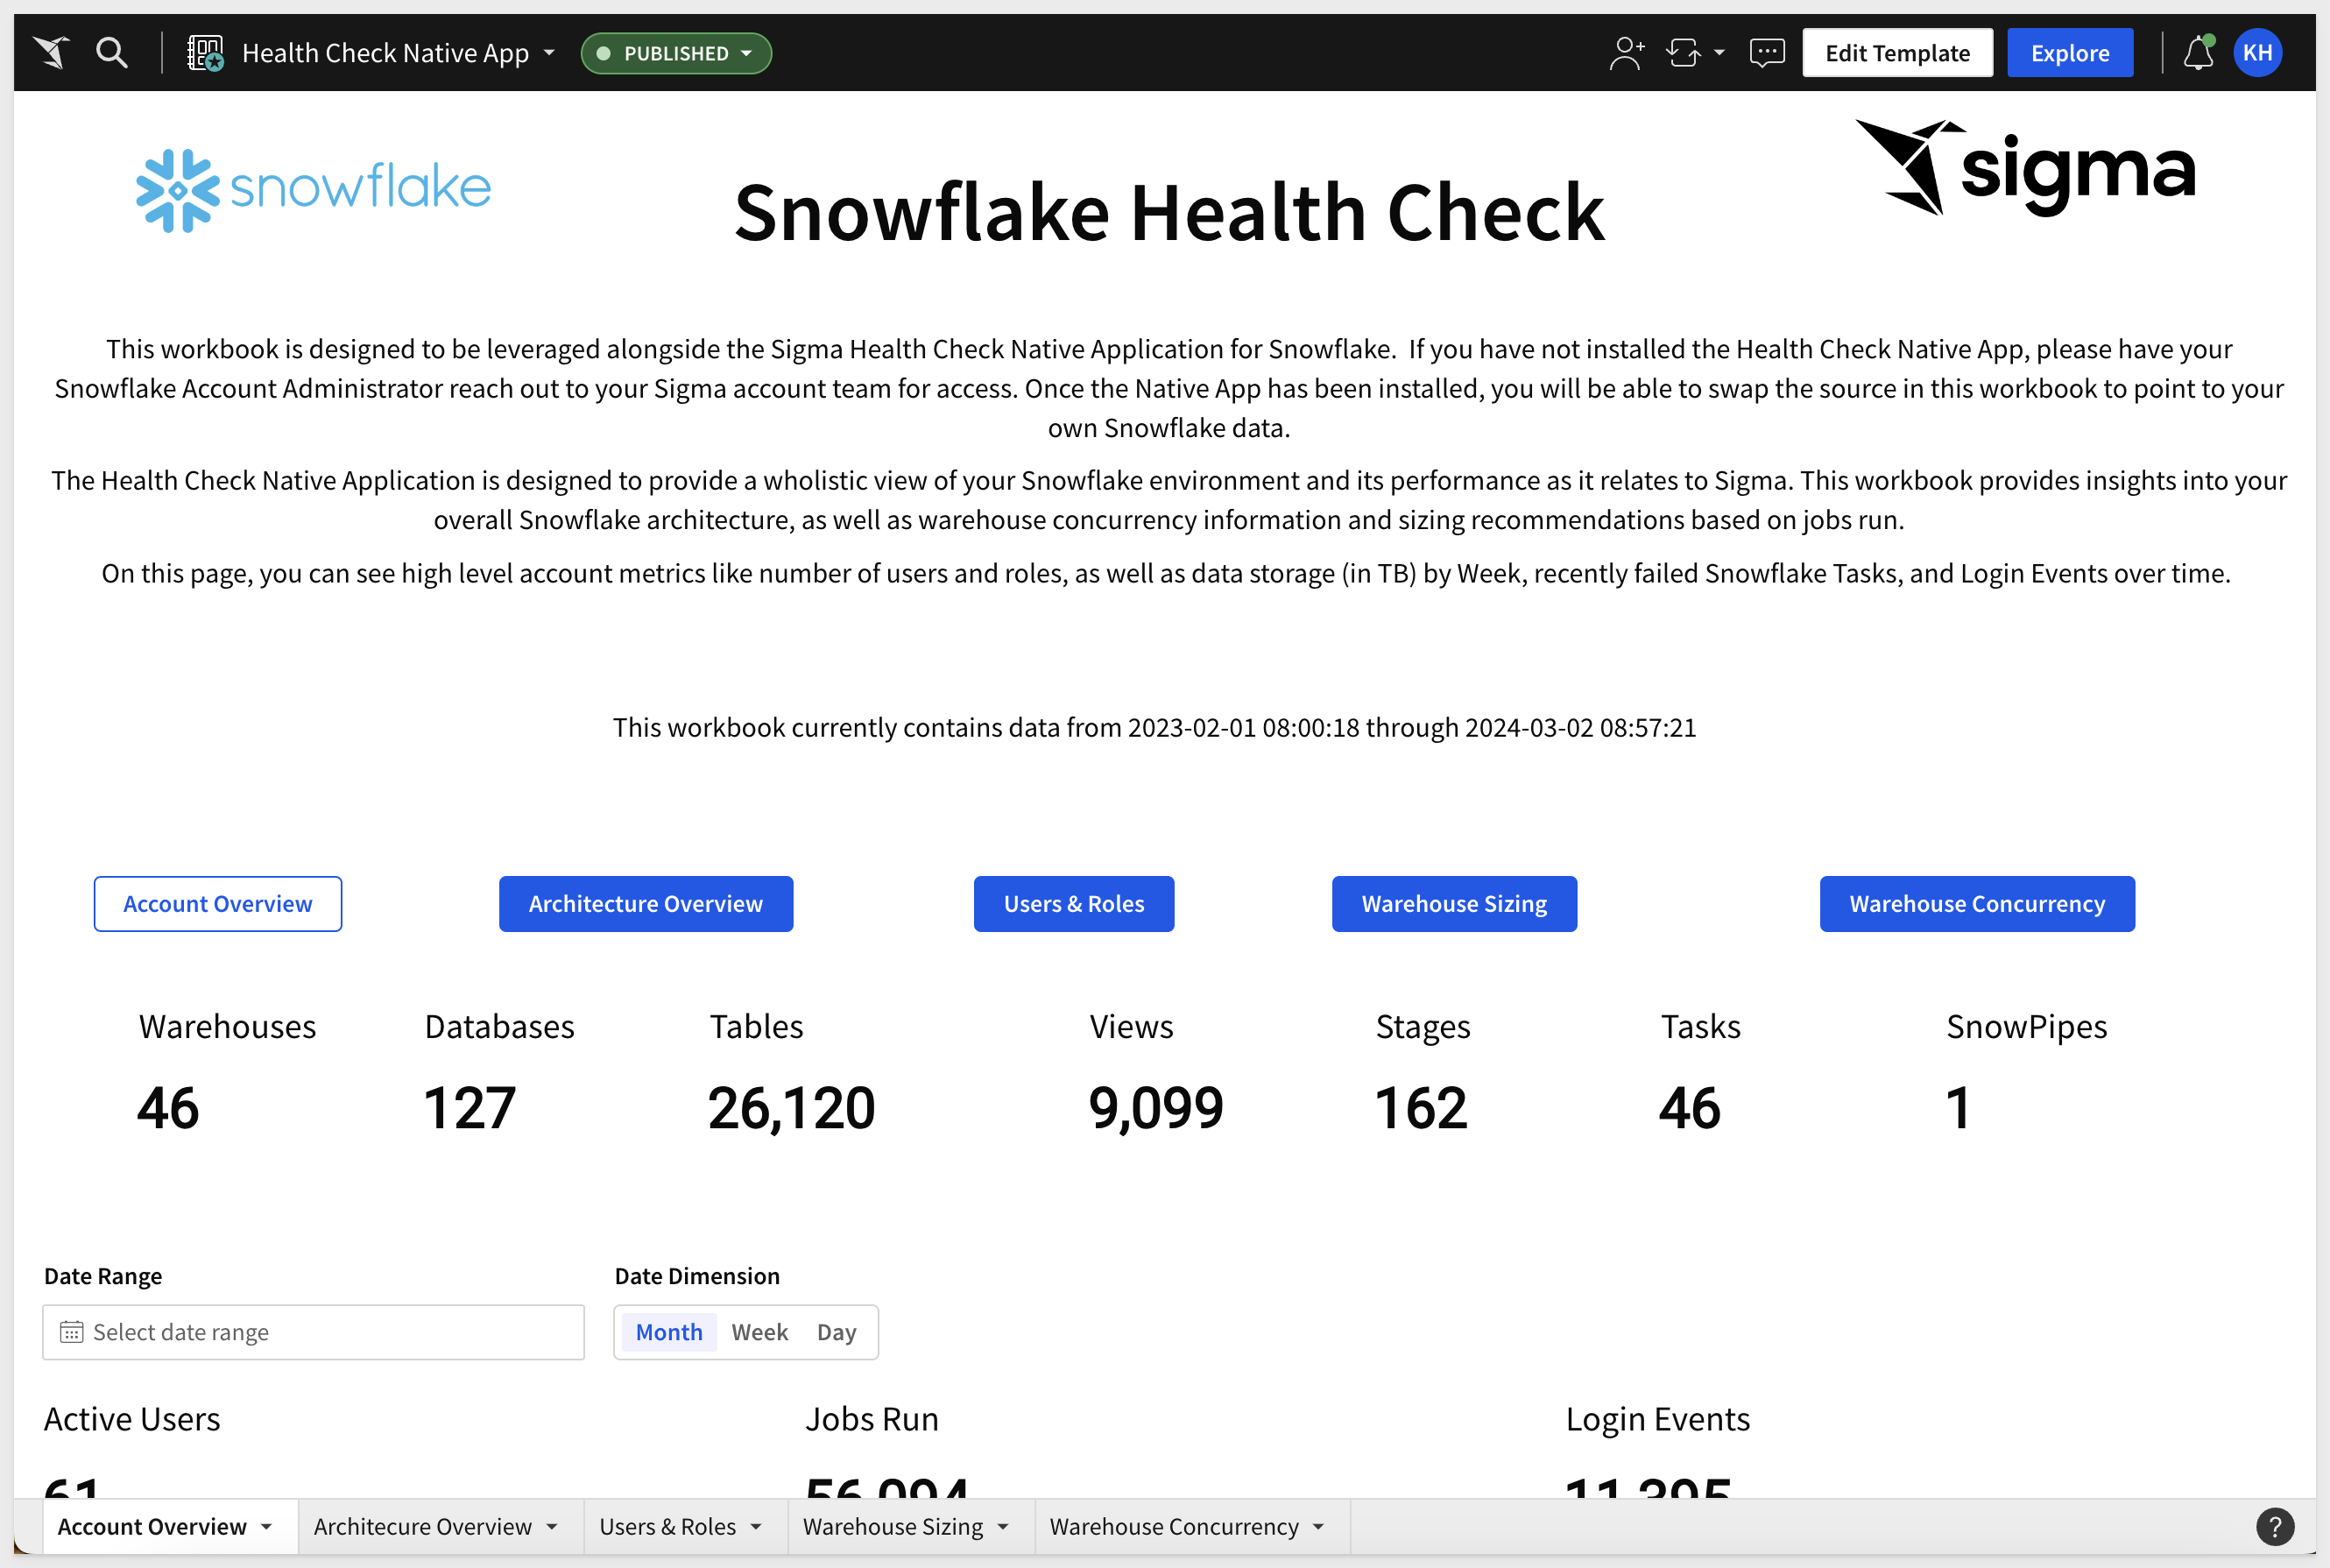
20: You are now done installing and configuring the native application in Snowflake, and are ready to connect it to Sigma.

The Health Check Native Application in Snowflake created the tables and objects needed for the health check analysis.
In order to make it simple to visualize the outputs of the Native App, Sigma has created the Sigma Health Check template.
You may have received an email telling you this template was shared with you.
Please DO NOT click the link in the email until you have completed the Snowflake side set up, as well as the set up of the connection to Sigma to ensure the smoothest connection process possible.
If you prefer, you may watch a video that shows all the steps required in Snowflake for this to work:
Configuring Sigma for the Health Check Native App with Snowflake - Watch Video
Step by Step Instructions
1: Login into Sigma as an Administrator.
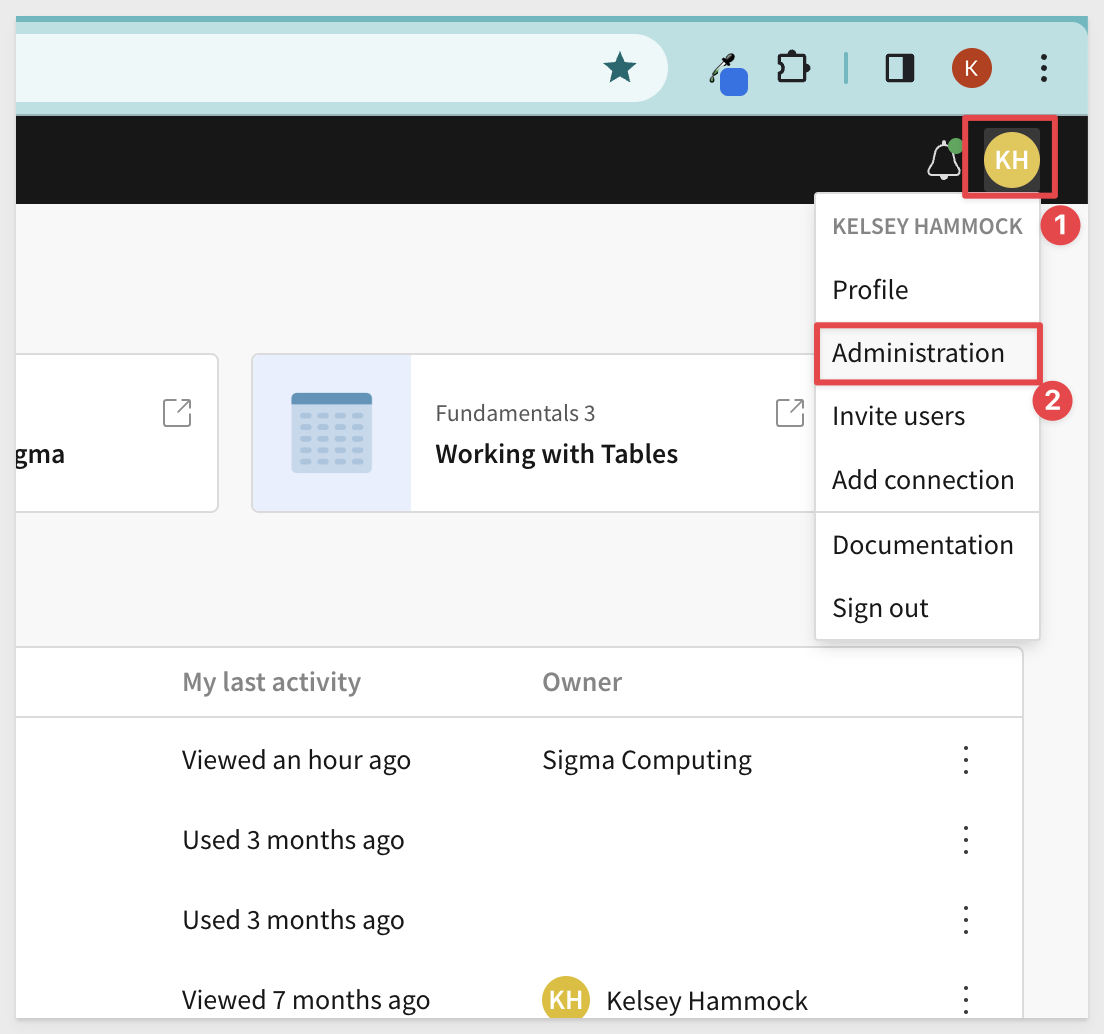
2: Navigate to administration by clicking the icon in the top right, then selecting Administration from the drop down.
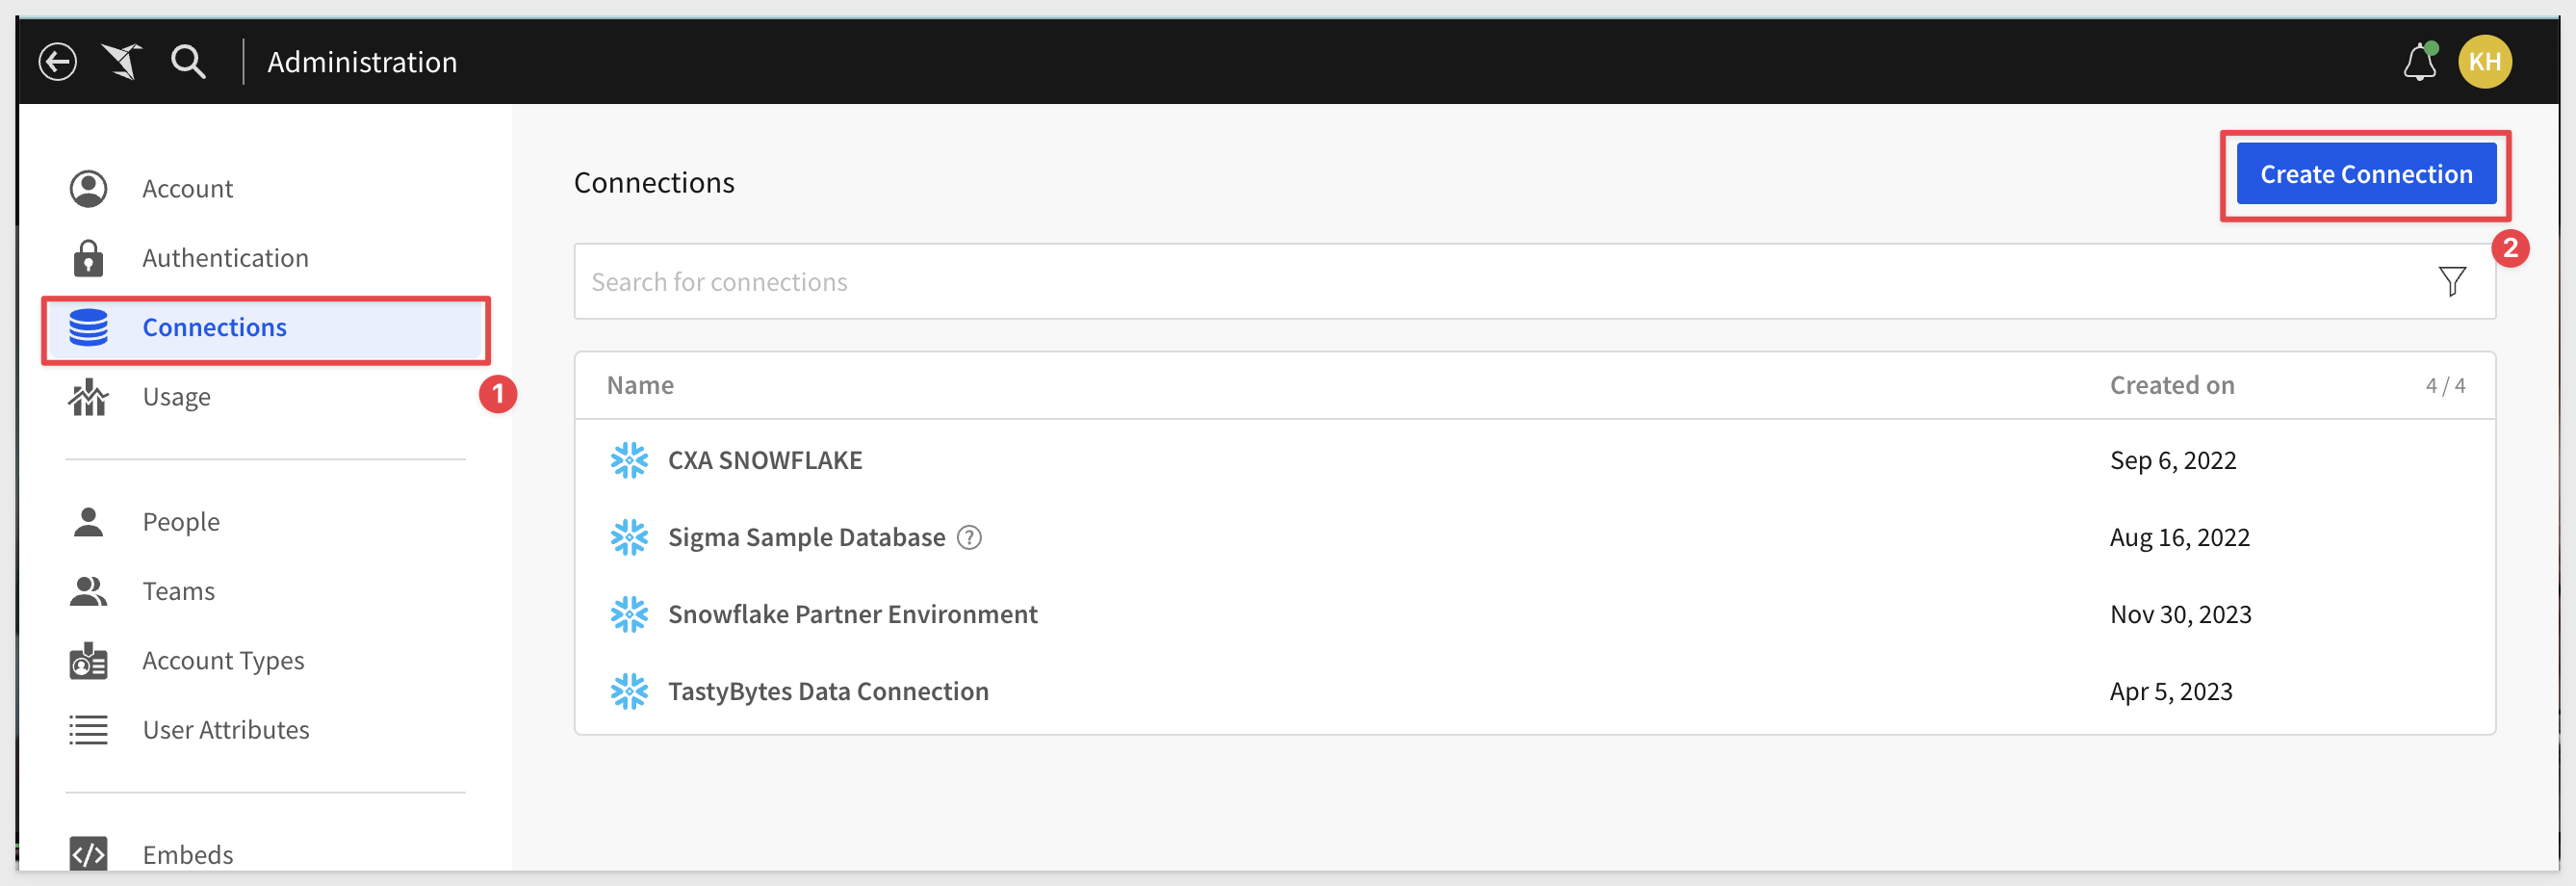
3: From the left-hand menu, select Connections, then click Create Connection.
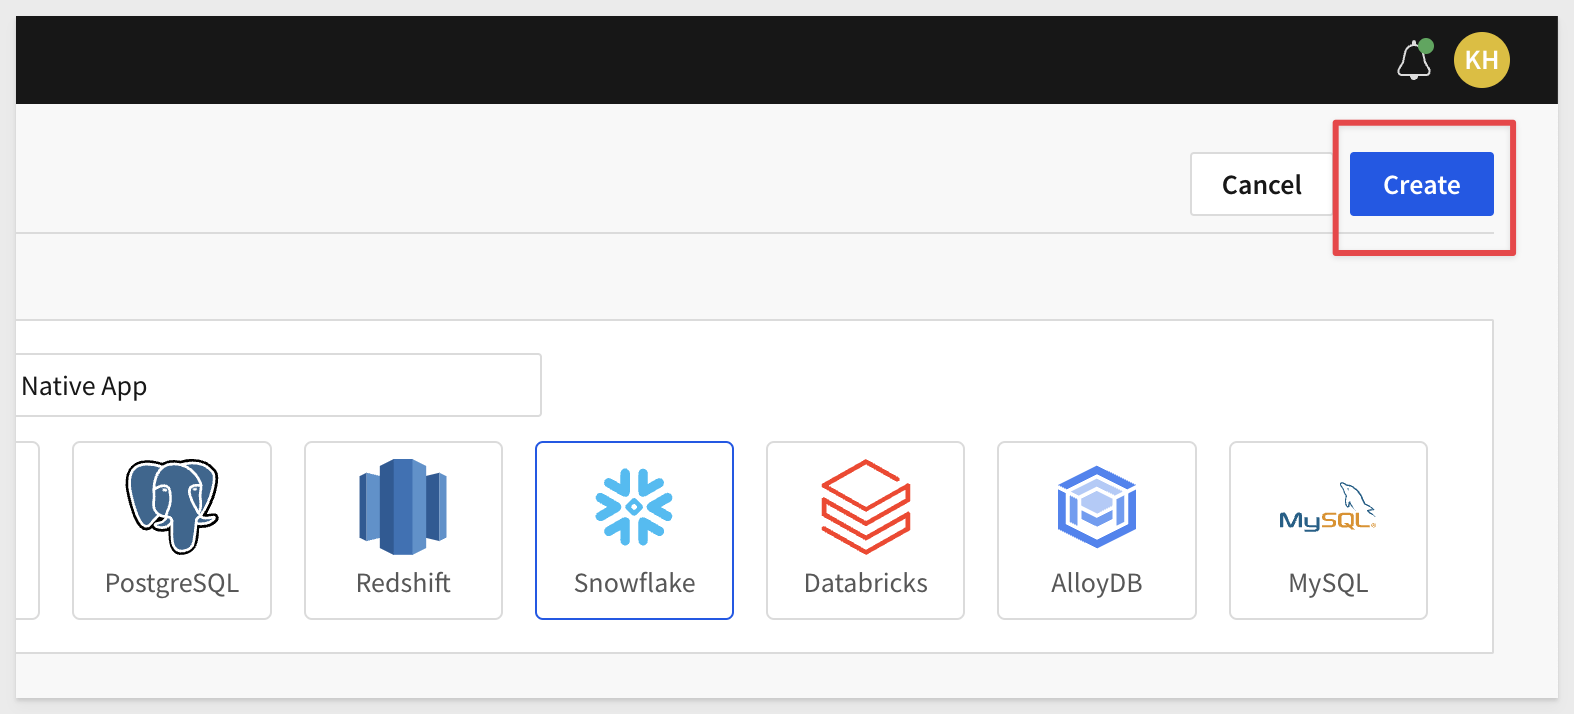
4: Provide a Name for the connection, then select the Snowflake icon:
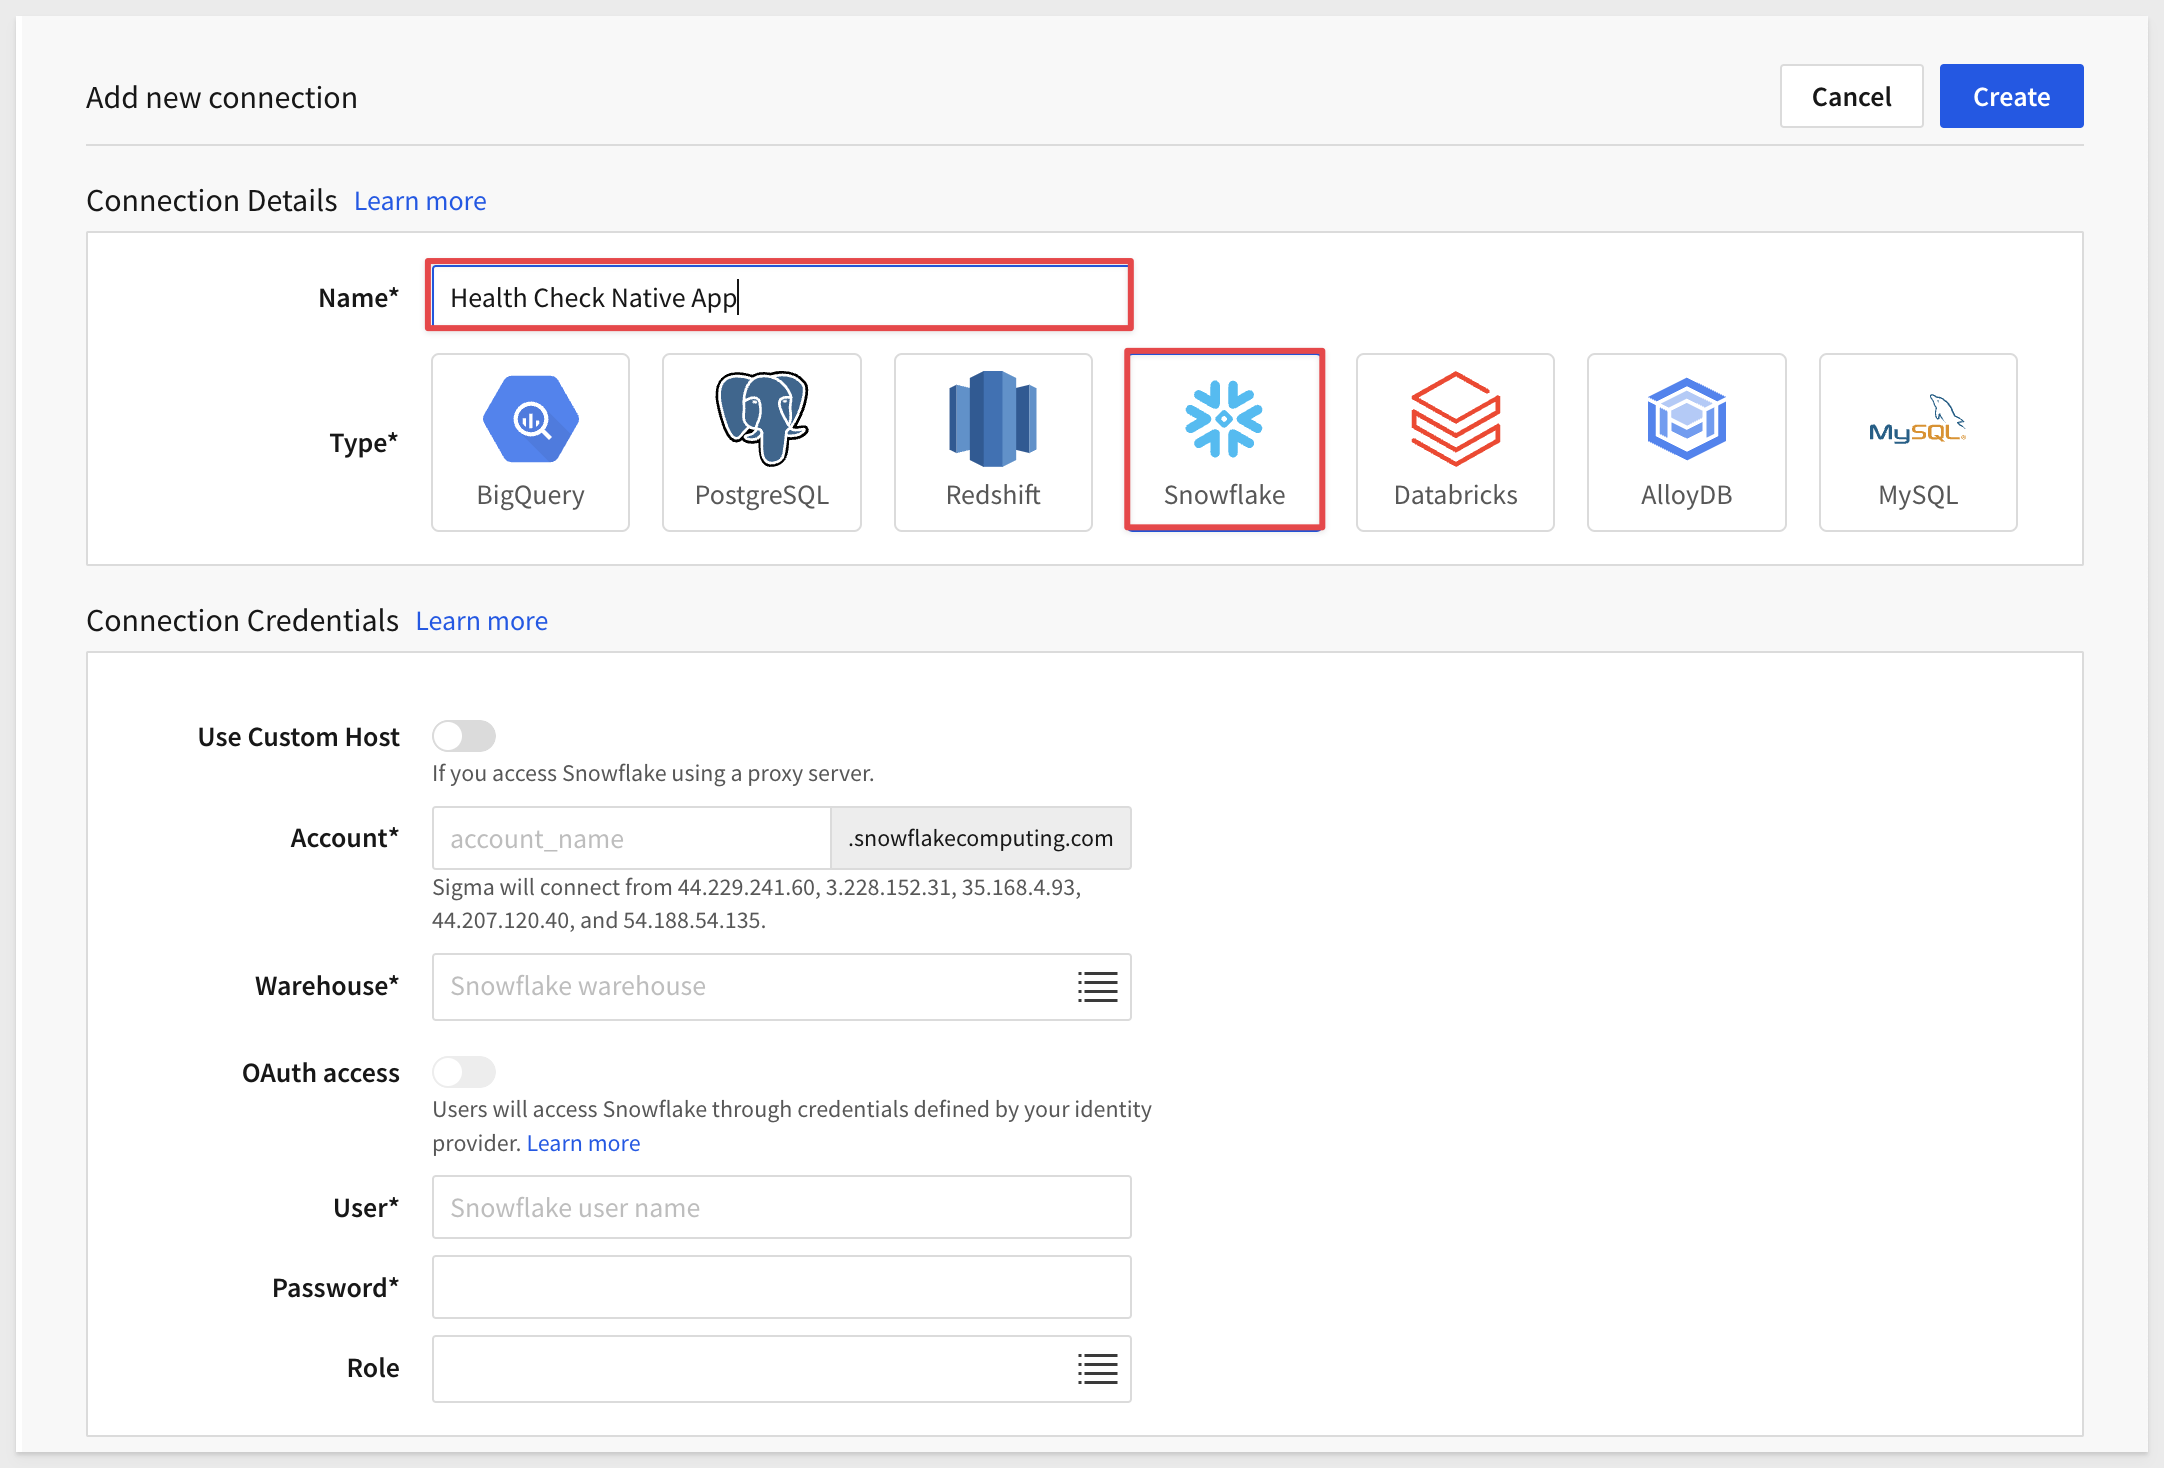
5: Enter your Snowflake account locator.
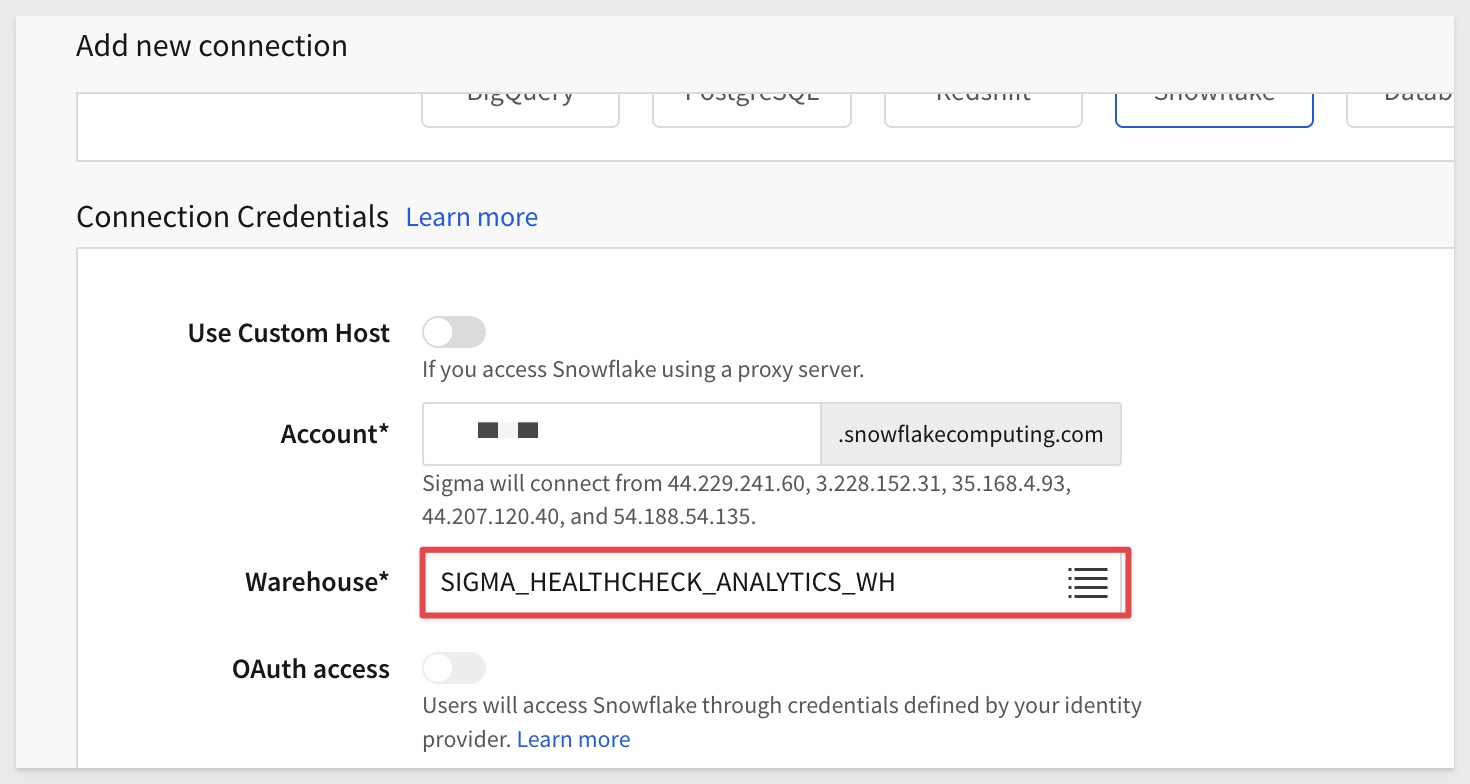
The Health Check Native App created the warehouses needed for the workbook in the set up script. For warehouse enter SIGMA_HEALTHCHECK_ANALYTICS_WH:
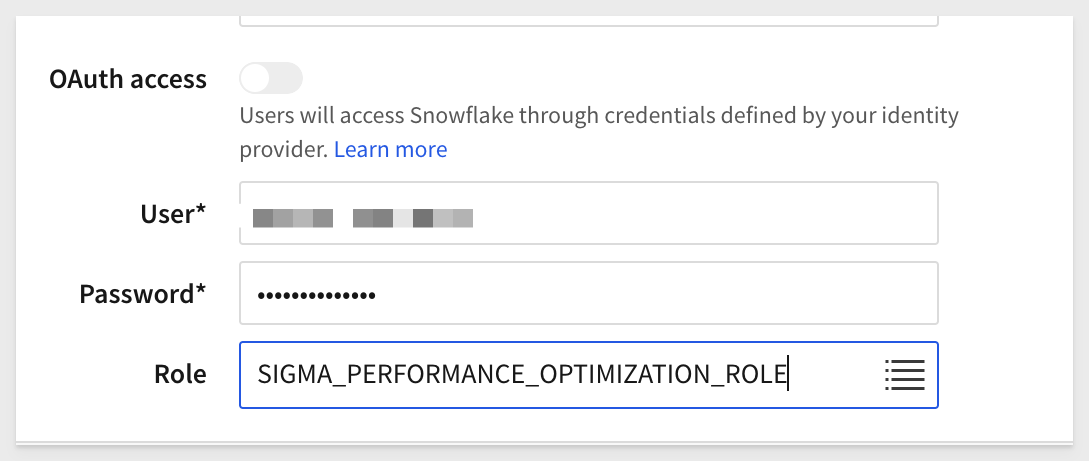
6: For User, enter the credentials of the user you use to connect to Sigma, as well as the Role that you granted the application role to in the previous section:
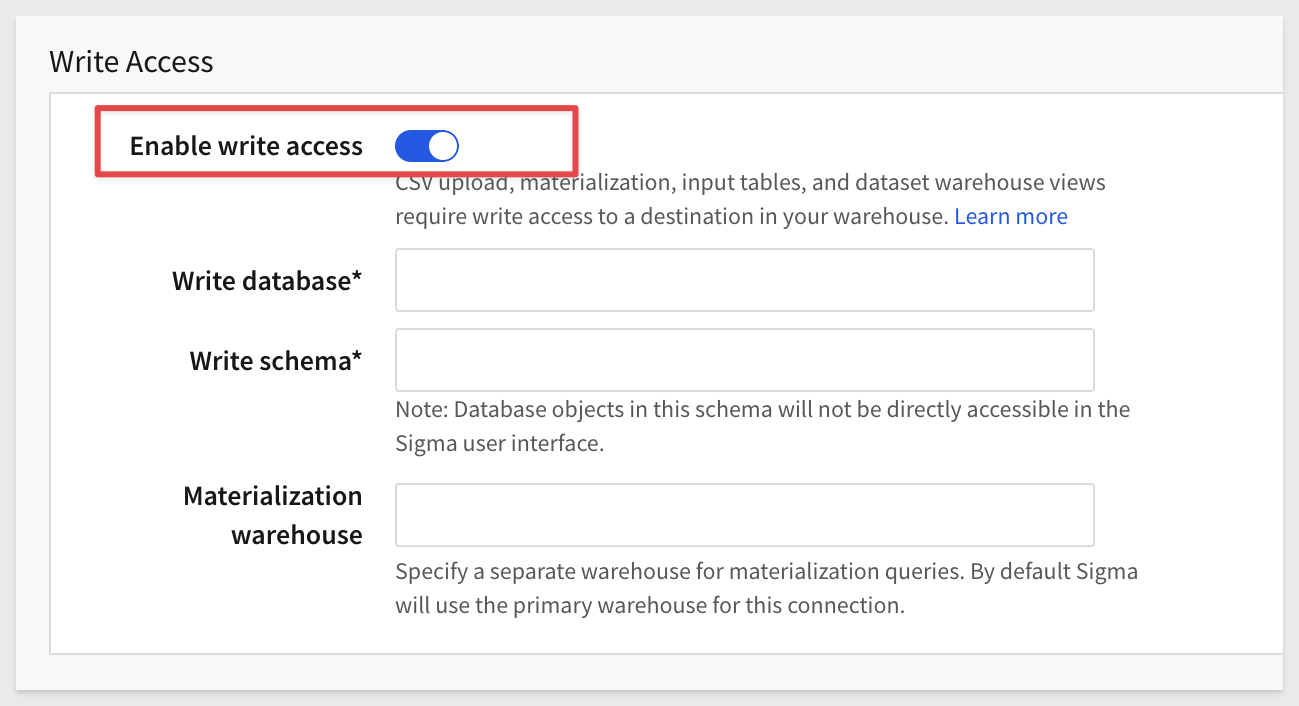
7: Scroll down, and toggle the Enable Write Access switch to on:
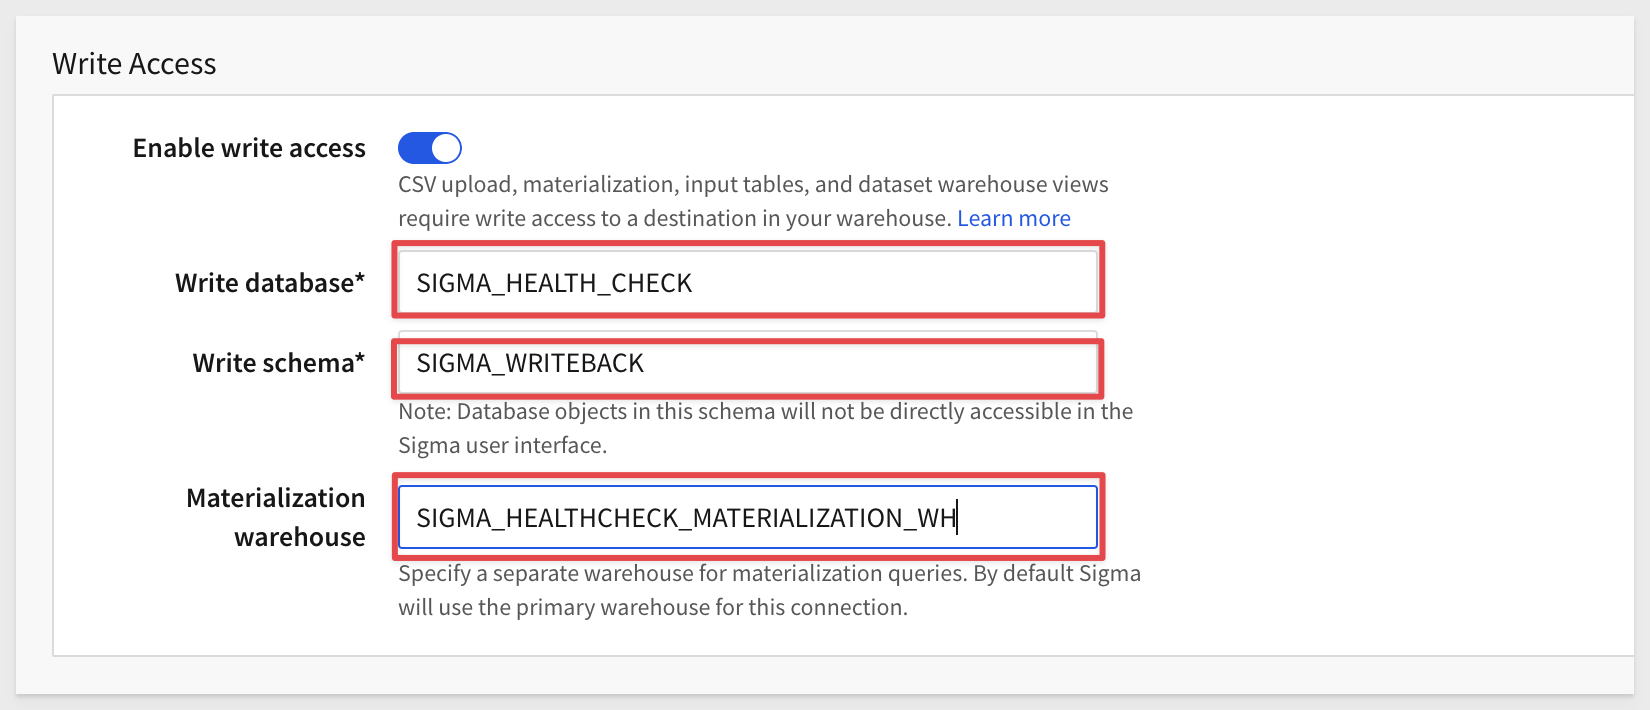
8: For Write database enter SIGMA_HEALTH_CHECK.
For Write schema, enter SIGMA_WRITEBACK.
Finally, for Warehouse enter SIGMA_HEALTHCHECK_MATERIALIZATION_WH.
All three of these objects were created on the backend during the native app set up in Snowflake:
9: Click Create in the top right corner to finish creating the connection:
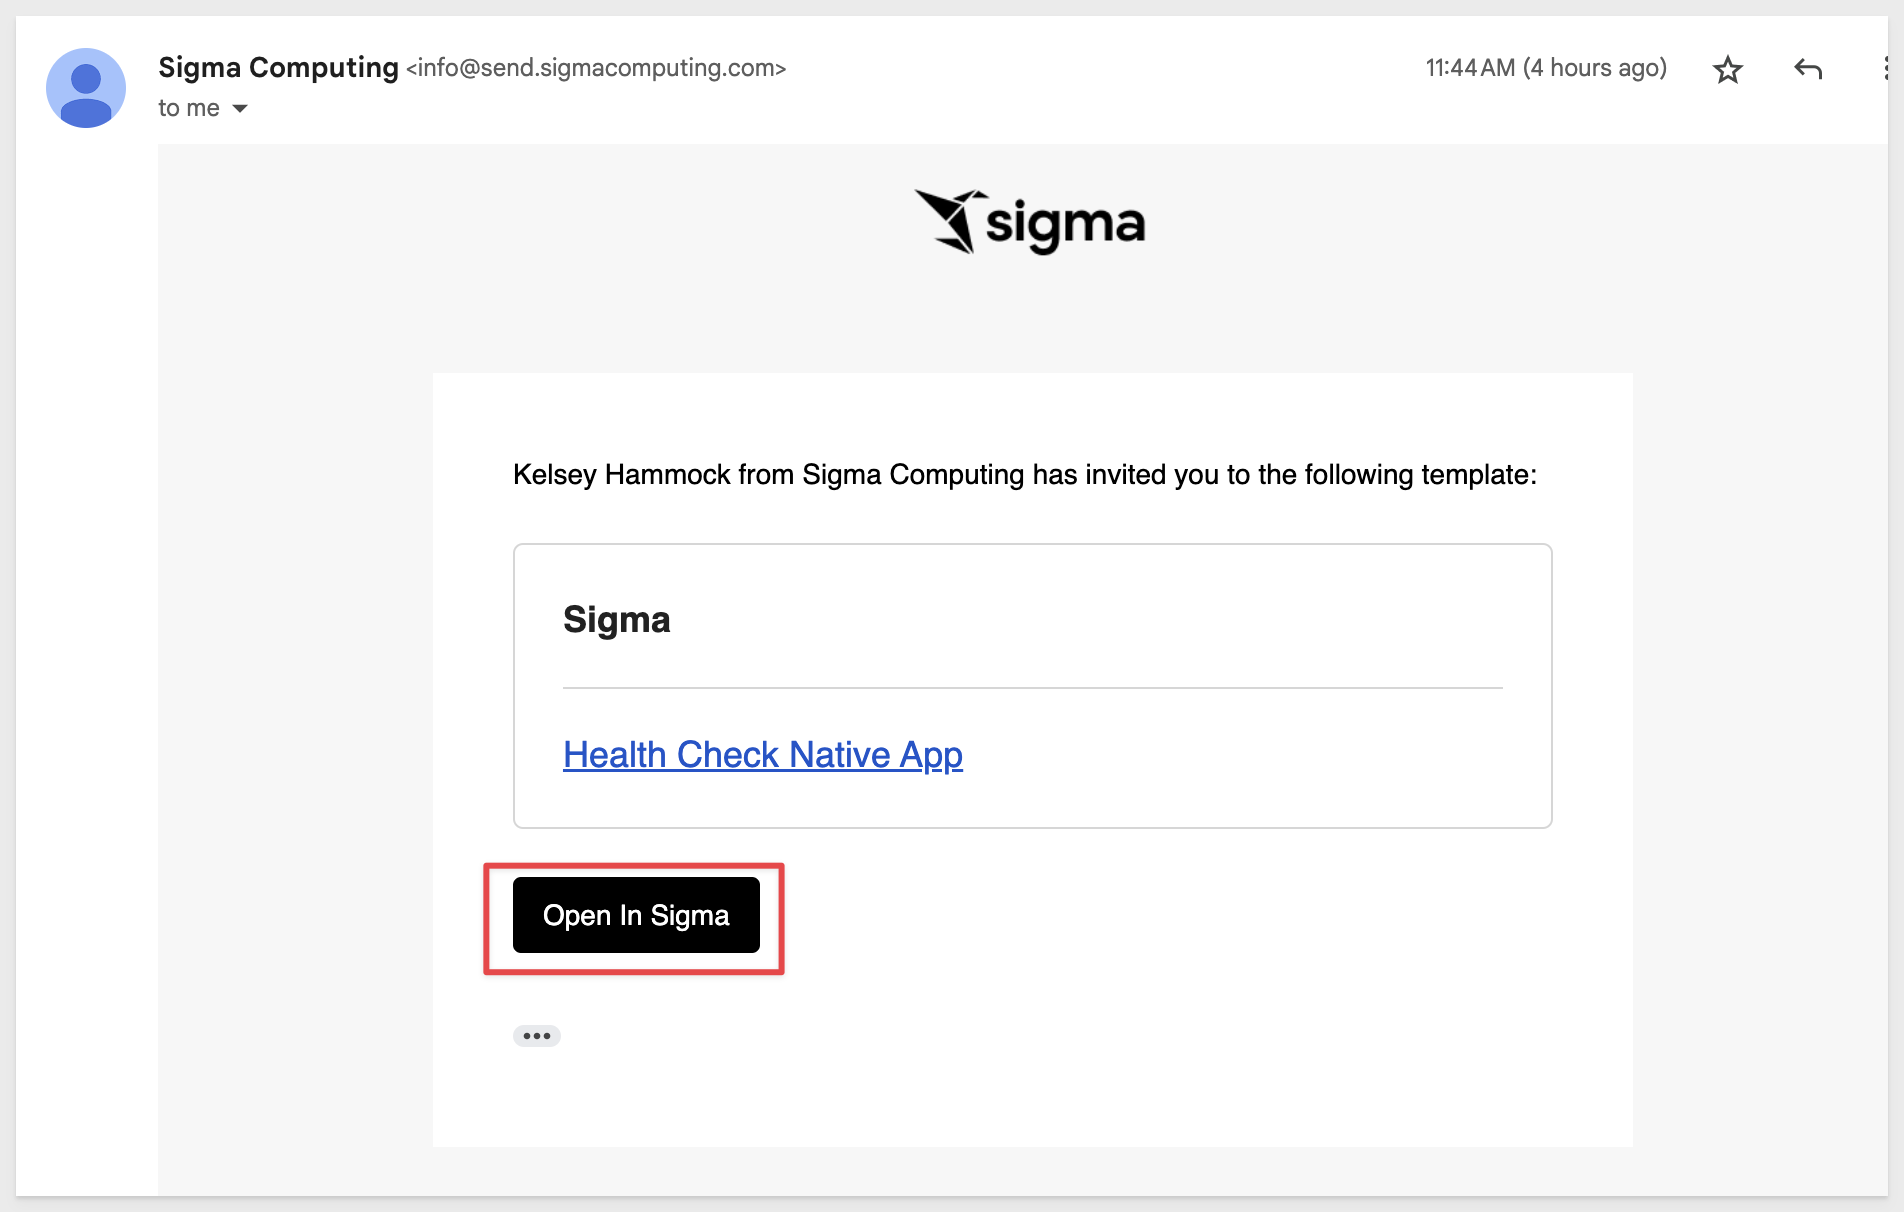
10: Now that the connection is established, locate the email you received from Sigma.
It will likely be titled Health Check Native App - Invitation to Use.
Click Open in Sigma:
11: You should now see the Swap Data Sources module.
12: You will notice that Sigma intuitively located the new connection, and matched the data within the connection to the appropriate elements in the inbound workbook share.
Click Choose:
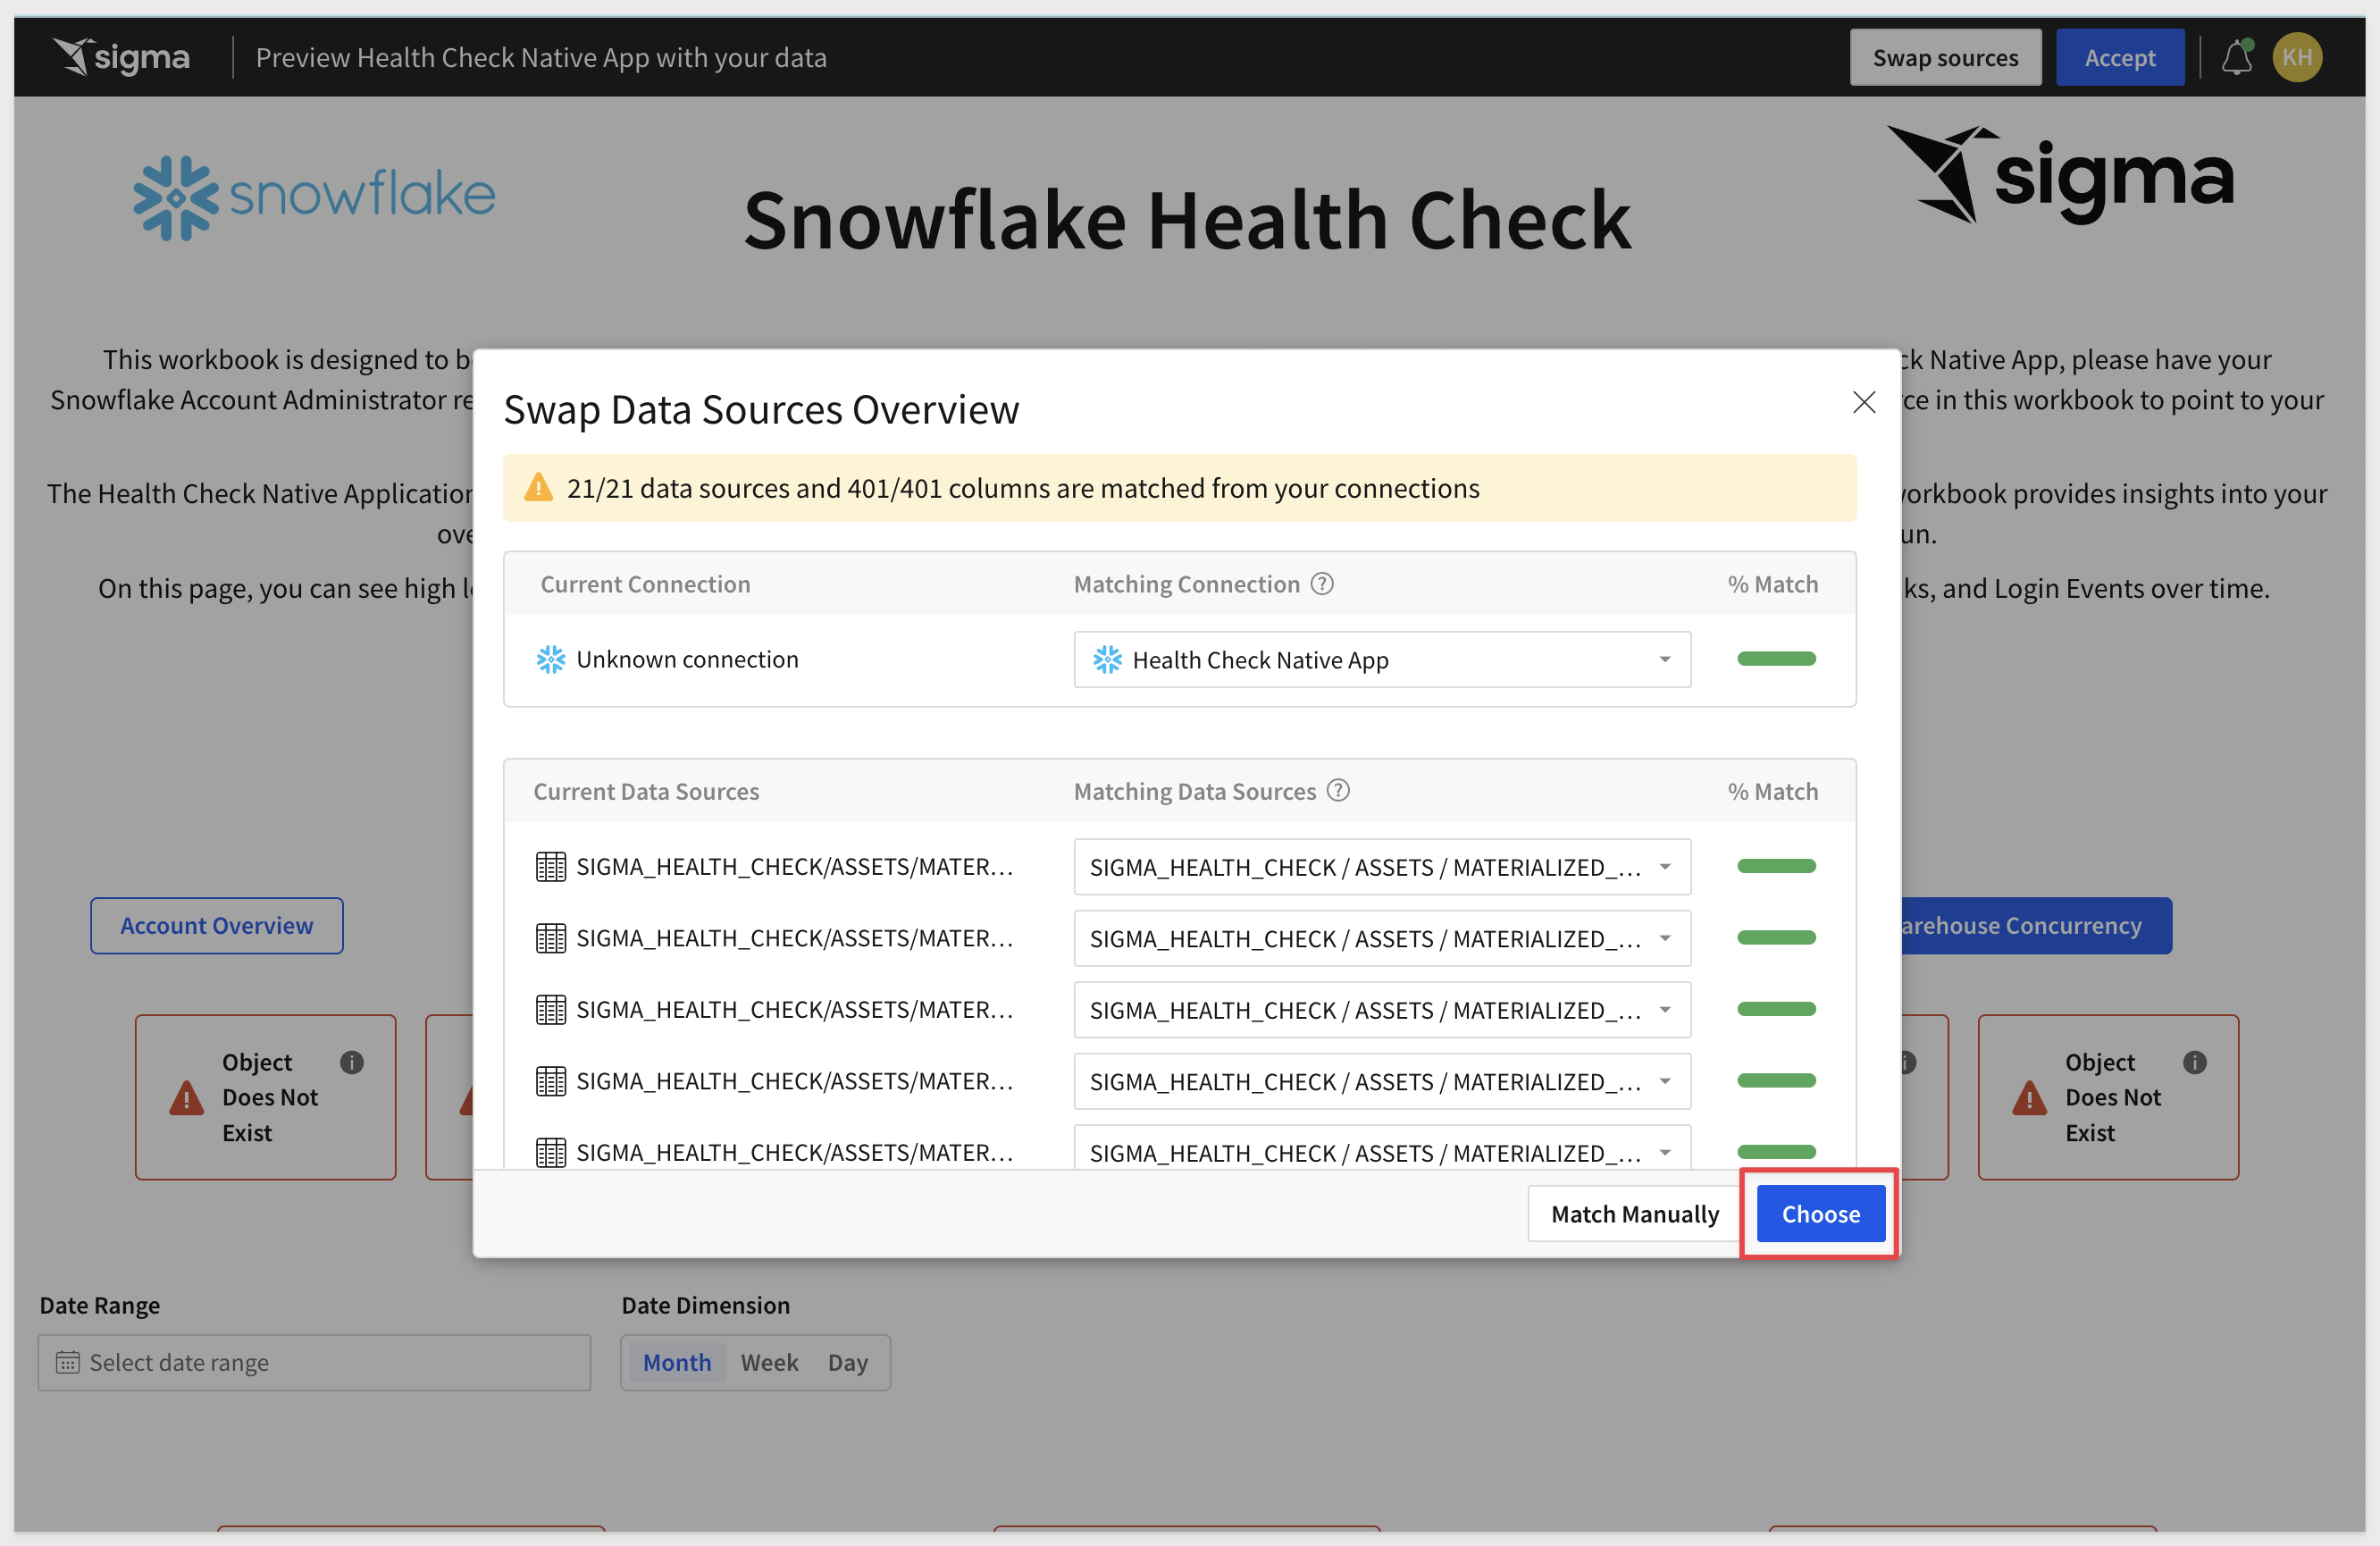
You will now see the Health Check workbook pointing to your data.
Click Accept in the top right corner:

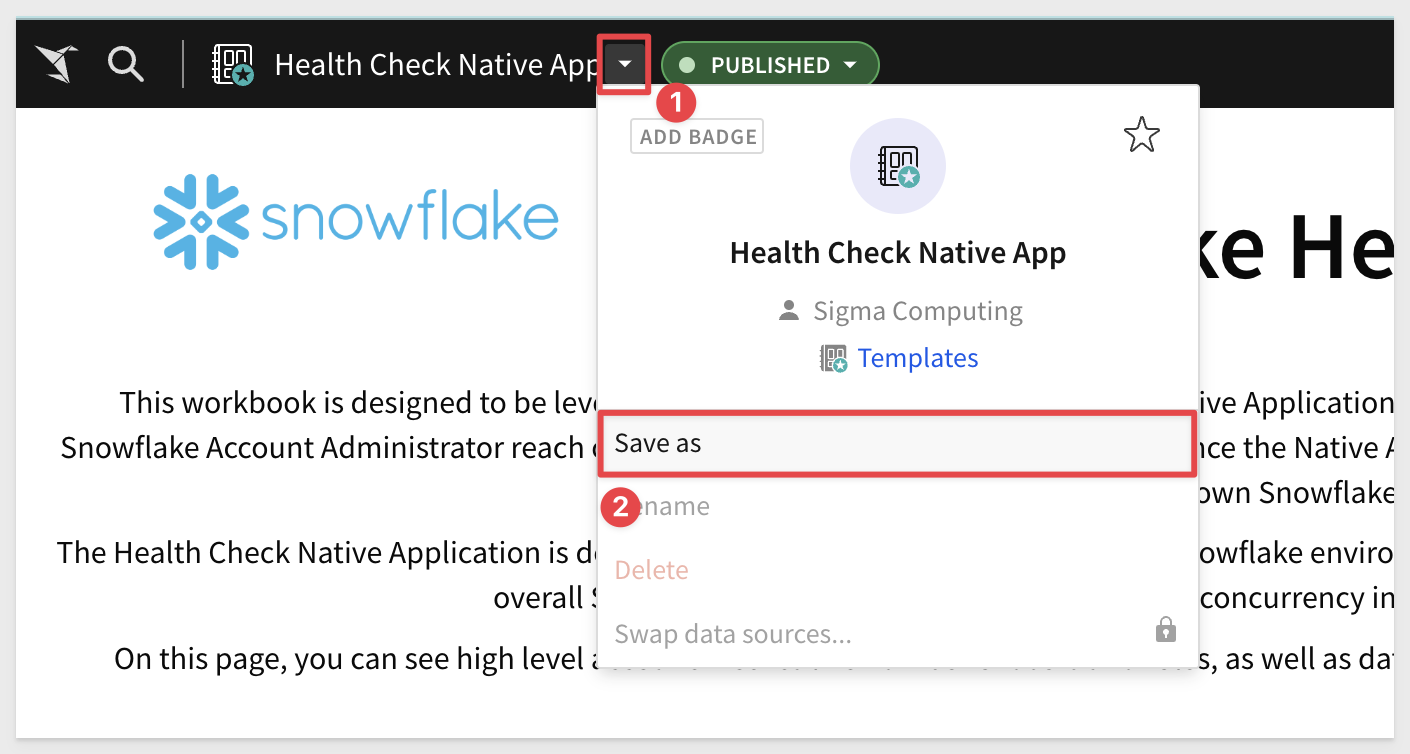
13: Click the drop down to the right of the title, and click Save As:
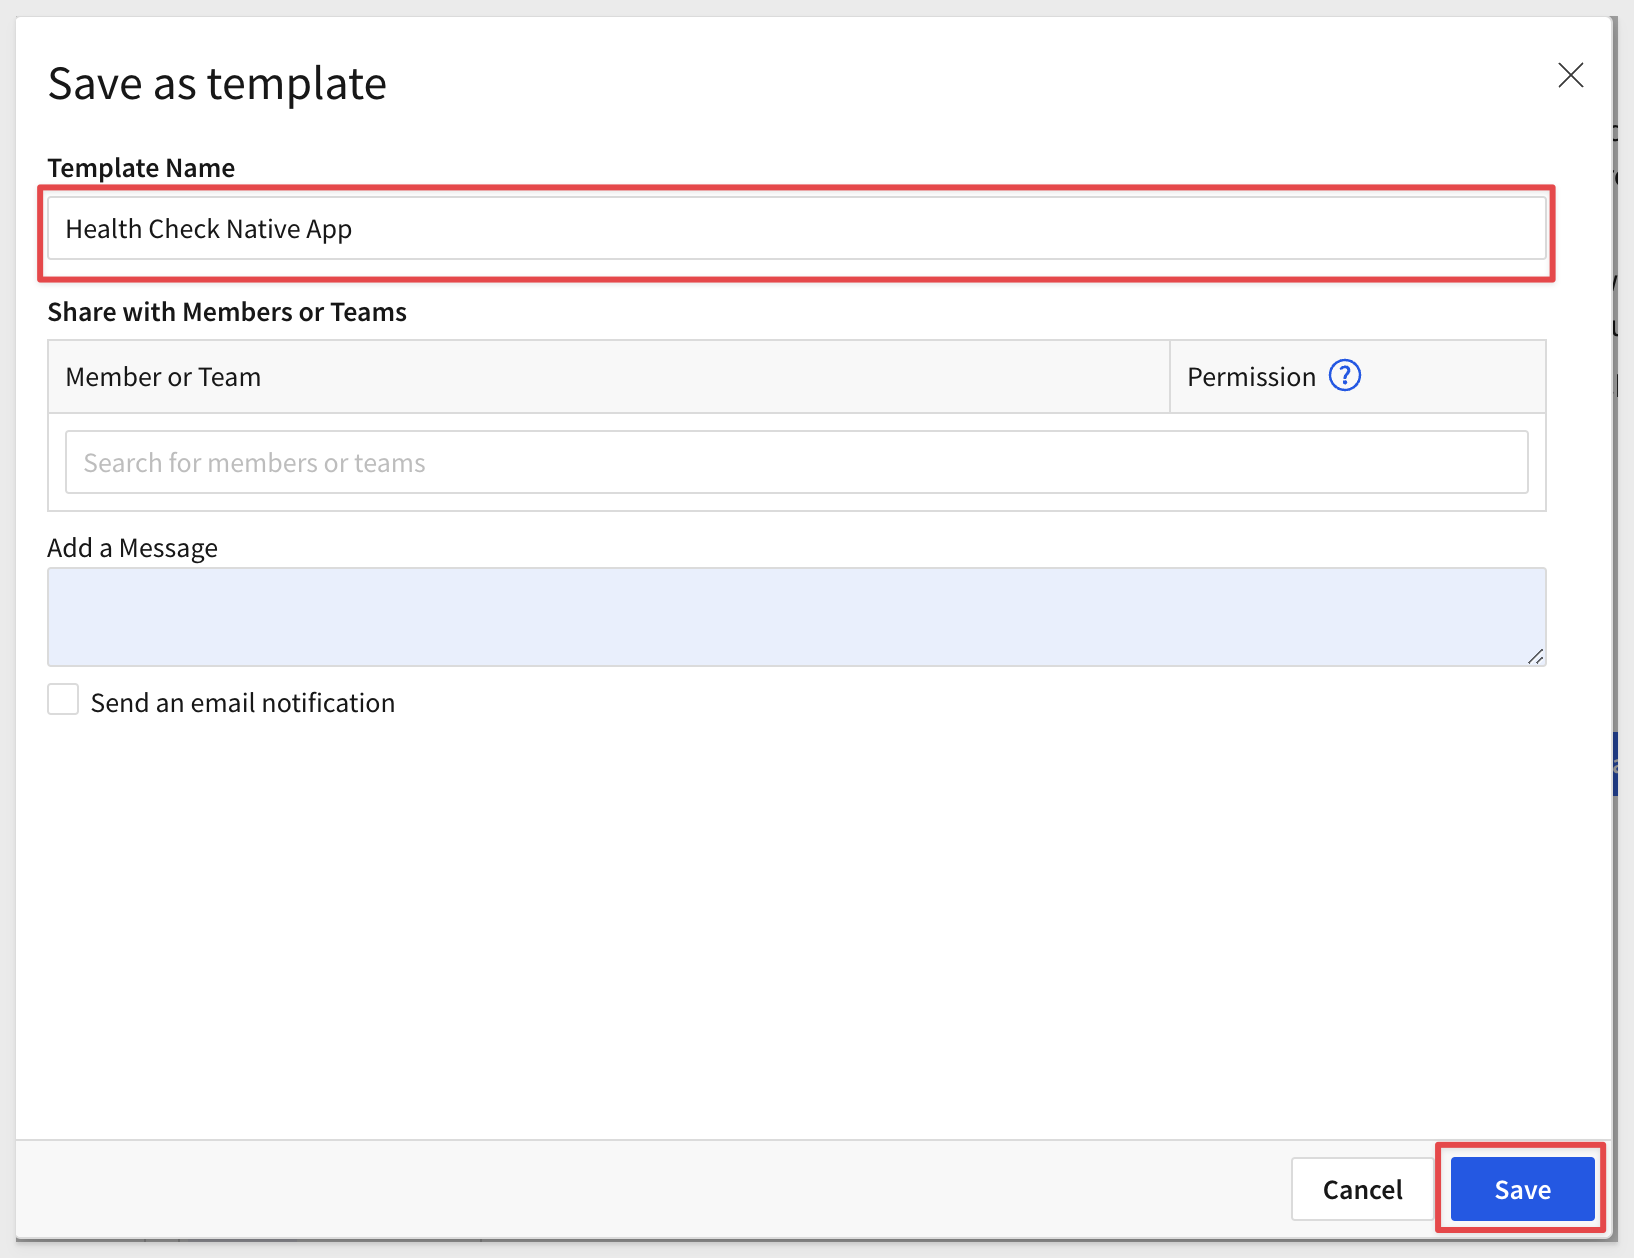
14: In the popup, enter a name for the workbook, or leave it as Health Check Native App.
You may also use this screen to share the workbook with members of your team and delegate permissions.
If you choose not to do this at this time, you can always grant permissions later.
Click Save:
15: You should now see your saved Template:
16: Templates created in Sigma can be located via the homepage.
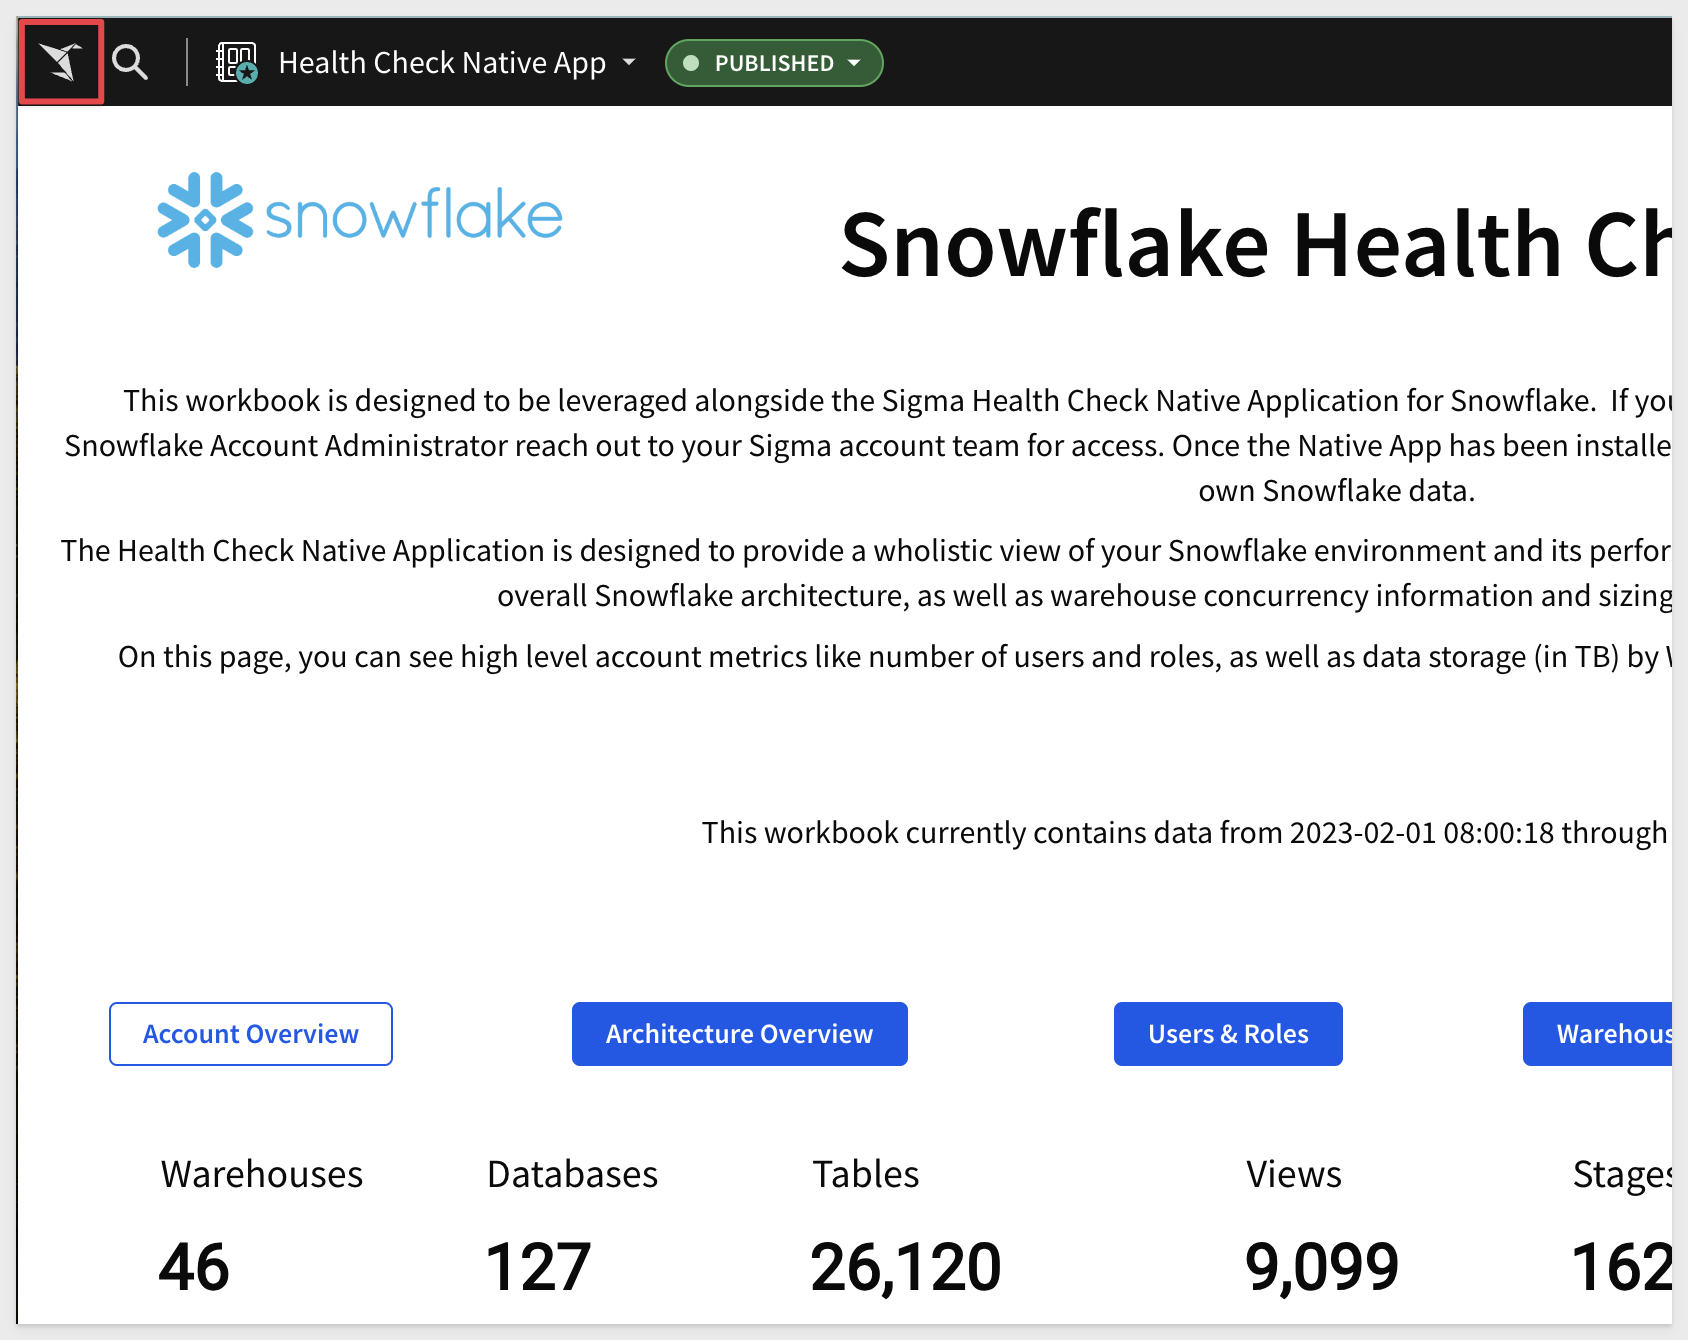
To see where your template is saved, click the papercrane icon in the top left of your workbook to navigate back to the homepage:
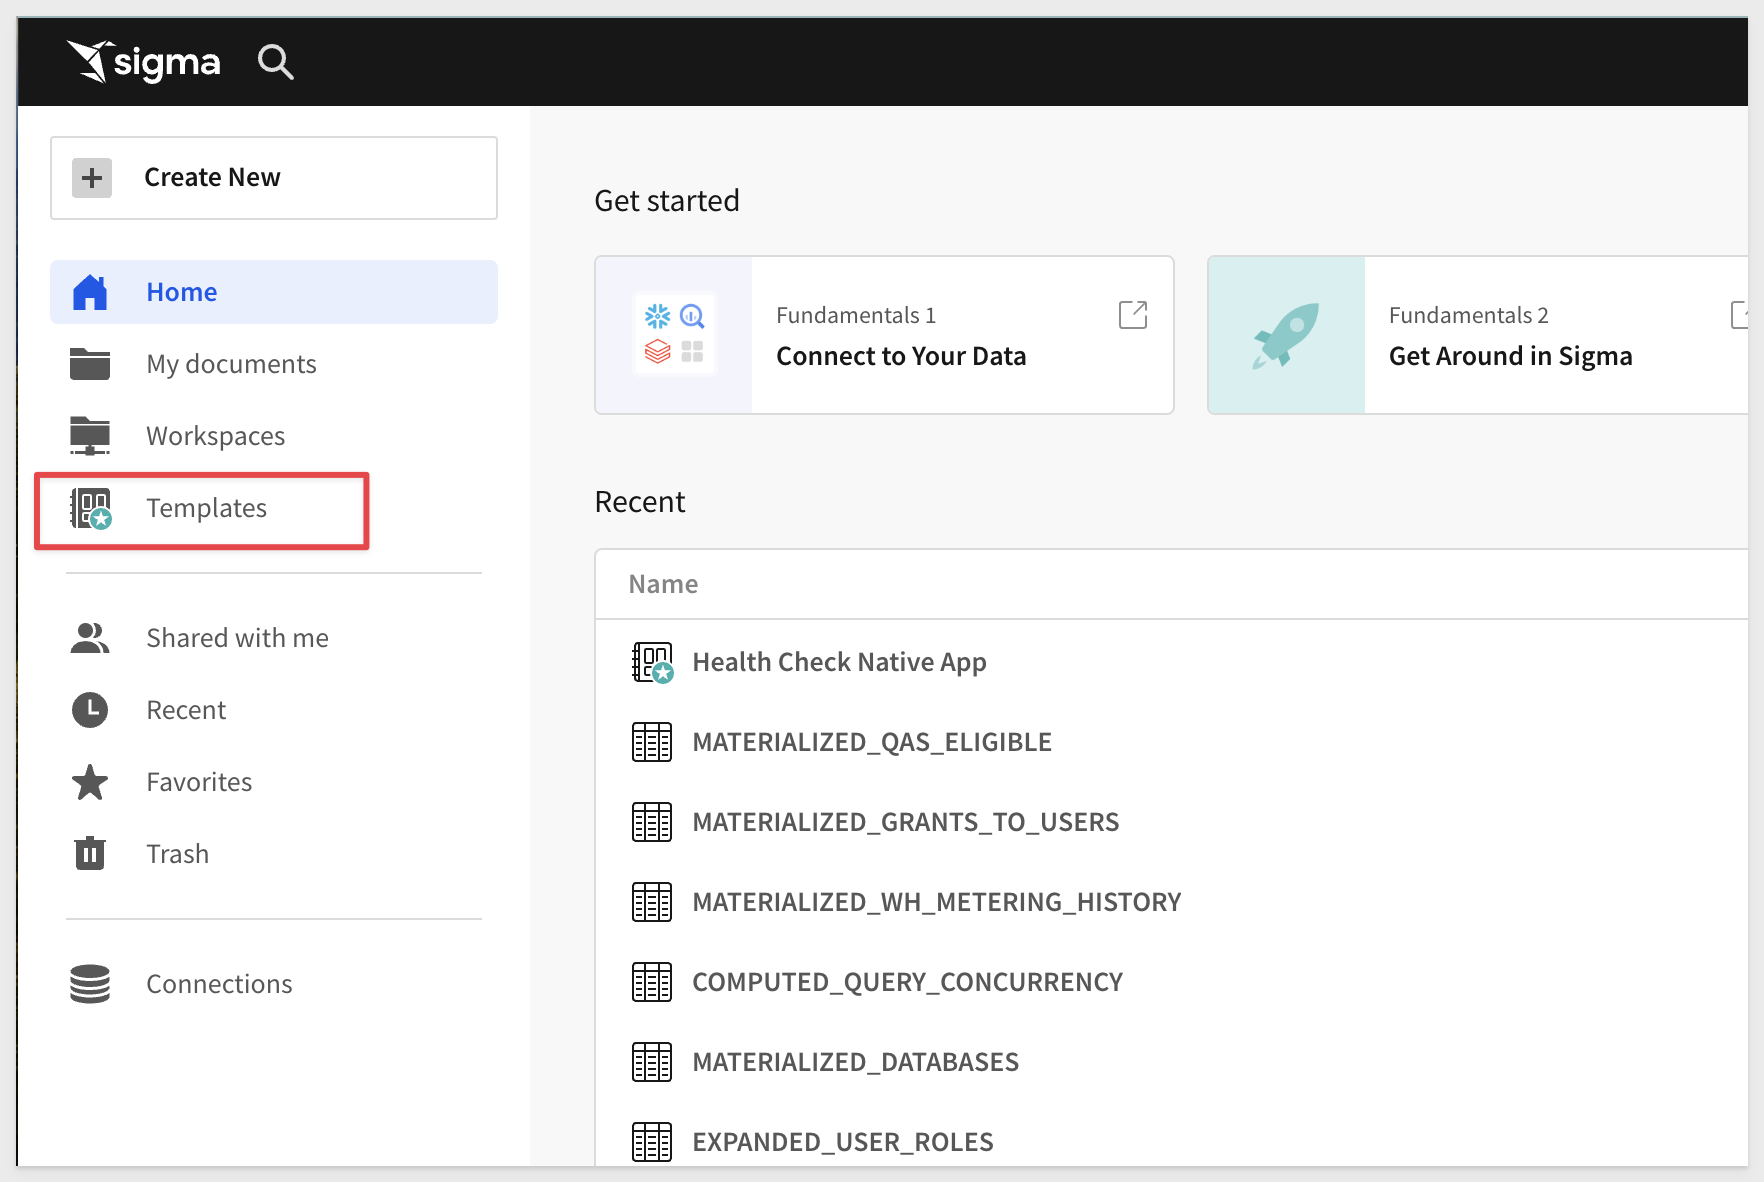
17: From the home page, click Templates in the left-hand navigation menu:
18: Under Internal, you should now see your saved Health Check Native App workbook:
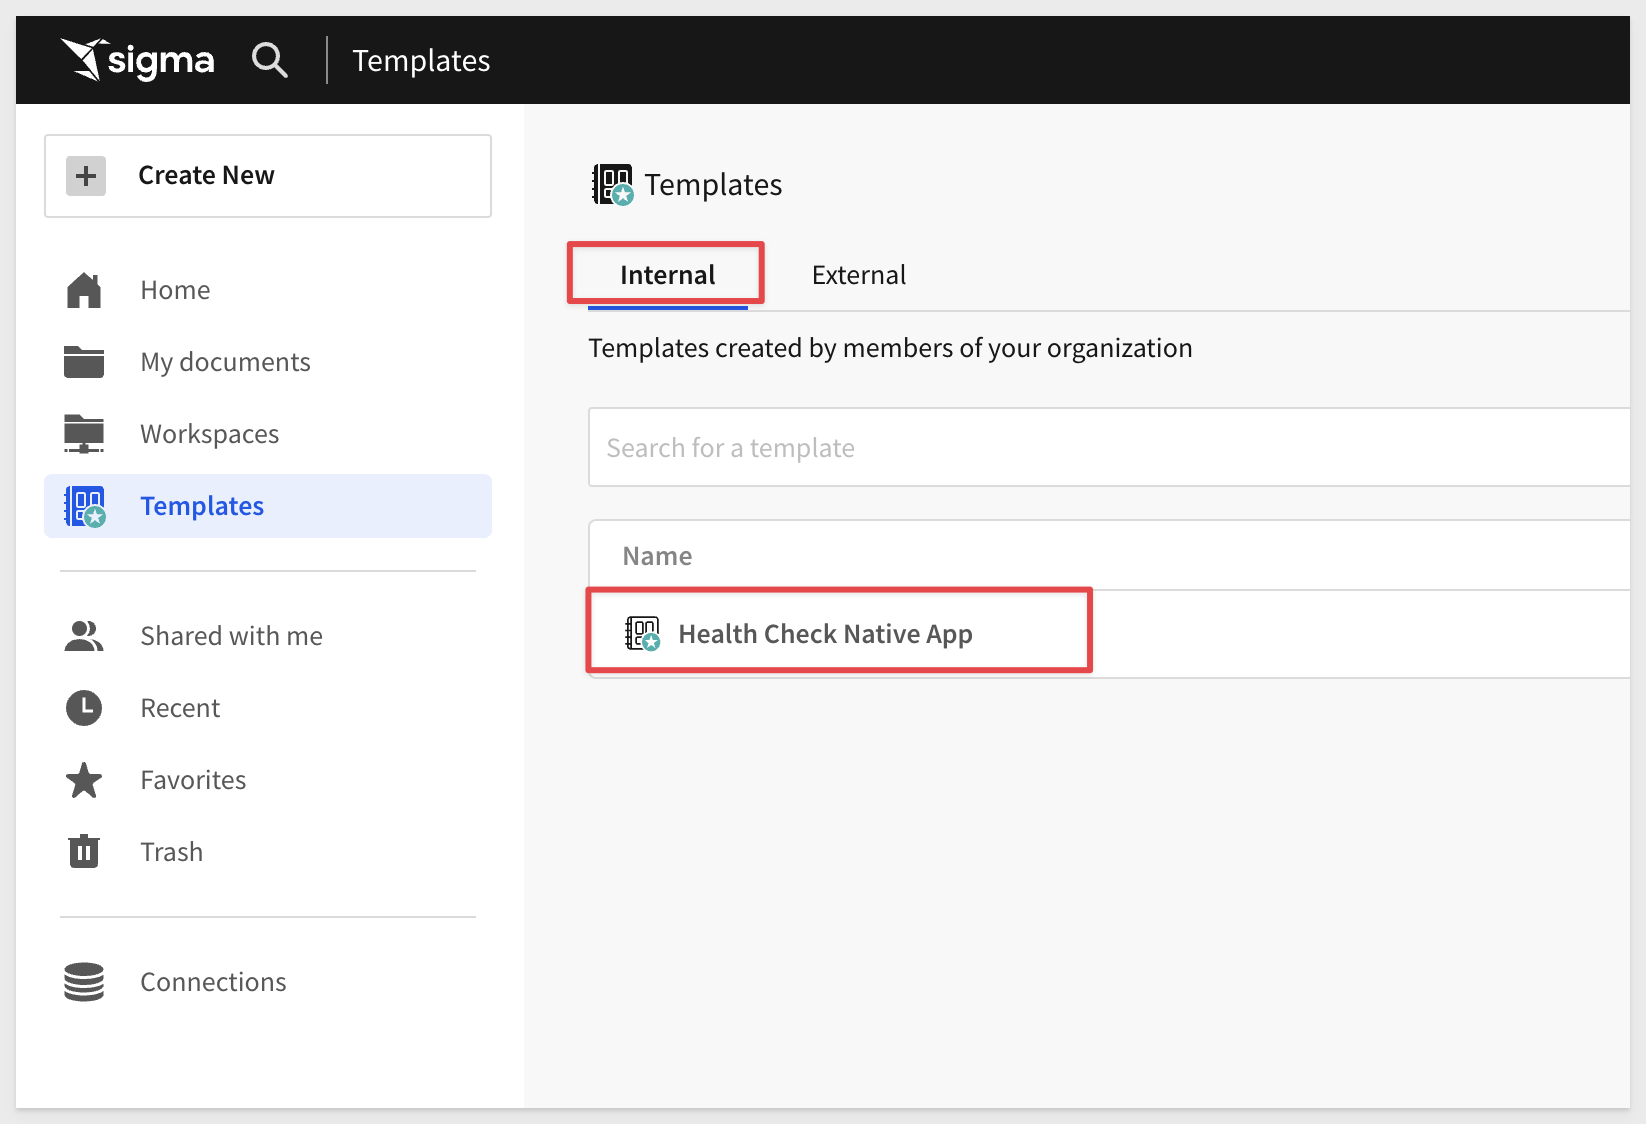
To learn more about Templates in Sigma, click here.
The Health Check Native App contains input tables that allow you to categorize and group warehouses, then leverage those groupings in your analysis.
This functionality enables you to look at Snowflake performance by business unit, associated 3rd party tool, or whatever category you choose to leverage. Using these input tables is not required for the native app to function properly, so the below section is optional.
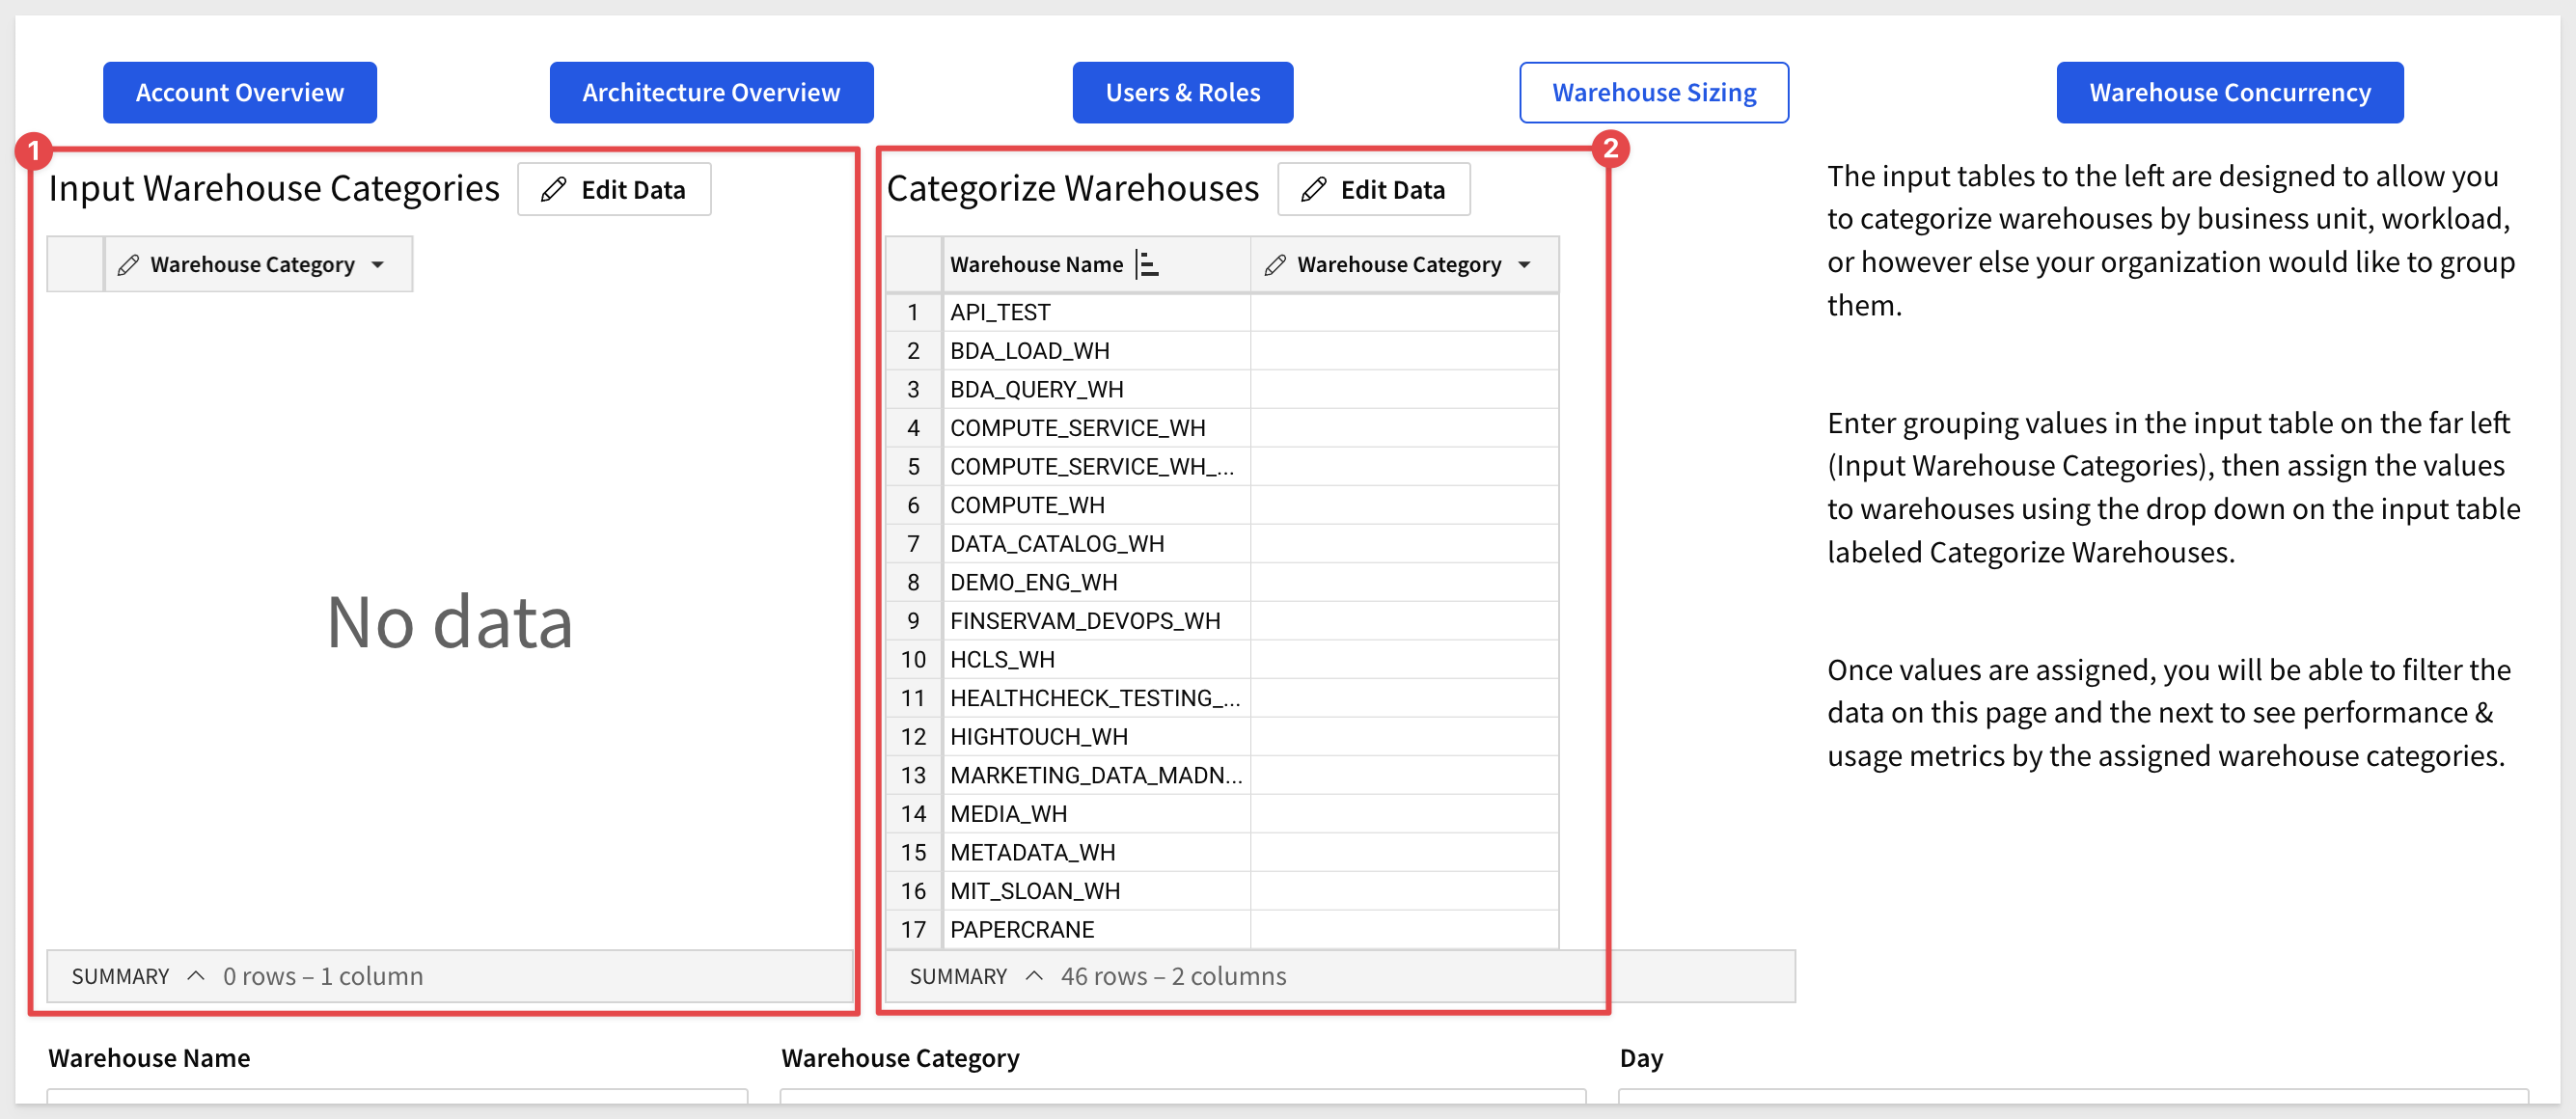
1: Navigate to the "Warehouse Sizing" page of the workbook using the tabs at the bottom or the buttons along the top.
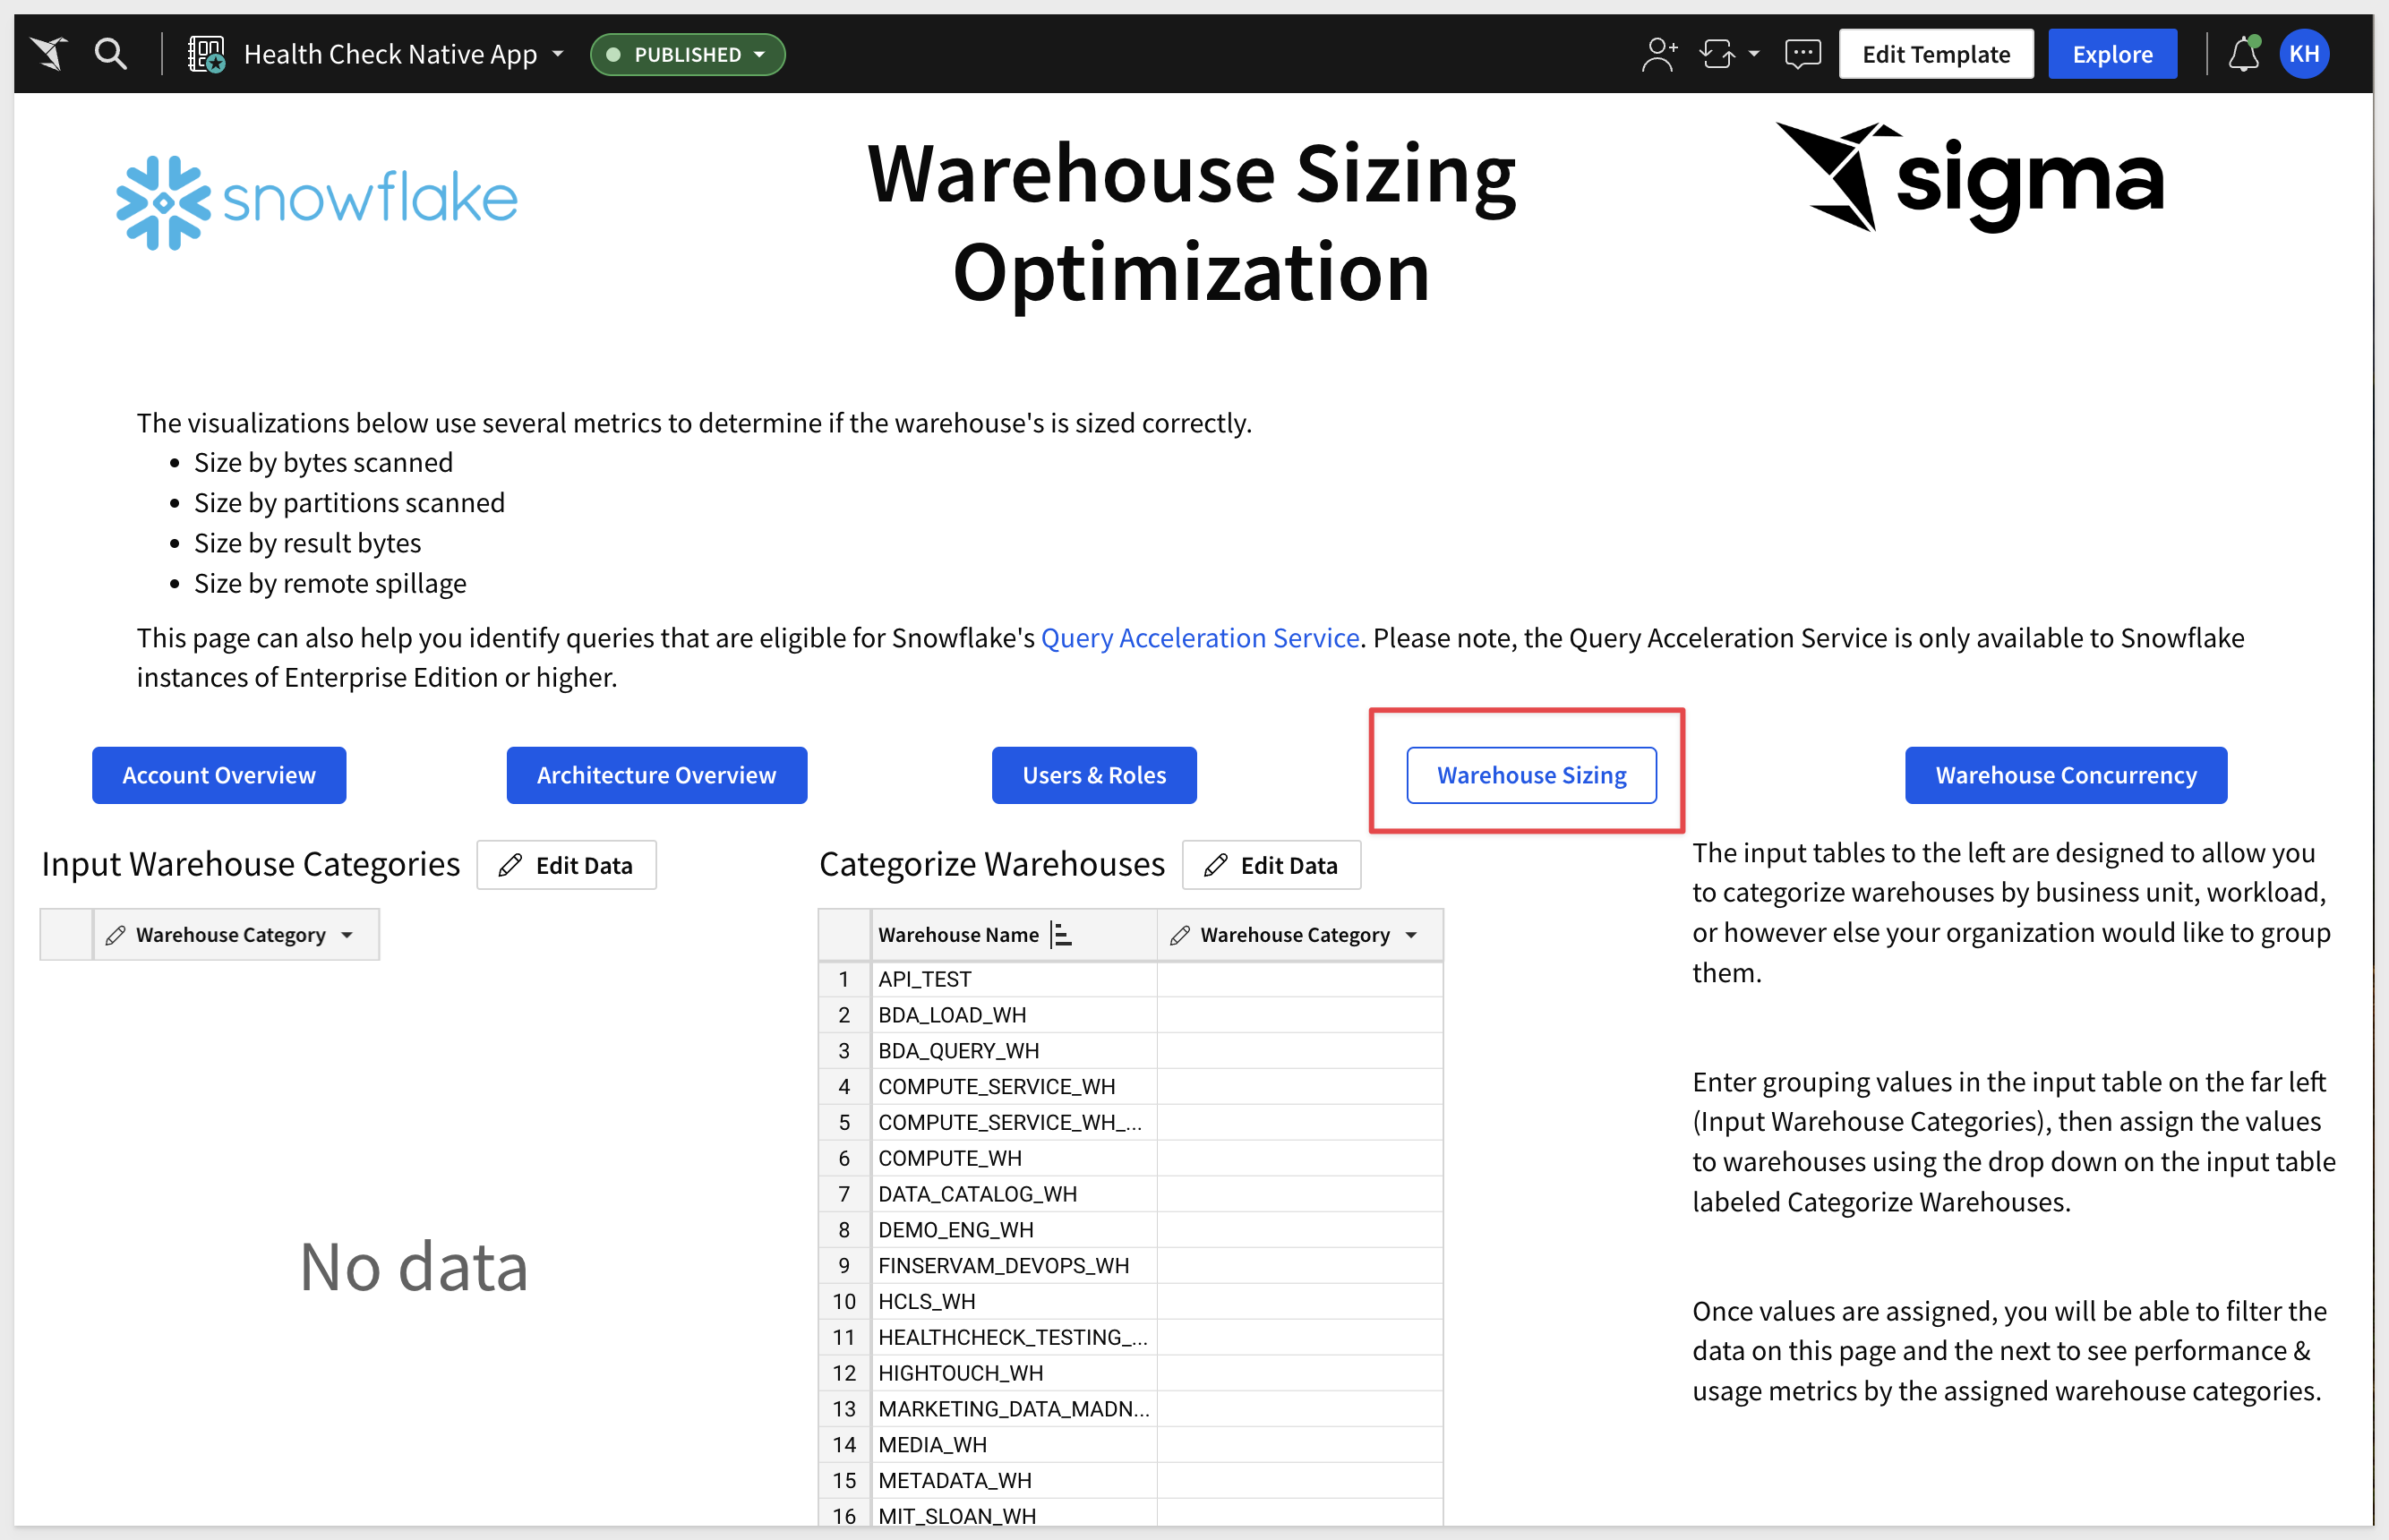
2: You will notice two input tables in the middle of the page.
These input tables are designed to allow you to create categories, then assign them to your warehouses for use in your analysis.
Warehouse groupings can be different business units, external tools that leverage a Snowflake warehouse like Sigma, or whatever grouping makes the most sense to your organization:
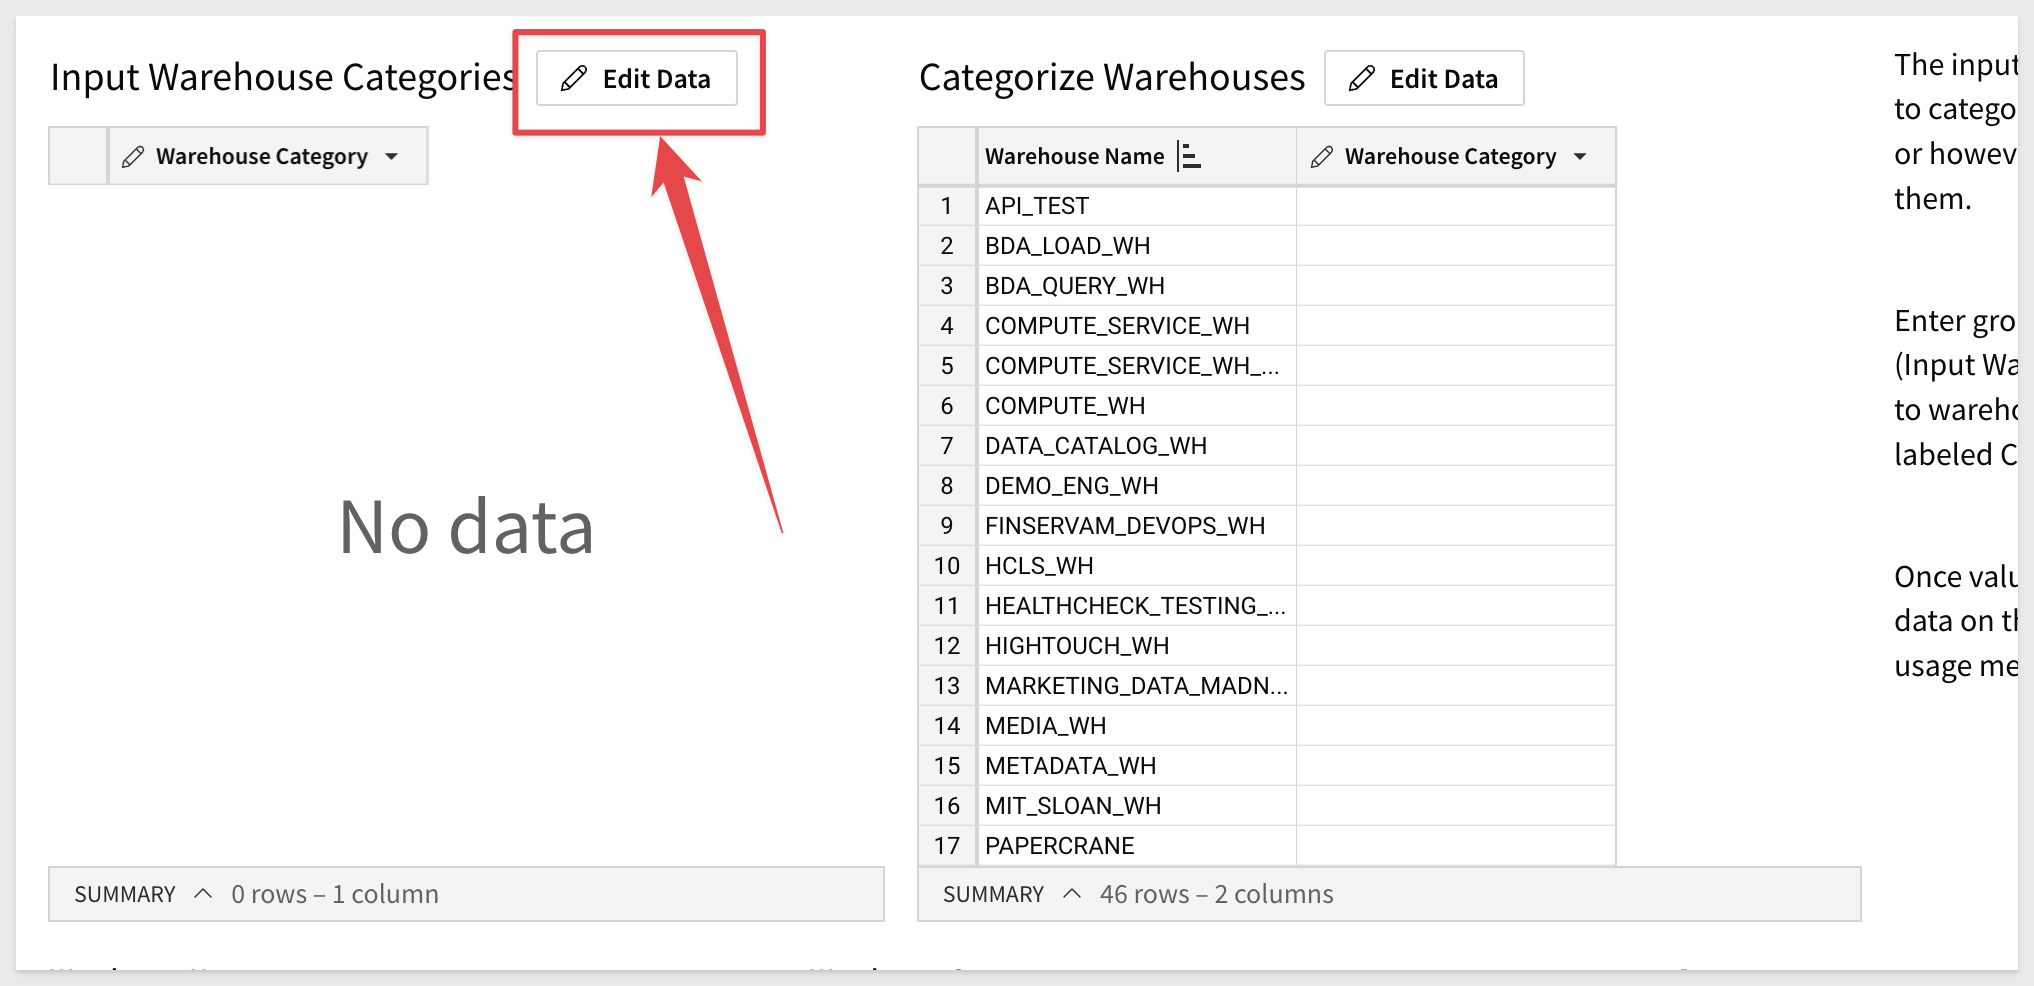
3: Click Edit Data next to the input table on the left that is labeled Input Warehouse Categories:
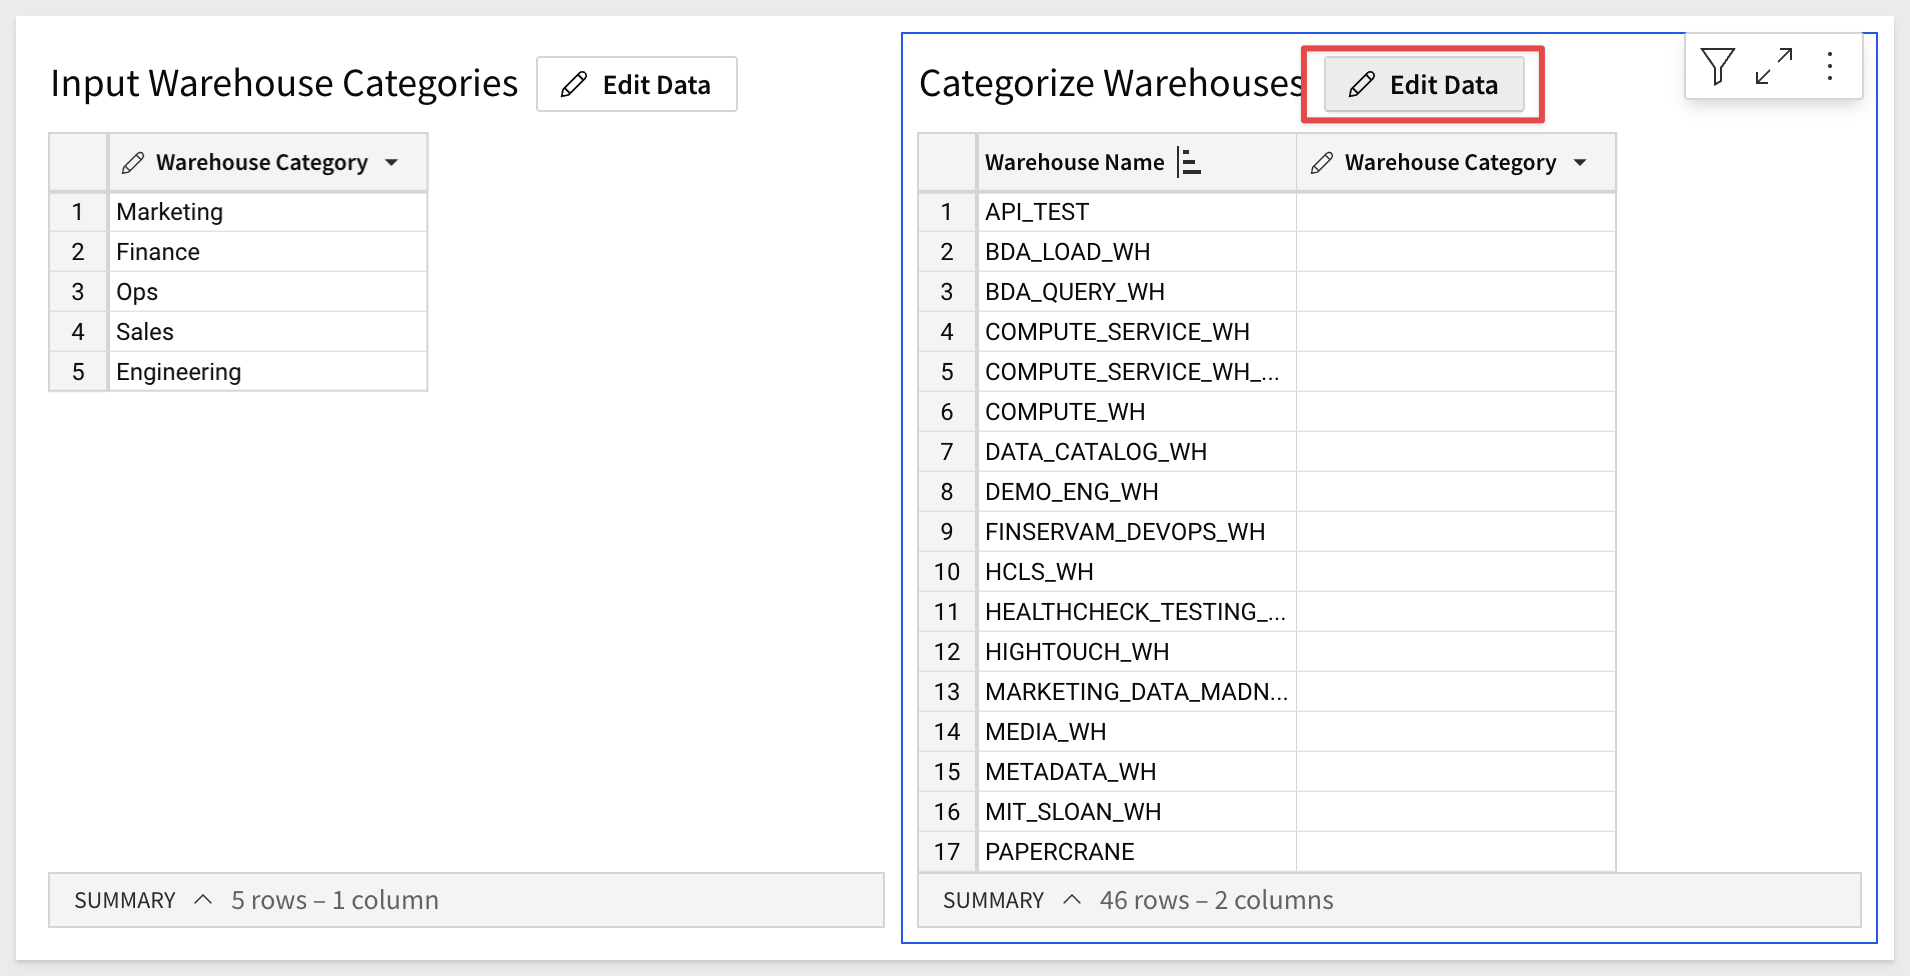
4: Enter the categories you would like to use.
For the purposes of this QuickStart, we chose business units for the category.
Click the blue Save button.

5: Once you have saved the first input table, click Edit Data next to the right-hand input table labeled Categorize Warehouses:
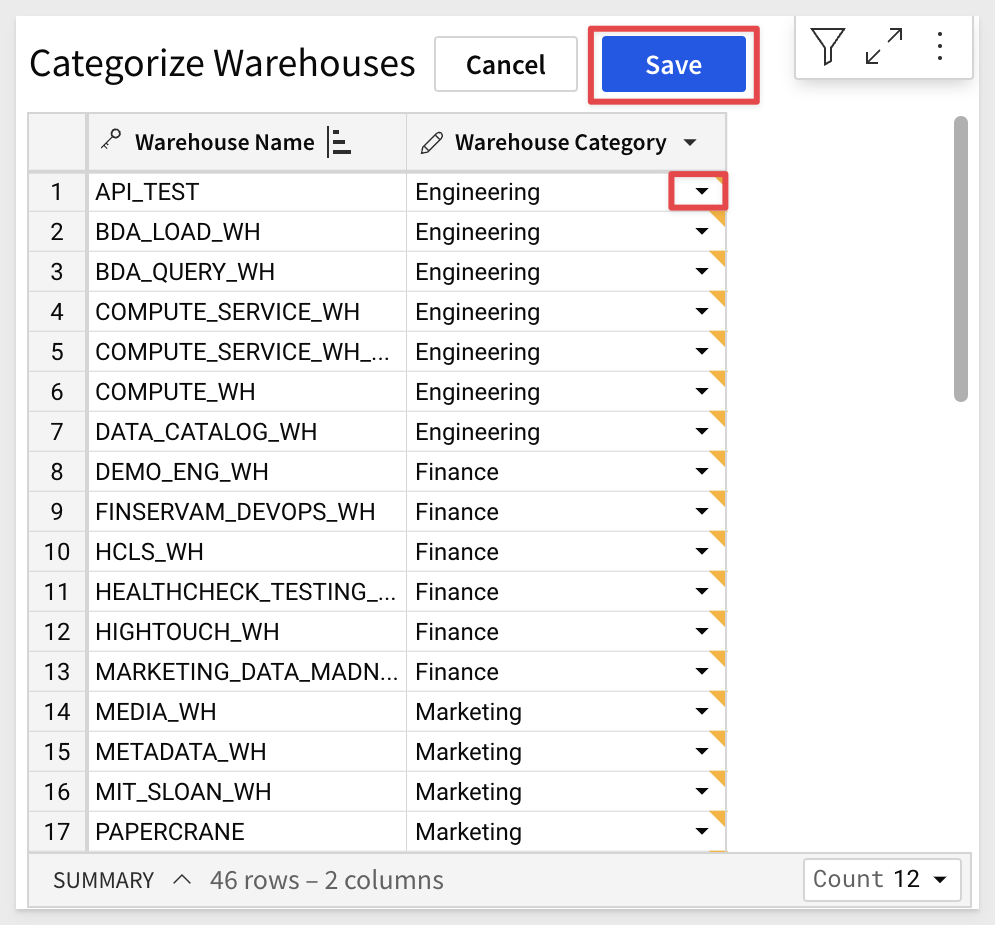
6: Using the drop downs in the Warehouse Category column, assign each warehouse a category value.
These category values are pulled from the first input table we worked with.
Once you have entered categories, click Save:
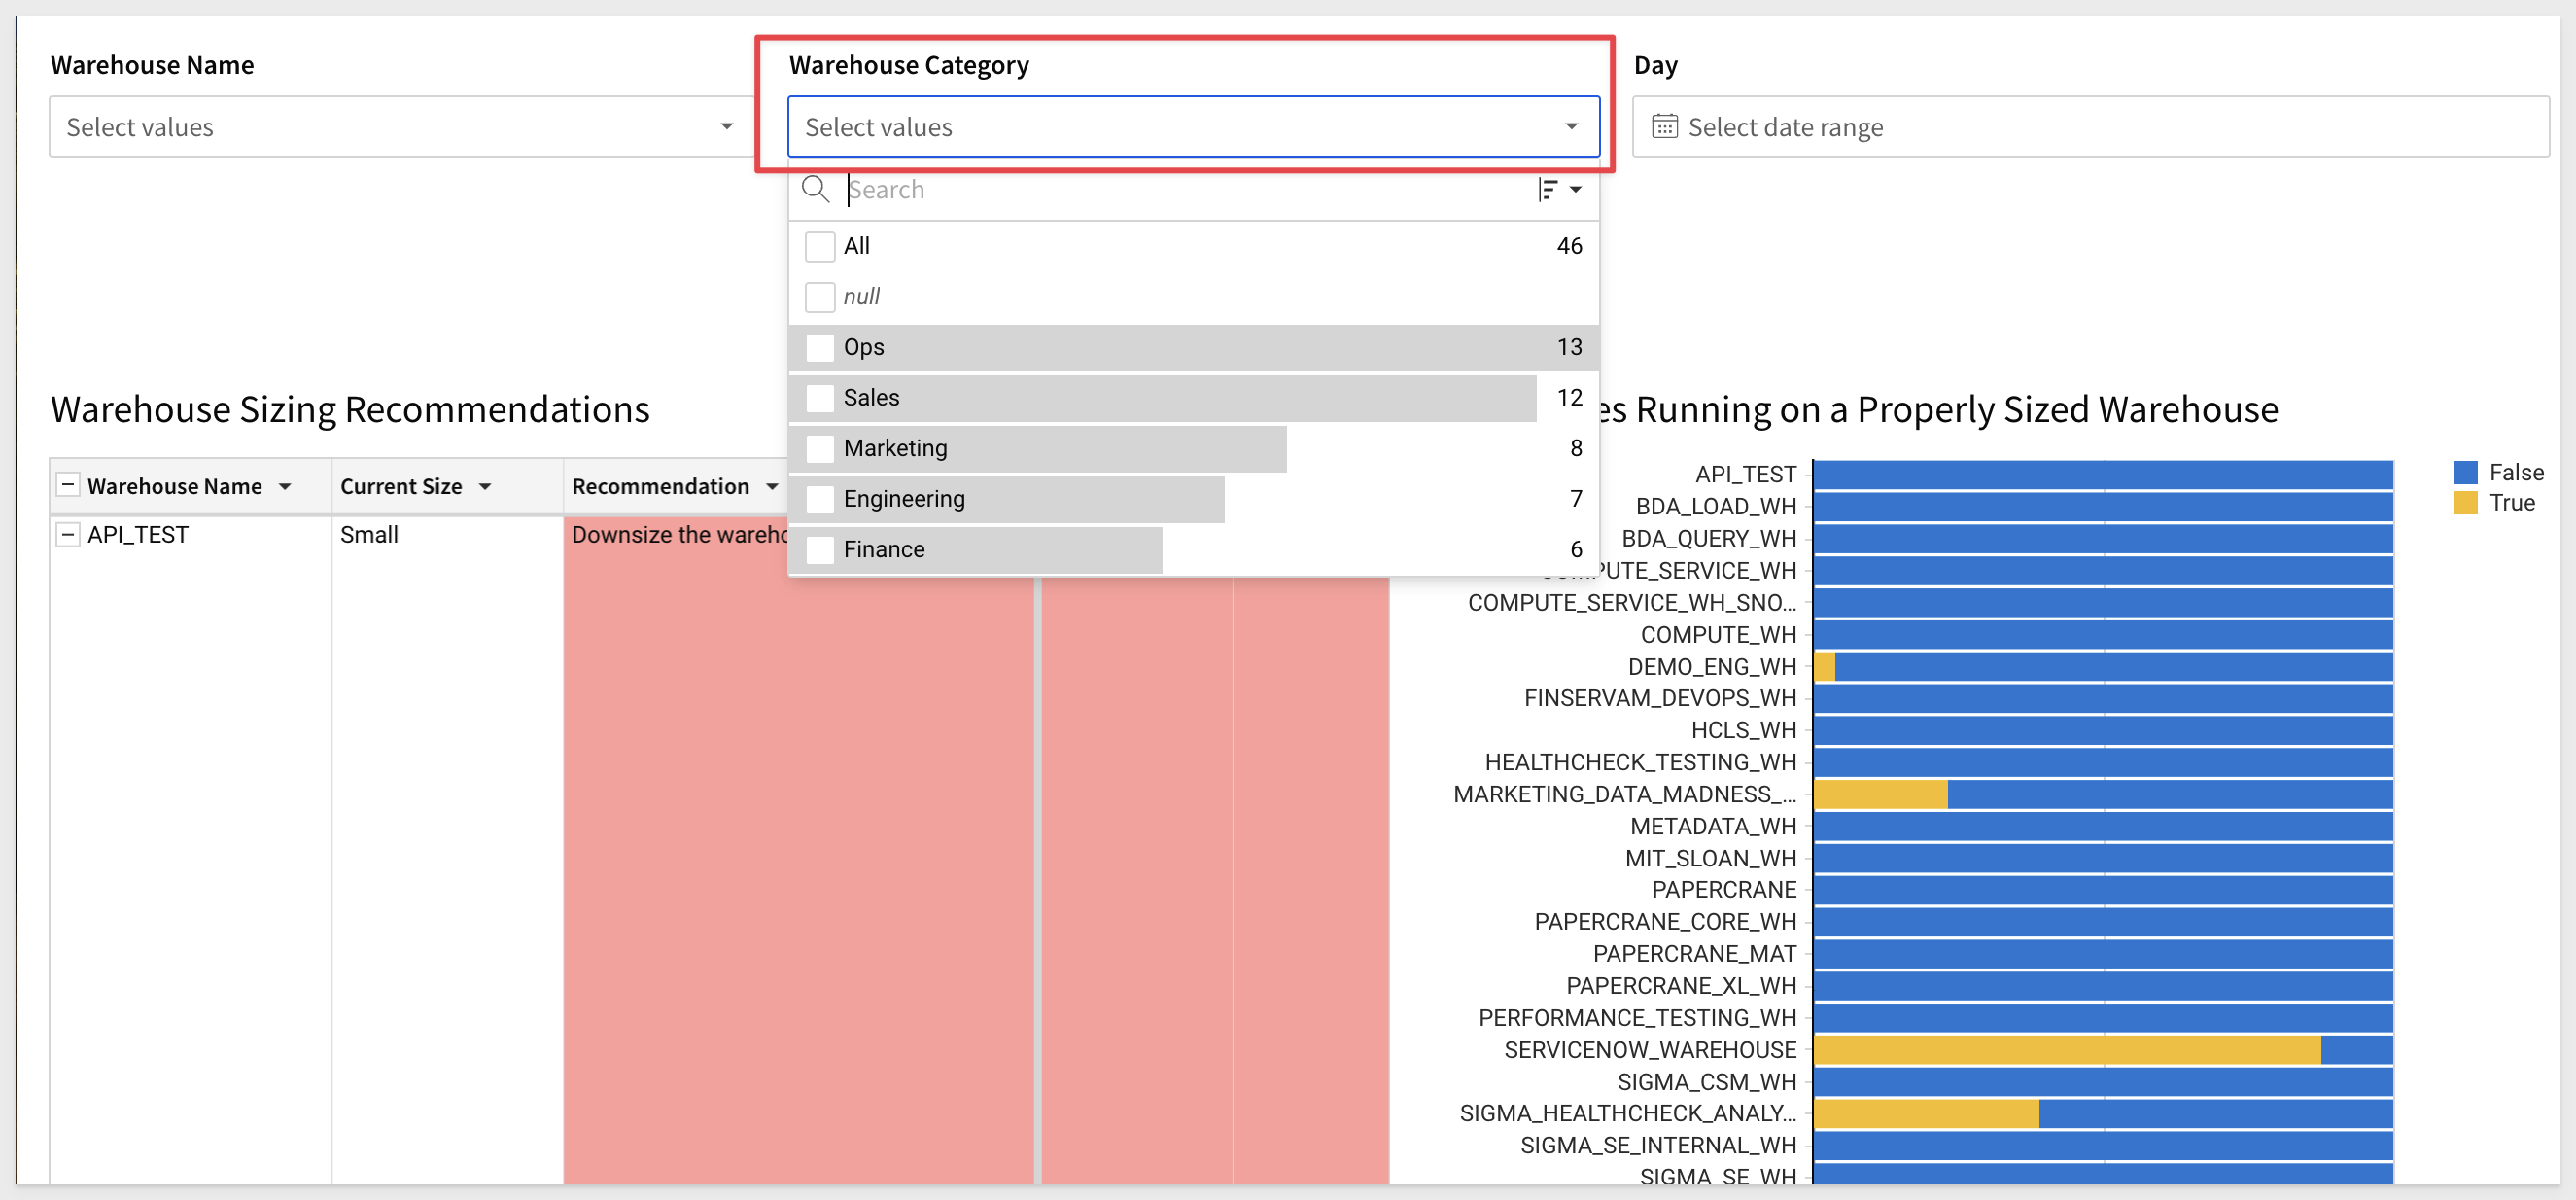
7: You will now be able to use the Warehouse Category filter, located directly below the input tables, in your analysis.
This filter can be leveraged to see sizing and concurrency metrics only for a specific group of warehouses across both the Warehouse Sizing and Warehouse Concurrency pages of the Health Check workbook.
To learn more about Sigma Input Tables, click here
To see common use cases for Sigma Input Tables, review this QuickStart
We hope this set up process was quick and simple for you, and that you find value in the Sigma Health Check Native Application.
For assistance with setting up the native application, please reach out to your Sigma account team.
We are always looking for ways to improve our optimization assets, so please share any feedback you have on the application with your Sigma account team as well.
Additional Resource Links
Blog
Community
Help Center
QuickStarts
Be sure to check out all the latest developments at Sigma's First Friday Feature page!