Column level security ("CLS") in the context of analytics is a data protection feature that allows you to control access to specific columns within a database table. This is particularly important in scenarios where certain data elements are sensitive or regulated, such as personally identifiable information (PII), financial details, or health records.
Implementing column level security requires careful planning to balance data accessibility and security, ensuring that users can perform their necessary tasks without compromising sensitive data.
These are some considerations when implementing a CLS solution. Not all of these are required, and while company needs vary, being aware of them is beneficial.
This QuickStart assumes you are generally familiar with Sigma or have taken the QuickStart Fundamentals series. Not all steps are shown in detail.
For more information on Sigma's product release strategy, see Sigma product releases
If something doesn't work as expected, here's how to contact Sigma support
### Target Audience This QuickStart is intended for anyone looking to implement column-level security in Sigma, ensuring that each logged-in user can access only the data they are authorized to see.
Prerequisites
- A computer with a current browser (any modern browser is fine).
- Access to your Sigma environment.
- Some familiarity with Sigma is assumed; not all basic steps are shown.

In Sigma, CLS is enforced directly in the data model. Configuring CLS in data models enforces consistent security policies across all downstream analyses and workbooks. When CLS rules are updated in a data model, they automatically propagate to all downstream references.
We will create a new data model using Sigma's sample data and add a few columns that we will use to evaluate CLS.
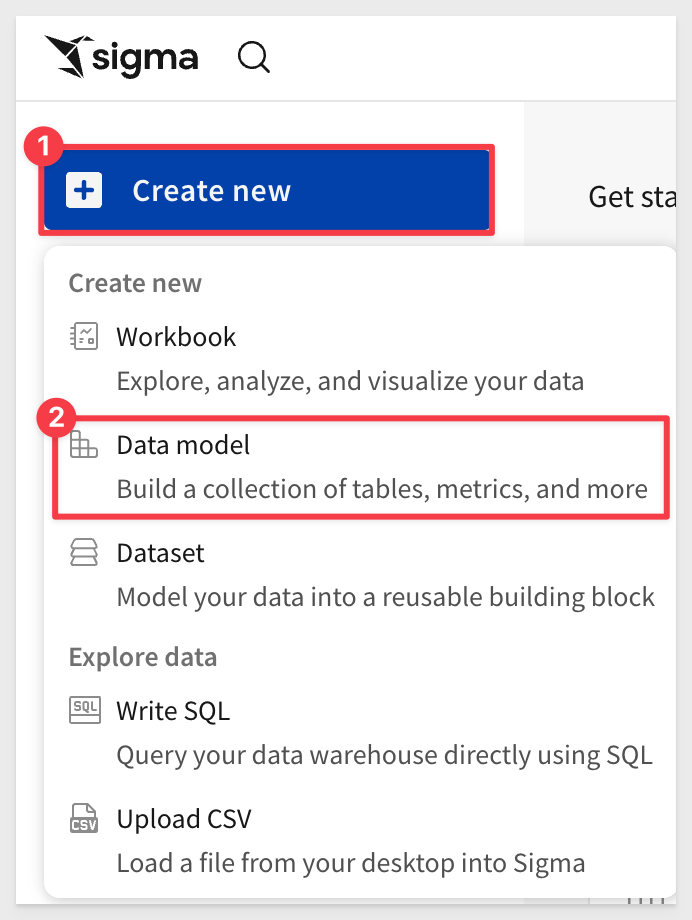
Log into Sigma as Administrator and click the Create New button, then select Data model:
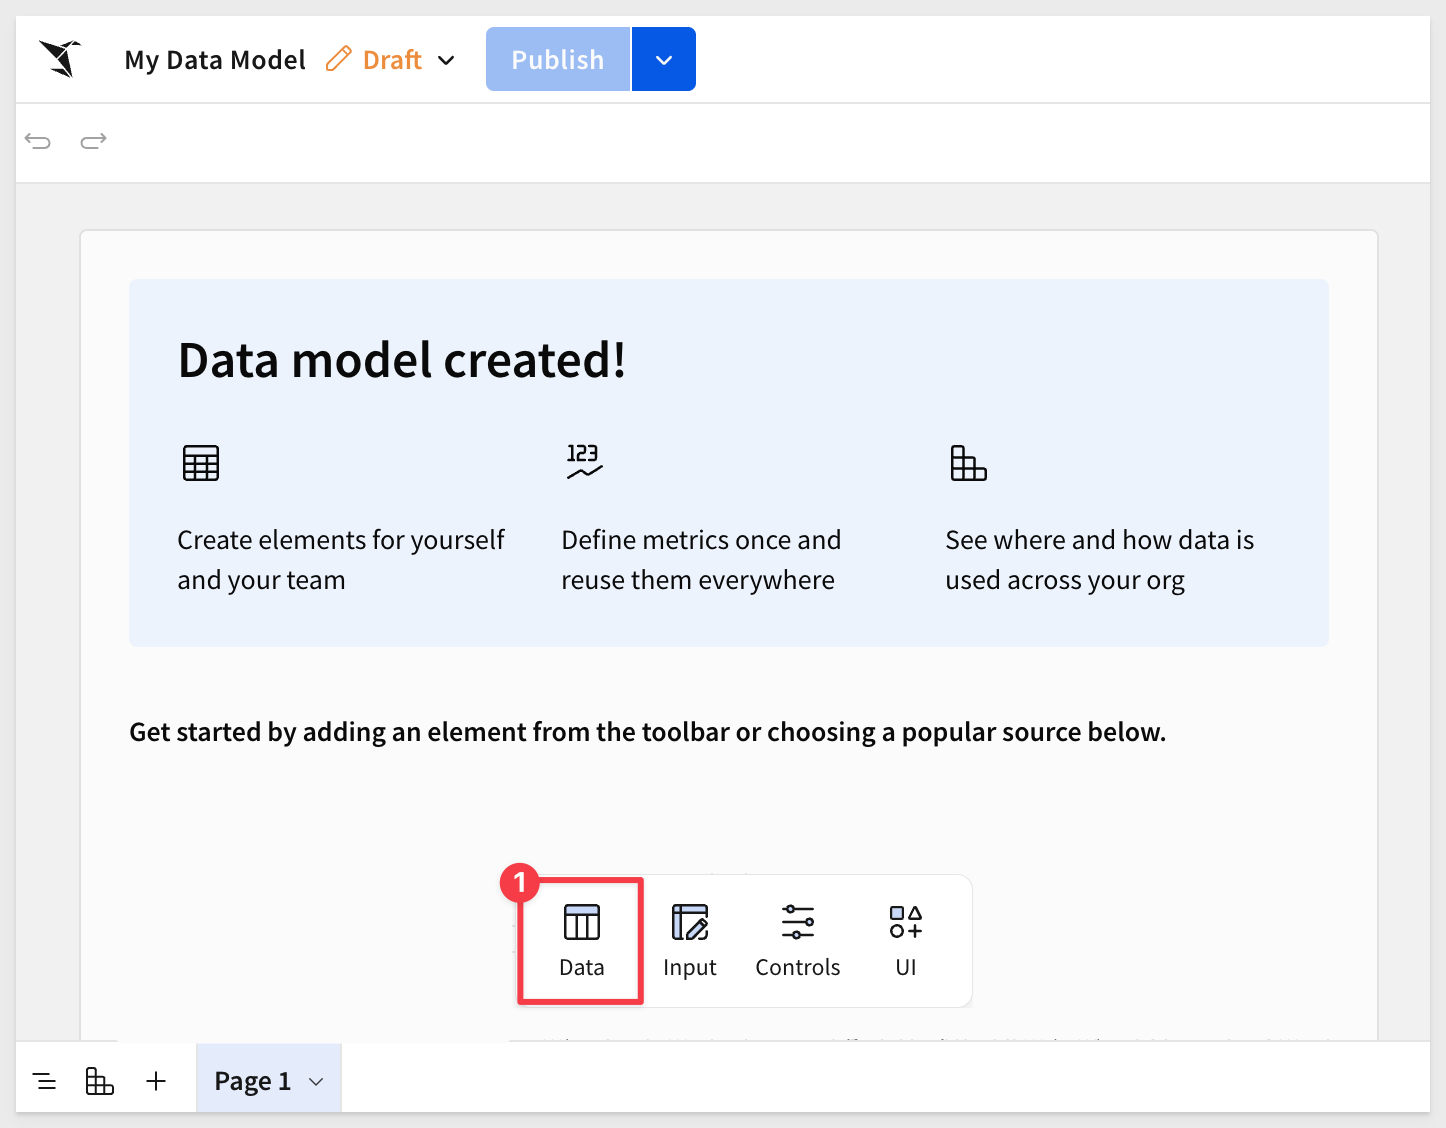
Select Data > Table from the Element bar:
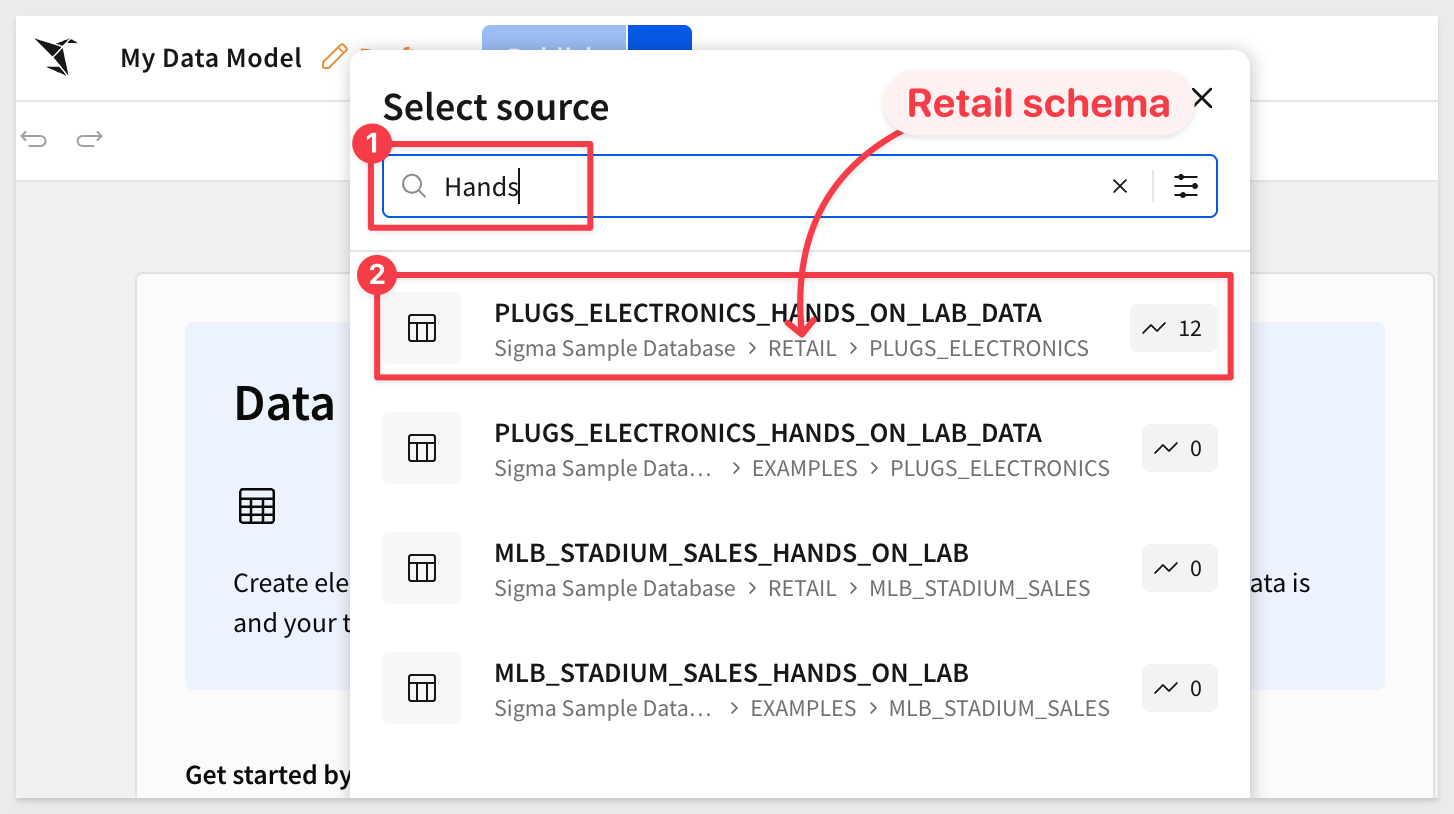
Search for Hands and select the Plugs Electronics Hands On Lab table from the Retail schema:
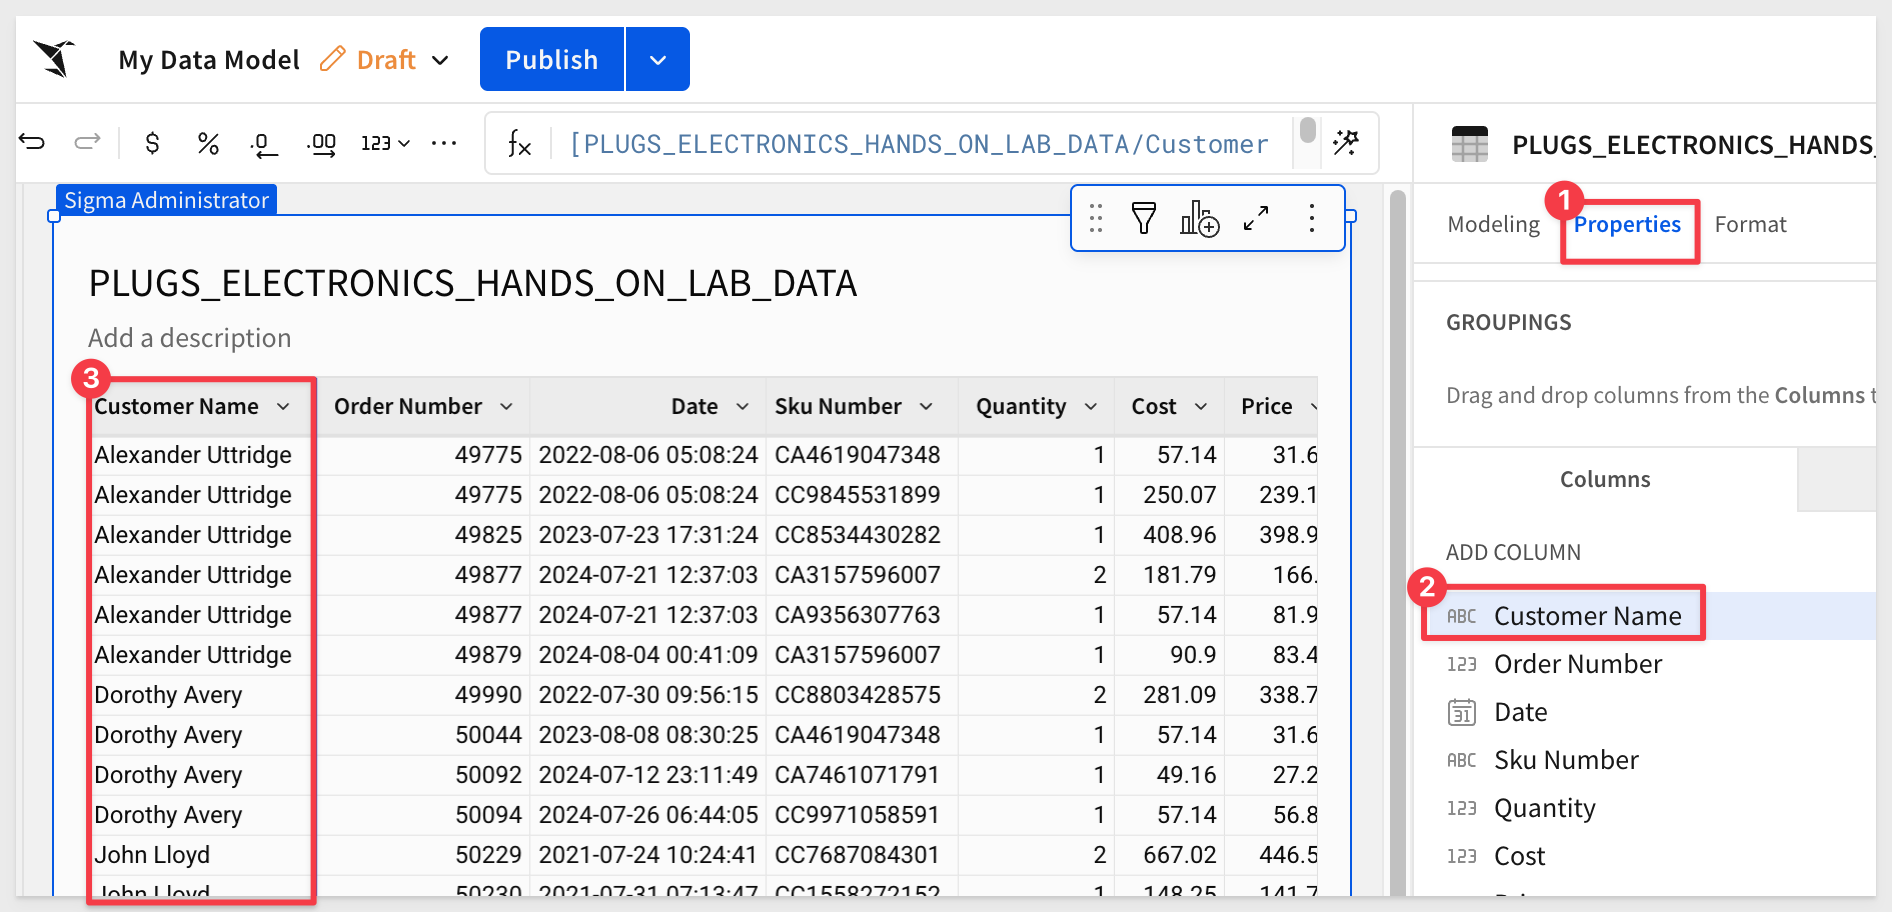
After the table loaded, use the Properties tab and drag the Customer Name column to the first position:
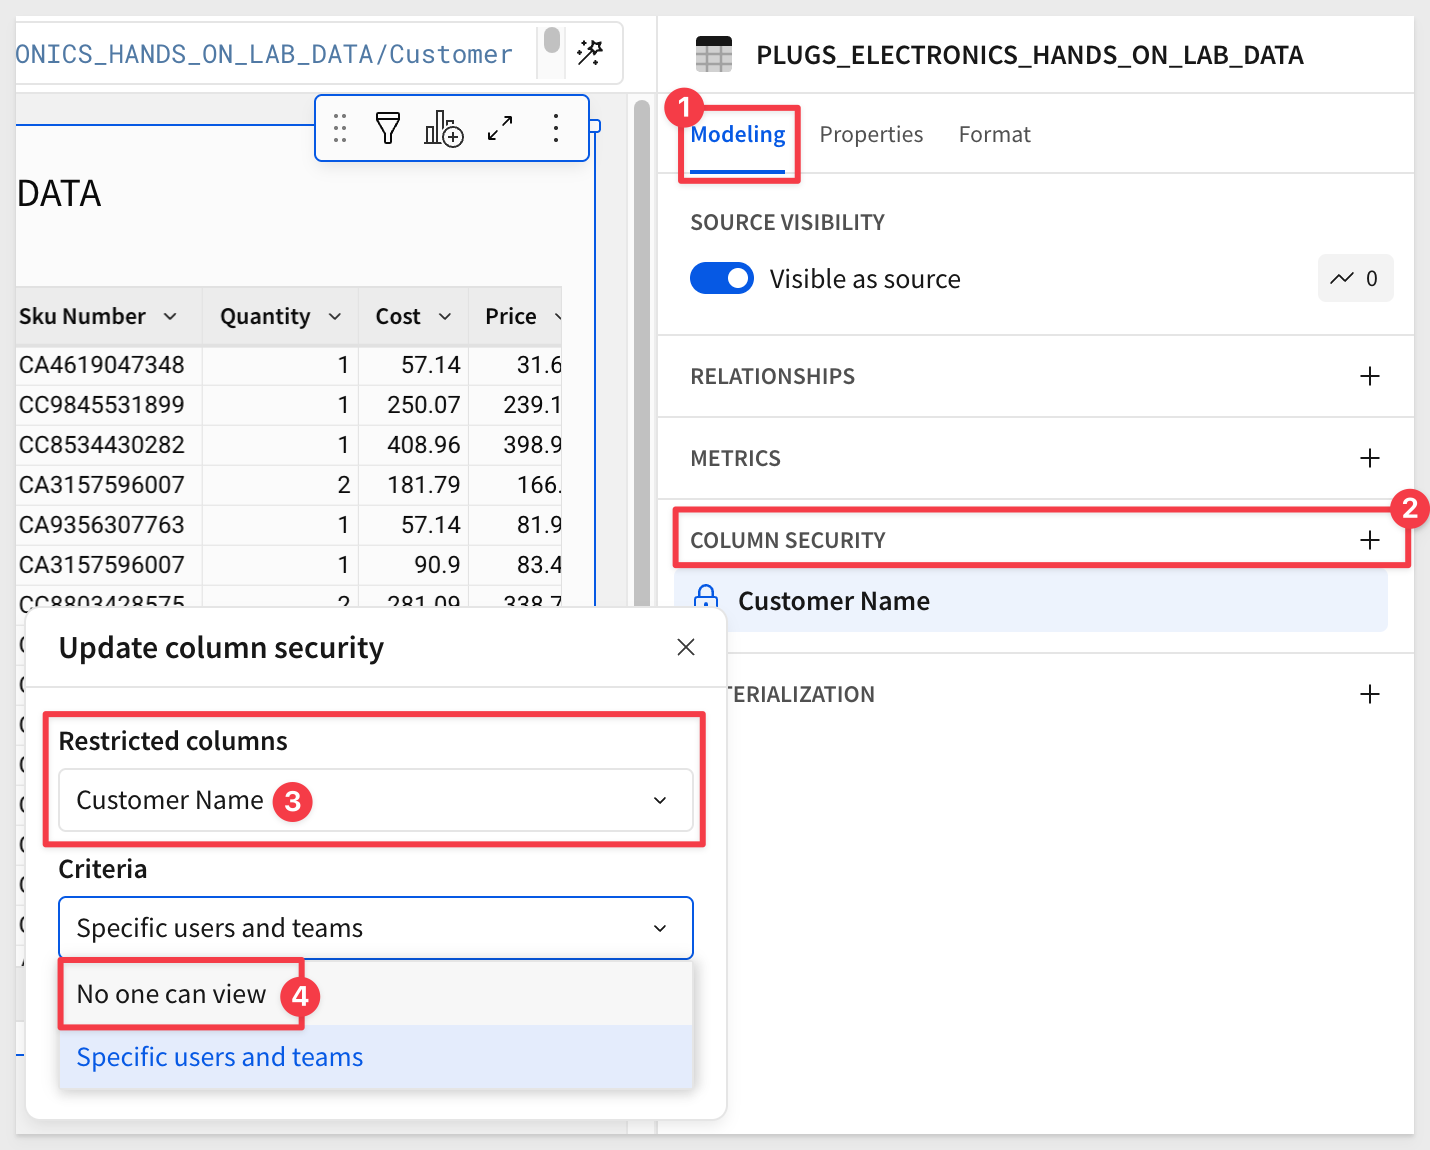
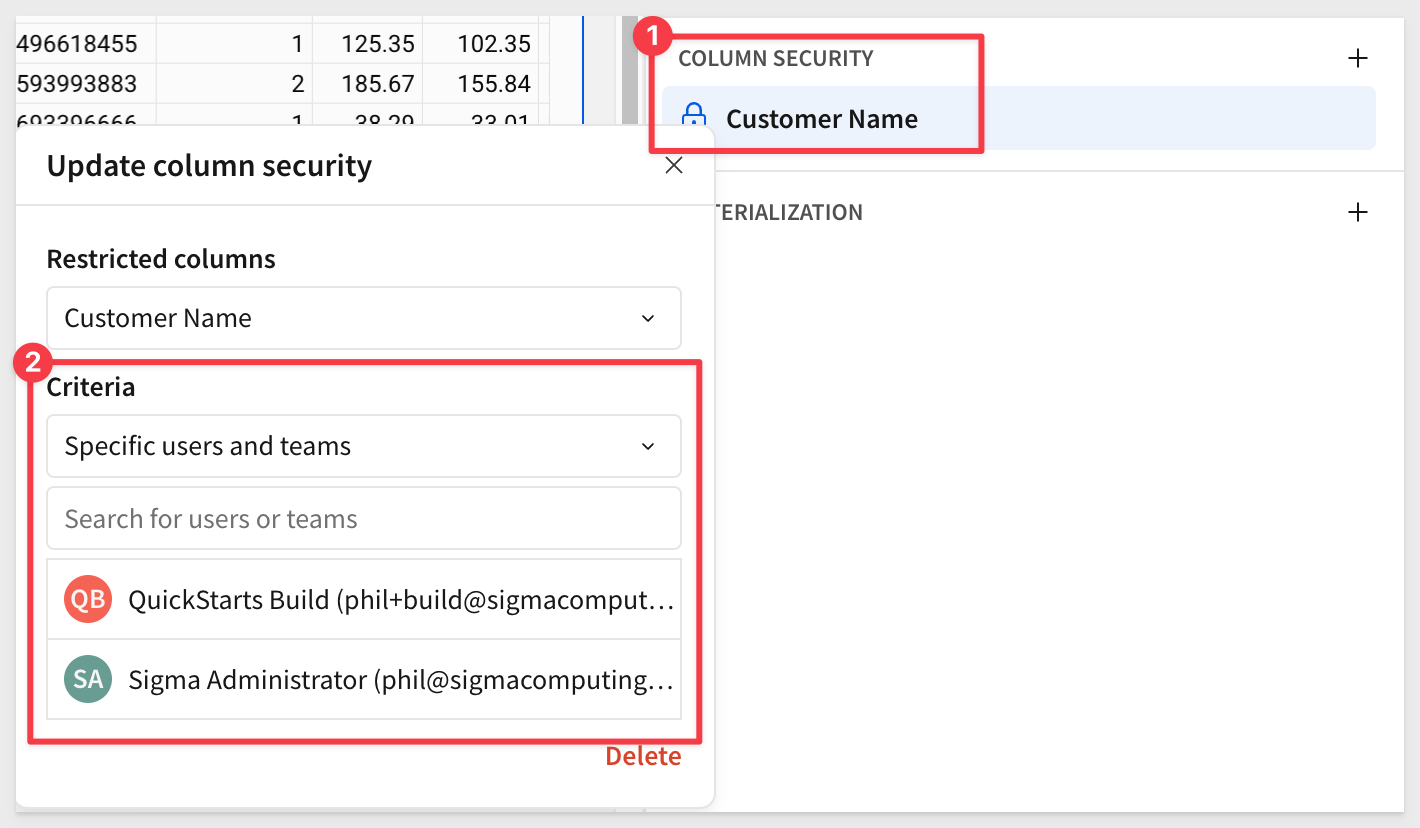
Still in the new model, click the Modeling tab and select the + next to COLUMN SECURITY.
The Restricted columns dropdown lets us select one or more columns to apply specific Criteria to.
Select the Customer Name column and No one can view:
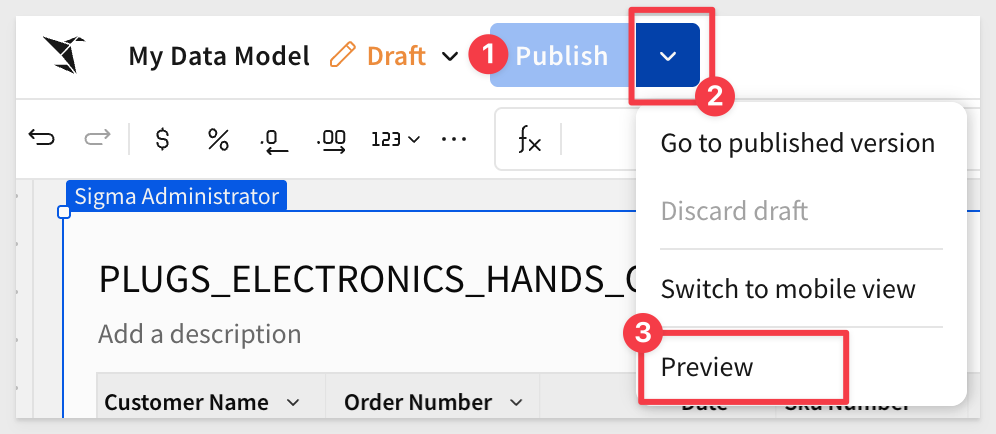
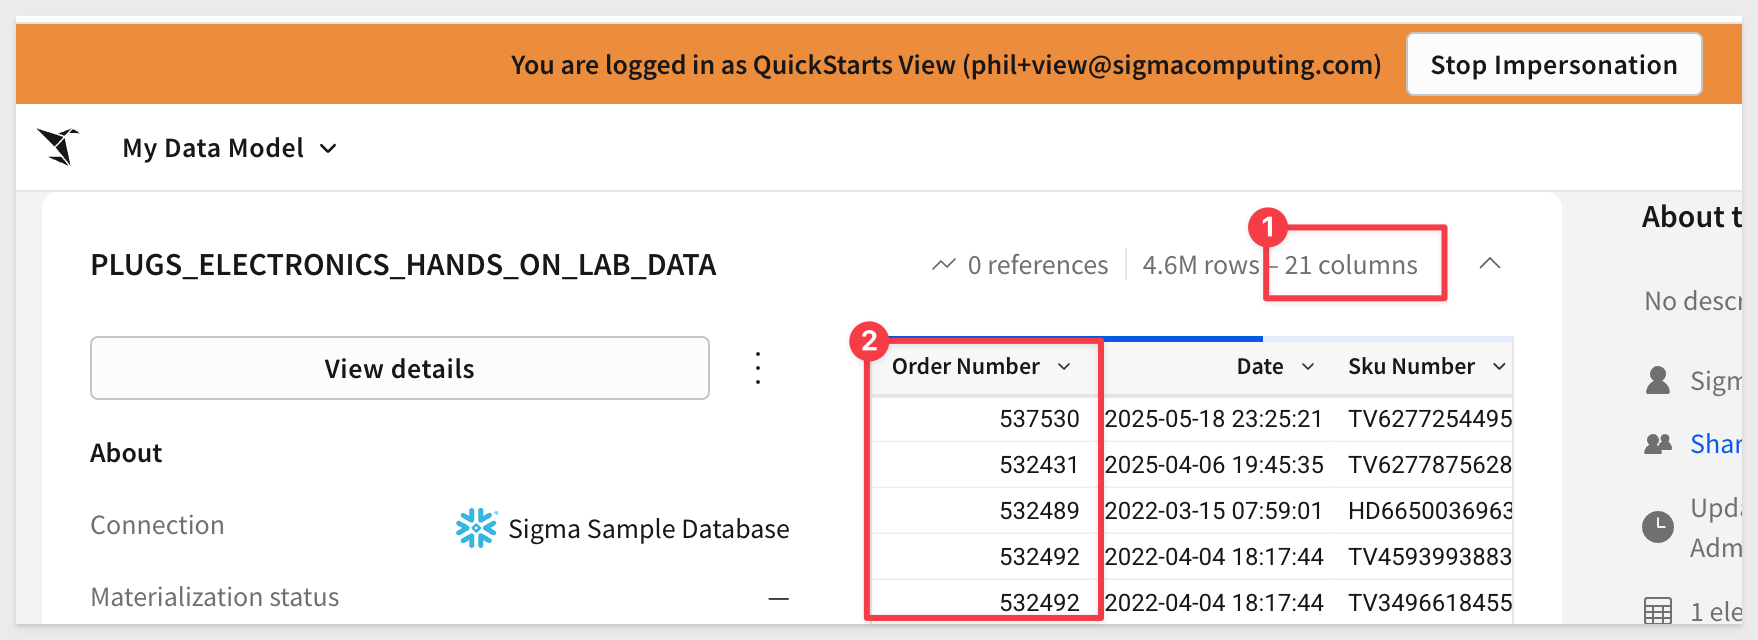
Click Publish and then open the Preview, which takes us to the data model's main page where we can see the table columns as the logged-in user (ourselves in this case).
Here we can see that there are 21 columns with Order Number first:
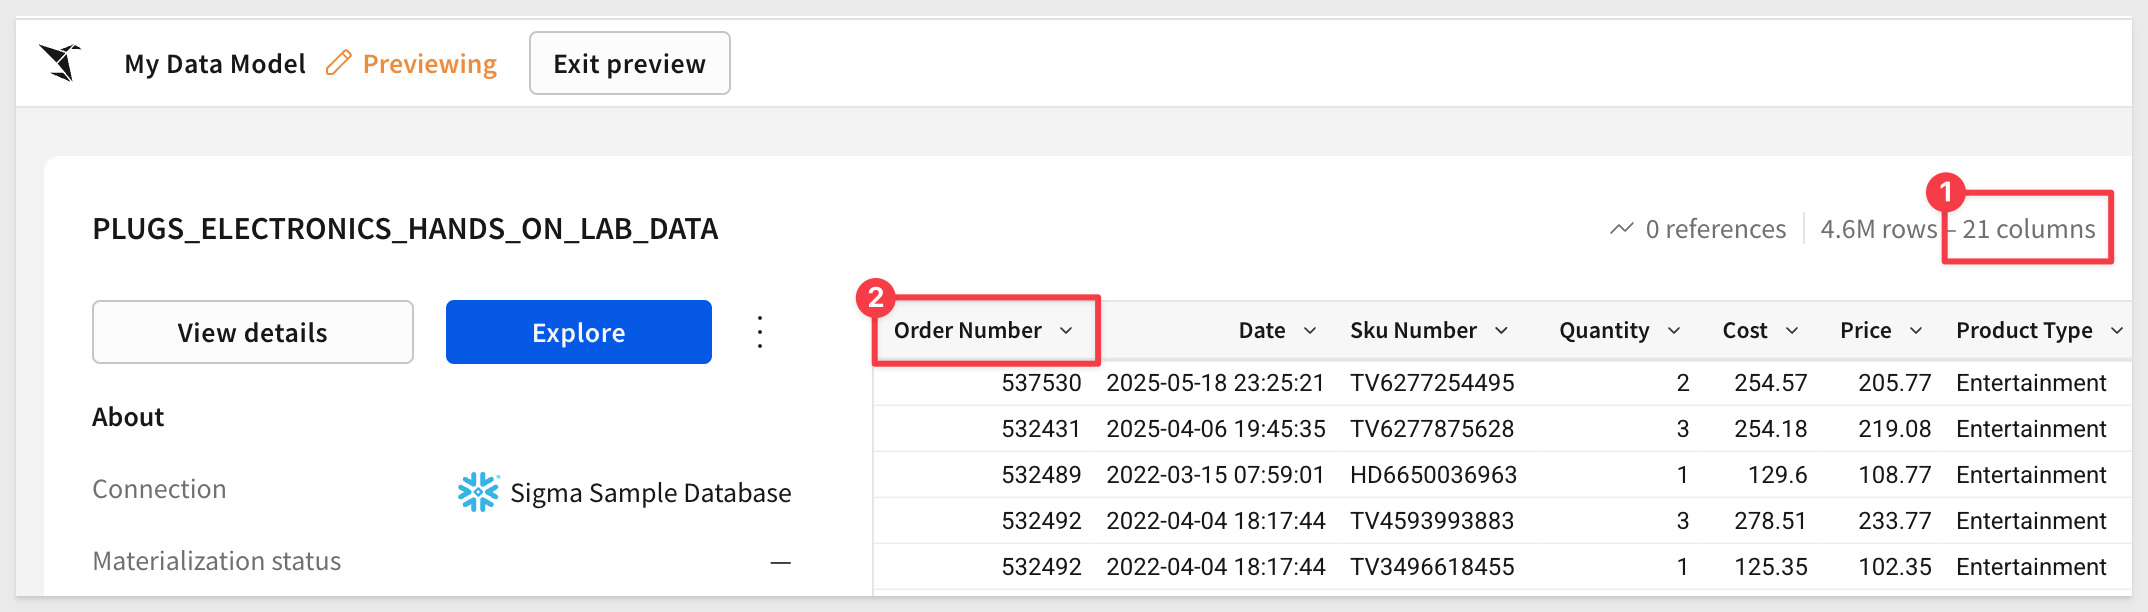
Click Exit preview.
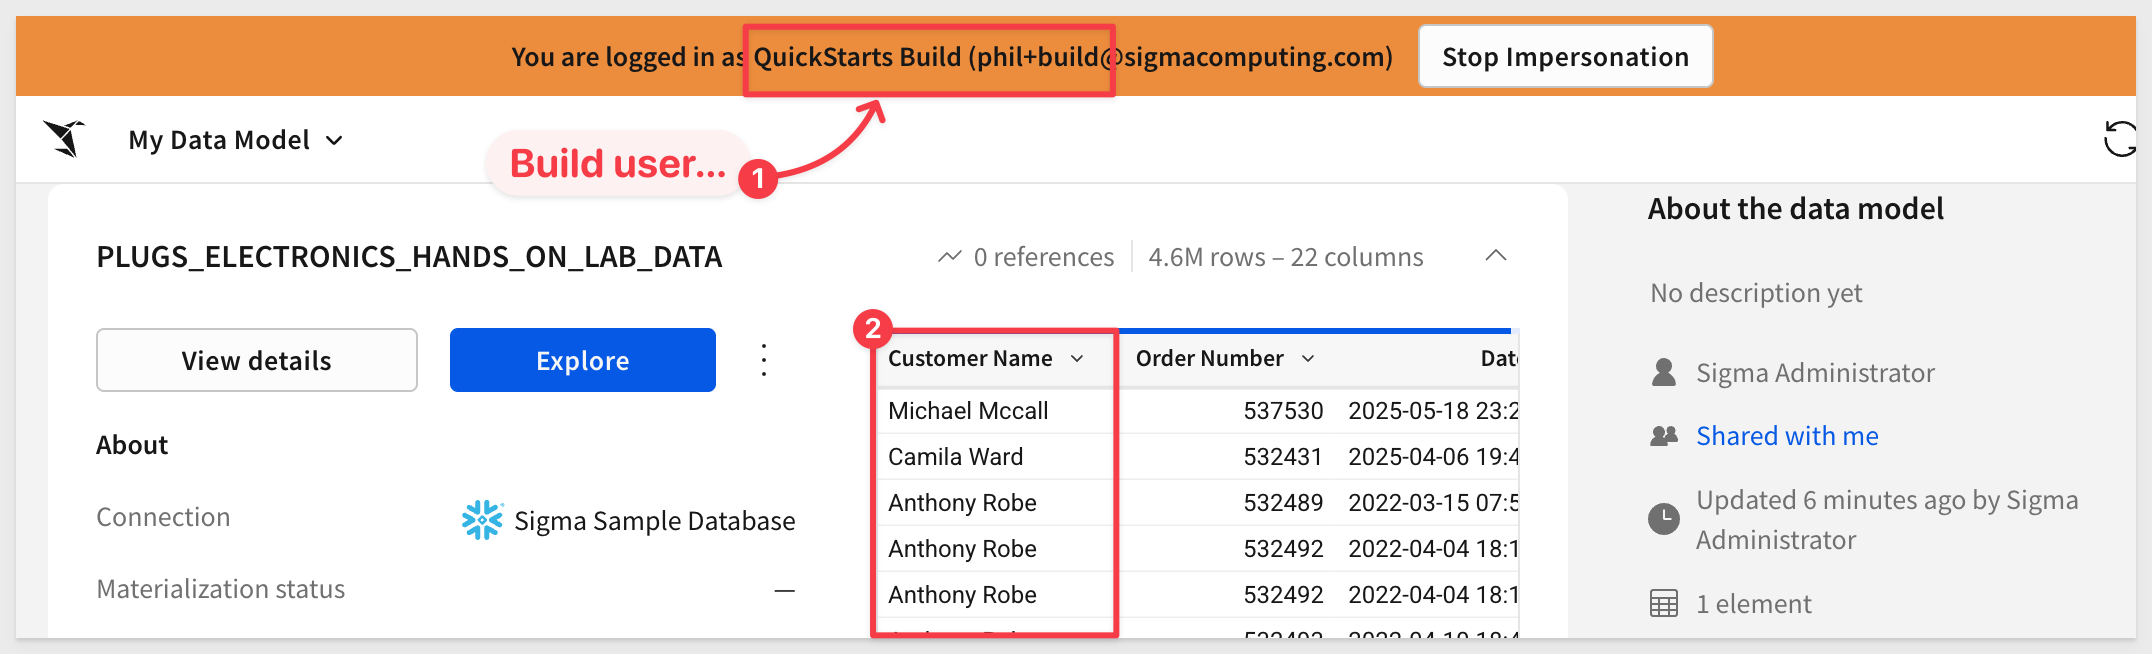
There are 22 columns in the data model, so we know our column security is working:
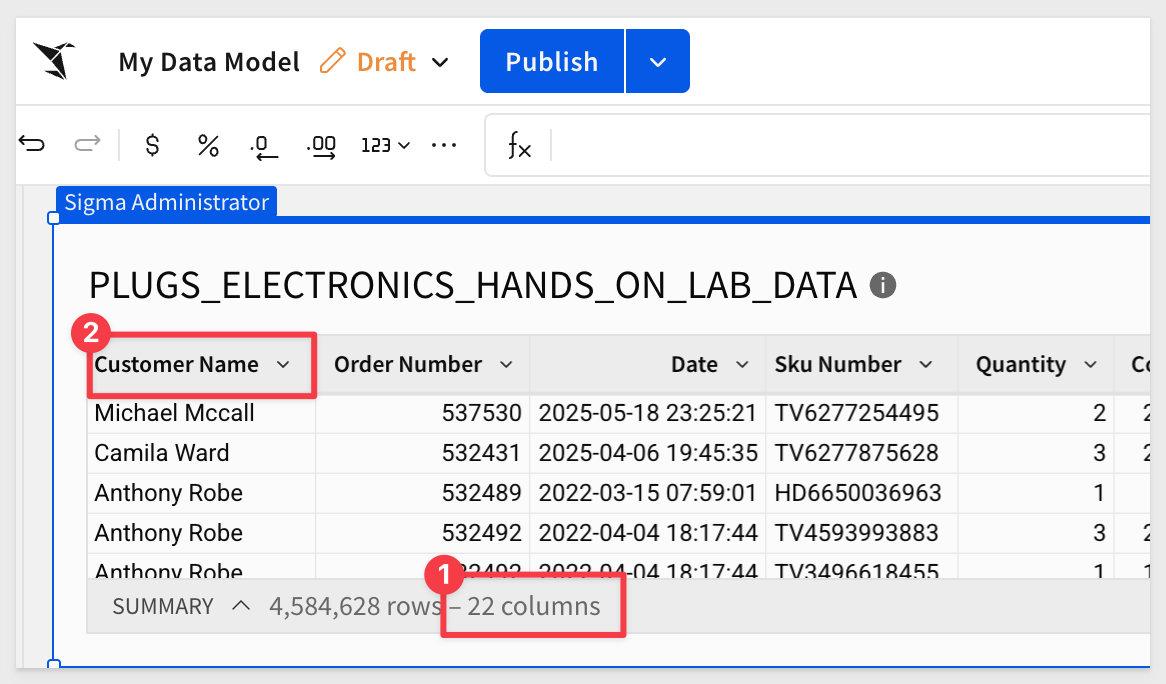
Click Publish.
Specific user or team
For this section, we will demonstrate; you do not need to create the extra users as that is only distraction at this point.
Let's assume we want to share this data model with two users (teams work in a similar fashion). One is a "Build" user, who creates content from scratch for others to use and needs to include the customer name column.
The other is a "View" user, who wants to use the data model to explore the data but should not see the Customer Name column.
First we share the data model with those users:
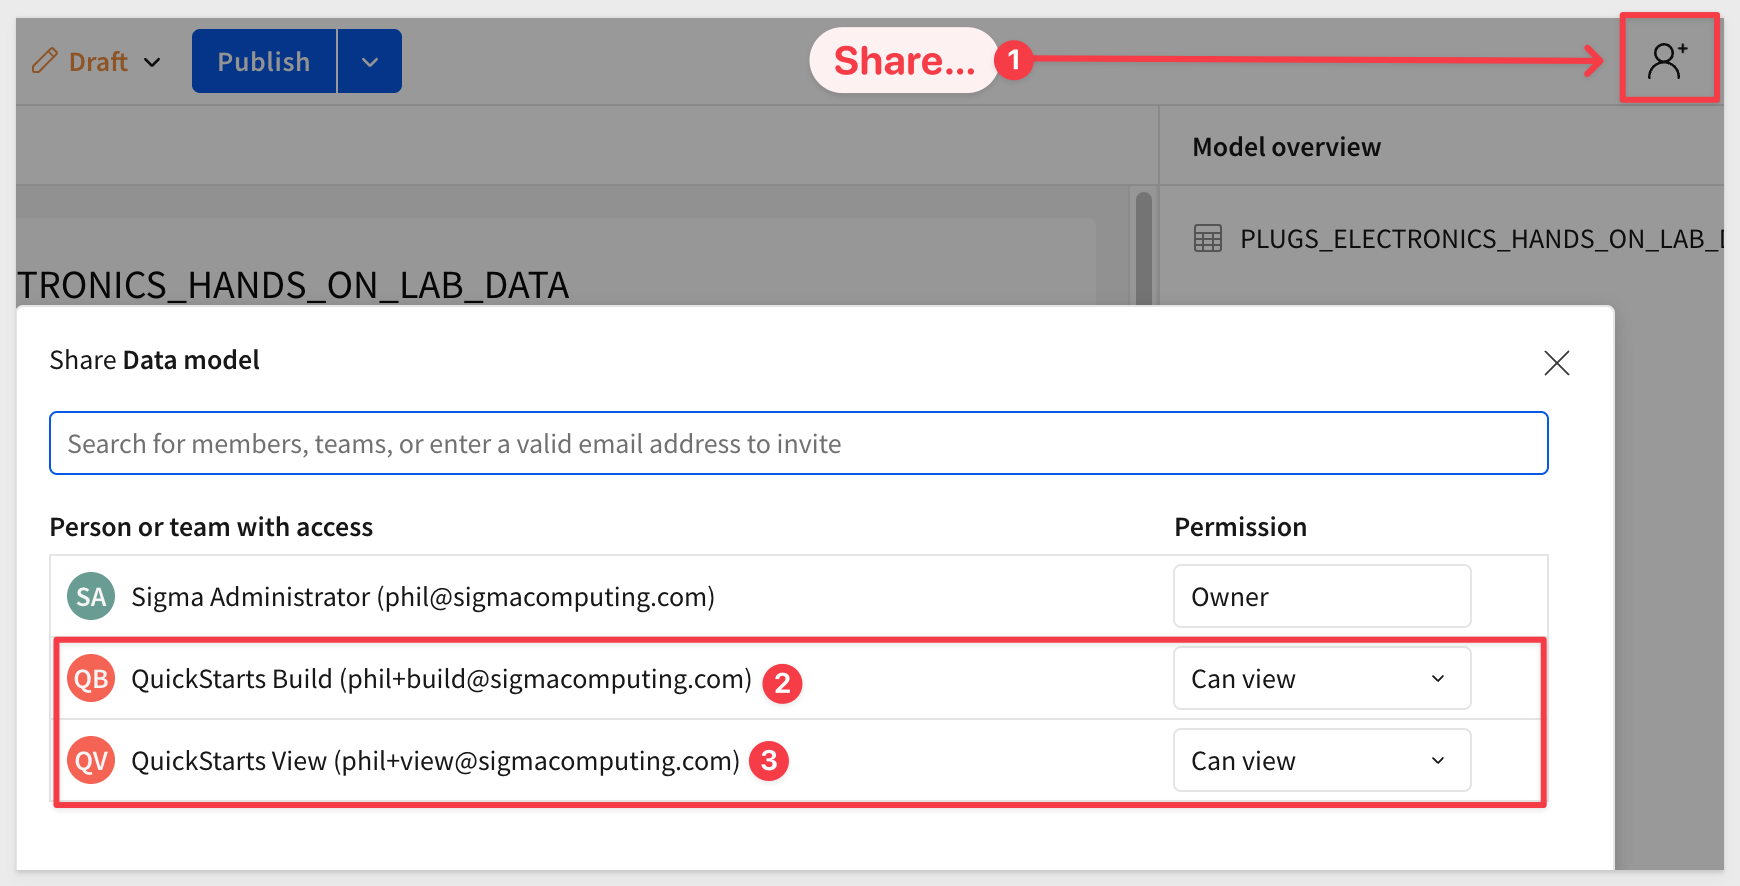
Next, update our CLS configuration to allow the build user (and ourselves) to see the Customer Name column:
Click Publish.
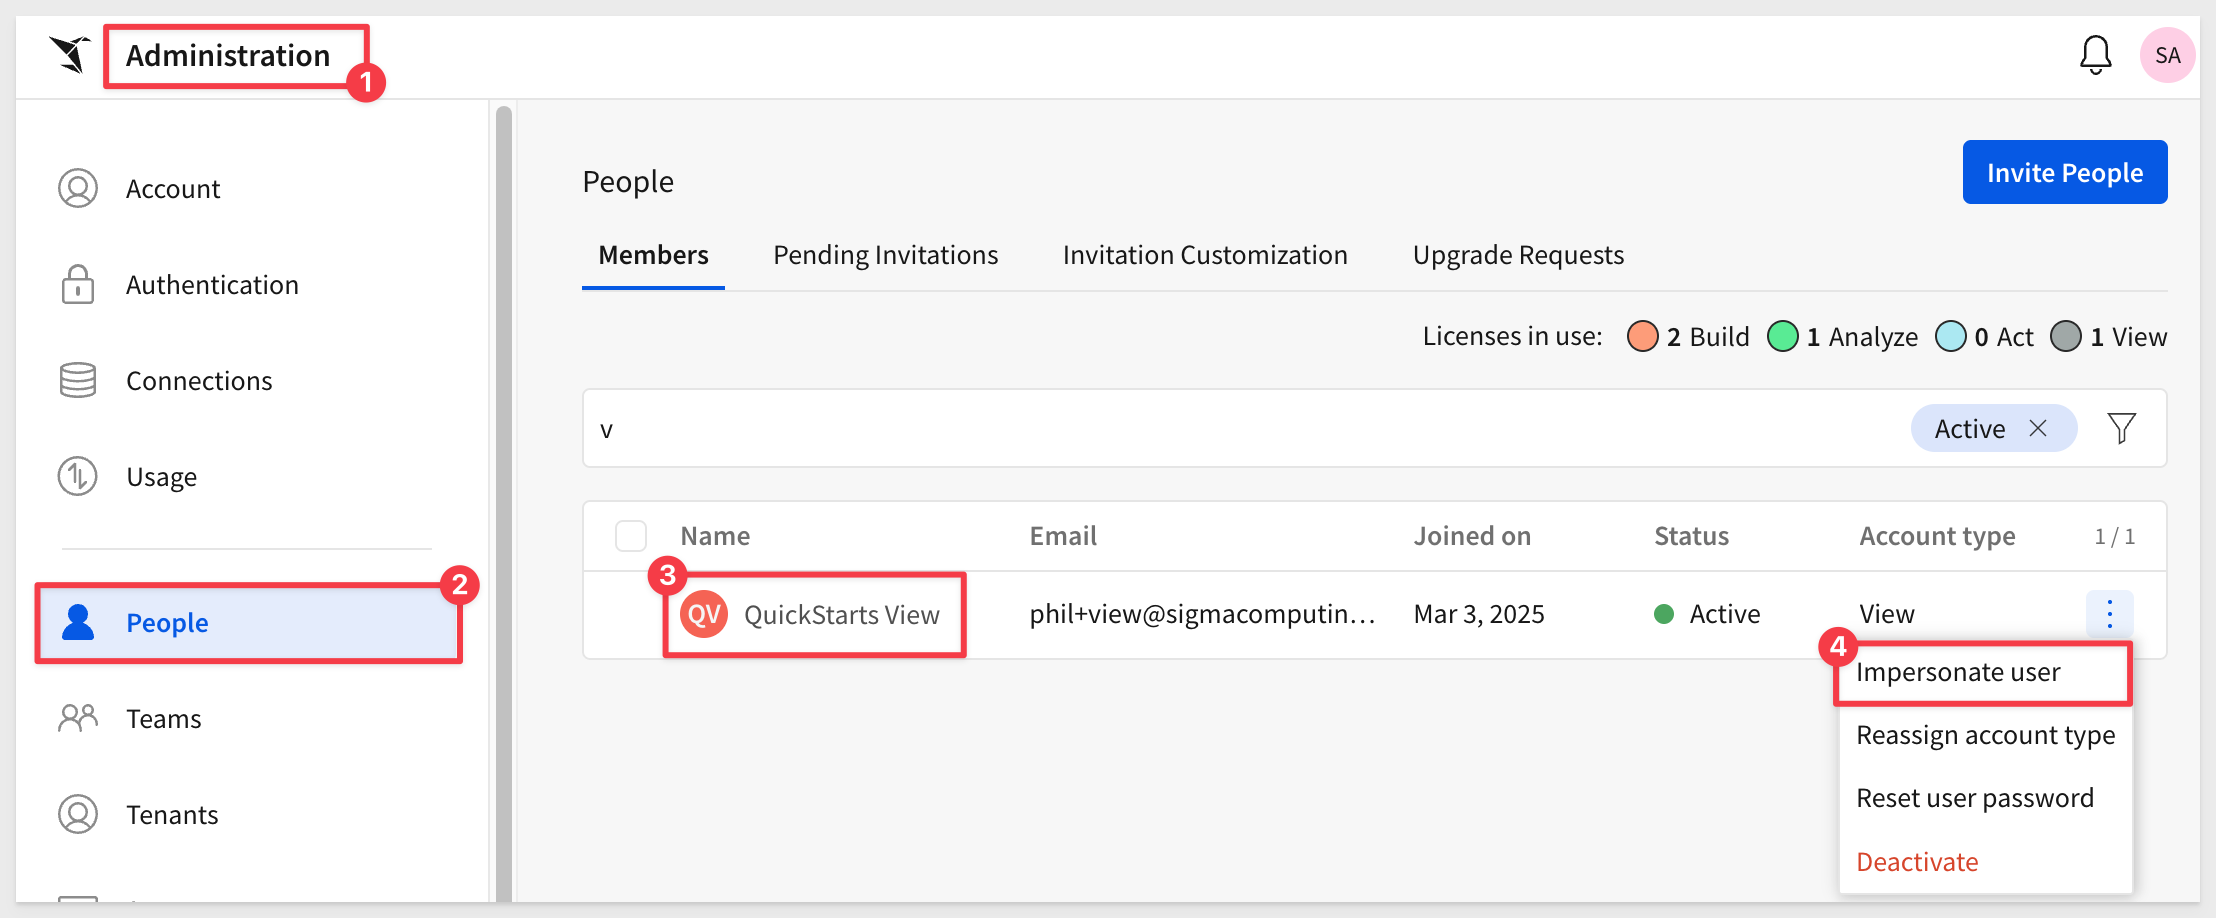
Now we can use Sigma's Impersonation feature to see the data model as the different users:
While impersonating, we can see the shared data model:
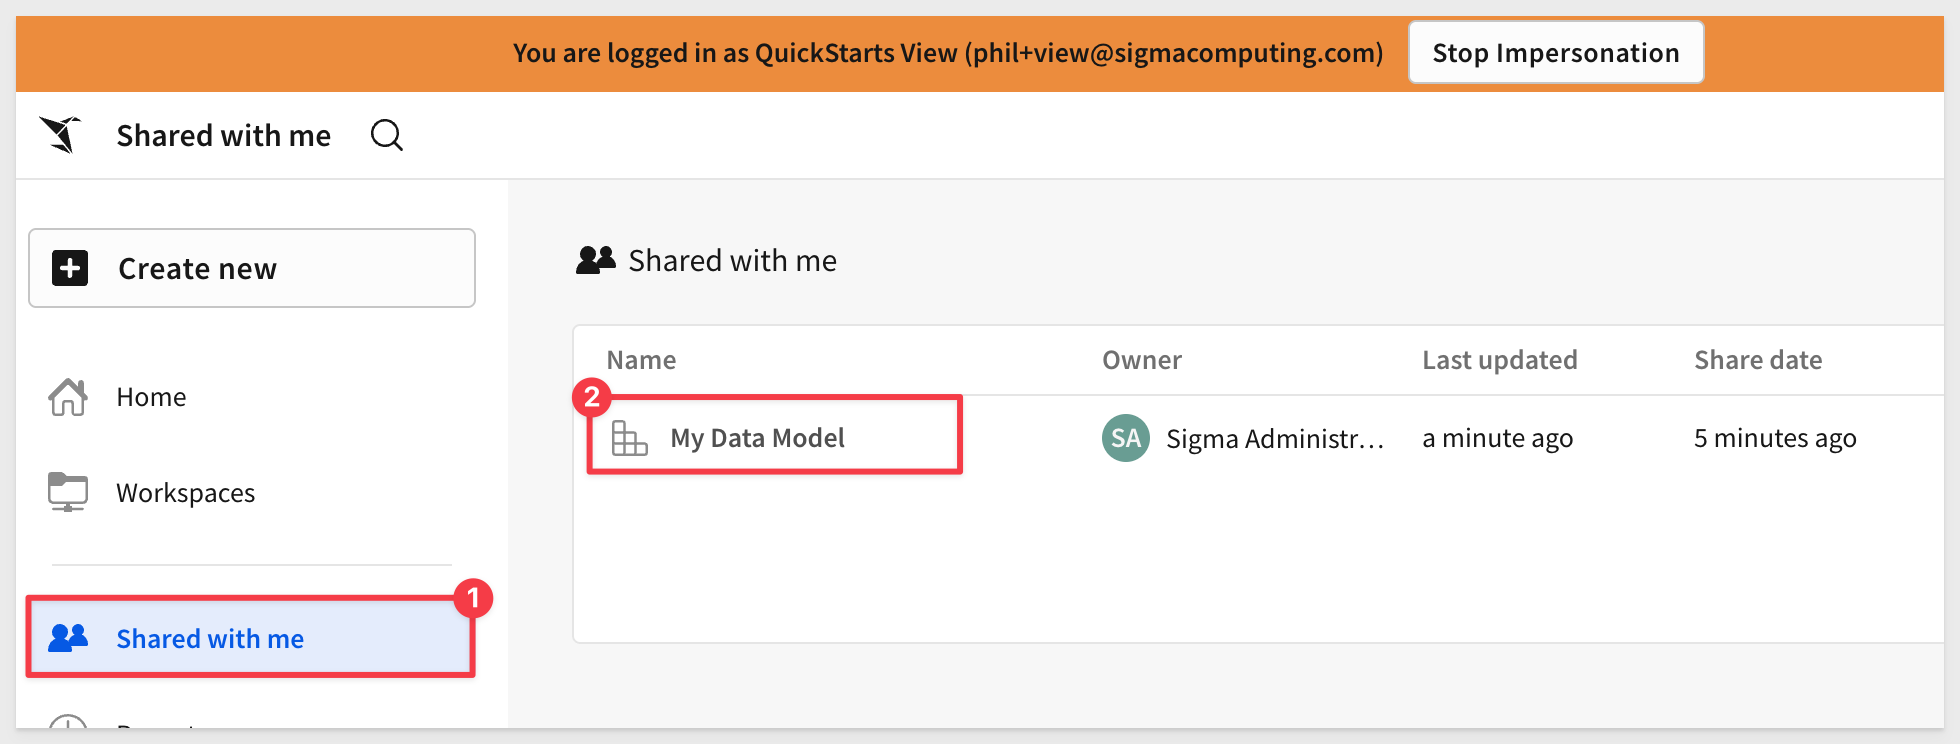
Again we can see that there are 21 columns with Order Number first:
By impersonating the build user, we can once again see the Customer Name column, as expected:
In this QuickStart, we learned how to apply column-level security (CLS) in Sigma using data models. We also explored how different configurations—such as restricting columns by default, assigning visibility to specific users or teams, and using impersonation to test downstream access.
Additional Resource Links
Be sure to check out all the latest developments at Sigma's First Friday Feature page!
Help Center Home
Sigma Community
Sigma Blog