This QuickStart is part of a series of QuickStarts designed to teach new users how to use Sigma.
The main goal of this QuickStart is to introduce input tables, explore some of the key features, and get you thinking about how you may use them in your business.
There is a dedicated QuickStart on input tables that covers several different use cases like Forecast Adjustment, Territory Planning and Data Collection.
To get the latest information on input tables, see Intro to input tables
For more information on Sigma's product release strategy, see Sigma product releases
If something is not working as you expect, here is how to contact Sigma support
### Target Audience The typical audience for this QuickStart includes users of Excel, common Business Intelligence or Reporting tools and semi-technical users who want to try out or learn Sigma. Everything is done in a browser so you already know how to use that. No SQL or technical skills are needed to do this QuickStart.
Prerequisites
- A computer with a current browser. It does not matter which browser you want to use.
- Completion of the QuickStart "Fundamentals 1: Getting Around"
- Completion of the QuickStart "Fundamentals 2: Data"
- Access to your Sigma environment. A Sigma trial environment is acceptable and preferred.
- If you have not already, you can sign up for a Sigma Trial here:

At first glance, an input table can look a lot like a standard table, but it is so much more than that.
Input tables are dynamic workbook elements that support structured data entry.
They allow you to integrate new data points into your analysis and augment existing data from your warehouse to capture critical data at the point of knowledge; the user.
Sigma supports three types of input tables today:
- Empty: Exactly what it says; you configure everything, and you know the column names/types that are required.
- Linked: Based on another workbook table, selecting only columns of interest.
- CSV: Import data from a standard comma-delimited file. Columns are named manually or created from the CSV header.
Input tables can be used as sources for tables, pivot tables, and visualizations, or to incorporate data using lookups and joins.
When you create warehouse views for input tables, you can reuse the manually entered data across your broader data ecosystem.
Since input tables provide the opportunity for more interactivity, we cover some of that in a later Fundamentals QuickStart using forms.
If you are after an even more sophisticated example of input tables in action, see Approvals
Return to the Fundamentals workbook and add a new page. Rename the page to Fundamentals 4.
Open the Data page where our Plugs_Store_Sales source data is located.
Unique Key
It is often useful to create a key that uniquely identifies any single row of data in a table. In the case of our Plugs_Store_Sales table, we can't use Order Number because there are many orders that have more than one SKU on them.
There are several ways to create this "row uniqueness" in Sigma. Since one order may include multiple items (SKUs), we can easily combine both values to generate a stable unique key, using the MD5 function which uses the MD5 algorithm to automatically calculate a hash value from a given string.
Add a new column, and set the formula to:
MD5(Text([Order Number]) & "_" & [Sku Number])
Rename this column to Row Number.
Now we have a value that is unique for every row.
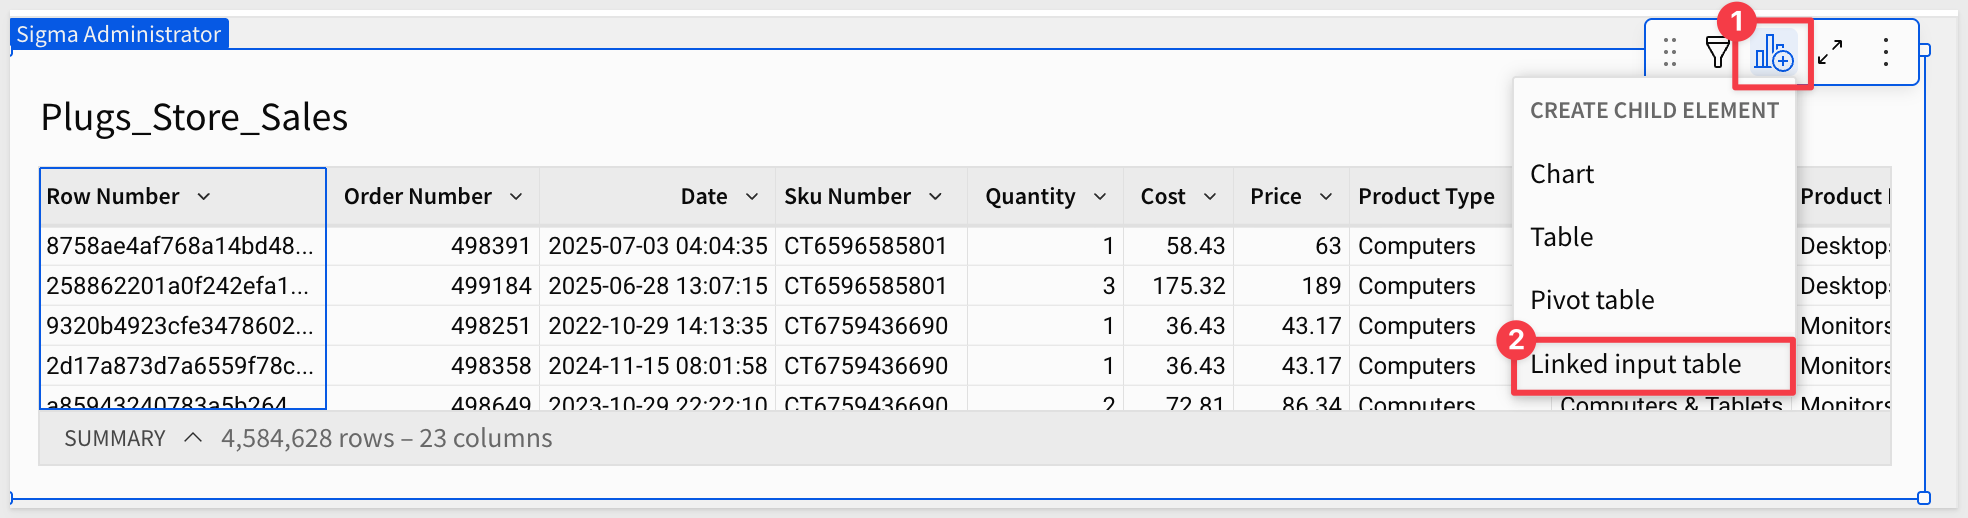
There are a few ways to place an input table in the page.
One way is to just drag and drop one from the Element bar > Input group.
In our case, it is faster to create it directly from the Plugs_Store_Sales table, since that is the "link" we wish to create.
Create a Linked Input Table from the PLUGS_ELECTRONICS_HANDS_ON_LAB_DATA table.
We must select a column to be the unique "connection" between the two tables.
Select the Row Number column as the unique row identifier.
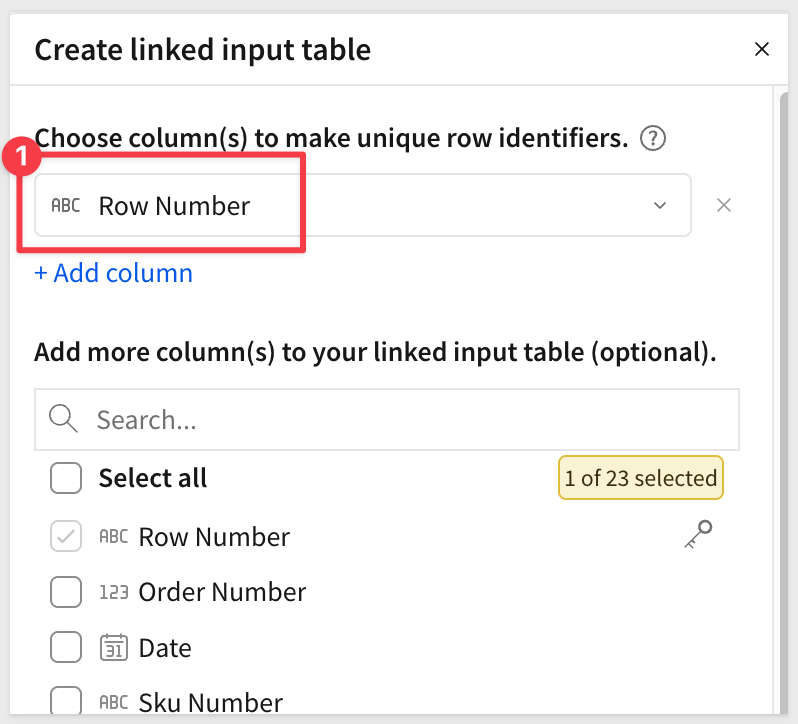
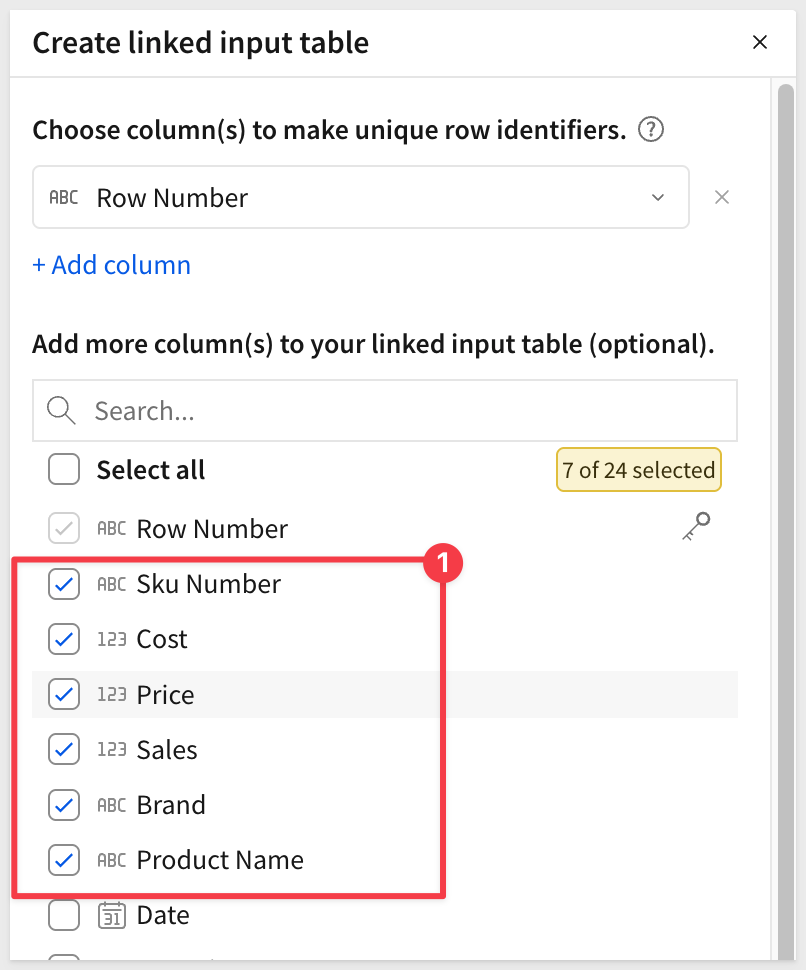
Then we need to select the other columns that we want to appear in the linked input table.
To make things cleaner, let's only select the columns that are needed for this demonstration. (Yes, we reordered the columns in the Plugs_Store_Sales table so it was more clear in this step).
Click Create input table.
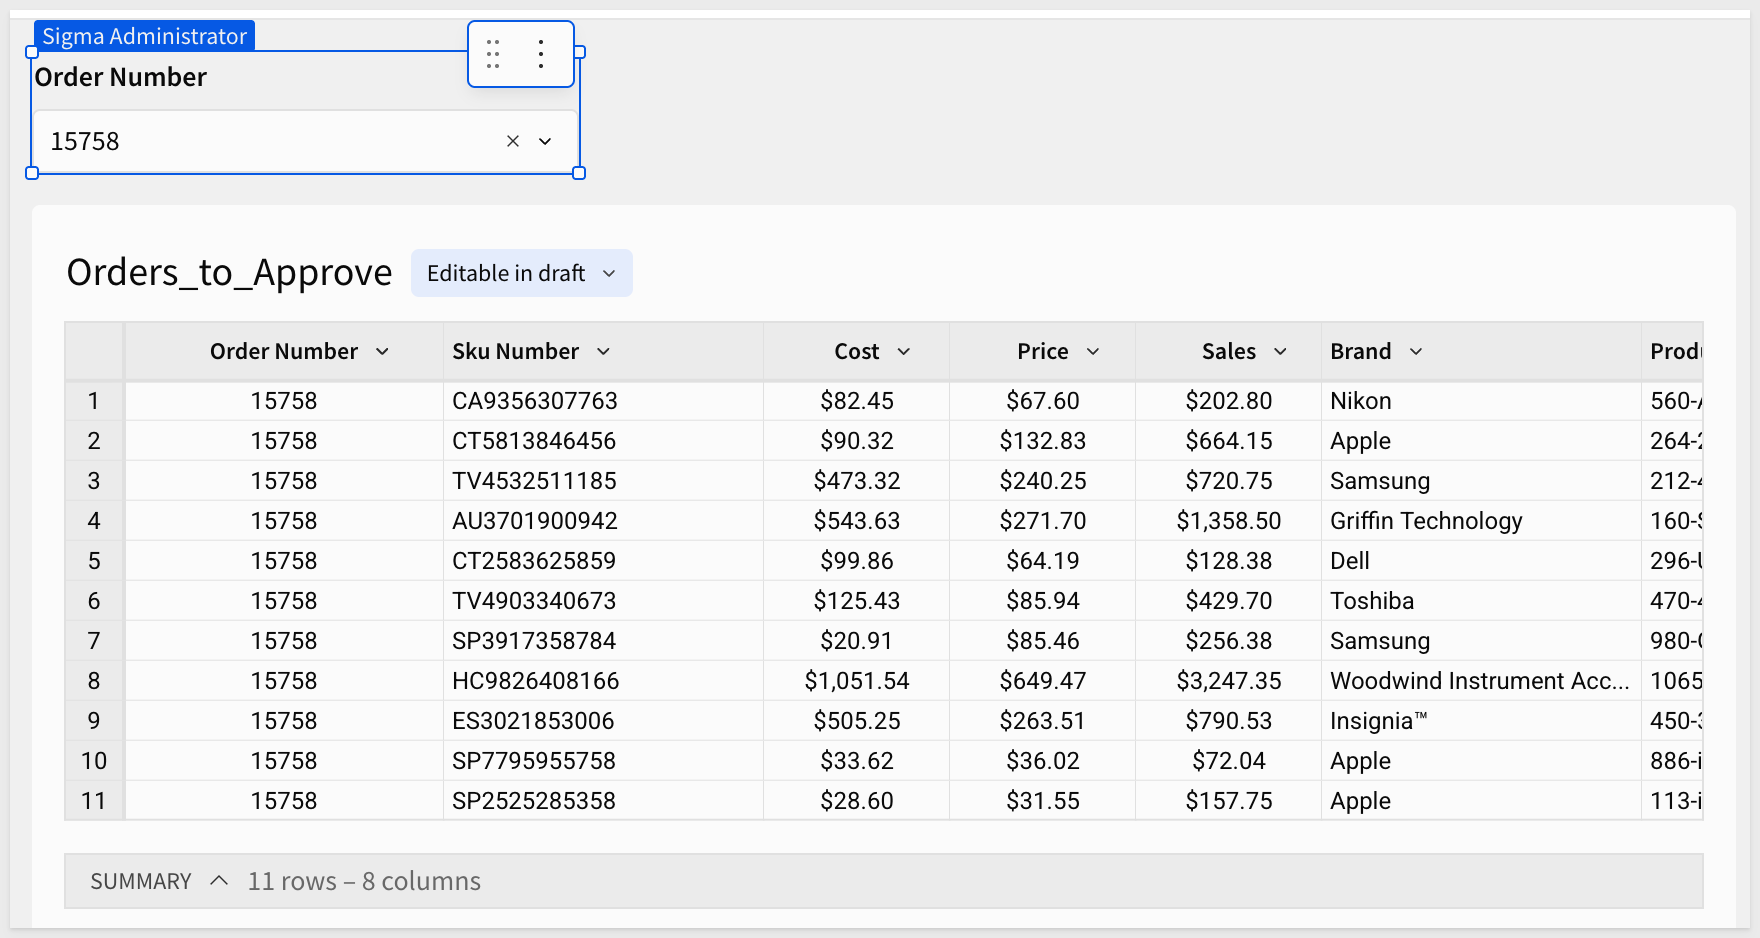
Rename the input table to Orders_to_Approve.
Move the new input table to the Fundamentals 4 page.
The Fundamentals 4 page now looks like this:
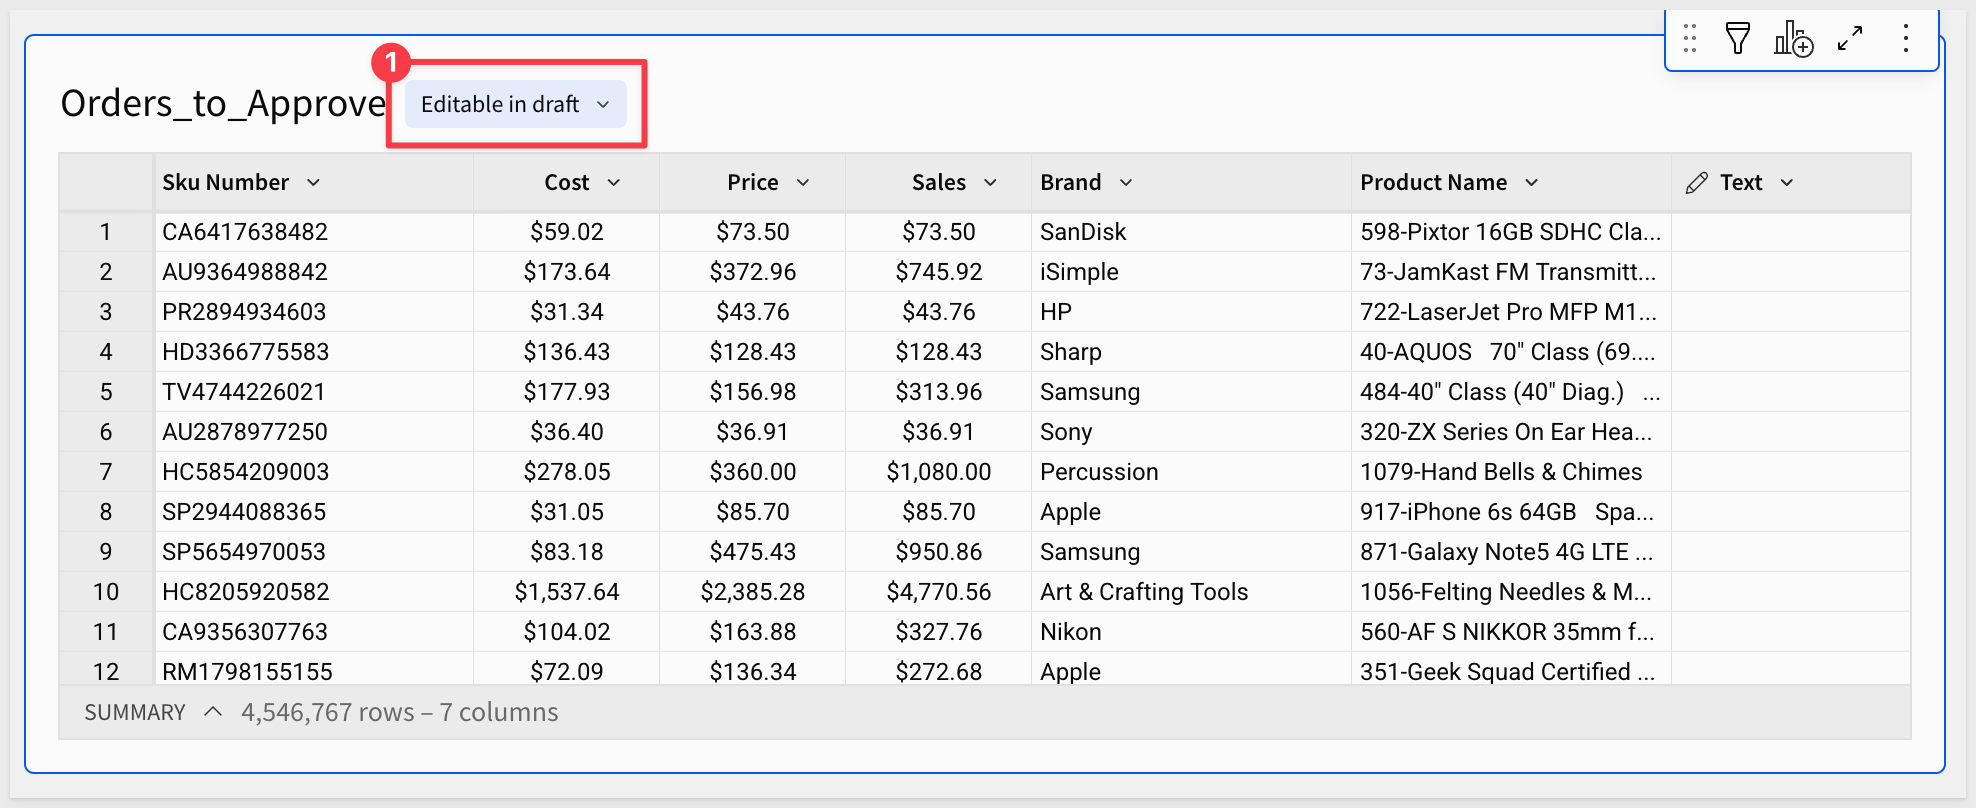
Notice that the linked input table ("input table") indicates that it is Editable in draft. Who can edit input table data and under what circumstances is a detailed topic that is too broad to cover here.
For information on the rules surrounding input table edits, see Edit existing input table columns
For information on data entry permissions and governance, see Configure data governance options in input tables
For this QuickStart, we will work in draft mode.
Hide the Row Number column. We can still reference it if needed, but users don't need to see it.
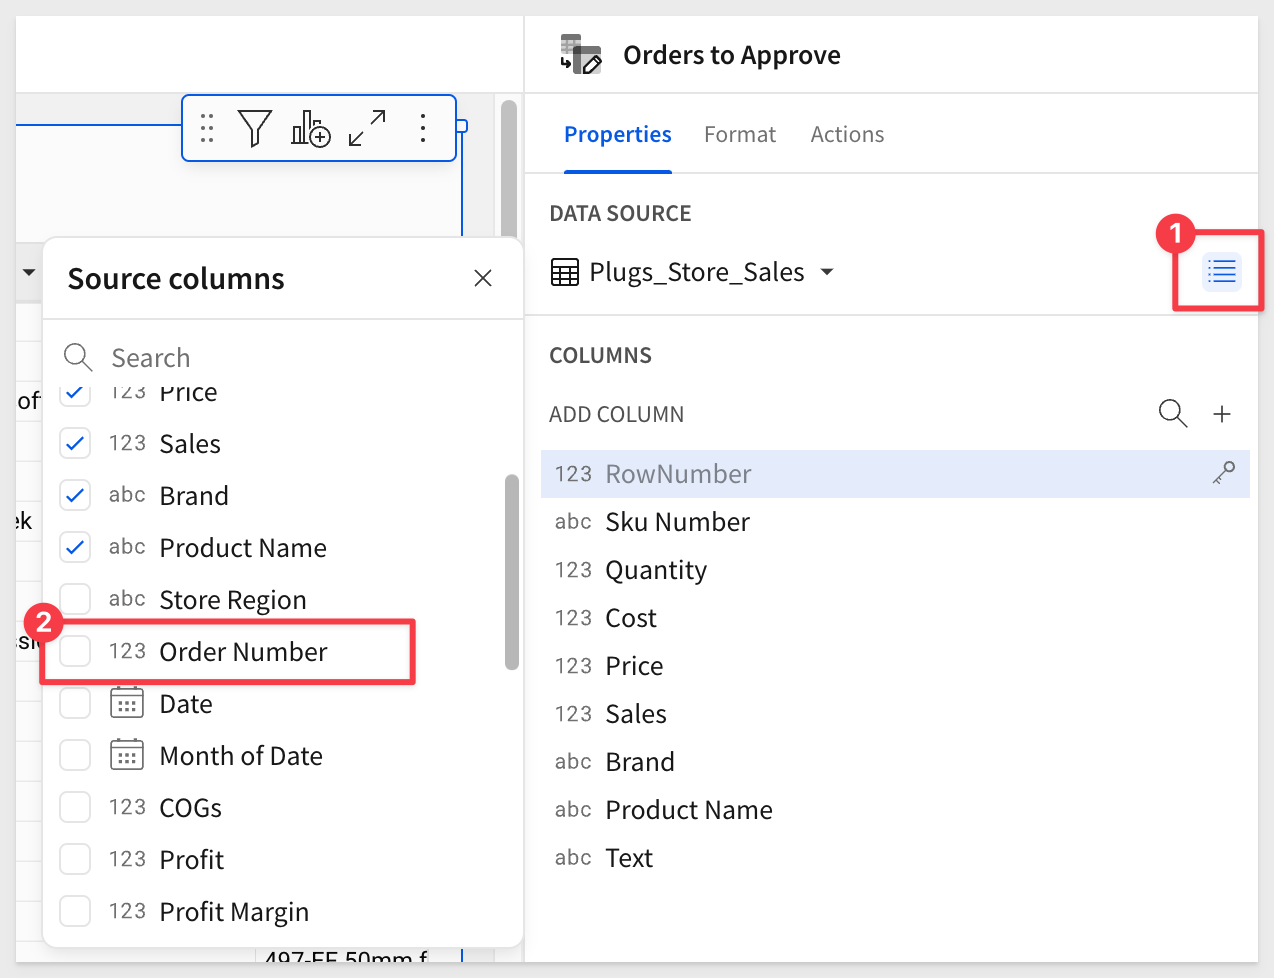
With our sample data in place, we want to give the user a way to target a specific order number.
We just realized that the Order Number column was one we needed.
In the element panel click Available columns, and add the Order Number column:
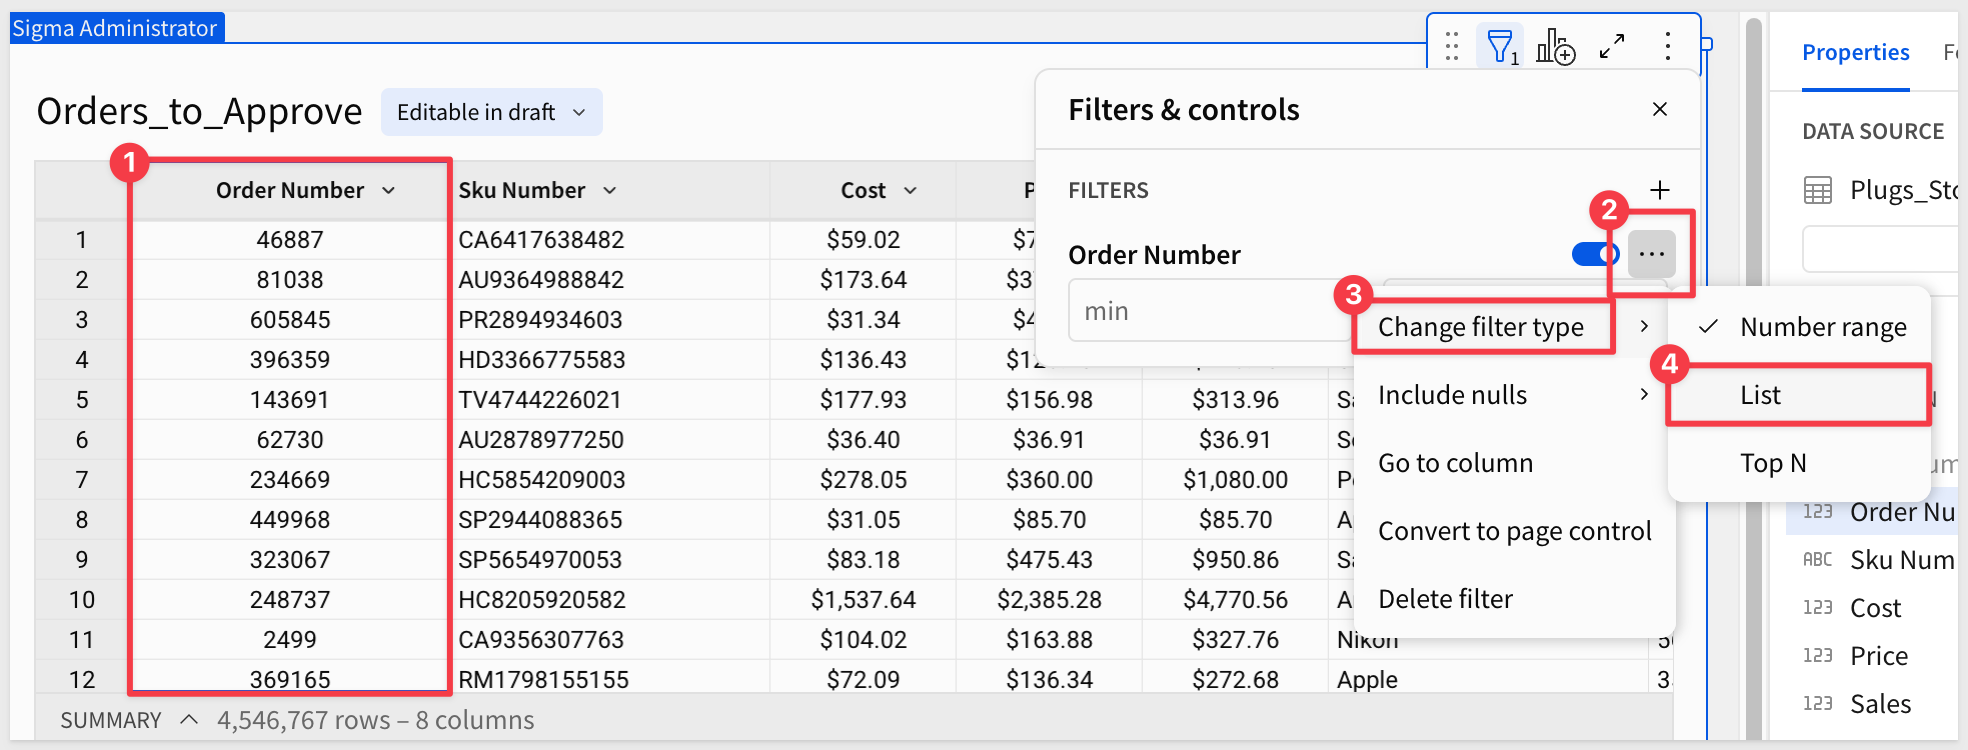
Using the Order Number column, create a filter and Change filter type to List:
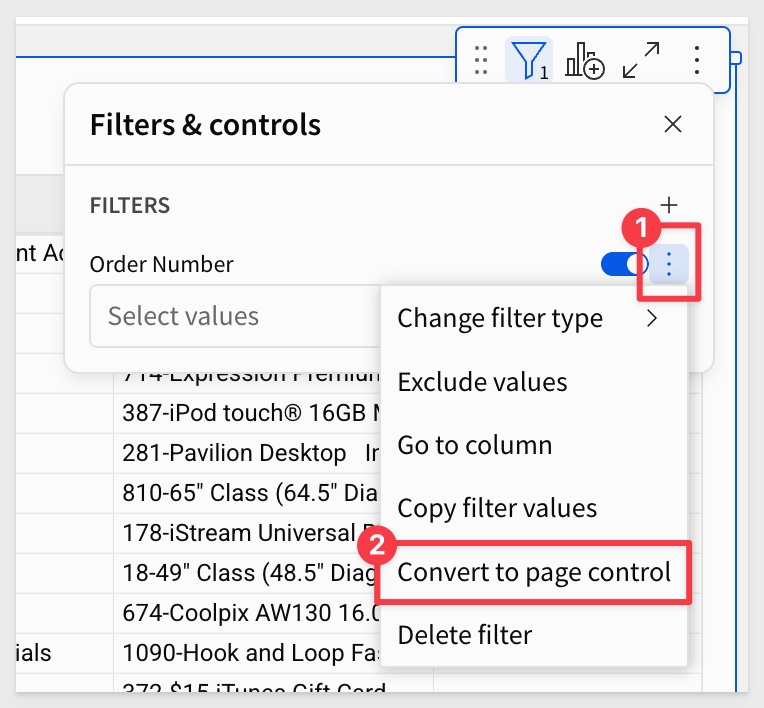
Then convert it to a Page control:
We can adjust the Order Number control as shown to clean things up to our preferences:
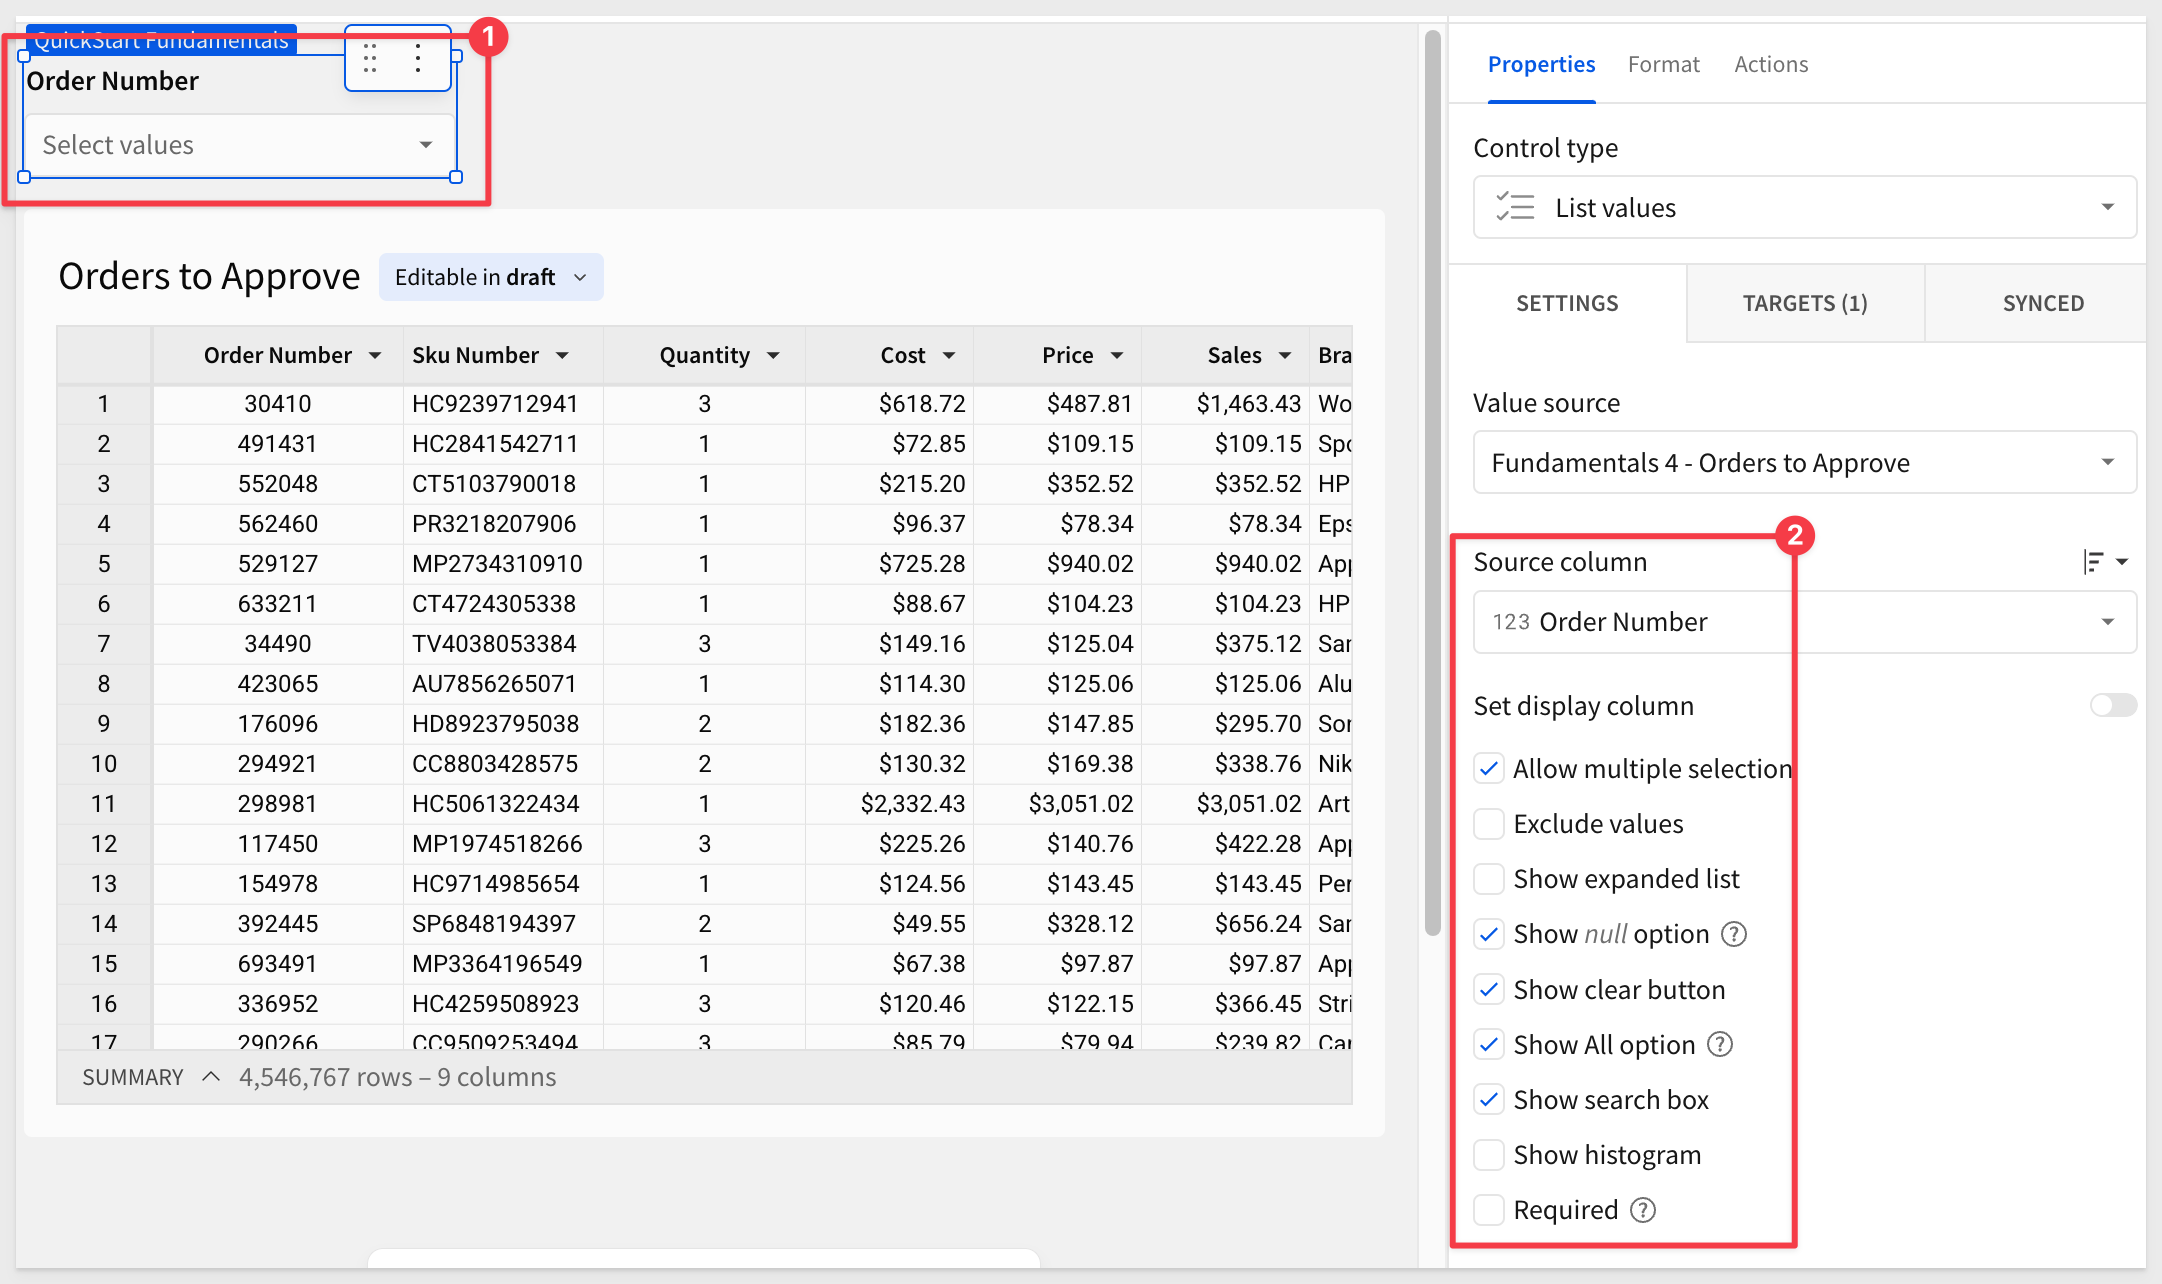
Selecting Order Number > 15758 filters the input table just like it would a standard table or pivot table. It also shows that one order can have many Sku Numbers:
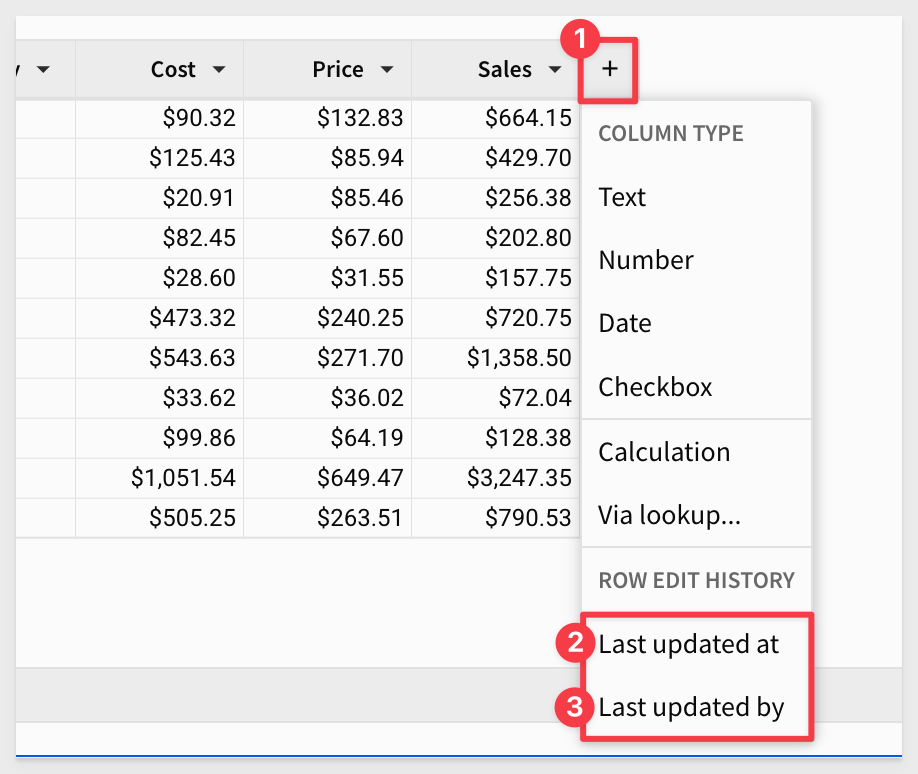
Tracking who made changes
All input tables include two optional row history columns. Add these by clicking the + icon and selecting Last updated at and Last updated by.
Adding comments
Add a new Text column next to Sales:
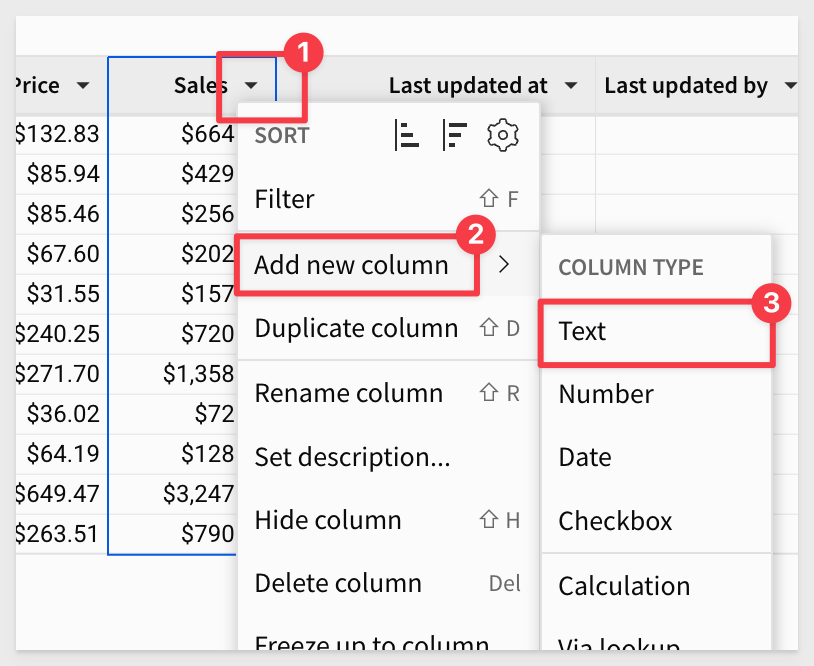
Rename it to Comments.
Now simply add some information for any row(s) you like.

As each comment is added to a row, Sigma has saved that information automatically to the warehouse, based on the connection that the input table was configured to use.
At the same time, the tracking fields were updated.
Input table data is maintained separately from the "original source data" — Plugs_Store_Sales, so that the integrity of your data in the warehouse is maintained.
No data was stored in Sigma; your data stays in your warehouse.
Now that is incredibly cool!
It is simple to create an input table from a CSV file. Once imported, the input table can be edited directly, joined to other tables, used as a source for other Sigma elements and participate in complex workflows using actions.
To demonstrate, we can download some sample data using this button:
The file is named sample_tradeshow_leads.csv.
On the Fundamentals 4 page, add a new Input element > CSV from the Element bar.
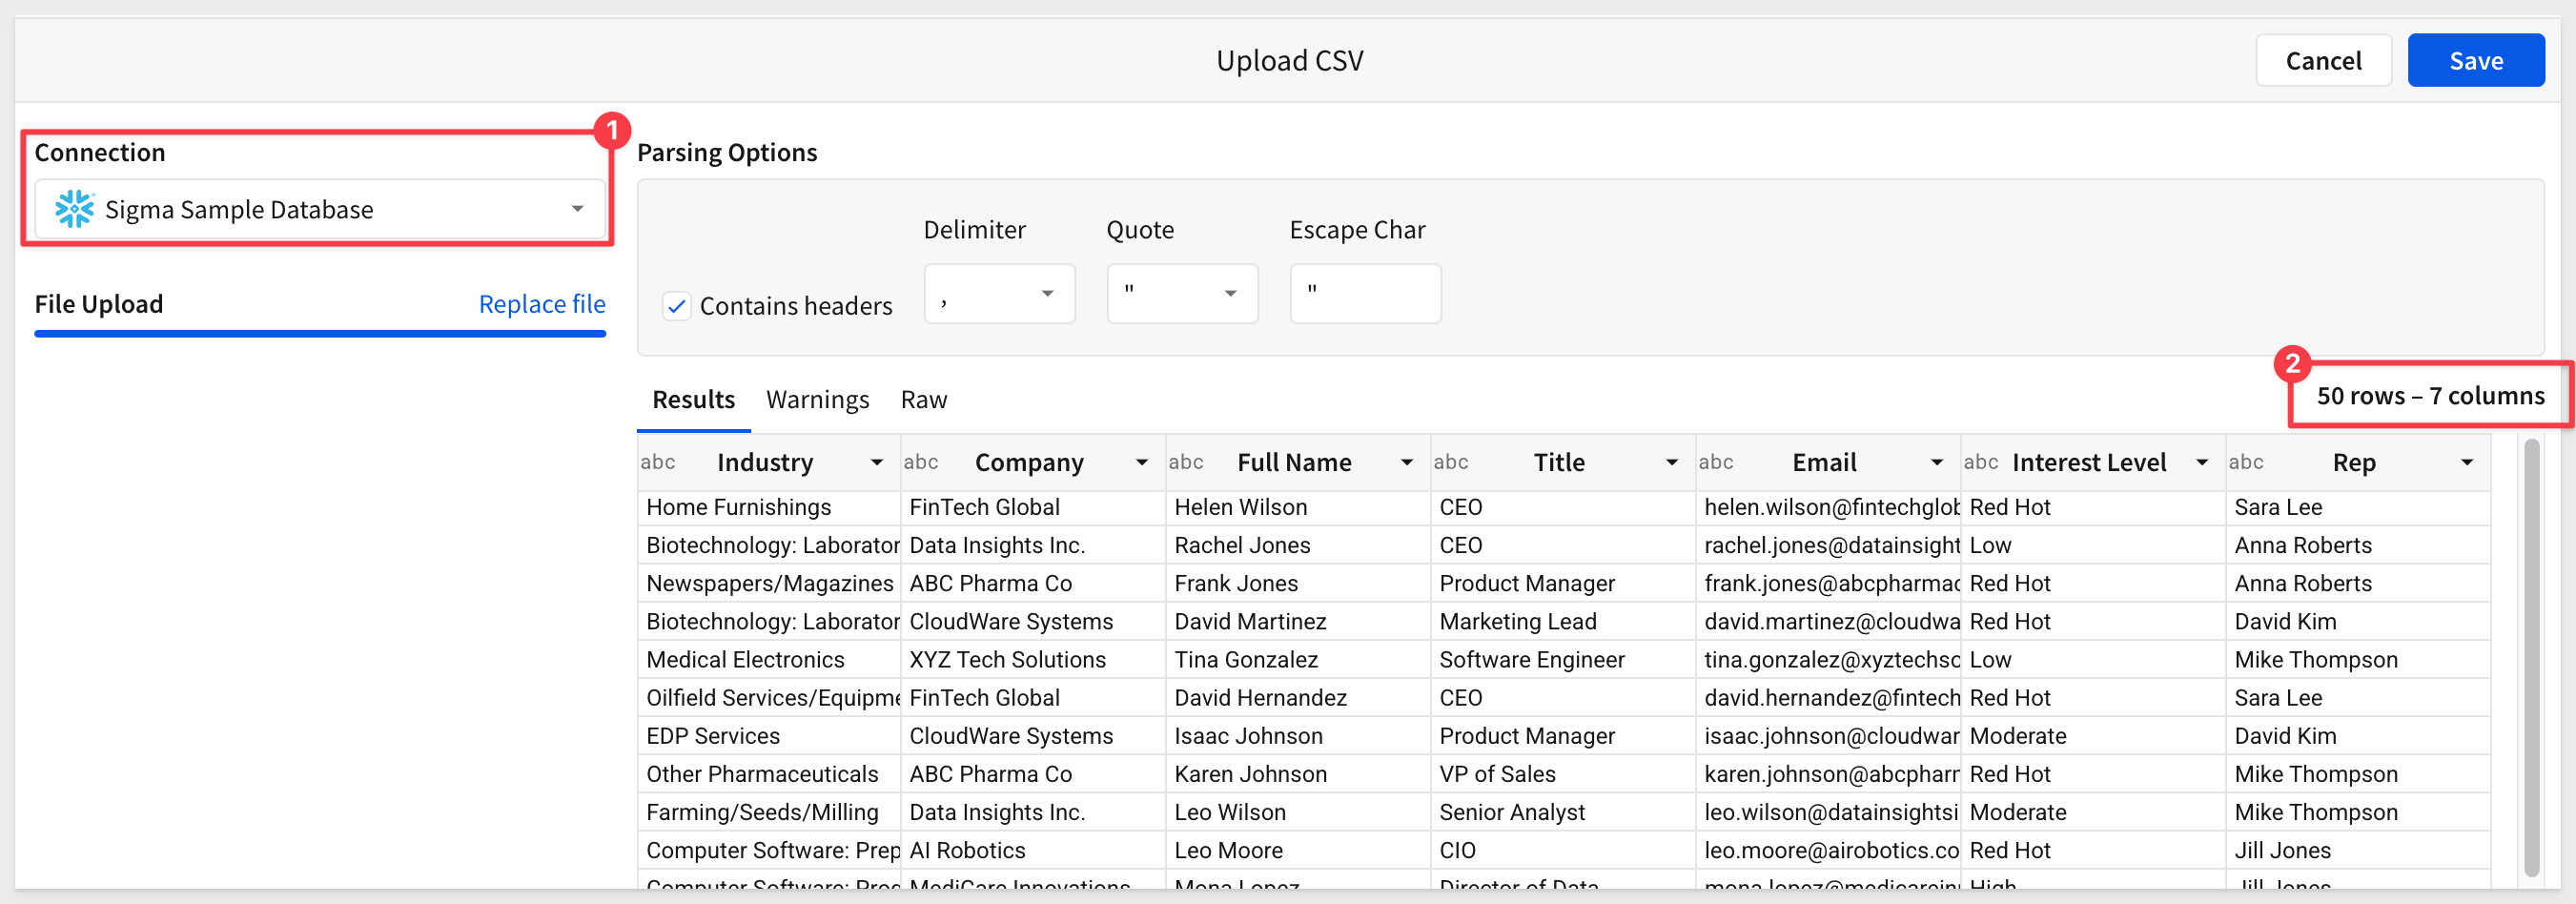
Set the Connection to the Sigma Sample Database and browse to locate the sample CSV we downloaded (likely in the Downloads folder).
Sigma will import that data, parse it, and display it:
Click Save.
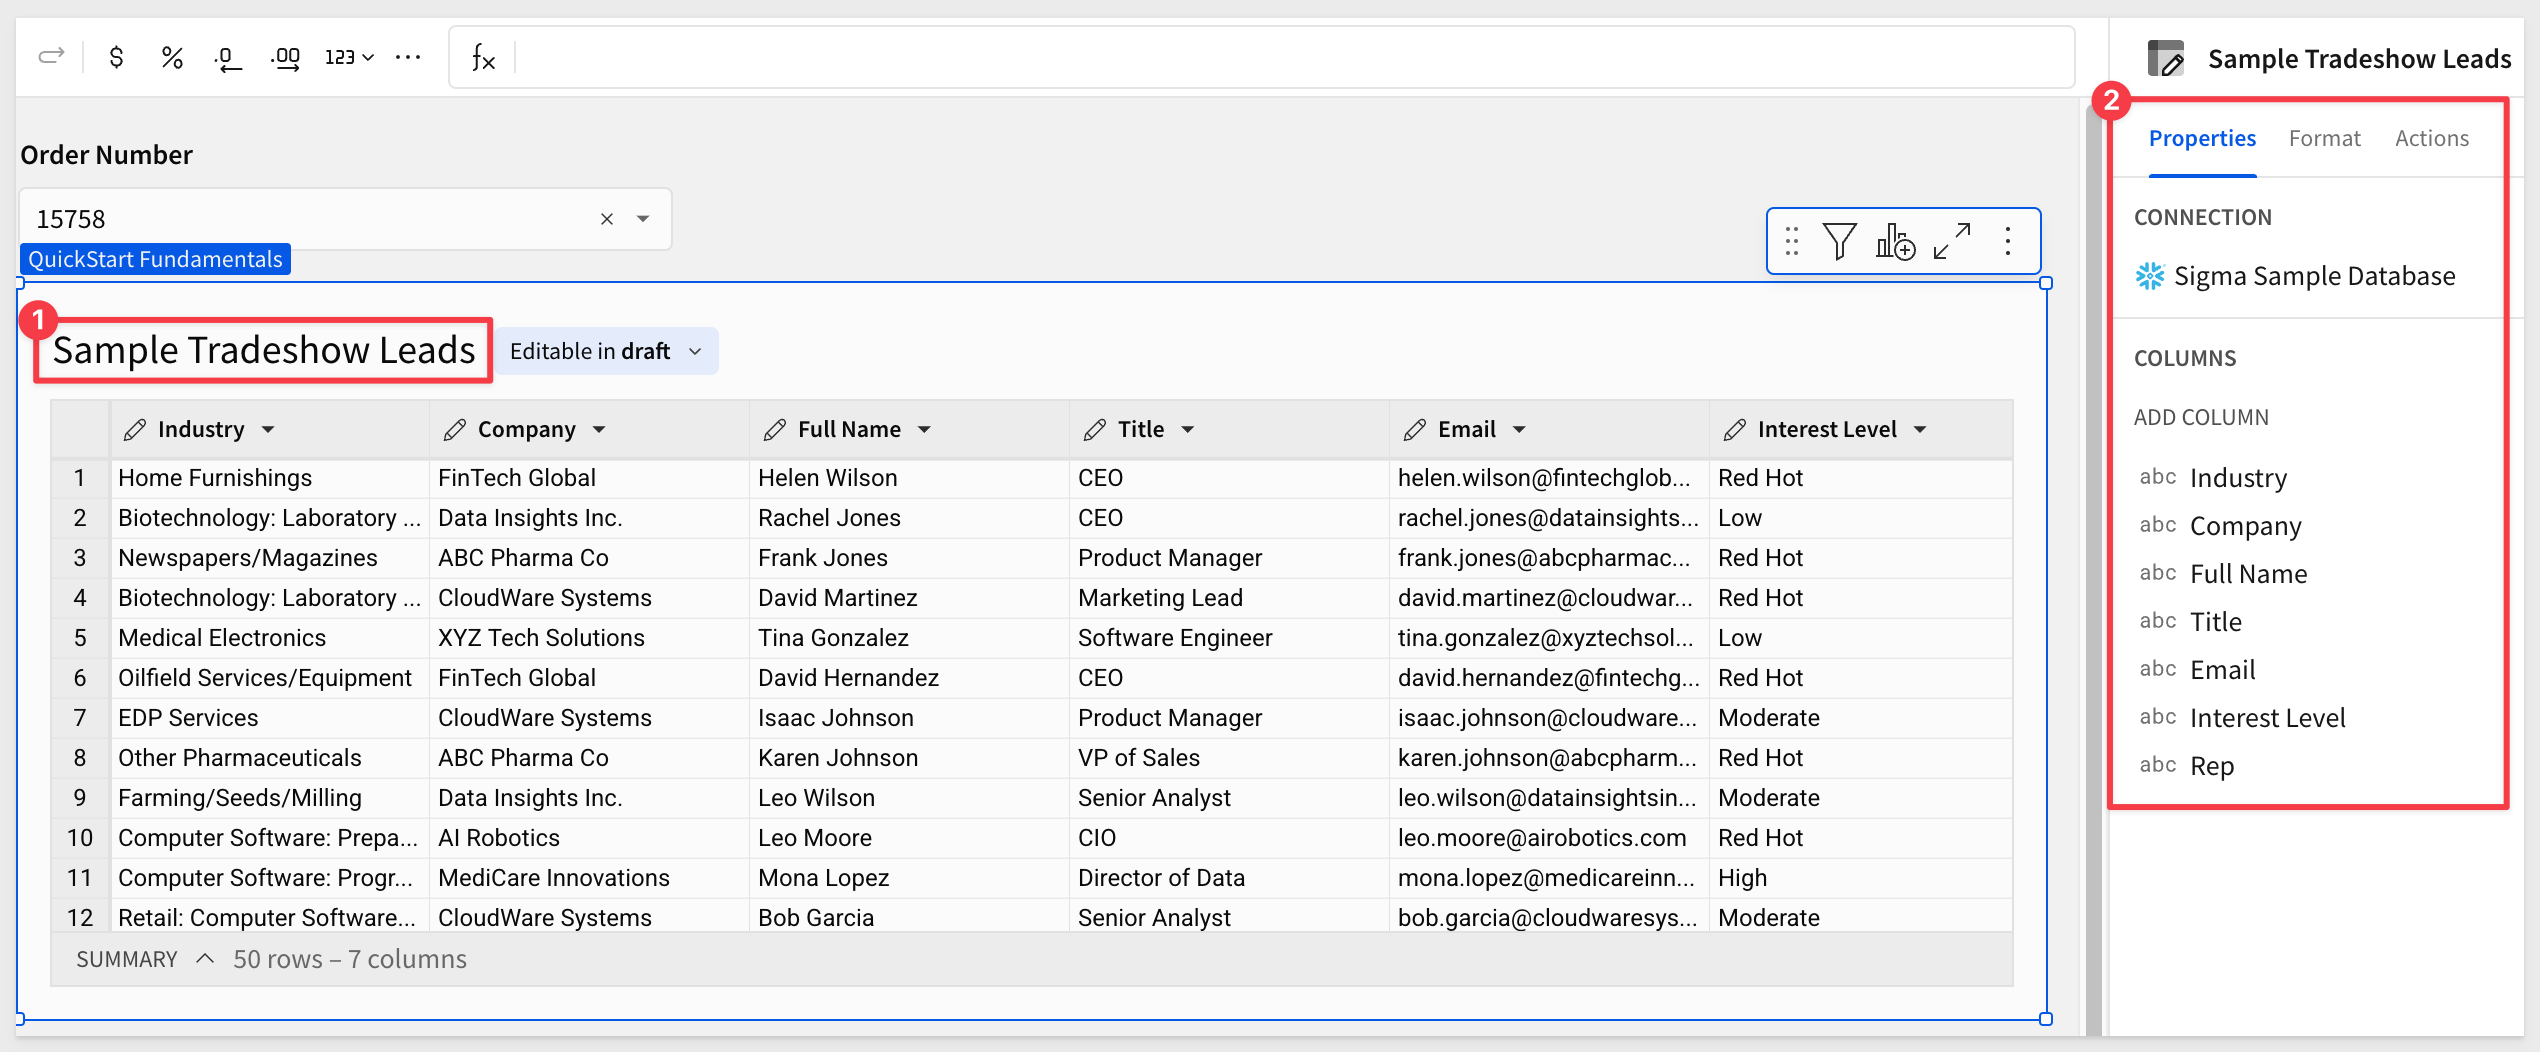
After renaming the input table, we can start working with the data directly just like any other input table.
In this QuickStart, we covered the basic functionality provided by Sigma input tables. We explored a simple use case and demonstrated how easy it can be to solve business problems without long development cycles or the need for additional software.
The next QuickStart in this series covers using charts in Sigma
Additional Resource Links
Be sure to check out all the latest developments at Sigma's First Friday Feature page!
Help Center Home
Sigma Community
Sigma Blog